Table of Contents
Advertisement
Available languages
Available languages
KDC-BT782HD
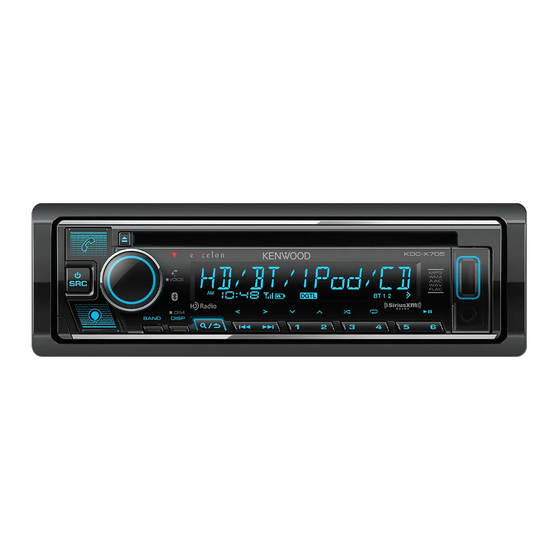
KDC-X705
CD-RECEIVER
INSTRUCTION MANUAL
AUTORADIO CD
MODE D'EMPLOI
RECEPTOR CD
MANUAL DE INSTRUCCIONES
For your records
Record the serial number, found on the back of the unit, in the spaces designated on the warranty card, and in the space provided below. Refer to the model and serial
numbers whenever you call upon your Kenwood dealer for information or service on the product.
Model KDC-BT782HD/KDC-X705
Serial number
US Residents Only
Register Online
Register your Kenwood product at https://www.kenwood.com/usa/
© 2022 JVCKENWOOD Corporation
B5A-3893-00 [KN]
Advertisement
Chapters
Table of Contents

Related Manuals for Kenwood KDC-X705


Summary of Contents for Kenwood KDC-X705
- Page 1 Record the serial number, found on the back of the unit, in the spaces designated on the warranty card, and in the space provided below. Refer to the model and serial numbers whenever you call upon your Kenwood dealer for information or service on the product.
- Page 2 útil, deberán ser reciclados en instalaciones que puedan dar el tratamiento Products: CD-RECEIVER adecuado a estos productos y a sus subproductos residuales correspondientes. Model Name: KDC-BT782HD/KDC-X705 Póngase en contacto con su administración local para obtener información sobre el Responsible Party: JVCKENWOOD USA CORPORATION punto de recogida más cercano.
- Page 3 ISED Caution CAUTION This device contains licence-exempt transmitter(s)/receiver(s) that comply with Innovation, Science This equipment complies with FCC/ISED radiation exposure limits set forth for an uncontrolled and Economic Development Canada’s licence-exempt RSS(s). Operation is subject to the following two environment and meets the FCC radio frequency (RF) Exposure Guidelines and RSS-102 of the ISED radio conditions: frequency (RF) Exposure rules.
- Page 4 SOFTWARE LICENSE AGREEMENT Article 4 Right pertaining to the Licensed Software The software embedded in the Product (hereinafter the "Licensed Software") provided by Licensor is Any and all copyrights and other rights pertaining to the Licensed Software and related documents copyrighted to or sublicensable by the Licensor, and this Agreement provides for the terms and conditions shall belong to the Licensor or the original holder of the right who granted to the Licensor the license or which Users shall follow in order to use the Licensed Software.
- Page 5 Important Notice concerning the Software Article 9 Destruction of the Licensed Software If this Agreement is terminated pursuant to the provision of Article 8, the User shall destroy the Licensed -jansson Software, any related documents and copies thereof within two (2) weeks from such date of termination. Copyright (c) 2009-2012 Petri Lehtinen <petri@digip.org>...
- Page 6 -CMP sha2 AUTHOR: Aaron D. Gifford - http://www.aarongifford.com/ The MIT License (MIT) Copyright (c) 2014 Charles Gunyon Copyright (c) 2000-2001, Aaron D. Gifford All rights reserved. Permission is hereby granted, free of charge, to any person obtaining a copy of this software and associated documentation files (the "Software"), to deal in the Software without restriction, including without You may obtain a copy of the license at limitation the rights to use, copy, modify, merge, publish, distribute, sublicense, and/or sell copies of the...
- Page 7 Copyright (c) 1995, 1996 Carnegie-Mellon University. All rights reserved. T-Kernel 2.0 This product uses the source code of T-Kernel 2.0 under T-License 2.0 granted by T-Engine Forum Author: Chris G. Demetriou (www.tron.org) Permission to use, copy, modify and distribute this software and its documentation is hereby granted, BSD-3-Clause provided that both the copyright notice and this permission notice appear in all copies of the software, Copyright (c) 2000-2001, Aaron D.
-
Page 8: Table Of Contents
AUX......................15 be different from the actual displays or faceplates. • Operations are explained mainly using buttons on the faceplate of KENWOOD Remote Application ............15 Bluetooth® ....................16 • English indications are used for the purpose of explanation. You can select the display language from the [FUNCTION] menu. -
Page 9: Before Use
Before Use IMPORTANT General: • Avoid using the external device if it might hinder safe driving. • To ensure proper use, please read through this manual before using this • Make sure all important data has been backed up. We shall bear no product. -
Page 10: Basics
Basics Faceplate Volume knob Loading slot Attach Detach How to reset Reset the unit within 5 seconds after detaching the Detach button Display window* faceplate. * Only for illustration purpose. On the faceplate Turn on the power Press B SRC. •... -
Page 11: Getting Started
Getting Started Basics Remote control (RC-406) This unit can be remotely controlled with an optionally purchased remote control. Remote sensor (Do not expose to bright sunlight.) Select the display language and cancel the demonstration Pull out the insulation sheet when using for the first time. -
Page 12: Set The Other Optional Settings
[F/W UP Vxx] activated). To return to the previous setting item, press For details on how to update the firmware, visit <https://www.kenwood.com/cs/ce/>. Default: [XX] * Once you have upgraded the firmware, you are unable to downgrade the firmware. [DISPLAY] [FACTORY RESET] [YES]: Resets the settings to default (except the stored station). -
Page 13: Hd Radio Tm Tuner
HD Radio™ Tuner You can tune in to both conventional and HD Radio broadcasts. Direct Access Tuning (using the remote control) • To find HD Radio stations in your area, visit <http://www.hdradio.com>. Press DIRECT to enter Direct Access Tuning. Press the number buttons to enter a station frequency or channel number. - Page 14 HD Radio™ Tuner Default: [XX] Receive an emergency alert message [TUNER SETTING] When an emergency alert message is received, it appears and remains on the display until the user performs the “Ignore” function. [SEEK MODE] Selects the searching method for S / T buttons when pressed. [AUTO1]: Automatically search for a station or channel.
-
Page 15: Cd/Usb/Ipod
CD/USB/iPod Insert a disc Basic operations Eject disc Label side The source changes to CD automatically and playback starts. Selectable sources: CD/USB/iPod USB or iPod BT Connect a USB device For playable audio file, see “Playable files” on page 34. USB input terminal USB type A cable*1 On the faceplate... - Page 16 CD/USB/iPod Select music drive Set the playable source for iPod/iPhone You can make the following setting at all sources except at iPod USB source While in USB source, press 5 repeatedly. and iPod BT source. Stored songs in the following drive will be played back. •...
- Page 17 CD/USB/iPod [SKIP SEARCH] setting Select a file to play Press the volume knob to enter [FUNCTION]. From a folder or list Turn the volume knob to select [USB], then press the knob. Turn the volume knob to select [SKIP SEARCH], then press the knob. Press Turn the volume knob to select the skip search ratio, then press the Turn the volume knob to select a folder/list, then press the knob.
-
Page 18: Siriusxm® Radio
SiriusXM® Radio Only SiriusXM® brings you more of what you love to listen to, all in one place. Start listening Get over 140 channels, including commercial-free music plus the best sports, news, talk, comedy and entertainment. Welcome to the world of satellite Press B SRC repeatedly to select SIRIUS XM. - Page 19 SiriusXM® Radio When replay keymode is selected... Parental Control On the faceplate On the remote control The Parental Control feature allows you to limit access to any SiriusXM channels, including those with mature content. Play back/pause Press 6 IW. Press ENT IW. When enabled, the Parental Control feature requires you to enter a pass Skip backward/forward Press S / T*.
- Page 20 SiriusXM® Radio TuneScan™ [CHANNEL LOCK] To unlock settings: 1 Turn the volume knob to select a number. You can get a short preview of the songs that you have missed on each of 2 Press S / T to move to the entry position. your SmartFavorites music channels or a music channel currently tuned into.
-
Page 21: Aux
KENWOOD Remote Application You can listen to music from a portable audio player via the auxiliary input You can control the KENWOOD car receiver from iPhone/iPod touch (via jack. Bluetooth or via USB input terminal) or Android device (via Bluetooth) using KENWOOD Remote application. -
Page 22: Bluetooth
Bluetooth® KENWOOD Remote Application Default: [XX] • Depending on the Bluetooth version, operating system and the firmware version of your mobile phone, Bluetooth features may not work with this [REMOTE APP] unit. [SELECT] Selects the device ([IOS] or [ANDROID]) to use the application. -
Page 23: Bluetooth - Mobile Phone
When you connect iPhone/iPod touch to the USB input terminal, pairing request (via Bluetooth) is automatically activated if [AUTO PAIRING] is set to Search and select the name of your receiver (“KDC-BT782HD”/ [ON]. (Page 21) “KDC-X705”) on the Bluetooth device. “PAIRING” “PASS XXXXXX” “Device name”... - Page 24 Bluetooth® The following operations may differ or be unavailable depending on the *1 This adjustment will not affect the volume of the other sources. connected phone. *2 Press and hold VOL to continuously increase the volume to 15. *3 Operations may vary according to the connected Bluetooth device. On the faceplate On the remote control First incoming call...
- Page 25 Bluetooth® Make the setting for answering a call [CALL HISTORY] (Applicable only if the phone supports PBAP.) 1 Press the volume knob to select a name or a phone number. Press to enter Bluetooth mode. • “I” indicates call received, “O“ indicates call made, “M” indicates call Turn the volume knob to select [SETTINGS], then press the knob.
- Page 26 Bluetooth® Store a contact in memory [NUMBER DIAL] 1 Turn the volume knob to select a number (0 to 9) or character ( , #, You can store up to 6 contacts into the number buttons (1 to 6). 2 Press S / T to move the entry position. Repeat step 1 and step 2 until you finish entering the phone number.
- Page 27 [DEVICE DELETE] 1 Turn the volume knob to select a device to delete, then press the knob. “KDC-X705”) on the Bluetooth device. 2 Turn the volume knob to select [YES] or [NO], then press the knob. Operate the Bluetooth device to confirm pairing.
-
Page 28: Bluetooth - Audio
Bluetooth® Bluetooth — Audio On the faceplate • Operations and display indications may differ according to their availability Repeat play Press 4 repeatedly. on the connected device. • Depending on the connected device, some features may not work with [ALL REPEAT], [FILE REPEAT], [GROUP REPEAT], your device. -
Page 29: Amazon Alexa
Tap “Automotive Accessory” or “Headphones” from the list of device Setup for the first time types. Tap the name of your receiver (“KDC-BT782HD”/“KDC-X705”) and For Android device follow the instructions. Pair your device with this unit via Bluetooth. (Page 17) Start up the Alexa mobile application on your device. - Page 30 AMAZON ALEXA • To return to the previous source before ALEXA, press B SRC. • To activate Alexa, press or speak “Alexa”. • To cancel current listening state, press . • To cancel current thinking/speaking states and go to listening state, press or speak “Alexa”.
-
Page 31: Audio Settings
Audio Settings AMAZON ALEXA Start listening While in Alexa idle state... Speak the word “Alexa” to the connected microphone (Page 16) to activate Alexa. (or) Press on the unit to speak with Alexa. The display shows: “LISTENING...”. Communicate with Alexa via the connected microphone. Press the volume knob to enter [FUNCTION]. - Page 32 Audio Settings [MANUAL EQ] Adjusts your own sound settings for each source. [SOUND EFFECT] • The settings are stored to [USER] in [PRESET EQ]. [SOUND RECNSTR] (Not applicable for HD RADIO source, AUX source and SIRIUS XM source.) • The settings made may affect the current settings of [EASY EQ]. (Sound [ON]: Creates realistic sound by compensating the high-frequency [62.5HZ]...
- Page 33 Audio Settings [X ‘ OVER] [SW LPF SLOPE] [–6DB]/[–12DB]/[–18DB]/[–24DB]: Adjusts the crossover slope. [TWEETER] [FRQ] [1KHZ]/[1.6KHZ]/[2.5KHZ]/[4KHZ]/[5KHZ]/ (Selectable only if a setting other than [THROUGH] is [6.3KHZ]/[8KHZ]/[10KHZ]/[12.5KHZ]: Adjusts the selected for [SW LPF FRQ].) crossover frequency for the tweeter speaker. [SW LPF [REVERSE] (180°)/[NORMAL] (0°): Selects the [GAIN LEFT] [–8] to [0]: Adjusts the output volume of the left...
- Page 34 Audio Settings • Before making an adjustment for [DISTANCE] and [GAIN] of [DTA SETTINGS], Digital Time Alignment settings select the speaker you want to adjust: Digital Time Alignment sets the delay time of the speaker output to create a [FRONT LEFT]/[FRONT RIGHT]/[REAR LEFT]/[REAR RIGHT]/[SUBWOOFER] more suitable environment for your vehicle.
-
Page 35: Display Settings
Display Settings Zone identification for color settings and brightness settings Default: [XX] [DISPLAY] [COLOR SELECT] Selects illumination colors for [ALL ZONE], [ZONE 1] and [ZONE 2] separately. 1 Select a zone. (See the illustration on left column.) 2 Select a preset color for the selected zone. (Page 34) Default: [VARIABLE SCAN] To make your own color, select [CUSTOM R/G/B]. -
Page 36: Installation/Connection
Installation/Connection Part list for installation This section is for the professional installer. For safety’s sake, leave wiring and mounting to professionals. Consult the (A) Faceplate (×1) (B) Trim plate (×1) car audio dealer. WARNING • The unit can only be used with a 12 V DC power supply, negative ground. (C) Mounting sleeve (×1) (D) Wiring harness (×1) •... - Page 37 Installation/Connection Installing the unit (in-dash mounting) Installing the unit (without mounting sleeve) Remove the mounting sleeve and trim plate from the unit. Align the holes in the unit (on both sides) with the vehicle mounting bracket and secure the unit with supplied screws. Use only the specified screws.
- Page 38 Installation/Connection Wiring connection IMPORTANT We recommend installing the unit with a commercially available custom wiring harness specific for your car and leave this job to professionals for your safety. Consult your Fuse (10 A) Antenna terminal car audio dealer. White If no connections are made, do not let the wire come out from the tab.
-
Page 39: References
• When connecting an external amplifier to the output terminals of this unit, securely connect the amplifier ground wire to the car chassis to prevent damage to the unit. More information For: – Latest firmware updates and latest compatible item list – KENWOOD original application – Any other latest information Visit <https://www.kenwood.com/cs/ce/>. General •... - Page 40 References Playable files About AMAZON ALEXA • Disc: • Alexa is a third party service, therefore the specifications are subject to change without prior Playable audio file: notice. Accordingly, compatibility may be impaired or some or all of the services may become MP3 (.mp3), WMA (.wma), AAC (.aac) unavailable.
-
Page 41: Change The Display Information
References Change the display information Source name Display information: Main display iPod USB/iPod BT Song title/Artist Album title/Artist Playing time Date back to Each time you press DISP, the display information changes. the beginning • If the information is unavailable or not recorded, “NO TEXT”, “NO INFO”, or other information (eg. -
Page 42: Troubleshooting
Troubleshooting Symptom Remedy Symptom Remedy Sound cannot be heard. • Adjust the volume to the optimum level. Playback order is not as Optical disc, the files are played in the order which they • Check the cords and connections. intended. were recorded. - Page 43 Troubleshooting Symptom Remedy Symptom Remedy “NO DISC” Insert a playable disc into the loading slot. “NO SIGNAL” Make sure the antenna is mounted outside the vehicle. “TOC ERROR” Make sure the disc is clean and inserted properly. “SUBSCRIPTION UPDATED – Your subscription is updated.
- Page 44 Troubleshooting Symptom Remedy Symptom Remedy Sound is being interrupted or • Reduce the distance between the unit and the Bluetooth No response from Alexa after Amazon cloud was unable to analyze the voice input. skipped during playback of a audio player. the voice input.
-
Page 45: Specifications
Specifications Laser Diode GaAIAs Frequency Range 87.9 MHz — 107.9 MHz (200 kHz step) Digital Filter (D/A) 8 times over sampling Usable Sensitivity 7.2 dBf (0.63 μV/75 Ω) (S/N = 30 dB) Spindle Speed 500 rpm — 200 rpm (CLV) Quieting Sensitivity 15.2 dBf (1.58 μV/75 Ω) Wow &... - Page 46 Specifications Frequency Response (±3 dB) 20 Hz — 20 kHz Tone Action Band 1: 62.5 Hz ±9 dB Band 2: 100 Hz ±9 dB Input Maximum Voltage 1 000 mV Band 3: 160 Hz ±9 dB Input Impedance 30 kΩ Band 4: 250 Hz ±9 dB Band 5: 400 Hz ±9 dB Band 6: 630 Hz ±9 dB...
- Page 48 • Les opérations sont expliquées principalement en utilisant les touches de la Application KENWOOD Remote ............15 façade du • Les indications en anglais sont utilisées dans un but explicatif. Vous pouvez Bluetooth®...
-
Page 49: Avant L'utilisation
Avant l’utilisation IMPORTANTES Généralités: • Éviter d’utiliser le périphérique extérieur s’il peut gêner une conduite en toute • Pour utiliser correctement l’appareil, veuillez ce manuel complément avant sécurité. de l’utiliser. Il est particulièrement important que vous lisiez et acceptiez les •... -
Page 50: Fonctionnement De Base
Fonctionnement de base Façade Bouton de volume Fente d’insertion Attachez Détachez Comment réinitialiser Réinitialisez l’appareil en moins de 5 secondes après avoir Touche de détachement Fenêtre d’affichage* détaché la façade. * Uniquement à des fins d’illustration. Pour Sur la façade Mettez l’appareil sous tension Appuyez sur SRC. -
Page 51: Prise En Main
Prise en main Fonctionnement de base Télécommande (RC-406) Cet appareil peut être commandé à distance avec une télécommande vendue séparément. Capteur de télécommande (Ne l’exposez Pas à la lumière directe du soleil.) Sélectionne la langue d’affichage et annule la démonstration Retirez la feuille d’isolant lors de la première utilisation. -
Page 52: Réglage Des Autres Réglages Optionnels
à niveau n’est pas activée). Pour en savoir plus sur la mise à niveau du micrologiciel, consultez Pour retourner à l’option de réglage précédente, appuyez sur <https://www.kenwood.com/cs/ce/>. * Une fois que vous avez mis à niveau le micrologiciel, vous ne pouvez plus [XX] Défaut:... -
Page 53: Tuner Hd Radio
Tuner HD Radio™ Vous pouvez accorder à la fois les émissions conventionnelles et HD Radio. Syntonisation à accès direct (utilisation de la télécommande) • Pour en savoir plus sur les stations HD Radio dans votre région, consultez le site <http://www.hdradio.com>. Appuyez sur DIRECT pour entrer en mode de Syntonisation à... - Page 54 Tuner HD Radio™ [XX] Défaut: Réception d’un message d’urgence [TUNER SETTING] Quand un message d’urgence est reçu, il apparaît et reste sur l’affichage jusqu’à ce que l’utilisateur utilise la fonction “Ignore”. [SEEK MODE] Sélectionne la méthode de recherche quand vous appuyez sur les touches [AUTO1] : Recherche automatiquement d’une station ou Appuyez sur...
-
Page 55: Cd/Usb/Ipod
CD/USB/iPod Insérez un disque Opérations de base Face portant l’étiquette Éjectiez le disque La source change automatiquement sur CD et la lecture démarre. Sources sélectionnables: CD/USB/iPod USB ou iPod BT Connectez un périphérique USB Pour les fichiers audio compatibles, reportez-vous à “Fichiers pouvant être lus” à la page 34. - Page 56 CD/USB/iPod Sélectionnez le lecteur de musique Réglage de la source de lecture pour iPod/iPhone Quand la source est USB, appuyez répétitivement sur 5. Vous pouvez réaliser le réglage suivant pour toutes les sources à l’exception de la source iPod USB et de la source iPod BT. Les morceaux mémorisés dans le lecture suivant seront lus.
- Page 57 CD/USB/iPod Réglage [SKIP SEARCH] Sélectionnez un fichier à lire Appuyez sur le bouton de volume pour entrer [FUNCTION] Tournez le bouton de volume pour choisir [USB] , puis appuyez sur le À partir d’un dossier ou d’une liste bouton. Tournez le bouton de volume pour choisir [SKIP SEARCH] , puis appuyez sur Appuyez sur...
-
Page 58: Radio Siriusxm
Radio SiriusXM® Seul SiriusXM® vous apporte plus de ce que vous aimez écouter, en un seul Démarrez l’écoute endroit. Obtenez plus de 140 canaux, y compris de la musique sans pauses publicitaires, le meilleur du sport, les nouvelles, les discussions, les comédies et de Appuyez répétitivement sur SRC pour sélectionner SIRIUS XM. - Page 59 Radio SiriusXM® Quand le mode de touche de relecture est sélectionné... Contrôle parental Pour Sur la façade Sur la télécommande La fonction de contrôle parental vous permet de limiter l’accès à tous les canaux SiriusXM, y compris ceux dont le contenu est destiné aux adultes. Lecture/pause Appuyez sur 6 Appuyez sur ENT...
- Page 60 Radio SiriusXM® TuneScan™ [CHANNEL LOCK] Pour déverrouiller les réglages: Tournez le bouton de volume pour sélectionner un numéro. Vous pouvez obtenir un bref aperçu des morceaux que vous avez manqués sur Appuyez sur pour déplacer la position d’entrée. chacun de vos canaux de musique SmartFavorites ou sur le canal de musique que Répétez les étapes 1 et 2 pour entrer le code secret actuel.
-
Page 61: Aux
[BUILT-IN AUX] dans [SOURCE SELECT] . (Page 6) Préparation: Installez la dernière version de l’application KENWOOD Remote sur votre Démarrez l’écoute périphérique avant la connexion. Connectez un lecteur audio portable (en vente dans le commerce). Prise d’entrée auxiliaire Commencez à utiliser l’application KENWOOD Remote Lecteur audio portable Démarrez l’application KENWOOD Remote sur votre appareil. -
Page 62: Bluetooth
Bluetooth® Application KENWOOD Remote [XX] Défaut: • En fonction de la version Bluetooth, du système d’exploitation et de la version du micrologiciel de votre téléphone portable, la fonction Bluetooth peut ne [REMOTE APP] pas fonctionner avec cet appareil. [SELECT] [IOS] [ANDROID] •... -
Page 63: Bluetooth - Téléphone Portable
SRC pour mettre l’appareil sous tension. [ON] . (Page 21) Recherchez et sélectionnez le nom de votre récepteur (“KDC-BT782HD”/ “KDC-X705”) sur le périphérique Bluetooth. Appuyez sur le bouton de volume pour faire le pairage une fois que vous avez “PAIRING” “PASS XXXXXX” “Nom du périphérique”... - Page 64 Bluetooth® Les opérations suivantes peuvent différer ou peuvent ne pas être disponibles en *1 Cet ajustement n’affecte pas le volume des autres sources. fonction du téléphone connecté. *2 Maintenez VOL enfoncé de façon continue pour augmenter le volume sur 15. *3 Les opérations peuvent différer en fonction du périphérique Bluetooth connecté.
- Page 65 Bluetooth® Réalisez le réglage pour répondre à un appel [CALL HISTORY] (Applicable uniquement quand le téléphone prend en charge PBAP.) Appuyez sur le bouton de volume pour sélectionner un nom ou un numéro Appuyez sur pour entrer en mode Bluetooth. de téléphone.
- Page 66 Bluetooth® Stockage d’un contact en mémoire [NUMBER DIAL] Tournez le bouton de volume pour sélectionner un numéro (0 à 9) ou un caractère ( , #, +). Vous pouvez mémoriser un maximum de 6 contacts sur les touches numériques Appuyez sur pour déplacer la position d’entrée.
- Page 67 • Vous pouvez connecter un maximum de deux téléphones Bluetooth et un Recherchez et sélectionnez le nom de votre récepteur (“KDC-BT782HD”/ périphérique audio Bluetooth en même temps. “KDC-X705”) sur le périphérique Bluetooth. Utilisez le périphérique Bluetooth pour valider le pairage. [DEVICE DELETE] Tournez le bouton de volume pour choisir le périphérique à...
-
Page 68: Bluetooth - Audio
Bluetooth® Bluetooth — Audio Pour Sur la façade • Les opérations et les indications de l’affichage peuvent différer en fonction de Lecture répétée Appuyez répétitivement sur 4 leur disponibilité sur le périphérique connecté. • En fonction du périphérique connecté, il se peut que certains fonctions ne [ALL REPEAT] [FILE REPEAT] [GROUP REPEAT]... -
Page 69: Amazon Alexa
Touchez “Automotive Accessory (Accessoire automobile)” ou “Headphones (Casque d’écoute)” sur la liste des types de périphérique. Configuration pour la première fois Touchez le nom de votre autoradio (“KDC-BT782HD”/“KDC-X705”) et suivez les instructions. Pour un périphérique Android Appariez votre périphérique avec cet appareil via Bluetooth. (Page 17) Une fois le processus de configuration terminé, l’application Alexa mobile établit... - Page 70 AMAZON ALEXA • Pour retourner à la source précédente à ALEXA, appuyez sur SRC. • Pour activer Alexa, appuyez sur ou dîtes “Alexa”. • Pour annuler l’état d’écoute actuel, appuyez sur . • Pour annuler les états penser/parler et passer à l’état d’écoute, appuyez sur dîtes “Alexa”.
-
Page 71: Réglages Audio
Réglages audio AMAZON ALEXA Démarrez l’écoute Quand Alexa est en attente... Dîtes le mot “Alexa” sur le microphone connecté (Page 16) pour activer Alexa. (ou) Appuyez sur sur l’appareil pour parler avec Alexa. L’affichage montre: “LISTENING... ” . Communiquez avec Alexa via le microphone connecté. Pendant la lecture de musique avec la source ALEXA, vous pouvez réaliser Appuyez sur le bouton de volume pour entrer [FUNCTION]... - Page 72 Réglages audio [MANUAL EQ] Ajuste vos propres réglages sonores pour chaque source. [SOUND EFFECT] [USER] [PRESET EQ] • Les réglages sont mémorisés sur dans [SOUND RECNSTR] (Ne s’applique pas à la source HD RADIO, à la source AUX et à la source SIRIUS [EASY EQ] •...
- Page 73 Réglages audio [X ‘ OVER] [SW LPF SLOPE] [–6DB] [–12DB] [–18DB] [–24DB] : Ajuste la pente de transition. [TWEETER] [FRQ] [1KHZ] [1.6KHZ] [2.5KHZ] [4KHZ] [5KHZ] (Peut être uniquement sélectionné si un réglage autre [6.3KHZ] [8KHZ] [10KHZ] [12.5KHZ] : Ajuste la [THROUGH] [SW LPF FRQ] est choisi pour fréquence de transition de l’enceinte des aigus.
- Page 74 Réglages audio [DISTANCE] [GAIN] [DTA SETTINGS] • Avant de réaliser un ajustement pour Réglages de l’alignement temporel numérique sélectionnez l’enceinte que vous souhaitez ajuster: [FRONT LEFT] [FRONT RIGHT] [REAR LEFT] [REAR RIGHT] [SUBWOOFER] L’alignement temporel numérique règle la temporisation de la sortie d’enceinte –...
-
Page 75: Réglages D'affichage
Réglages d’affichage Identification de zone pour les réglages de la couleur et les réglages de la [XX] Défaut: luminosité [DISPLAY] [COLOR SELECT] [ALL ZONE] [ZONE 1] [ZONE 2] Sélectionne une couleur d’éclairage pour séparément. Choisissez une zone. (Voir l’illustration sur la colonne de gauche.) Choisissez une couleur préréglée pour la zone sélectionnée. -
Page 76: Installation/Connexion
Installation/Connexion Liste des pièces pour l’installation Cette section est réservée aux installateurs professionnels. Pour des raison de sécurité, laissez le travail de câblage et de montage des Façade (×1) Plaque d’assemblage (×1) professionnels. Consultez votre revendeur autoradio. MISE EN GARDE •... - Page 77 Installation/Connexion Installation de l’appareil (montage encastré) Installation de l’appareil (sans le manchon de montage) Retirez le manchon de montage et la plaque de garniture de l’appareil. Alignez les entailles de l’appareil (des deux côtés) avec le support de montage du véhicule et fixez l’appareil avec les vis fournis. N’utiliser que les vis spécifiés.
- Page 78 Installation/Connexion Connexions IMPORTANTES Nous recommandons d’installer l’appareil en utilisant un harnais de câblage en vente dans le commerce recommandé spécifiquement pour votre voiture et, pour votre sécurité, Fusible (10 A) Borne de l’antenne de laisser ce travail a des professionnels. Consultez votre revendeur autoradio.
-
Page 79: Références
éviter d’endommager l’appareil. Plus d’informations Pour: – Les dernières mise à jour du micrologiciel et la liste de compatibilité la plus récente – Application originale KENWOOD – Autres informations récentes Consultez <https://www.kenwood.com/cs/ce/>. Généralités •... - Page 80 Références Fichiers pouvant être lus À propos d’AMAZON ALEXA • Disque: • Alexa est un service tiers, et par conséquent les spécifications sont sujettes à changement sans Fichier audio reproductible: notification préalable. Par conséquent, la compatibilité peut réduite ou certains services ou même tous MP3 (.mp3), WMA (.wma), AAC (.aac) les services peuvent devenir indisponibles.
-
Page 81: Changez L'information Sur L'affichage
Références Changez l’information sur l’affichage Nom de la source Informations sur l’affichage: Affichage principal iPod USB/iPod BT Titre du morceau/Artiste Titre d’album/Artiste Durée de lecture Chaque fois que vous appuyez sur DISP, les informations affichées changent. Date retour au début • Si aucune information n’est disponible ou si aucune information n’est enregistrée, “NO TEXT”, “NO INFO”, ou une autre information (par ex. -
Page 82: Guide De Dépannage
Guide de dépannage Symptôme Remède Symptôme Remède Le son ne peut pas être • Ajustez le volume sur le niveau optimum. L’ordre de lecture n’est pas celui Disque optique, les fichiers sont lus dans l’ordre dans lequel ils entendu. • Vérifiez les cordons et les connexions. que vous pensiez. - Page 83 Guide de dépannage Symptôme Remède Symptôme Remède “NO DISC” Insèrez un disque reproductible dans la fente d’insertion. “NO SIGNAL” Assurez-vous que l’antenne est montée à l’extérieure du véhicule. “TOC ERROR” Assurez-vous que le disque est propre et inséré correctement. “SUBSCRIPTION UPDATED – Votre abonnement a été...
- Page 84 Guide de dépannage Symptôme Remède Symptôme Remède Le son est interrompu ou saute • Réduisez la distance entre cet appareil et le lecteur audio Aucune réponse d’Alexa après Amazon cloud n’a pas été capable d’analyser l’entrée vocale. pendant la lecture d’un lecteur Bluetooth.
-
Page 85: Spécifications
Spécifications Diode laser GaAIAs Plage de fréquences 87,9 MHz — 107,9 MHz (pas de 200 kHz) Filtre numérique (A/N) 8 fois suréchantillonnage Sensibilité utilisable 7,2 dBf (0,63 μV/75 Ω) (S/B = 30 dB) Vitesse de rotation 500 t/min. — 200 t/min. (CLV) Seuil de sensibilité 15,2 dBf (1,58 μV/75 Ω) Pleurage et scintillement Non mesurables (DIN S/B = 46 dB) - Page 86 Spécifications Réponse en fréquence (±3 dB) 20 Hz — 20 kHz Action en tonalité Bande 1: 62,5 Hz ±9 dB Bande 2: 100 Hz ±9 dB Tension maximum d’entrée 1 000 mV Bande 3: 160 Hz ±9 dB Bande 4: 250 Hz ±9 dB Impédance d’entrée 30 kΩ...
- Page 88 • Las operaciones se explican utilizando principalmente los botones de la placa Aplicación KENWOOD Remote ............15 frontal del • Se utilizan indicaciones en inglés para las explicaciones. Puede seleccionar el Bluetooth®...
-
Page 89: Antes Del Uso
Antes del uso IMPORTANTE General: • Evite el uso de dispositivos externos cuando puedan afectar la seguridad de • Antes de utilizar este producto y para asegurar su uso correcto, lea conducción. completamente este manual. En especial, lea y acate las Advertencias y •... -
Page 90: Puntos Básicos
Puntos básicos Placa frontal Rueda de volumen Ranura de carga Fijar Desmontar Cómo reinicializar Reinicialice la unidad en menos de 5 segundos después Botón de liberación Ventanilla de visualización* de haber extraído la placa frontal. * Solo para fines ilustrativos. Para En la placa frontal Encender la unidad Pulse... -
Page 91: Procedimientos Iniciales
Procedimientos iniciales Puntos básicos Mando a distancia (RC-406) Esta unidad puede controlarse a distancia mediante un mando a distancia adquirido a opción. Sensor remoto (DO lo exponga a la luz solar brillante.) Seleccione el idioma de visualización y cancele la demostración Retire la hoja aislante cuando se utilice [FACTORY RESET]... -
Page 92: Configure Los Otros Ajustes Opcionales
[F/W UP Vxx] no se activa). Para volver al elemento de ajuste anterior, pulse Para obtener información sobre cómo actualizar el firmware, visite <https://www.kenwood.com/cs/ce/>. [XX] Predeterminado: * Una vez que haya actualizado el firmware, no podrá cambiar a una versión inferior de firmware. -
Page 93: Sintonizador Hd Radio
Sintonizador HD Radio™ Puede sintonizar tanto transmisiones convencionales y emisiones de HD Radio. Sintonización de acceso directo (usando el mando a distancia) • Para encontrar emisoras de HD Radio en su área, visite <http://www.hdradio.com/>. Pulse DIRECT para ingresar a la Sintonización de acceso directo. Pulse los botones numéricos para ingresar la frecuencia de una emisora o un número de canal. - Page 94 Sintonizador HD Radio™ [XX] Predeterminado: Recibir un mensaje de alerta de emergencia [TUNER SETTING] Cuando se recibe un mensaje de alerta de emergencia, éste aparecerá y permanecerá en la pantalla hasta que el usuario ejecute la función “Ignore”. [SEEK MODE] Al pulsarlos, selecciona el método de búsqueda de los botones [AUTO1] Pulse...
-
Page 95: Cd/Usb/Ipod
CD/USB/iPod Inserte un disco Operaciones básicas Lado de la etiqueta Expulsa el disco La fuente cambia automáticamente a CD y se inicia la reproducción. Fuentes seleccionables: CD/USB/iPod USB o iPod BT Conecte un dispositivo USB Para obtener información sobre los archivos de audio reproducibles, consulte Terminal de entrada USB “Archivos reproducibles”... - Page 96 CD/USB/iPod Seleccionar Music drive Ajuste de la fuente reproducible para iPod/iPhone Pulse 5 repetidamente mientras está en una fuente USB. Puede realizar los siguientes ajustes en todas las fuentes excepto en la fuente iPod USB y en la fuente iPod BT. Se reproducirán las canciones almacenadas en la siguiente unidad.
- Page 97 CD/USB/iPod Configuración de [SKIP SEARCH] Seleccione el archivo que desea reproducir Pulse la rueda de volumen para ingresar en [FUNCTION] Gire la rueda de volumen para seleccionar [USB] y, a continuación, pulse la De una carpeta o una lista rueda. Gire la rueda de volumen para seleccionar [SKIP SEARCH] y, a continuación,...
-
Page 98: Radio Siriusxm
Radio SiriusXM® Solo SiriusXM® ofrece todo lo que quiere escuchar, en un solo lugar. Con más Comience a escuchar de 140 canales, incluida música sin publicidad además de lo mejor en deportes, noticias, entrevistas, comedia y entretenimiento. Bienvenido al mundo de la radio Pulse SRC repetidamente para seleccionar SIRIUS XM. - Page 99 Radio SiriusXM® Cuando se selecciona el modo de tecla Repetición... Control parental Para En la placa frontal En el mando a distancia La función Control parental le permite limitar el acceso a cualquier canal de SiriusXM, incluyendo aquellos con contenido para adultos. Reproducción/pausa Pulse 6 ...
- Page 100 Radio SiriusXM® TuneScan™ [CHANNEL LOCK] Para desbloquear los ajustes: Gire la rueda de volumen para seleccionar un número. Puede obtener una pequeña vista previa de las canciones que se perdió en cada Pulse para mover la posición de ingreso. uno de los canales de música SmartFavorites o el canal de música sintonizado Repita los pasos 1 y 2 para ingresar el código de acceso actual.
-
Page 101: Aux
• Para obtener más información, visite <https://www.kenwood.com/cs/ce/>. Preparativos: Comience a escuchar Antes de la conexión, instale la versión más reciente de la aplicación KENWOOD Conecte un reproductor de audio portátil (disponible en el mercado). Remote en su dispositivo. Toma de entrada auxiliar Comience a utilizar la aplicación KENWOOD Remote... -
Page 102: Bluetooth
Bluetooth® Aplicación KENWOOD Remote [XX] Predeterminado: • Las funciones Bluetooth podrían no funcionar con esta unidad, dependiendo de la versión de Bluetooth, del sistema operativo y de la versión de firmware [REMOTE APP] de su teléfono móvil. [SELECT] [IOS] [ANDROID] •... -
Page 103: Bluetooth - Teléfono Móvil
Cuando hay un iPhone/iPod touch conectado al terminal de entrada USB, la Busque y seleccione el nombre de su receptor (“KDC- solicitud de emparejamiento (a través de Bluetooth) se activa automáticamente si BT782HD”/“KDC-X705”) en el dispositivo Bluetooth. [AUTO PAIRING] está activado [ON] . - Page 104 Bluetooth® Las siguientes operaciones pueden diferir o no estar disponibles dependiendo del *1 Este ajuste no influirá en el volumen del resto de las fuentes. teléfono que se haya conectado. *2 Pulse y mantenga pulsado VOL para aumentar continuamente el volumen a 15. *3 Las operaciones pueden variar dependiendo del dispositivo Bluetooth conectado.
- Page 105 Bluetooth® Configurar el ajuste para contestar una llamada [CALL HISTORY] (Solo si el teléfono es compatible con PBAP.) Pulse la rueda de volumen para seleccionar un nombre o un número de Pulse para ingresar al modo Bluetooth. teléfono. Gire la rueda de volumen para seleccionar [SETTINGS] y, a continuación, •...
- Page 106 Bluetooth® Almacenar un contacto en la memoria [NUMBER DIAL] Gire la rueda de volumen para seleccionar un número (0 a 9) o un carácter ( , #, +). Puede guardar hasta 6 contactos en los botones numéricos (1 a 6). Pulse para mover la posición de ingreso.
- Page 107 • Solo se puede conectar un máximo de dos teléfonos con Bluetooth y un Busque y seleccione el nombre de su receptor (“KDC-BT782HD”/ dispositivo de audio con Bluetooth a la vez. “KDC-X705”) en el dispositivo Bluetooth. Opere el dispositivo Bluetooth para confirmar el emparejamiento. [DEVICE DELETE] Gire la rueda de volumen para seleccionar el dispositivo a eliminar y, a “TESTING”...
-
Page 108: Bluetooth - Audio
Bluetooth® Bluetooth — Audio Para En la placa frontal • Las operaciones y las indicaciones en pantalla difieren según su disponibilidad Repetir reproducción Pulse 4 repetidamente. en el dispositivo conectado. • Dependiendo del dispositivo conectado, algunas características podrían no [ALL REPEAT] [FILE REPEAT] [GROUP REPEAT] funcionar con su dispositivo. -
Page 109: Amazon Alexa
Toque “Automotive Accessory (Accesorio automotriz)” o “Headphones (Auriculares)” en la lista de tipos de dispositivos. Cómo configurar por primera vez Toque el nombre de su receptor (“KDC-BT782HD”/“KDC-X705”) y siga las instrucciones. Para el dispositivo Android Empareje su dispositivo con esta unidad a través de Bluetooth. - Page 110 AMAZON ALEXA • Para volver a la fuente anterior a ALEXA, pulse SRC. • Para activar Alexa, pulse o diga “Alexa”. • Para cancelar el estado de audición actual, pulse . • Para cancelar los estados “thinking/speaking (pensando/hablando)” actuales y volver al estado de audición, pulse o diga “Alexa”.
-
Page 111: Ajustes De Audio
Ajustes de audio AMAZON ALEXA Comience a escuchar Cuando Alexa está en estado de inactividad... Diga la palabra “Alexa” al micrófono conectado (página 16) para activar Alexa. Pulse en la unidad para hablar con Alexa. En la pantalla se muestra: “LISTENING... ” . Comuníquese con Alexa a través del micrófono conectado. - Page 112 Ajustes de audio [MANUAL EQ] Configura sus propios ajustes de sonido para cada fuente. [SOUND EFFECT] • Los ajustes se guardan en [USER] para [PRESET EQ] [SOUND RECNSTR] (No aplicable para la fuente HD RADIO, para la fuente AUX ni para la fuente [EASY EQ] •...
- Page 113 Ajustes de audio [X ‘ OVER] [SW LPF SLOPE] [–6DB] [–12DB] [–18DB] [–24DB] : Ajusta la pendiente de cruce. [TWEETER] [FRQ] [1KHZ] [1.6KHZ] [2.5KHZ] [4KHZ] [5KHZ] (Puede seleccionarse solo si se seleccionó un ajuste [6.3KHZ] [8KHZ] [10KHZ] [12.5KHZ] : Ajusta la [THROUGH] [SW LPF FRQ] distinto de para...
- Page 114 Ajustes de audio [DISTANCE] [GAIN] [DTA SETTINGS] • Antes de realizar un ajuste para , seleccione Ajustes de la alineación del tiempo digital el altavoz que desea ajustar: [FRONT LEFT] [FRONT RIGHT] [REAR LEFT] [REAR RIGHT] [SUBWOOFER] La Alineación de Tiempo Digital ajusta el tiempo de retardo de la salida de los –...
-
Page 115: Ajustes De Visualización
Ajustes de visualización Identificación de zonas para los ajustes de color y de brillo [XX] Predeterminado: [DISPLAY] [COLOR SELECT] [ALL ZONE] [ZONE 1] Selecciona por separado los colores de iluminación para [ZONE 2] Selecciona una zona. (Véase la ilustración de la columna izquierda.) Seleccione un color preajustado para la zona seleccionada. -
Page 116: Instalación/Conexión
Instalación/Conexión Lista de piezas para la instalación Esta sección es para los instaladores profesionales. Para fines de seguridad, deje que un profesional realice el cableado y Placa frontal (×1) Placa embellecedora (×1) el montaje. Consulte con un distribuidor de productos de audio para automóviles. - Page 117 Instalación/Conexión Instalación de la unidad (montaje en el tablero) Instalación de la unidad (sin manguito de montaje) Retire de la unidad, el manguito de montaje y la placa embellecedora. Alinee los orificios de la unidad (en ambos lados) con la ménsula de montaje del vehículo y fije la unidad con los tornillos suministrados.
- Page 118 Instalación/Conexión Conexión del cableado IMPORTANTE Se recomienda instalar la unidad con un mazo de cables disponible en el mercado que sea adecuado para su automóvil y, para fines de seguridad, deje esta tarea en Fusible (10 A) Terminal de la antena manos de profesionales.
-
Page 119: Referencias
Más información unidad. Para: – Últimas actualizaciones de firmware y lista de los últimos elementos compatibles – Aplicación original KENWOOD – Cualquier otra información más reciente Visite <https://www.kenwood.com/cs/ce/>. General •... - Page 120 Referencias Archivos reproducibles Acerca de AMAZON ALEXA • Disco: • Debido a que Alexa es un servicio de terceros, las especificaciones se encuentran sujetas a cambios sin Archivos de audio que pueden reproducirse: previo aviso. Por consiguiente, la compatibilidad podría verse afectada, y alguno o todos los servicios MP3 (.mp3), WMA (.wma), AAC (.aac) podrían dejar de estar disponibles.
-
Page 121: Cambiar La Información En Pantalla
Referencias Cambiar la información en pantalla Nombre de la Información en pantalla: Visualización principal fuente Cada vez que pulsa DISP, la información en pantalla cambia. • Si la información no está disponible o no está registrada, aparecerá “NO TEXT”, “NO INFO”, u otra iPod USB/iPod BT Título de la canción/Artista Título del álbum/Artista... -
Page 122: Localización Y Solución De Problemas
Localización y solución de problemas Síntoma Solución Síntoma Solución El sonido no se escucha. • Ajuste el volumen al nivel óptimo. El orden de reproducción no es Disco óptico, los archivos se reproducen en el orden en que • Inspeccione los cables y las conexiones. el que se esperaba. - Page 123 Localización y solución de problemas Síntoma Solución Síntoma Solución “NO DISC” Inserte un disco reproducible en la ranura de carga. “NO SIGNAL” Asegúrese de que la antena esté montada fuera del vehículo. “TOC ERROR” Asegúrese de que el disco esté limpio e insertado “SUBSCRIPTION UPDATED –...
- Page 124 Localización y solución de problemas Síntoma Solución Síntoma Solución El sonido se interrumpe o se • Reduzca la distancia entre la unidad y el reproductor de audio Alexa no responde a las La nube de Amazon no pudo analizar la entrada de voz. omite durante la reproducción Bluetooth.
-
Page 125: Especificaciones
Especificaciones Diodo láser GaAIAs Gama de frecuencias 87,9 MHz — 107,9 MHz (pasos de 200 kHz) Filtro digital (D/A) 8 veces sobremuestreo Sensibilidad útil 7,2 dBf (0,63 μV/75 Ω) (Relación señal/ruido = 30 dB) Velocidad de giro 500 rpm — 200 rpm (CLV) Sensibilidad de silenciamiento 15,2 dBf (1,58 μV/75 Ω) Fluctuación y trémolo Por debajo del límite medible (DIN S/N = 46 dB) Respuesta de frecuencia (±1 dB) - Page 126 Especificaciones Respuesta de frecuencia (±3 dB) 20 Hz — 20 kHz Acción tonal Banda 1: 62,5 Hz ±9 dB Banda 2: 100 Hz ±9 dB Voltaje de entrada máximo 1 000 mV Banda 3: 160 Hz ±9 dB Banda 4: 250 Hz ±9 dB Impedancia de entrada 30 kΩ...
- Page 128 • Windows Media is a registered trademark or trademark of Microsoft Corporation in the United States and/or other countries. This product is protected by certain intellectual property rights of Microsoft. Use or distribution of such technology outside of this product is prohibited without a license from Microsoft. •...
Need help?
Do you have a question about the KDC-X705 and is the answer not in the manual?
Questions and answers