Advertisement
Table of Contents
Advertisement
Table of Contents

Subscribe to Our Youtube Channel
Related Manuals for RODE Microphones NT-USB


Summary of Contents for RODE Microphones NT-USB
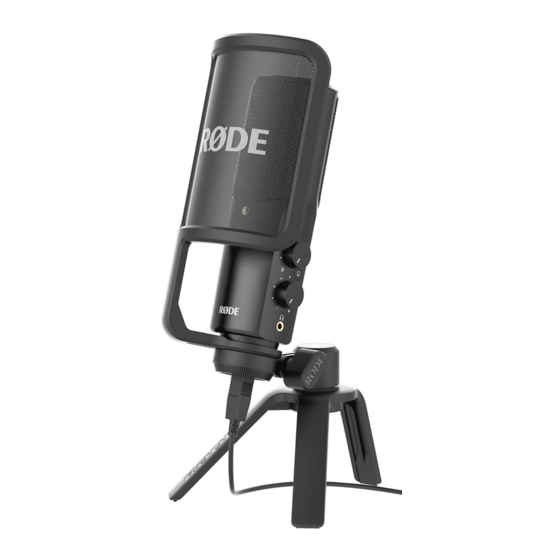
- Page 1 NT-USB Versatile Studio-Quality USB Microphone www.rodemic.com/nt-usb...
-
Page 2: What's In The Box
Features What’s in the box? • Compatible with Apple iPad® • NT-USB microphone • Cardioid polar pattern • Tripod mount (stand) • State-of-the-art surface mount electronics • Pop shield • Designed in Australia • USB cable (6m/ 20”) • Full 2 year guarantee* •... -
Page 3: Specifications
Specifications Acoustic Principle Pressure Gradient 0˚ +5.0 Active Electronics JFET impedance converter with bipolar -2.0 -2.0 output buffer, A/D converter 16bit 48kHz, -4.0 -6.0 headphone amplifier -8.0 -10.0 -10.0 -12.0 -14.0 Directional Pattern Cardiod -16.0 -18.0 -20.0 -20.0 Polar Response -22.0 -24.0 90˚... -
Page 4: Warranty
Windows and Mac computers, as well as the Apple iPad via the USB camera connection kit (available directly from Apple). The NT-USB is covered by a limited warranty for one (1) year from The NT-USB features a purple LED inside the microphone cage the date of purchase. - Page 5 (diagram 1). The mounting the stand. ring can also be used as a mic clip to attach the NT-USB to a When recording vocals, mic or boom stand. always use the supplied pop...
-
Page 6: General Operation
Headphone volume control The headphone volume control (the bottom knob) allows you to control the volume of the playback through headphones connected to the NT-USB via the headphone jack. Diagram 3 - Monitor mix control and headphone volume control... - Page 7 15cm (6”) An ideal reference is to begin with the NT-USB with the pop shield attached, mounted directly in front of the vocalist, approximately 15cm (6”) away. The pop shield will assist in keeping the performer at a constant minimum distance from the microphone and helps to maintain reasonable recording levels.
- Page 8 Setting your input level: Adjusting the input level on a Mac OS computer: The NT-USB has been set to an ideal internal gain setting, without 1. Click on the Apple symbol at the top left of your screen, and the need for physical level adjustments on the microphone body.
- Page 9 2. Click on ‘Sound’ to open the sound options 3. Open the ‘Input tab’. 4. From here, select the ‘RØDE NT-USB’ from the list of devices, and adjust the input level using the slider. Diagram 6 - Opening ‘Sound’ options...
- Page 10 General operation cont. 2. Open the ‘Sound’ preferences from within the Control Panel Adjusting the input level on a Windows computer: folder. 1. Open the Start menu and click on ‘Control Panel’ Diagram 8 - Accessing Windows Control Panel Diagram 9 - Opening ‘Sound’ options...
- Page 11 General operation cont. 3. Open the ‘Recording’ tab and double click on ‘RØDE NT-USB’ 4. Adjust the input level using the slider. from the list of devices. Diagram 10 - Selecting the NT-USB input device Diagram 11 - Adjusting NT-USB input level...
- Page 12 Using the NT-USB with your Apple iPad ® The NT-USB can be used to record with an Apple iPad using After use the NT-USB should be removed from its tripod mount, the USB Camera Connection Kit applicable to your iPad version wiped with a dry, soft cloth and placed in the supplied protective (available as an accessory from most Apple retailers).
- Page 13 Support Contact RØDE If you experience any problem, or have any questions regarding your International RØDE microphone, first contact the dealer who sold it to you. 107 Carnarvon Street If the microphone requires a factory authorised service, return will Silverwater NSW 2128 Australia be organised by that dealer.
Need help?
Do you have a question about the NT-USB and is the answer not in the manual?
Questions and answers