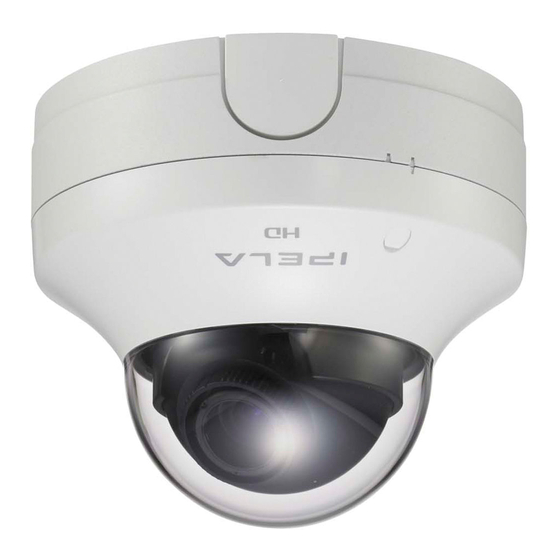
Sony Ipela SNC-CH140 User Manual
Hide thumbs
Also See for Ipela SNC-CH140:
- Installation manual (2 pages) ,
- Brochure & specs (2 pages) ,
- User manual (130 pages)

Related Manuals for Sony Ipela SNC-CH140


Summary of Contents for Sony Ipela SNC-CH140
-
Page 1: Network Camera
4-174-237-11 (1) Network Camera User’s Guide Software Version 1.0 Before operating the unit, please read this manual thoroughly and retain it for future reference. SNC-CH140 SNC-DH140 © 2009 Sony Corporation... -
Page 2: Table Of Contents
Common Tab ............31 Accessing the Camera Using the Web Focus tab — Adjusting the Focus Browser ..............13 (SNC-CH140 only) .........32 Focus/Zoom tab — Adjusting the focus/zoom Basic Configuration by the Administrator ..15 (SNC-DH140 only) .........32 Picture Tab ............32 Operating the Camera Privacy masking tab ..........34... - Page 3 Sending an Image via E-mail — e-Mail (SMTP) Configuring the Viewer Menu ..............58 — Viewer Menu ...........79 Common Tab — Setting the e-Mail (SMTP) Layout tab ............79 Function ............58 HTML output tab ..........81 Alarm sending Tab — Setting the e-mail sending mode when detecting the Others alarm ...............
-
Page 4: Overview
Overview NOTICE TO USERS © 2009 Sony Corporation. All rights reserved. This manual or the software described herein, in whole or in part, may not be reproduced, translated or reduced to any machine readable form without prior written Features approval from Sony Corporation. -
Page 5: How To Use This User's Guide
Microsoft Internet Explorer Ver 6.0 or 7.0 from the ones that appear in actual use. The illustrations of the camera and menu display in the User’s Guide show the SNC-CH140 or SNC-DH140 as Display an example. 1600 × 1200 pixels or higher. -
Page 6: Preparation
Assigning an IP address using SNC Preparation toolbox The Preparation section explains what the administrator Insert the CD-ROM in your CD-ROM drive. has to prepare for monitoring images after installation A cover page appears automatically in your Web and connection of the camera. browser. - Page 7 Set the IP address. To obtain the IP address automatically from a DHCP server: Select Obtain an IP address automatically. The IP address, Subnet mask and Default gateway are assigned automatically. Note When you select Obtain an IP address automatically, make sure that the DHCP server is operating on the network.
-
Page 8: When Using Windows Xp Service Pack 2 Or Later
The viewer screen of the network camera is If the message “File Download – Security Warning” displayed on the Web browser. appears, click Run. Display sample Program name Note If you select Save in the “File Download – Security Note Warning”... -
Page 9: Configuring Windows Firewall
If the information bar appears, click on the bar and select Select Off in the Windows Firewall dialog. Install ActiveX Control…. If “ Internet Explorer – Security Warning” appears, click Install. Program name The installation of ActiveX Control starts. When installation is completed, the main viewer or the Motion detection menu appears. -
Page 10: When Using Windows Vista
In the Add Program dialog, select SNC toolbox and If the pop-up “AutoPlay” appears when a CD-ROM is click OK. inserted into the CD-ROM drive, click Install or run program. SNC toolbox is added to the Programs and Services list. Click OK. -
Page 11: Starting The Software
If the message “User Account Control – Windows needs Note your permission to continue” appears, click Continue. If you select Save in the “File Download – Security Warning” dialog, you will not be able to perform If “Internet Explorer – Security Warning” appears, click installation correctly. - Page 12 Select Off in the General tab. Click OK. When the above procedure is completed, the The cameras will be displayed in the list. cameras connected in the local network are If you want to keep Windows Firewall On, continue displayed in SNC toolbox. with the following steps.
-
Page 13: Accessing The Camera Using The Web Browser
When Internet Explorer 7 is used Accessing the Camera When you enter the camera IP address, “Certificate Error” may appear according to the status of the Using the Web Browser certificate set on the camera. In this case, click Continue to this website (not recommended). - Page 14 Notes • If Automatic configuration is enabled in the Local Area Network (LAN) settings of Internet Explorer, the image may not be displayed. In that case, disable Automatic configuration and set the Proxy server manually. For the setting of the Proxy server, consult your network administrator.
-
Page 15: Basic Configuration By The Administrator
Basic Configuration by the Administrator You can monitor the camera image by logging in with the initial conditions set for this network camera. You can also set various functions according to the installing position, network conditions or purpose of the camera. We recommend you configure the following items before monitoring images from the camera. -
Page 16: Operating The Camera
Operating the Camera Administrator and User This network camera identifies those who log in as the Administrator or User. This section explains how to monitor the image from the The Administrator can use all the functions of this camera using your Web browser (Internet Explorer). network camera, including camera settings. -
Page 17: Logging In To System
Plug-in free viewer Logging in to System This viewer allows the user to select from three image display methods: JPEG, JPEG/FLASH or ActiveX viewer. JPEG method: JPEG images will be displayed in Logging in as a user sequence. JPEG/FLASH method: JPEG images will be displayed Start the Web browser on your computer and type in sequence. -
Page 18: Configuration Of Main Viewer
Control panel section Configuration of Main Viewer Information panel This section explains the functions of the parts and controls of the main viewer. For a detailed explanation on each part or control, see the specified pages. Check the date and time here. Main viewer using ActiveX viewer View panel Main menu... -
Page 19: Monitor Image
(Run)/ (Stop Save Video) Others panel Runs and stops Save Video. Click to open the folder to be saved. Volume (Displayed only when the camera image is in MPEG4 or H.264.) Use the slide bar to adjust the volume for sound output level. -
Page 20: Control Bar
Monitor screen Save still image button (Pan/tilt/zoom functions are not available for this Captures still images taken by the camera and saves model.) them to the computer. The image shot by the camera is shown here. Audio output volume slider There are two modes for on-screen pan/tilt/zoom Use the slider to adjust the volume. -
Page 21: Using The Trigger Button
You can capture a camera image as a still picture and function by clicking Day/Night. record it. SNC-CH140 can record images in its built-in memory or Playing an audio file stored in the CF memory card (not supplied). SNC-DH140 can only record images in its built-in memory. -
Page 22: Switching Tcp/Udp Transmission Mode
UDP (Multicast): This protocol is selectable when Switching TCP/UDP Multicast streaming (page 38) is On. When UDP (Multicast) is selected as the transmission port, Transmission Mode RTP (Real-time Transport Protocol) and UDP multicast techniques are adopted for video/audio transmission. By selecting it, the network You can select TCP or UDP as the communication port transmission load of the camera can be reduced. -
Page 23: Using The System Utility
Connection tab Using the System Utility You can download system utility from the tools tab on the main menu. You can set the connection method. Select the start-up connection from: TCP, UDP Unicast, and UDP Multicast. If TCP connection is selected, you can configure proxy To use the utility, click Download to begin download. -
Page 24: Snc Desktop Viewer
Joystick tab This device is not equipped with operational functions for images. Audio tab You can assign the joystick buttons here. This device is not equipped with Joystick functions. Volume SNC Desktop viewer Mute: Select this option for muting the sound at This is a gadget that displays the camera image in the start-up. - Page 25 Using the SNC desktop viewer How to control PTZ When the SNC desktop viewer is successfully installed, Select the PTZ operation mode for the Gadget screen it will appear on the side bar of Windows Vista. from the options Area zoom, PTZ control bar, and Vector dragging.
-
Page 26: Administrating The Camera
Click the menu name (example: System) on the left Administrating the Camera side of the Administrator menu. The clicked menu appears. This section explains how to set the functions of the Example: “System” menu camera by the Administrator. For details about monitoring the camera image, see “Operating the Camera”... -
Page 27: Configuration Of The Administrator Menu
FTP client Configuration of the Administrator Displays the FTP client menu for sending an image/ menu audio file, etc., to an FTP server. (“Sending Images to FTP Server — FTP client Menu” on page 61) Image memory Displays the Image memory menu for recording an image/audio file, etc. -
Page 28: Configuring The System - System Menu
Date & time format Configuring the System Select the format of date and time to be displayed in the main viewer from the drop-down list. — System Menu You can select the format between yyyy-mm-dd hh:mm:ss (year-month-day hour:minutes:seconds), mm-dd-yyyy hh:mm:ss (month-day-year When you click System in the Administrator menu,... -
Page 29: Superimpose Tab
OK/Cancel Superimpose format See “Buttons common to every menu” on page 26. Click Edit to edit the content to superimpose over each display position. Only one Date and one Camera ID can be specified for Superimpose Tab the Superimpose format. You can set the content to superimpose in the bottom Select whether to superimpose the camera ID, date &... -
Page 30: Initialize Tab
See “Buttons common to every menu” on page 26. the 802.1X authentication function – Header logo – superimpose logo Initialize Tab Format CF memory card (SNC-CH140 Reboot only) Used when rebooting the system. Click Format to format the CF memory card (not Click Reboot, and the message “This System will be... -
Page 31: System Log Tab
System log Tab Use this menu to set the functions of the camera. The camera menu consists of the following 7 tabs. SNC-CH140: Common, Focus, Picture, Privacy masking, Day/Night, Video codec, and Streaming. SNC-DH140: Common, Focus/Zoom, Picture, Privacy masking, Day/Night, Video codec, and Streaming. -
Page 32: Focus Tab - Adjusting The Focus (Snc-Ch140 Only)
– Privacy masking and Cropping is deactivated. Focus tab — Adjusting the Focus – The current image focus position is superimposed. (SNC-CH140 only) – The alarm of Motion detection is deactivated. – View-DR is turned on. Adjust the focus by moving the flange back position of the imaging device. -
Page 33: Shutter Speed
• This cannot be selected when View-DR is On. +2.0, +1.6, +1.3, +1.0, +0.6, +0.3, 0, -0.3, -0.6, -1.0, • For SNC-CH140, if the Lens type is set to Auto iris -1.3, -1.6, -2.0 lens, the shutter speed control mode cannot be set to Auto. -
Page 34: Privacy Masking Tab
For SNC-CH140 (Shutter speed: Fixed) or Brightness SNC-DH140 Select the brightness in 11 steps, from -5 to +5. • When Auto slow shutter is Off Selecting +5 provides the brightest picture. Shutter speed is fixed to the value set in Shutter speed •... -
Page 35: Day/Night Tab
For details on Easy Focus, refer to the “Focus tab — Preview screen Adjusting the Focus (SNC-CH140 only)” (page 32) and This screen is for monitoring images and configuring “Focus/Zoom tab — Adjusting the focus/zoom (SNC- day/night settings. -
Page 36: Video Codec Tab
Video codec Tab Note Use this tab to set the items for the video codec. The selectable size of images and frame rate for Image 2 may be limited depend on the setting of codec type, size of images and/or frame rate for Image 1. Image size You can select the size of images sent from the camera. -
Page 37: Streaming Tab
Frame rate Image quality Set the frame rate of the image. Set the JPEG image quality. Selectable frame rates are as follows: Selectable values are from Level 1 to Level 10. 1, 2, 3, 4, 5, 6, 8, 10, 15, 20, 25, 30 (fps) When Level 10 is selected, the best image quality is achieved. -
Page 38: Configuring The Network - Network Menu
Multicast streaming Configuring the Network Set whether the camera uses multicast streaming for MPEG4/H.264 video data and audio data or not. It — Network Menu reduces the transmission load on the camera by having a computer of the same segment network receive the same When you click Network in the Administrator menu, the... -
Page 39: Wireless Tab - Setting Of Wireless Connection (Snc-Ch140 Only)
Network tab. Verified wireless cards Note • Sony Wireless Card SNCA-CFW5* sold separately. The domain suffix is sent to the DHCP server as FQDN (Fully Qualified Domain Name) information when Host * SNCA-CFW5 is not available in some countries and name is set. -
Page 40: Mac Address
• The throughput of data transmission/reception via the Note network cable may decrease when the wireless card is in use. When you select Obtain DNS server address automatically, make sure that a DHCP server is operating on the network. MAC address Displays the MAC address of the wireless card inserted Primary DNS server in to the CF card slot. -
Page 41: Common Setting
Common setting Note This setting is not recommended for reasons of Type protecting your computer from harm. Select the network connection type. WEP: Select this option when WEP (Wired Equivalent Ad hoc mode: Select this when connecting to a Privacy) security method is used. computer directly. -
Page 42: Qos Tab
for a 40-bit key, or 26 characters for a 104-bit key. Note In ASCII, type 5 characters for a 40-bit key, or 13 characters for a 104-bit key. This function is available only for some models. When Type is set to Infrastructure mode, the WEP key should be the same as that of the access OK/Cancel point. - Page 43 Select the number to use when registering on the QoS The subnet mask value represents the number of bits table. from the left side of the network address. When you select a registered number, the registered QoS information is displayed. Port Enter the port number for the data traffic of the device Network address...
-
Page 44: Dynamic Ip Address Notification Tab - Notifying The Ip Address
QoS table Note Displays the list of registered QoS information. If multiple conditions match, the rule with the smallest The model on sale in China does not support the TLS number has priority. function. STARTTLS To attain QoS of data traffic, the target device must be To use the encryption function by STARTTLS, set to connected to a router or switch that supports the QoS function. -
Page 45: Http Notification
The standard port number is 110. If TLS is enabled, the http:// [IPv6 address] standard port number for POP3s is 995. http:// [IPv6 address]: port [:port]: Specify the port number to which you want to connect. If you want to use the established port Authentication mode number 80, you do not need to input a value. -
Page 46: Setting The Ssl Function - Ssl Menu
In this case, you must reset the camera to the factory Setting the SSL function settings. (All settings will be initialized.) To avoid this, check that SSL connection is possible by — SSL Menu performing the following steps. Set the SSL function to On, and select Allow When you click in the Administrator menu, the HTTP connection for some clients. -
Page 47: Private Key Password
Use a self-signed certificate (For test use): This mode To display certificate information uses the certificate and private key pair generated by When the certificate has been set in the camera correctly, “Generating a self-signed certificate” on page 47. its information appears on Status, Issuer DN, Subject Private key information corresponding to the DN, Validity Period and Extended Key Usage. -
Page 48: Ca Certificate Tab - Adding The Ca Certificate For Client Authentication
To import the CA certificate Note Click Cancel at the bottom of the menu if you want to Click Browse… to select the CA certificate to be cancel changing the private key password after clicking saved in the camera. Reset. Doing so restores the other setting items in the Client certificate tab to the previous settings. -
Page 49: How To Install The Ca Certificate
Click Next. How to install the CA certificate The camera may not be connected because the browser (Internet Explorer) does not display whether the certificate will be accepted or not due to the type of certificate. In this case, install the CA certificate as follows. -
Page 50: To Remove An Installed Ca Certificate
Select Certificates from the list, then click Add. To remove an installed CA Certificate Snap-in is displayed. certificate Select Computer account as the certificate administrated in this Snap-in, then click Next. In Internet Explorer, click in the order Tools, Internet options, Content tab and Certificates. Select Local Computer as the computer The Certificates dialog appears. -
Page 51: Using The 802.1X Authentication Function - 802.1X Menu
Supplicant Using the 802.1X A supplicant is a device that connects to the authentication server to join the network. This camera Authentication Function serves as a supplicant in the 802.1X network. The supplicant can enter the 802.1X network after — 802.1X Menu appropriate authentication by the authentication server. -
Page 52: Client Certificate Tab
Wired interface status Shows the authentication status of the 802.1X authentication function for wired ports. Click Refresh to update the status. Wireless interface status (SNC-CH140 only) Shows the authentication status of the 802.1X authentication function for wireless networks. Client certificate request Click Refresh to update the status. -
Page 53: Ca Certificate Tab
CA certificate Tab Note When the client certificate to be imported is of You can import a trusted CA certificate (server PKCS#12 format and the private key password is not set certificate or route certificate) to the camera. Up to four correctly, “<Put correct private key password>”... -
Page 54: Setting The 802.1X Authentication Function - Example Of Windows Server 2003
Select New from the context menu, then select Setting the 802.1X authentication Group and configure the group for 802.1X function – Example of Windows connection. For example, the group “Wired_802.1X_Group” is Server 2003 assumed for explanation purposes. This section explains how to configure the authentication server and CA using Microsoft Windows Configuring the Internet Authentication Server 2003. - Page 55 Set the following items: The “Microsoft Certificate Services” page opens. Friendly name: Type “authenticator” as an example. Client address (IP or DNS): IP address of the authenticator Client-Vender: RADIUS Standard Shared secret: Specify the shared secret to be set in the authenticator. Adding a user Open Active Directory Users and Computers from Administrative Tools of Windows menu.
- Page 56 When “Use a key pair from a CA” is selected Click Next and select as follows. Do you want to export the private key with the Start Internet Explorer on the client PC and type the certificate?: Select Yes, export the private key. CA’s URL in the address bar.
-
Page 57: Setting The User - User Menu
Viewer mode Setting the User When the user is authenticated for logging in the main viewer, select the viewer mode to be displayed after — User Menu authentication. Full: The user can operate all functions in this mode. When you click User in the Administrator menu, the Light: In addition to the View mode, the user can select... -
Page 58: Setting The Security - Security Menu
Setting the Security Sending an Image via E-mail — Security Menu — e-Mail (SMTP) Menu e-Mail (SMTP) When you click Security in the Administrator menu, the When you click in the Administrator menu, the e-Mail (SMTP) menu appears. Security menu appears. Using the e-Mail (SMTP) function, you can send an This allows you to control which computers can have e-mail with an attached image file that has been shot... - Page 59 POP port number Note Enter a port number from 110 to 65535. The model on sale in China does not support the TLS The standard port number is 110. If TLS is enabled, the function. standard port number for POP3s is 995. STARTTLS Authentication mode Select Login or CRAM-MD5 as the authentication...
-
Page 60: Alarm Sending Tab - Setting The E-Mail Sending Mode When Detecting The Alarm
Interval: Set the interval at which you want to send an Alarm sending Tab — Setting the e-mail periodically after detection. e-mail sending mode when E-mails are sent after a specified interval time until the Camera tampering detection setting is cleared or detecting the alarm the detection setting is turned off. -
Page 61: Sending Images To Ftp Server
Date & time: The date & time suffix is added to the Sending Images to FTP image file name. The date & time suffix consists of the year (2 digits), Server month (2 digits), date (2 digits), hour (2 digits), minutes (2 digits) and seconds (2 digits), and —... -
Page 62: Alarm Sending Tab - Setting The Ftp Client Action When Detecting The Alarm
Passive mode Sequence number: A sequential number of 10 digits between 0000000001 and 4294967295 and a Set whether you use the passive mode of FTP server or sequential 2-digit number are added to the image file not when connecting to the FTP server. Select On to name. -
Page 63: Periodical Sending Tab - Setting The Periodical Ftp Client Activity
Effective period Periodical sending Tab — Setting Set the period during which periodical sending is the periodical FTP client activity effective. You can set to send image files (JPEG files) to an FTP Always: Periodical sending is always effective. server periodically. Schedule: You can specify the period during which periodical sending is effective. -
Page 64: Recording Images In Memory
(shot being linked with the external sensor input or built-in motion detection function) in the built-in memory (approx. 8 MB), or in a CF memory card (not supplied. Applicable for SNC-CH140 only) inserted in the camera. The image file can also be recorded periodically. - Page 65 Off: A warning mail is not sent to the Administrator. Wait time after POP Set the waiting time in POP before SMTP before Note SMTP authentication after POP authentication is When Overwrite is set to On, a warning mail is not sent completed.
-
Page 66: Alarm Recording Tab - Setting The Image Memory Function When Detecting The Alarm
Sensor input 1: The external sensor that is connected to Alarm recording Tab — Setting the sensor input of the camera I/O port. Image memory function when Camera tampering detection: An alarm that is triggered when the camera detects vibration or detecting the alarm shaking. -
Page 67: Folder Structure Of Image Memory
(one day). Note Note In the CF memory card of SNC-CH140, the folder size The actual interval may be longer than the set value varies depending on the capacity of the CF memory depending on the image size, image quality, bit rate, or card. -
Page 68: Downloading Images From The Camera - Ftp Server Menu
Day/Night memory (approximately 8 MB) or CF memory card (not function. supplied. Applicable for SNC-CH140 only) inserted in The Alarm output menu consists of two tabs: the camera, or configure the FTP server function for Alarm out 1 and Alarm out 2. -
Page 69: Outputting Audio Linked To Alarm Detection
Camera tampering detection Outputting Audio Linked Select this option when you link the alarm output to the vibration/shaking detection of the camera. to Alarm Detection — Voice alert Menu Select this option when you link the alarm output to the VMF detection function. -
Page 70: Setting The Operations From The Viewer - Trigger Menu
Voice alert Setting the Operations To use the voice alert function linked with the sensor input or the motion detection function, select On. from the Viewer — Trigger Repeat Menu Select playback repeat time from 1 to 3. Click Trigger in the Administrator menu to display the Alarm Trigger menu. -
Page 71: Ftp Client
See “Buttons common to every menu” on page 26. For details on usable cards, contact your authorized Sony dealer. Click Image memory to display the Trigger-Image memory menu. You can set the necessary options here. -
Page 72: Setting The Schedule - Schedule Menu
Setting the Schedule Setting the Alarm Buffer — Schedule Menu — Alarm buffer Menu When you click Schedule in the Administrator menu, When you click Alarm buffer in the Administrator menu, the Schedule menu appears. the Alarm buffer menu appears. The Schedule menu consists of seven tabs. -
Page 73: Setting The Sensor Input/Camera Tampering
Motion detection tab — Set the Setting the Sensor input/ motion/VMF detection Camera tampering Motion detection detects moving objects in the camera image and outputs an alarm. In VMF, an alarm is detection/Motion notified when a motion detected under the motion detection detection setting passes, appears in, disappears from or shows any movement in a specified area or on an... -
Page 74: Setting Items For Motion Detection
Capacity Setting items for motion detection When the Capacity of moving objects in the reference Use the settings tab to set the conditions for the motion area reaches definite number, an alarm is set off. FTP detection function while observing camera images. This client alarm sending, image memory alarm recording menu is the same as the settings menu displayed when and/or audio file playback can be performed in... - Page 75 Use the following buttons to specify the active Detection sense area(s) and inactive area(s). Set the sensitivity of motion detection. Add detection area Clicking this button will add an active area window in the center of the screen. When you place the cursor on the area, the cursor changes to a crossed arrow, which you can drag to move the area.
-
Page 76: Vmf Settings
Moving shadow exemption When all rules are violated in order: An alarm will be Set ON/OFF for the moving shadow exemption function set off when the three conditions are met in the of motion detection. sequence specified. If the conditions occur in an Selecting Do not respond to shadows will prevent the order different from the sequence specified, such as shadows of a moving object from being recognized as... - Page 77 Passing object trigger line Appearance By default, one passing object trigger line is displayed. The number of vertexes is 2. Placing the cursor on the line will turn the cursor into a cross, and when you drag the line, the whole line will move.
-
Page 78: Trigger Speed
This criterion is the number of objects found in the Trigger speed trigger area. Specify the range of the speed of object to inspect by The quantity is specified from the pull-down list. determining Min. speed and Max. speed. Similar to a active window, the trigger area can also be moved and its vertexes can also be moved, added or deleted. -
Page 79: Configuring The Viewer - Viewer Menu
To set the logo image, click Browse and specify the Custom: Select the homepage to be displayed. URL of the logo image to display. With SNC-CH140, you can write data in the built-in flash memory or CF memory card (not supplied) to Text color, Background color 1, and use your favorite homepage. - Page 80 Registering in Cameras Initial frame rate Specify a number on the camera list and set the IP Set the initial camera image frame rate. address, port number, and comment for each camera. Initial image Insert: Click to register a camera in the camera list. Modify: Click to edit a selected camera list.
-
Page 81: Html Output Tab
HTML output tab If the monitor is for personal use, this tab can be used to output sample source for HTML and script. For details on the setting, refer to “Monitor” of the Layout tab. Monitor Displays a preview. Preview: Displays a preview on the monitor based on the current settings. -
Page 82: Using The Snc Toolbox
How to use SNC toolbox Others Menu bar Function buttons This section explains how to use the application software and commands, including the supplied CD- ROM. Using the SNC toolbox Explains the functions except those of the Network tab in SNC toolbox. To install SNC toolbox, to assign an IP address and to set the network, see “Assigning the IP Address to the Device tree display... -
Page 83: Device List
Privacy Masking: Displays the Privacy Masking Setting screen. Displays the settings screen for the device. Panorama Creator: Displays the Panorama Creator screen. Task Not available with this product. Displays the Task List dialog. Custom Homepage: Displays the Custom Homepage screen. Device tree view Firmware Upgrade: Displays the Firmware Upgrade This function allows you to customize folders. -
Page 84: Registering In My Device
Serial No. Registering by Add Device Entry dialog Displays the serial number. Select the folder to register the device. Version No. Right click the mouse and select Add Device Entry Displays the version of firmware. from the displayed menu. The Add Device Entry dialog appears. Admin name Displays the administrator user name. -
Page 85: Changing The Device List Display Method
Renaming the device/folder Display with large thumbnails Select the folder or device to rename and right click the Select Snapshot(L) from the View menu or click mouse. Select Rename from the displayed menu. The set to display with large thumbnails. device/folder name is highlighted. -
Page 86: Setting Snc Toolbox Options
Network tab Setting SNC toolbox options Select Option from the Tools menu to display the “Option” dialog. This dialog consists of three tabs: General, Network and Log. General tab Configure the HTTP proxy and FTP proxy. When using HTTP proxy, check Use HTTP proxy. When using FTP proxy, check Use FTP proxy. -
Page 87: Using Privacy Masking - Masking A Camera Image
Log tab Privacy Masking screen Overwrite the oldest log file To set the size of the log file, check Enable and specify the minimum required space for a log file. Log output folder Viewer Click Browse to display the folder selection dialog. A live image of the camera is displayed. -
Page 88: Using The Custom Homepage - Setting The Customized Homepage
Clear all Click to delete all privacy masks simultaneously. Setting a privacy mask To set a privacy mask in a desired position, do the following: Specify the privacy mask area by dragging the mouse on the viewer. Select the color or mosaic of the mask from the Color drop-down list. -
Page 89: Using The Schedule Task
Notes • To stop upgrading, click Stop upgrading. To protect some devices, during the process of upgrading, upgrading cannot be canceled. • Do not turn off the power until the device restarts after upgrading. Using the Schedule Task You can specify the time or interval to change the Device setting or perform Firmware upgrade. - Page 90 Displays Task Wizard. Select the task action. Select Device Setting or Firmware Upgrade. Click Next. Click Next. Select a device to which the task is assigned. A list of devices registered in My device is For Device Setting: displayed. Select the device you want to assign the Edit the value for the setting you wish to change.
-
Page 91: Configuring The Device Setting
Recurrence pattern Setting tree Specify the operation interval. All settings are sorted into categories. Click + to display Onetime: Runs the task once. the subcategories under a category. Click – to hide the Hourly: Specify the operation frequency in units of subcategories. - Page 92 Setting items Pages to refer to in Setting items Pages to refer to in “Administrating the “Administrating the Camera” Camera” Device “Setting the Camera Image e-Mail (SMTP) “Sending an Image via E- and Audio — Camera mail — e-Mail (SMTP) Menu”...
-
Page 93: Device Restart And Initialization
Setting items Pages to refer to in Using the SNC audio “Administrating the Camera” upload tool — Transmitting Voice Alert “Outputting Audio Linked to Alarm Detection — Voice Audio to Camera alert Menu” on page 69 The supplied SNC audio upload tool allows you to Voice alert 1 “Voice alert 1, 2, 3 Tab”... -
Page 94: Connecting The Camera To The Computer
Click Open. Using the SNC audio upload tool Note When you start the SNC audio upload tool, the Setting If you click “Save this program to disk” on the “File tab is displayed. Download” dialog, you cannot install the tool correctly. - Page 95 OK. Target camera(s) (Camera list) When the SNC audio upload tool starts, it automatically detects Sony network cameras connected to the local network and displays them in the camera list. Up to 256 cameras can be displayed in the list.
- Page 96 Notes Notes • An error dialog appears if the specified IP address in • Audio transmission stops if you switch the tab during the camera list is assigned for a device other than the transmission. network camera, or does not exist in the network. •...
-
Page 97: Voice Alert Tab
Voice alert tab Recording/playback progress bar Use this menu to record sound via a microphone connected to the computer, and upload the recorded audio file to the camera. You can upload the audio file to multiple cameras selected from the camera list simultaneously. - Page 98 Target camera(s) (Camera list) Saving the recorded audio file to the Displays the cameras selected with the camera select computer checkbox of the camera list in the Setting tab. The list shows information and status of selected Click (recording) in the Voice alert tab to cameras.
-
Page 99: Using The Snc Video Player - Playing A Video
Using the SNC video player Using the SNC video player Start the SNC video player. — Playing a Video/ Audio File Recorded with the Camera The supplied SNC video player allows you to play video/audio data recorded with the camera on your computer. -
Page 100: Assigning The Ip Address To The Camera Using Arp Commands
Record event: Type of event used for the Assigning the IP recording: Sensor input, Camera tampering detection, VMF, Motion detection Address to the Camera Playing a video/audio file Using ARP Commands Click (start) to start playback from the beginning of the selected file. -
Page 101: Using The Snmp
IP address setting information. The following explains the setting “192.168.0.101”. information using the inqjs=snmp (JavaScript parameter) format. 2. Setting Commands var sysDescr=“SNC-CH140”, “SNC-DH140” ...1 var sysObjectID=“1.3.6.1.4.1.122.8501” ...2 The unit supports the following SNMP setting var sysLocation=“”... -
Page 102: Glossary
sysName=<string> Glossary Set the case of “mib-2.system.sysName.0” in the <string> position. The maximum length of <string> is 255 characters. ActiveX control enaAuthTraps=<value> A component program object that can be used with web Set the case value of “mib-2.snmp.snmp pages or other application programs. The technology for EnableAuthenTraps.0”... -
Page 103: Dhcp Server
DHCP server H.264 Acronym for Dynamic Host Configuration Protocol An image compression format. The standard written by server. The IP address of a terminal without an the JVT (Joint Video Team) a joint organization for individual IP address can be automatically distributed by standardization (composed of ISO and ITU-T. -
Page 104: Proxy Server
Primary DNS server SNMP One of the DNS servers that can first reply to a request A protocol for monitoring and managing network by connected devices or other DNS servers. devices. Proxy server A server or software that acts as an intermediary Acronym for Secure Sockets Layer. -
Page 105: Index
Index CA (Certificate Authority) ..51 EAP ..........42 CA certificate ......53 EAP method ......52 CA certificate tab ......48 EAP-TLS authentication ....103 Numerics Camera ........27 Effective period .... 60 802.1X......41 Camera list ....... 20 e-mail ........44 Camera Menu......... - Page 106 Network Menu........38 image file........21 saves the setting data ......30 Image file name.... 60 Schedule ........27 OK button ........26 Image memory ..... 21 Schedule Menu .......72 Overwrite........64 Image memory Menu .....64 Schedule Task.........89 Image quality........37 Secondary DNS server ..... 39 Image size........36 Security.......
- Page 107 TCP ..........22 welcome page......... 13 TCP/UDP ........22 WEP ..........41 Test..........69 WEP key ........41 Text ..........80 Windows Firewall ......9 time difference ....... 28 Windows Vista ....... 10 Time zone........28 Windows XP Service Pack 2.... 8 Timer..........
- Page 108 Sony Corporation...