Table of Contents
Advertisement
Instruction Manual
A
MBI
I
I
NSTALLATION AND
INDEX
Introduction and Document Index
Installation Requirements ------------------------------------------------- 1
Assembly Instructions ----------------------------------------------------- 2
Commissioning Instructions ---------------------------------------------- 3
Servicing Instructions ------------------------------------------------------ 4
Spare Parts ------------------------------------------------------------------ 5
Fault Finding Guide -------------------------------------------------------- 6
Replacing Parts ------------------------------------------------------------- 7
User and Operating Instructions ---------------------------------------- 8
WARNINGS
AmbiRad equipment must be installed and maintained in accordance with the relevant
codes and practices. Due account should also be taken of any obligations arising from the
Health and Safety at Works Act 1974 or relevant codes of practice. In addition the
installation must be carried out in accordance with the current IEE wiring regulations (BS
7671), BS 6896 (Industrial & Commercial) and any other relevant British Standards and
Codes of Practice by a qualified installer. All external wiring MUST comply with the current
IEE wiring regulations.
R
Q
AD
I
NSTANT
NFRA
UARTZ
-R
H
ED
EATERS
O
PERATING
G
LOW
M
ANUAL
Section
Part No. 700505
Advertisement
Table of Contents

Related Manuals for Ambirad QUARTZ GLOW


Summary of Contents for Ambirad QUARTZ GLOW
-
Page 1: Table Of Contents
User and Operating Instructions ---------------------------------------- 8 WARNINGS AmbiRad equipment must be installed and maintained in accordance with the relevant codes and practices. Due account should also be taken of any obligations arising from the Health and Safety at Works Act 1974 or relevant codes of practice. In addition the installation must be carried out in accordance with the current IEE wiring regulations (BS 7671), BS 6896 (Industrial &... - Page 2 Introduction. Welcome to the range of high frequency height regulations are adhered to at the infra-rad heaters. Local regulations may vary in mounting heights specified. the country of use and it is the installers responsibility to ensure that such regulations All Dimensions shown are in mm unless are satisfied PLEASE READ this document prior to...
-
Page 3: Installation Requirements
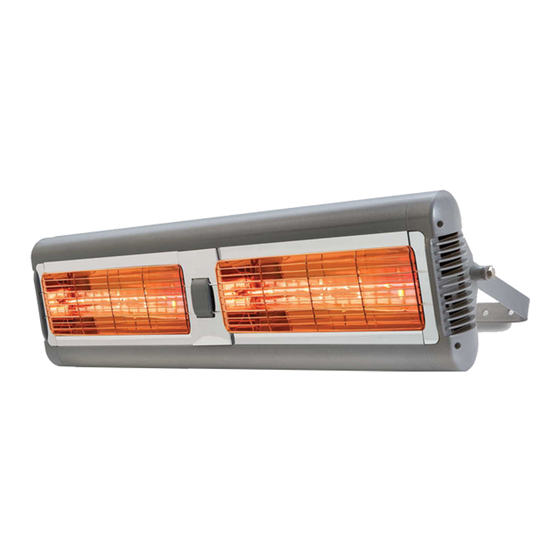
Model Definitions been recently used. • Do not handle the halogen lamp with bare QH (QHL) = AmbiRad Apollo range of indoor hands. If it is inadvertently touched, remove heaters. Power options from 1.5kW to 9.0kW. finger marks with a soft cloth and methylated Vertical and Horizontal adjustment. -
Page 4: Titan Range
Mounted Hung Mounted Hung Horiz AmbiRad Apollo Range Horiz or Horiz or Horiz or AmbiRad Sorrento SOR -15 Vertical Vertical Vertical AmbiRad Sorrento SOR –DL30 Horiz Horiz AmbiRad Sorrento SOR –TW45 AmbiRad Titan Range 1. Apollo can be mounted horizontally (i.e facing straight down) slung from chains. Ideally though, the better angle is to mount at 45°... -
Page 5: Apollo Range
1.3.1 Apollo range: 1.3.2 Sorrento range: • 1.3.2.1 General The heater must be mounted in such a way that the halogen lamp does not slant more • Always allow the heater to cool before than 4° from the horizontal, when viewed from the front. - Page 6 1. When wall mounting, securely fasten the L- 3. When hanging from a ceiling two equal shaped wall brackets to the mounting length and gauge chains are required and surface using both of the fixing holes in the should be selected with fixings that are more short part of the bracket .
- Page 7 • When hanging from a ceiling two chains of equal length and gauge are required and should be selected with fixings that are more than adequate to hold the weight of the heater. Ensure minimum distance from ceiling is adhered to as shown below. If in doubt contact a professional for advice! 1.
- Page 8 of the heater. Please note. wall fixings are not supplied. They should be selected to substantially support the weight of the installation. doubt contact professional for advice! 2. Fix the heater assembly to the brackets via the bolt threads on the middle heater. A serrated washer should be placed on the threads first and the wall brackets should prise apart in order to fit the threads in place.
- Page 9 For industrial installations, the units must be Electrical Connections supplied via double pole miniature circuit breakers (MCB) with instantaneous coefficients 1.4.1 General in the range 7 to 10 with a separation of at least 3mm between contacts. Refer to Table 1 for •...
-
Page 10: Titan Range
2. Use a minimum of 1.0mm2 H05RN-F supply cable with 2 poles and earth and sleeve with silicon glass fibre braided (250°C) sleeving. The live and neutral wires must be connected to the terminal block. See below. 3. The green/yellow wire should be connected to the clamp marked with the earth symbol using a suitable wire terminal. - Page 11 Technical Details. Table 1 Lamps Current Amps per Voltage Total Power x Power per lamp phase Model ref Description V ph QH 15-1 Single tube 230V 1ph 1 x 1.5 QH 30-1 Double tube 230V 1ph 2 x 1.5 13.0 QH 45-1 Triple tube 230V 1ph...
-
Page 12: Assembly Instructions
2. Assembly Instructions. PLEASE READ this section prior to Please ensure that all packaging is assembly to familiarise yourself with the disposed of in a safe environmentally components and tools you require at the friendly way. various stages of assembly. Carefully open the packaging and check the contents against the For your own safety we recommend the parts and check list. - Page 13 2.4.2 Titan Mobile heater The support stand for the Titan Static heater is supplied in two halves for ease of packing. 1. Interlock the two base plates with the base anchor plate uppermost. 2. Affix the casters to each of the four ends. 3.
-
Page 14: Servicing Instructions
3. Servicing Instructions. These appliances should be serviced annually by a competent person to ensure safe and efficient operation. In exceptional dusty or polluted conditions more frequent servicing may be required. The manufacturer offers a maintenance service. Details available on request Tools Required. -
Page 15: Replacing Parts
Please contact AmbiRad to purchase your replacement lamp and state the model number of the heater you wish to fit the lamp to. - Page 16 4.3 Sorrento Range: 6. At the front of the heater, the guard in front of the lamp you are replacing should be removed by gently pulling it away from the heater so it 1. Ensure the heater and lamp are cool and the prises out of its locating holes at each end.
- Page 17 11. The lamp should now be removed from the 5. Disconnect lamp leads from terminal plates, heater as shown below. and remove lamp retaining clips (see diagram below). 12. Refit the new lamp in reverse order ensuring that no wires get trapped and all screws are fully tightened.
- Page 18 Notes...
- Page 19 Notes...
- Page 20 Technical Support: Tel: 01384 489 200 Fax: 01384 489 707 ambiradgroupsupport@tnb.com www.ambiradgroup.co.uk...
Need help?
Do you have a question about the QUARTZ GLOW and is the answer not in the manual?
Questions and answers