Bunn dual sh dbc Installation And Operating Manual
Hide thumbs
Also See for dual sh dbc:
- Operating manual (52 pages) ,
- Installation & operating manual (50 pages) ,
- Programming manual (37 pages)
Table of Contents
Advertisement
Quick Links
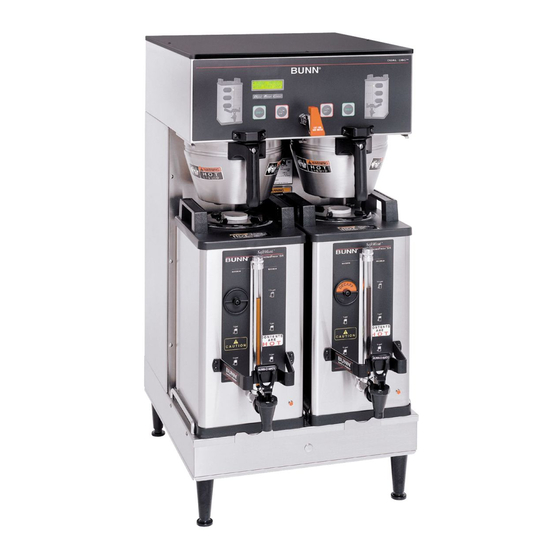
DUAL
SH DBC
®
®
WITH SMART FUNNEL
®
Software Version 1.15
and all ending __.15
N
IO
U T
C A
!
INSTALLATION & OPERATING MANUAL
BUNN-O-MATIC CORPORATION
POST OFFICE BOX 3227
SPRINGFIELD, ILLINOIS 62708-3227
PHONE: (217) 529-6601 FAX: (217) 529-6644
To ensure you have the latest revision of the manual or to obtain the illustrated parts catalog, please visit
the Bunn-O-Matic website, at www.bunn.com. This is absolutely FREE, and the quickest way to obtain
the latest catalog and manual updates. Contact Bunn-O-Matic Corporation at 1-800-286-6070 to obtain
a paper copy of the required Illustrated Parts Catalog mailed via U.S. Postal Service.
29877.0000G 02/09 ©2001 Bunn-O-Matic Corporation
Advertisement
Table of Contents

Subscribe to Our Youtube Channel
Related Manuals for Bunn dual sh dbc


Summary of Contents for Bunn dual sh dbc
- Page 1 To ensure you have the latest revision of the manual or to obtain the illustrated parts catalog, please visit the Bunn-O-Matic website, at www.bunn.com. This is absolutely FREE, and the quickest way to obtain the latest catalog and manual updates. Contact Bunn-O-Matic Corporation at 1-800-286-6070 to obtain a paper copy of the required Illustrated Parts Catalog mailed via U.S.
- Page 2 SOLE OPTION AS SPECIFIED HEREIN, TO REPAIR, REPLACEMENT OR REFUND. In no event shall BUNN be liable for any other damage or loss, including, but not limited to, lost profits, lost sales, loss of use of equipment, claims of Buyer’s customers, cost of capital, cost of down time, cost of substitute equipment, facilities or services, or any other special, incidental or consequential damages.
-
Page 3: Table Of Contents
TABLE OF CONTENTS User Notices ..........................4 Electrical Requirements ......................5 Plumbing Requirements ......................6 Operating Controls ........................7 Initial Setup ..........................8 Coffee Brewing ..........................8 Cleaning ............................8 Glossary ............................9 PROGRAMMING ........................10 Programming Switches ......................10 Programming the Brewer ......................11 PROGRAM FUNCTIONS (LEVEL 1) Brew Lockout ..............11 PROGRAM FUNCTIONS (LEVEL 2) ...................12 and G9-2T DBC Grinder) ........13 Set New Recipe (using a Smart Funnel... -
Page 4: User Notices
FAILURE TO COMPLY RISKS EQUIPMENT DAMAGE, FIRE OR SHOCK HAZARD. READ THE ENTIRE OPERATING MANUAL BEFORE USING THIS PRODUCT 00986.0000F 10/07 ©1994 Bunn-O-Matic Corporation 00986.0000 00658.0000 This equipment must be installed to comply with the International Plumbing Code of the... -
Page 5: Electrical Requirements
ELECTRICAL REQUIREMENTS WARNING - The brewer must be disconnected from the power source until specified in Initial Set-Up. Refer to Data Plate on the Brewer, and local/national electrical codes to determine circuit requirements. L2 RED L2 RED L2 RED L2 RED WHITE WHITE L1 BLACK... -
Page 6: Plumbing Requirements
" water supply line. A tight coil of copper tubing in the water line will facilitate moving the brewer to clean the counter top. Bunn-O-Matic does not recommend the use of a saddle valve to install the brewer. The size and shape of the hole made in the supply line by this type of device may restrict water flow. -
Page 7: Operating Controls
OPERATING CONTROLS I T C OPERATING CONTROLS (a) MAIN ON/OFF SWITCH This switch, located under the brewer behind the right front leg, turns power on and off to all components in the brewer. (b) BATCH SELECTOR SWITCHES Pressing the switch corresponding to the Small, Medium, or Large batch selects the amount of coffee to be brewed. -
Page 8: Initial Setup
7. The brewer is now ready for use in accordance with the coffee brewing instructions. COFFEE BREWING 1. Insert a BUNN filter into the Smart Funnel. 2. If a grinder is not used to obtain the coffee grounds, pour the proper amount of fresh coffee grounds into the funnel and level by gently shaking. -
Page 9: Glossary
GLOSSARY AD CARD: An assembly consisting of a computer chip and an instruction label. Used for loading advertising messages into the brewer. BREW LOCKOUT: The inability to initiate a brew if the water temperature is less than the ready temperature programmed into the brewer. -
Page 10: Programming
This is used to access the programming mode and is also used to scroll forward through the function list. 2. Upper left corner of the "B" in the BUNN logo This is used to scroll backwards through the function list. -
Page 11: Programming The Brewer
PROGRAMMING THE BREWER The programming of the brewer is divided into two levels. There is one function in Level 1. All other functions are accessed in Level 2. The following function screens are in order of appearance. Each screen will have instructions on how to access, and the procedures to program the various functions of the brewer. -
Page 12: Program Functions (Level 2)
AND NO NAME RIGHT BREW REFER TO NAME LIST SETTINGS GO TO REVIEW RECIPES IN GRINDER MANUAL AND FOLLOW INSTRUCTIONS CONTACT BUNN-O-MATIC TO VIEW A LIST OF EXISTING RECIPES, FOR ASSISTANCE GO TO REVIEW RECIPES AND FOLLOW THE INSTRUCTIONS P2369 Page 12... -
Page 13: Set New Recipe (Using A Smart Funnel ® And G9-2T Dbc Grinder)
PROGRAMMING FUNCTIONS - LEVEL 2 (cont.) SET NEW RECIPE Procedure for Setting the Recipe: Using a Smart Funnel and a G9-2T DBC Grinder: NOTE: Before beginning setup, place a server beneath ® This function allows the operator to set BREW VOL- the left brew funnel. -
Page 14: Set By-Pass Percentages
PROGRAMMING FUNCTIONS - LEVEL 2 (cont.) SET NEW RECIPES (cont.) 17. If setting pulse brew by ENTER TIMES (entering 8. Using (-) and (+), set the amount of brew water, in known times) press NO. The display should read ounces, to be dispensed for that particular batch ENTER TIMES. -
Page 15: Set Drip Times
PROGRAMMING FUNCTIONS - LEVEL 2 (cont.) SET NEW RECIPES (cont.) 27. The display should now read DRIP TIME, along with either the word OFF, or a time will be showing. 22. Using (-) and (+), set the amount of time the brew A batch light should also be blinking. -
Page 16: Set New Recipe (Using A Recipe Card)
Using a RECIPE CARD to load coffee names and brew 6. If the brewing information is not correct, or it is settings into the Dual SH DBC with Smart Funnel: desired to exit the setup before the settings are The G9-2T DBC's memory contains certain coffee loaded into the brewer's memory, press QUIT. -
Page 17: Set New Recipe (No Smart Funnel ® Nor G9-2T Dbc Grinder)
This includes BREW VOLUMES, BYPASS PERCENT- AGES, PULSE BREW TIMES, PREINFUSION TIMES and DRIP-OUT TIMES. The brewer will perform in the BREW OZ. XX.X same capacity as a standard Bunn Dual Brewer. DONE The instructions for programming the NO NAME P2419 settings are on the following pages. -
Page 18: Review Recipes/Modify Recipes/Set Up No Name Coffee
PROGRAMMING FUNCTIONS - LEVEL 2 (cont.) REVIEW RECIPES/MODIFY RECIPES/SET UP NO 2. Press YES to proceed. The display should now NAME COFFEE FLAVORS: read NO-NAME LEFT, along with MODIFY, SHOW This function has three parts. It allows the operator and NEXT. to view the brew settings for the various coffee names 3. -
Page 19: Set Brew Volumes
PROGRAMMING FUNCTIONS - LEVEL 2 (cont.) BREW OZ (SETTING OR ADJUSTING BREW VOL- 5. Using (-) and (+), set the amount of brew water, in ounces, to be dispensed over the grounds for UMES) This function allows adjustment of the brew vol- that particular batch size. -
Page 20: Set Bypass Percentages
PROGRAMMING FUNCTIONS - LEVEL 2 (cont.) 4. Press and release MODIFY. The display should % BYPASS read BREW OZ. This function allows adjustment of the amount of 5. Press and release DONE. The display should read water that bypasses the grounds. The number signi- 3 BATCHES DONE?. -
Page 21: Set Pulse Brew Times
PROGRAMMING FUNCTIONS - LEVEL 2 (cont.) Modifying pulse brew: SET PULSE BREW: Range: 1st on time - off to 4 minutes This function allows the operator to program Off time - off to 4 minutes the brewer to "pulse” the sprayhead flow on and off Last on time - Preinfusion to 4 minutes during a brew cycle (start and stop the flow of water out of the sprayhead). -
Page 22: By Example
PROGRAMMING FUNCTIONS - LEVEL 2 (cont.) SET PULSE BREW (cont.) REVIEW RECIPES? EXIT TO NEXT FUNCTION SCREEN NO-NAME LEFT MODIFYSHOWNEXT ADVANCES TO ALL OTHER COFFEE NAMES PROGRAMMED IN THE BREWER'S MEMORY SCREEN DISPLAYED PRESS BREW OZ: XX.XX DONE 3 BATCHES DONE? % BYPASS XX.X DONE 3 BATCHES DONE? - Page 23 PROGRAMMING FUNCTIONS - LEVEL 2 (cont.) Setting Pulse Brew - BY EXAMPLE: 1. This display should read CONTAINER READY? Place a container under the left side sprayhead. Place a brew funnel containing a filter and grounds on top of the container so that the spray and coffee bed can be viewed.
-
Page 24: Enter Times
PROGRAMMING FUNCTIONS - LEVEL 2 (cont.) Setting Pulse Brew - ENTER TIMES: 6. If other batch sizes need to be modified, press NO. NOTE: No water should flow from the brewer during The display will then read SET BY EXAMPLE. this set-up process. -
Page 25: Set Preinfusion Times
PROGRAMMING FUNCTIONS - LEVEL 2 (cont.) SET PREINFUSION 16. When finished, press DONE. The display will show This function allows the operator to set an initial the ON and OFF TIMES that were entered for each soaking of the grounds and a delay time, before the particular batch size. -
Page 26: Set Drip Times
PROGRAMMING FUNCTIONS - LEVEL 2 (cont.) 12. When finished, press another batch size and repeat DRIP TIME (now displayed on "non" funnel lock step 11 until all three sizes are set. units as well) 13. When finished, press DONE. The display should This function allows the setting or modification read 3 BATCHES DONE? of the funnel locks to stay engaged after the end of... -
Page 27: Copy Settings
PROGRAMMING FUNCTIONS - LEVEL 2 (cont.) COPY SETTINGS. COPY SETTINGS (NO NAME COFFEE SETTINGS 2. Press YES in this screen. The display should read ONLY) LEFT >>> RIGHT. This function is used to transfer all the brew set- 3. If the initial programming was done on the left side tings from a NO NAME coffee flavor programmed on of the brewer, press YES. -
Page 28: Enable Ads
PROGRAMMING FUNCTIONS - LEVEL 2 (cont.) 2. To adjust the brew temperature, press (-) to de- ENABLE ADS? crease or (+) to increase the brew temperature. This function allows the operator to choose whether 3. When finished, press and release DONE to save or not to display the advertising message that was en- the new setting, exit the SET TEMP function and tered into the brewer with an AD CARD. -
Page 29: Refill (Adjust Sensitivity)
PROGRAMMING FUNCTIONS - LEVEL 2 (cont.) REFILL - Range: 20 to 230 SET NEW RECIPES. Release the ®. Press and This function allows the operator to adjust the release the ® pad until the display reads SPRAY sensitivity of the refill circuit. This is mainly a trouble- OZ/M. -
Page 30: Calibrate Flow
PROGRAMMING FUNCTIONS - LEVEL 2 (cont.) CALIBRATE FLOW This function allows the operator to enter the actual flow rate of the sprayhead and the bypass for each side of the brewer by dispensing both separately for one minute. The volumes are then entered in ounces per minute (OZ/M). -
Page 31: Calibrate Bypass Flow
PROGRAMMING FUNCTIONS - LEVEL 2 (cont.) CALIBRATE FLOW (cont.) Procedures to calibrate the bypass flow rate: CALIBRATE FLOW? 1. Place a container, accurately graduated in ounces, and with a minimum capacity of 60 ounces, below the funnel on the brewer to be calibrated. EXIT TO THE NEXT FUNCTION 2. -
Page 32: Brew Counters (View/Reset)
PROGRAMMING FUNCTIONS - LEVEL 2 (cont.) BREW COUNTERS 5. When finished, press NEXT to advance counter This function allows the operator to track the screens until the display reads BREW COUN- TERS. Press and release NO to advance to the number of brew cycles completed on the left side, the right side, and the total of both combined. -
Page 33: Server Detect
PROGRAMMING FUNCTIONS - LEVEL 2 (cont.) SERVICE TOOLS SERVER DETECT This function allows the testing of individual com- This function allows the operator to prevent the start ponents and the ability to check switches for proper of a brew cycle if a Soft Heat server is not positioned function. -
Page 34: Test Outputs (Components)
PROGRAMMING FUNCTIONS - LEVEL 2 (cont.) SERVICE TOOLS (cont.) 12. Press NEXT to advance to the next component to Testing individual components (outputs): be tested. This will allow the operator to test the operation 13. To test LEFT FUNNEL LOCK, press ON. If the fun- of individual components and outputs of the brewer. -
Page 35: Test Servers
PROGRAMMING FUNCTIONS - LEVEL 2 (cont.) SERVICE TOOLS (cont.) 6. In TEST OUTPUTS screen, press NO. This advances 2. Place a Soft Heat server beneath each brew fun- to TEST SWITCHES. Press and release NO once nel. more. The display should now read TEST SERV- 3. -
Page 36: Factory Defaults (Reset)
PROGRAMMING FUNCTIONS - LEVEL 2 (cont.) FACTORY DEFAULTS FACTORY DEFAULT VALUES This function allows the operator to erase all of the previously entered recipes and ad messages. Factory- Brew Lockout set default values will replace all previous settings. BREW VOLUMES: Small Batch 64 oz. -
Page 37: Troubleshooting
TROUBLESHOOTING A troubleshooting guide is provided to suggest probable causes and remedies for the most likely problems encountered. If the problem remains after exhausting the troubleshooting steps, contact the Bunn-O-Matic Technical Service Department. • Inspection, testing, and repair of electrical equipment should be performed only by qualified service personnel. - Page 38 TROUBLESHOOTING (cont.) Screen Displayed Possible Cause Troubleshooting Procedures 1. SMART FUNNEL not fully inserted Position the funnel so that the sensor NO FUNNEL into the funnel rails. is directly beneath the sensor coil on PRESENT the brewer. 2. Not using a SMART FUNNEL, Disable the FUNNEL DETECT func- and the FUNNEL DETECT function tion.
- Page 39 TROUBLESHOOTING (cont.) Screen Displayed Possible Cause Troubleshooting Procedures 1. Soft Heat Server was moved out To resume brewing, correctly BREW STOPPED! of position after the brew cycle was position the Soft Heat Server and SERVER REMOVED? press BREW again. The brew cycle started.
- Page 40 TROUBLESHOOTING (cont.) Possible Cause Troubleshooting Procedures Screen Displayed Check water supply shut-off 1. Water shut off to brewer FILL TIME TOO Service required 2. Inlet Solenoid Valve failure LONG Service required 3. Control Board Failure CHECK WATER SUPPLY TEMP SENSOR Check wire and connection of both 1.
- Page 41 TROUBLESHOOTING (cont.) Problem Troubleshooting Procedure Possible Cause Measure the voltage at the terminal Equipment will not operate. 1. No power or incorrect voltage. block and confirm that it matches the voltage specified on the brewer data plate within +/- 10%. Check plumbing and shut-off valves Brew cycle will not start.
- Page 42 TROUBLESHOOTING (cont.) Problem Possible Cause Troubleshooting Procedure Check the sensitivity setting. Refer Automatic refill will not operate or 3. Refill Probe or Sensitivity Set- to the Refill function on page 29. If display shows FILL TIME TOO LONG ting the left three digit number is less (cont.) than the right number, the machine “thinks”...
- Page 43 TROUBLESHOOTING (cont.) Problem Possible Cause Troubleshooting Procedures Water flows into tank continuously 1. Refill Probe or Sensitivity Set- Check the sensitivity setting. Refer with power applied to brewer. ting to the Refill function on page 29. If the left three digit number is less than the right number, the machine “thinks”...
- Page 44 TROUBLESHOOTING (cont.) Troubleshooting Procedures Problem Possible Cause Water will not heat or display shows 3. Triac Remove power from the brewer. HEATING TIME TOO LONG (cont.) Connect a voltmeter across one of the tank heaters. Reapply power to the brewer and refer to Testing Individual Components on page 34.
- Page 45 TROUBLESHOOTING (cont.) Problem Troubleshooting Procedures Possible Cause 3. Electronic control board Spitting or unusual steaming from Perform the previous procedure sprayhead or air vents. (Water too for testing triacs. If the voltage hot) (cont.) measured is very low or zero, then substitute a control board known to be in good working order.
- Page 46 Dripping from sprayhead. 1. Brew Valve Repair or replace leaky valve. Water overflows filter. BUNN paper filters should be used 1. Type of paper filters for proper extraction. 2. No sprayhead Check sprayhead Beverage overflows server.
- Page 47 Troubleshooting Procedures Consider adjusting bypass percent- Weak beverage (cont.) 6. Incorrect Recipe age, preinfusion, or pulse brew. Contact Bunn-O-Matic for sugges- tions. Brewer is making unusual noises. The nut on back of the solenoid 1. Solenoid (Inlet) must be tight or it will vibrate during...
-
Page 48: Schematic Wiring Diagram
MODELS WITH MAIN ON/OFF SWITCH ONLY BLK-14 BLK-14 BLK-14 RED-14 RED-14 RED-14 RED-14 RED-14 120/208 OR 120/240 VOLT A.C. + GND SINGLE PHASE 29876.0000D 01/07 © 2001 BUNN-O-MATIC CORPORATION White Strip-Tac Plus Black Ink Finished Size: 8.5" x 11.0" Page 48 ~77% Reduction 29877 022509... - Page 49 SCHEMATIC WIRING DIAGRAM DUAL SH DBC (W/SMART FUNNEL) GRN/YEL FILTER THERMAL THERMAL TRIAC SAFETY FUSE SAFETY FUSE LIMIT THERMOSTAT RIGHT BLK-14 BLK-14 BLU-14 TANK HEATER THERMAL THERMAL TRIAC SAFETY FUSE SAFETY FUSE LEFT BLK-14 BLK-14 BLU-14 TANK HEATER TOUCH SWITCH ASSEMBLY...
Need help?
Do you have a question about the dual sh dbc and is the answer not in the manual?
Questions and answers