Buffalo TeraStation User Manual
Network attached storage
Hide thumbs
Also See for TeraStation:
- User manual (160 pages) ,
- Setup manual (66 pages) ,
- Rack installation (12 pages)
Table of Contents
Advertisement
Advertisement
Table of Contents

Subscribe to Our Youtube Channel
Related Manuals for Buffalo TeraStation


Summary of Contents for Buffalo TeraStation
- Page 1 Network Attached Storage TeraStation User Guide Buffalo Inc. www.buffalotech.com...
-
Page 2: Table Of Contents
Contents Chapter 1 Diagrams and Layout ..............3 TeraNavigator Setup .............................3 Diagrams and Layout ...........................8 Chapter 2 Using your TeraStation ..............10 Opening a Shared Folder ..........................10 Opening a Shared Folder from a Second PC ..................11 Adding Additional TeraStations ........................12 Opening the Web Admin interface ......................13... - Page 3 Accessing from a NFS Client ........................63 Encrypting Data Transmission ........................66 Web Server ...............................68 MySQL server ..............................68 SNMP ..................................69 Amazon S3 (Amazon Simple Storage Service) Support ..............70 Appendix......................71 Troubleshooting .............................71 Data Backup ..............................72 GPL Information .............................72 Update the TeraStation’s Firmware ......................73 Compliance Information ..........................74...
-
Page 4: Chapter 1 Diagrams And Layout
Insert the TeraNavigator CD into your computer. TeraNavigator will launch. Click [Begin Installation]. The wizard will guide you through installation. Follow the steps on the screen to connect the TeraStation's Ethernet and power cables and turn it on. Notes: • If TeraNavigator does not open automatically, navigate to the TeraNavigator CD and double-click the icon [TSNavi.exe]. - Page 5 Power outlet Power cable Click [Complete]. NAS Navigator2 will start automatically. Right-click on your TeraStation’s icon, then choose [Properties] - [IP Settings]. Note: For Mac OS, hold the Control key, click on the TeraStation icon, then click [Configure] - [IP Address].
- Page 6 Notes: • For Mac OS, hold the Control key, click the TeraStation icon, and click [Open Web setting]. • The Web Admin interface requires Firefox 1.5 or later, Internet Explore 6.0 Service Pack 2 or later, or Safari 3 or later.
- Page 7 NTP Server. Internet Multifeed Co. is not responsible for any loss or damages caused by this service. • Buffalo Technology is not responsible for any loss or damage caused by using of this service, stopping the service, or missing service.
- Page 8 The TeraStation’s shared folders are displayed. Note: In OS X, your TeraStation is mounted as a drive icon on the desktop and displayed in the sidebar of the Finder. Setup is now complete. You can now use the TeraStation’s shared folders to save files just like any other folders.
-
Page 9: Diagrams And Layout
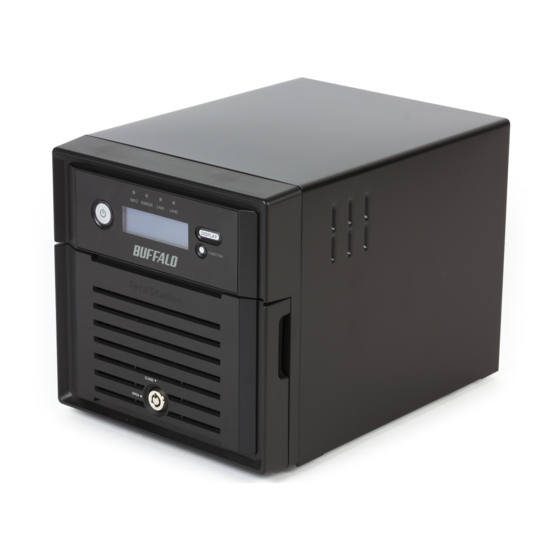
Diagrams and Layout TS-8VHL, TS-6VHL Front View Rear View with cover removed TS-QVHL Front View Rear View TS-WVHL Front View Rear View TS-RVHL Front View with cover attached 11 22 2 3 4 5 8 10 11 with cover removed Rear View 13 14 15 16 17 18... -
Page 10: Power Button
LED between on and off. 10 Reset Button 23 Factory Use Only To shut down and reboot the TeraStation, hold down this Only TS-RVHL TeraStation models have this port. button. 11 Status LEDs LEDs 1 through 8 will glow green when the corresponding hard drives are accessed. -
Page 11: Chapter 2 Using Your Terastation
The TeraStation’s Shared folders are displayed. Note: With a Mac, the TeraStation is mounted as a drive icon on the desktop, and displayed in the sidebar of the [Finder]. You can now use the TeraStation's shared folders to save files just like other hard drives. -
Page 12: Opening A Shared Folder From A Second Pc
Opening a Shared Folder from a Second PC Once you’ve connected the first computer to the TeraStation, you don’t have to run the setup program again to connect additional computers. Just install NAS Navigator2 on each additional computer and use it to open the TeraStation’s shared folder as necessary. -
Page 13: Adding Additional Terastations
The TeraStation’s Shared folders are displayed. Note: With a Mac, the TeraStation is mounted as a drive icon on the desktop, and displayed in the sidebar of the [Finder]. You can now use the TeraStation’s shared folders to save files just like other hard drives. -
Page 14: Opening The Web Admin Interface
Opening the Web Admin interface To configure your TeraStation, use the Web Admin interface from a browser on a computer connected to the same network. Launch NAS Navigator2. For Windows, click on the [BUFFALO NAS Navigator2] icon on your desktop. For Mac OS X, double-click on the [NAS Navigator2] icon in the Dock. - Page 15 1 Enter your username and password. 2 Click [Login]. Note: To log in as a guest, type “guest” as the username and leave the password blank. The Web Admin interface opens. The TeraStation’s name, IP address and disk information are displayed on the left.
-
Page 16: Chapter 3 Configuring Access Restrictions
2008. • Depending on the security settings, the TeraStation may not be able to join, or may be able to join but may not be authenticated by a domain. In such a case, it is recommended to restrict access by delegating authority. -
Page 17: Adding A Shared Folder
•Shared folder descriptions can contain up to 75 bytes (UTF-8). Alphanumeric characters, multi-byte characters, -(hyphen), _(underscore), and spaces may be used. Do not use a symbol as the first character. • You may create up to 400 shared folders on the TeraStation. You have created a new shared folder. - Page 18 Only SMB shares may be hidden. If other protocols are checked for the share, such as [Apple], [Ftp], or [SFTP], you cannot select [Hide Share]. To open a hidden share, click [Start] - [Run] and enter \\TeraStation Name\Shared Folder name$\. Example: If your TeraStation is named “TS-XL001” with the default share “share” hidden, enter \\TS-XL001\share$\.
- Page 19 Windows computer. With Mac OS X 10.2 or later, you may have to connect to the TeraStation via AFP in order to display or copy any of the following characters: ? [ ] / ¥...
- Page 20 • If you want to access a different network from the TeraStation, use LAN port 1. LAN port 2 cannot access beyond the local subnet as it doesn’t have a default gateway. Examples: You cannot use Mail Notification (cannot find the mail server), or you cannot find a TeraStation by IP address to configure as a backup destination.
-
Page 21: Adding Users
• Repetitive deletions and additions of users may cause the Quota feature to not work properly. Even though the data is copied by the backup function of the TeraStation, the Quota feature may not work properly if a user ID/group ID is duplicated. -
Page 22: Importing Users
• If a line is incorrectly formatted, then the user in that line will not be registered. • If a username is already registered on the TeraStation, that user will be overwritten. • Commas should not be used in usernames, passwords, or user descriptions... -
Page 23: Adding Groups
• Repetitive deletions and additions of groups may cause the quota feature to not work properly. Even though the data is copied by the backup function of the TeraStation, the Quota feature may not work properly if a user ID/group ID is duplicated. -
Page 24: Access Restrictions
Access Restrictions Setting Access Restrictions for Users/Groups The TeraStation allows you to specify which groups and users can access specific shared folders. Register Users and Groups to the TeraStation as described in the previous sections. 1 In the Web Admin interface, click [Shared Folders] - [Folder Setup]. - Page 25 1 Check users or groups that you want to allow to access to the share. 2 Click [Add]. Select the level of privilege for the user or group you added. Click [Save]. You have completed configuring access restrictions. Notes: • If you log on from a Microsoft Network Domain, you can set the access restrictions with the user names/group names which are registered on the domain.
-
Page 26: Access Restrictions On Nt Domain
Access Restrictions on NT Domain The TeraStation can download users, groups, and passwords from an NT Domain server. This procedure is recommended for system administrators only. Create an account on the Domain Controller for the TeraStation. Note: If there is an option to “Accept accounts for computers with Windows 2000 or earlier”, then select it. - Page 27 • The TeraStation only downloads the first 1000 users or the first 1000 groups from a domain controller. • If you operate TeraStation as a member server of an NT Domain or an Active Directory domain, you cannot connect as a guest user via AFP.
-
Page 28: Access Restrictions On Active Directory
Access Restrictions on Active Directory The TeraStation can download users, groups, and passwords from an Active Directory domain server. This procedure is recommended for system administrators only. 1 Click [Network] - [Workgroup/Domain] - [Modify Settings] in the Web Admin interface. - Page 29 Restrictions When Administrating in Active Directory Domain • When you have the TeraStation joined to an Active Directory domain, you must specify the DNS Server which can resolve names for Active Directory domain. • After building an Active Directory domain, the administrator’s password which is needed to join the Active Directory domain must be changed at least once, or joining the Active Directory domain will fail.
-
Page 30: Access Restrictions Through Delegate Authority To External Smb Server
Clicking [Yes] on the message for converting to Local Users which is displayed when applying changing External SMB Server Settings will convert all Local Users registered on the TeraStation to External SMB Server Users. You must set the Local user password again after resetting the External SMB Server. - Page 31 In the Web Admin interface, click [Network] - [Workgroup/Domain] - [Modify Settings]. 1 Select [Workgroup]. Note: Even if you will use this unit in a domain environment, select [Workgroup]. 2 Select [Delegate Authority to External SMB Server]. 1 Click [Automatic User Registration]. Check [Enable Authentication Shared Folder].
- Page 32 You have completed the settings for the Authentication Server. Restrictions When Administrating Delegate Authority Option • If you cannot access the TeraStation while logged into Windows using the account information registered to the authentication server, you cannot access shared folders on the TeraStation or set access restrictions.
-
Page 33: Chapter 4 Managing Your Terastation
Chapter 4 Managing your TeraStation Name, Date and Time Configure the TeraStation’s host name, date, or time as follows: In the Web Admin interface, navigate to [Modify Settings] in [System] - [Settings] - [Name]. 1 Enter [TeraStation Name] and [Description]. - Page 34 Note: The TeraStation’s internal clock may run at a slightly different speed from other clocks on you network, and over a long period of time your network devices may show different times. If clocks on your network vary by more than 5 minutes it may cause unexpected behavior.
-
Page 35: E-Mail Notification
E-mail Notification Your TeraStation can send you daily e-mail reports. It can also send you an e-mail when settings are changed or an error occurs. The following contents will be sent via E-mail. • Sends the status of hard drives at specified time •... - Page 36 Configuration Scree: http://172.16.37.62/ Continuous operating time: 13:51:57 • The content of mail which is sent periodically when [Disk Error] is selected TeraStation Status Report: DISK Error Notification: Failure: Fail to mount a disk DISK Error Notification The error occurred on HDD.
-
Page 37: Ups Settings
Notes: • If the UPS has shut down the TeraStation because of a power outage, make sure that power has been restored before restarting the TeraStation. If the TeraStation is restarted after a shutdown, but power is not available, then the UPS will not shut down the TeraStation a second time even if its battery is running low. -
Page 38: Beep Alerts
You’ve now configured alerts. LCD Display Settings You may configure the LEDs and LCD screen on the front of the TeraStation here. In the Web Admin interface, select [System] - [Maintenance] - [Front Panel Settings]. Click [Modify Settings]. 1 Configure the desired settings for [LCD Setup] and [LED Setup]. -
Page 39: Changing The Admin Username And Password
Changing the Admin Username and Password In the Web Admin interface, select [Users/Groups] - [Local Users]. 1 Click [admin] from the user list. 2 Click [Edit User]. 1 Enter [Username] and [Password]. 2 Click [Save]. You’ve now changed the admin password. Notes: •... -
Page 40: Erase Data On The Terastation Completely
Data: All deleted If you remove a drive and then erase all data on the TeraStation, the LCD display will show the error “HDx Error E22 HDx Can’t Mount” where x is the hard drive you removed. You can still use the TeraStation. -
Page 41: Initialization
In the Web Admin interface, you can initialize the following settings. TeraStation Name, Description, NTP Settings, Workgroup Settings, Network Services, File Sharing Settings, Shared Folders Settings, USB Disk Settings, RAID Scanning, Sleep Timer, Restrictions on Shared Folders, User Settings, User/ Group, Notification Settings, Synchronization with UPS, Backup Settings, Admin username and password, Network Settings (IP Address, Subnet Mask and etc.), Time Machine, Web Access, DFS, DirectCopy, NFS, TeraSearch, Alert Sound... -
Page 42: Changing The Ip Address
Changing the IP Address Normally, the TeraStation’s IP address is set automatically from a DHCP server on your network. If you prefer, you can set it manually. To change the TeraStation’s IP address settings, your computer should be connected to the same router (subnet) as the TeraStation and should be running NAS Navigator2 (included on your TeraNavigator CD). -
Page 43: Network
1 In the Web Admin interface, navigate to [Network] - [Settings] 2 Click [Modify Settings] in [Ethernet Frame Size]. 1 Select [Ethernet Frame Size]. 2 Click [Save]. Transmission Connection Transmit Jumbo Frame TeraStation (4102/7422/9694) Jumbo Frame Jumbo Frame Jumbo Frame (4102/7422/9694) Supported Supported Transmit... - Page 44 (1518 bytes) instead. • If you are using jumbo frames and back up data from a LinkStation/TeraStation to another LinkStation/TeraStation, set the Ethernet frame sizes of the LinkStations/TeraStations to the same settings (or the closest available). If the Ethernet frame sizes are significantly different, the backup job may fail.
-
Page 45: Port Trunking
*2 Your switch must support this. Enable LACP (Link Aggregation Control Protocol) in the switch in advance. Refer to your switch’s manual for instructions on configuring it. Important: After configuring Port Trunking, reboot the TeraStation. Press the power button twice within 3 seconds to shut it down, then press the power button again to restart the unit. - Page 46 To configure port trunking, Connect LAN port 1 on the TeraStation to a port on the switch. Do not connect LAN port 2 yet. In the Web Admin interface, navigate to [Network] - [Settings] - [Port Trunking]. Under [Port Trunking], click on [Modify Settings].
-
Page 47: Online Update
2 Click [Install Update] to update firmware. The [Confirm Operation] screen will appear. Enter the number shown in the [Confirmation Number] field within 60 seconds and click [Apply]. The TeraStation will reboot automatically after the firmware update have completed. You have now configured Online Firmware Installation. -
Page 48: Chapter 5 Extensions
What is WebAccess ? WebAccess lets you access files on your TeraStation through the Internet. Access restrictions can be set for folders that are shared, and automatic router settings by UPnP and redirect functionality from the buffalonas.com server (similar to Dynamic DNS) make configuration easy. -
Page 49: Printserver
Notes: • Only one printer can be connected to the TeraStation. • The TeraStation does not support 2-way communication. For example, it cannot tell you the amount of ink left. • Multi-function printers are not supported. • Printers which only support 2-way communication or WPS (Windows Printing System) are not supported. - Page 50 Click [Start] - [Network]. Double-click on the TeraStation’s server name. Double-click on the TeraStation’s printer icon (“LP”). Click [OK]. 1 Select your printer. Choose the manufacturer on the left and the model on the right. If your printer is not listed, click [Have Disk] and follow the printer manufacturer’s directions for installation.
- Page 51 Click [Start] - [Control Panel]. Click [Network and Internet Connections] icon. Double-click on [My Network Places] - [View workgroup computers] - (Name of the TeraStation Server name) in this order. Double-click on the TeraStation’s printer icon (“lp”). If “The printer driver to your computer will be automatically installed. (...) Would you like to continue?” is displayed, click [Yes].
- Page 52 2 Click [Save]. Refer to your printer’s manual to install the printer driver. Double-click [My Network Places (*)] -[Entire Network] - (the TeraStation Server Name). * On Windows NT 4.0 this is [Network]. Double-click on the TeraStation’s printer icon (“lp”).
-
Page 53: Sleep Timer
Sleep Timer Sleep Timer will automatically turn your TeraStation on and off at specific times to save energy. In Sleep mode, the TeraStation’s hard drives, display panel, and LED lights are turned off. In the Web Admin interface, navigate to [System] - [Power Management] - [Sleep Timer]. - Page 54 • To exit sleep mode, press the TeraStation’s power button. The unit will power on. • The TeraStation will not go into sleep mode while performing Check Disk, Disk Format, or Backup, or if a backup is scheduled within 5 minutes of the current time.
-
Page 55: Terasearch
TeraSearch Enable TeraSearch to allow text searches for strings (such as from a text file or data) on the TeraStation. In the Web Admin interface, select [Shared Folders] - [Folder Setup]. Click the shared folder to create an index for. - Page 56 TeraStation) :3000/ Tip: You can get the IP address of your TeraStation from its front panel LCD display, or from NAS Navigator2. Enter a username and password from an account on the TeraStation and click [Login]. For example, the guest account, with blank password, will work.
-
Page 57: Offline Files
Offline Files Your PC can access files from the TeraStation even when it’s not connected to the network if Offline Files are enabled. Offline Files are updated and saved on the computer when it’s online. Offline Files work with Windows 2000, Windows XP Professional, Vista, and Windows 7. - Page 58 If [Fast User Switching] in Windows XP is enabled, the screen above will not be displayed. In such a case, open [User Accounts] in the [Control Panel] and uncheck [Use Fast User Switching]. 1 Right-click on the icon of the shared folder on the TeraStation you have set the offline feature for.
- Page 59 After the synchronization is complete, you can open offline files even after disconnecting from the network that the TeraStation is on. Offline files can be accessed through the UNC to the original location. Note: If offline files are available, the icon is displayed in the systray.
-
Page 60: Dfs (Distributed File System)
In the following example, when the client computer addresses //tera/share/backup, it’s actually looking at files located at //pc_srv/backup. This is transparent to the user of the client computer. If the TeraStation is configured to address multiple DFS shares, then shares on other devices could be addressed as native shares on the TeraStation. For example, //tera/share/share might actually address data located at //link/share. - Page 61 Set up DFS as described below: In the Web Admin interface, select [Shared Folders] - [DFS]. Under [DFS Service], click [Modify Settings]. 1 Click [Enable]. 2 Choose whether to allow multiple DFS links, or just one. [No] allows just one DFS link to be addressed. [Yes] allows up to 8 DFS link destinations to be used.
-
Page 62: Ftp Server
FTP Server By default, the TeraStation’s shares are only accessible by users connected to the same network or router as the TeraStation. The optional FTP server allows users to access the TeraStation from outside of the local network. You may enable it as follows. - Page 63 - disk1 share - usbdisk1 • The internal hard drive of the TeraStation is displayed as disk1, and a USB hard drive (optional) will be displayed as usbdisk1. • ”usbdisk1” is not displayed when the USB hard drive is not connected or access is restricted.
-
Page 64: Accessing From A Nfs Client
Note: • If you use a public folder of the TeraStation set by NFS as a hard drive for VMware ESX/ESXi, it is required to set [NFS Mode] to [Kernel mode] in order to use it (It is set to [User mode] by default). - Page 65 Click [NFS Client Setup]. Click [Add Client]. 1 Type [Target Host Name] and [Target IP Address] of the NFS UNIX client. 2 Click [Save]. The IP address and the hostname of the client are added. Notes: • To remove, check the box next to the hostname and click [Delete Client]. •...
- Page 66 • When writing from an NFS client (Unix-based OS), the uid (user ID) and gid (group ID) are 99. • The same uid and gid cannot be set for user management on the TeraStation and for users on NFS clients.
-
Page 67: Encrypting Data Transmission
Encrypting Data from the Web Admin interface • Access https://<TeraStation’s IP address> instead of http://... to encrypt all data from the Web Admin interface. Note: Your computer may display “there is a problem with this site’s security”, but you may ignore this message and work normally. - Page 68 SSL (Secure Socket Layer) is a public key encryption method. SSL operation is managed by 2 files: (1) server.crt (SSL Certificate) TeraStation will send this certificate to other computers, which will use it as a key for encryption. The TeraStation will then receive encrypted data and use the server.key (SSL Key) to decrypt them.
-
Page 69: Web Server
MySQL server The TeraStation can be used as a MySQL server. A MySQL database may be installed and linked with the web server. The TeraStation’s MySQL server is for advanced users only. Do not enable it unless you know what you’re doing. -
Page 70: Snmp
SNMP If SNMP is enabled, you can browse your TeraStation from SNMP-compatible network management software. SNMP network management is for advanced users only. Do not enable it unless you know what you’re doing. In the Web Admin interface, navigate to [Network] - [SNMP]. Click [Modify Settings]. -
Page 71: Amazon S3 (Amazon Simple Storage Service) Support
• To disable Amazon S3 Support, disable [Amazon S3 Support Function]. • If a file is added to the Amazon S3 bucket from a folder other than the TeraStation’s Amazon S3 remote replication folder, it takes about one hour until the file appears in the TeraStation’s Amazon S3 remote replication folder. -
Page 72: Appendix
The TeraStation includes NAS Naviga tor2 on the internal drives in a folder called “info”. If you can’t access your TeraStation: The following list contains the typical symptoms and causes when TeraStation cannot be found on NAS Navigator2 or you cannot display the Web Admin interface. -
Page 73: Data Backup
In such a case, open the shared folder on the TeraStation by using NAS Navigator2. Note:• On Mac OS, TeraStation is mounted as a drive icon on the desktop, or displayed in the sidebar on the Finder. • If the problem still persists after you tried the procedures described above on Mac OS, select [System] - [Storage] - [Disks] - [Check Disk] - [Delete any hidden, non-essential MacOS dedicated files] on the Web Admin interface, and click [Check]. -
Page 74: Update The Terastation's Firmware
Update the TeraStation’s Firmware You may download updated firmware from Buffalo Technology’s website. Double-click the file you downloaded to update the firmware. -
Page 75: Compliance Information
Compliance Information FCC Warning This equipment has been tested and found to comply with the limits for a Class A digital device, pursuant to Part 15 of the FCC Rules. These limits are designed to provide reasonable protection against harmful interference when the equipment is operated in a commercial environment. This equipment generates, uses, and can radiate radio frequency energy and, if not installed and used in accordance with the instruction manual, may cause harmful interference to radio communications. - Page 76 기종별 사 용 자 안 내 문 A 급 기기 이 기기는 업무용 (A 급 ) 전자파적합기기로서 판 ( 업무용 정보통신기기 ) 매자 또는 사용자는 이 점을 주의하시기 바라 며 , 가정외의 지역에서 사용하는 것을 목적으 로 합니다 . BSMI 警告使用者...
Need help?
Do you have a question about the TeraStation and is the answer not in the manual?
Questions and answers