Powermatic DS20 Operating Instructions And Parts Manual
20" disc sander
Hide thumbs
Also See for DS20:
- Maintenance and operating instructions (12 pages) ,
- Instruction manual & parts list (12 pages) ,
- Operating instructions and parts manual (20 pages)
Table of Contents
Advertisement
Quick Links
Advertisement
Table of Contents

Related Manuals for Powermatic DS20


Summary of Contents for Powermatic DS20
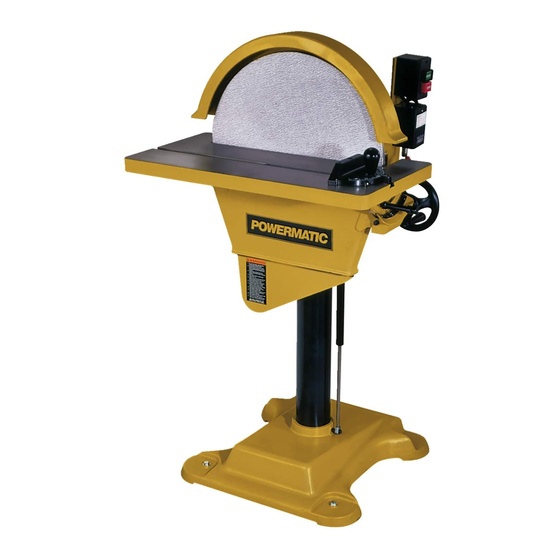
- Page 1 This .pdf document is bookmarked Operating Instructions and Parts Manual 20-inch Disc Sander Model DS20 Three Phase model shown Powermatic 427 New Sanford Road LaVergne, TN 37086 Part No. M-0460226 Ph.: 800-274-6848 Revision H2 03/2015 www.powermatic.com Copyright © 2015 Powermatic...
-
Page 2: Warranty And Service
Warranty and Service Powermatic warrants every product it sells against manufacturers’ defects. If one of our tools needs service or repair, please contact Technical Service by calling 1-800-274-6846, 8AM to 5PM CST, Monday through Friday. Warranty Period The general warranty lasts for the time period specified in the literature included with your product or on the official Powermatic branded website. -
Page 3: Table Of Contents
Replacement Parts ..........................13 Parts List: DS20 Disc Sander ......................14 Exploded View: DS20 Disc Sander ..................... 16 Parts List: Brake Assembly (DS20 Disc Sander) ................. 17 Electrical Connections for DS20 Disc Sander ..................18... -
Page 4: Warning
5. Do not use this disc sander for other than its intended use. If used for other purposes, Powermatic disclaims any real or implied warranty and holds itself harmless from any injury that may result from that use. - Page 5 21. Give your work undivided attention. Looking around, carrying on a conversation and “horse-play” are careless acts that can result in serious injury. 22. Maintain a balanced stance at all times so that you do not fall or lean against the disc or other moving parts.
-
Page 6: Introduction
Introduction This manual is provided by Powermatic covering the safe operation and maintenance procedures for a Powermatic Model DS20 Disc Sander. This manual contains instructions on installation, safety precautions, general operating procedures, maintenance instructions and parts breakdown. This machine has been designed and constructed to provide years of trouble free operation if used in accordance with instructions set forth in this manual. -
Page 7: Unpacking
Disc Sander is installed and running properly. Read the instruction manual thoroughly for assembly, maintenance and safety instructions. Contents of shipping container: DS20 Disc Sander 20” Abrasive Paper Brake Assembly Instruction and Parts Manual Warranty Card... -
Page 8: Grounding Instructions
The three phase Band Saw may be converted to Grounding Instructions 460 volt operation. Re-connect the motor leads according to the diagram inside the motor junction box. (Similar diagrams may be found at the back of Electrical connections must be this manual;... -
Page 9: On-Off Switch Padlock
On-Off Switch Padlock forward. The pointer on the trunnion scale (D, Figure 6) indicates the angle. The sander is equipped with a push-button switch 2. When table is positioned, re-tighten handle (B, that will accept a safety padlock (not included). See Figure 6). -
Page 10: Replacing Abrasive Disc
45 degrees left or right. To move the gauge body beyond these points, the stop (L, Figure 9) must be flipped out of the way. Figure 11 Forward-Reverse Switch (3-Phase) The three phase model of the DS20 has a Forward-Reverse switch (Figure 12). -
Page 11: Brake
The DS20 Sander requires minimal maintenance. Periodically, make sure the rack and the trunnions on both sides of the table (Figure 13) are lubricated with a good grade, non-hardening grease. Figure 12 (3 Phase model only) Brake Figure 13 Pull the brake handle until the pad contacts the rotating disc. -
Page 12: Troubleshooting
Troubleshooting Trouble Probable Cause Remedy Machine will not Machine not connected to Verify machine is connected to power. start/restart or power source. repeatedly trips Fuse blown, or circuit Replace fuse, or reset circuit breaker. circuit breakers or breaker tripped. blows fuses. Cord damaged. -
Page 13: Replacement Parts
Replacement parts are listed on the following pages. To order parts or reach our service department, call 1- 800-274-6848, Monday through Friday (see our website for business hours, www.powermatic.com). Having the Model Number and Serial Number of your machine available when you call will allow us to serve you quickly... -
Page 14: Parts List: Ds20 Disc Sander
31 ..... 6295590....Motor ............2HP, 1Ph, 230V ....1 ....6295591....Motor ............3HP, 3Ph, 230/460V ..1 ....DS20-SC ....Start Capacitor (not shown) ......500MFD, 250VAC ..... 1 ....DS20-RC ....Run Capacitor (not shown) ......40μf, 250VAC ....1 ....DS20-MF ....Motor Fan and Cover (not shown) ............1 32 ..... - Page 15 Index No. Part No. Description Size 54 ..... 6295614....Pilot, Right .................... 1 55 ..... 6295615....Phillip Head Screw ........1/4"-20 x 1/2" ....4 56 ..... 6295616....Spring Pin............ 5 x 20mm......5 57 ..... 6295617....Pilot, Left ....................1 58 ..... 6295618....Gear Segment ..................1 59 .....
-
Page 16: Exploded View: Ds20 Disc Sander
Exploded View: DS20 Disc Sander... -
Page 17: Parts List: Brake Assembly (Ds20 Disc Sander)
Parts List: Brake Assembly (DS20 Disc Sander) Index No. Part No. Description Size ....DS20-200 ....Brake Assembly (includes index #1 through 12) ........1 ....DS20-201 ....Brake Pad ..................... 1 2 ....TS-2311081 .....Hex Nut .............M8 ......1 3 ....DS20-203 ....Push Body ..................... 1 4 .... -
Page 18: Electrical Connections For Ds20 Disc Sander
Electrical Connections for DS20 Disc Sander... - Page 19 This page intentionally left blank...
- Page 20 427 New Sanford Road LaVergne, Tennessee 37086 Phone: 800-274-6848 www.powermatic.com...
Need help?
Do you have a question about the DS20 and is the answer not in the manual?
Questions and answers