Table of Contents

Related Manuals for Powermatic OSS10


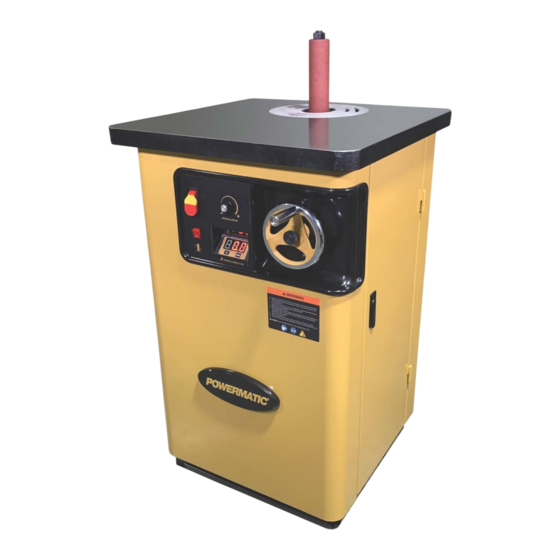
Summary of Contents for Powermatic OSS10
- Page 1 Operating Instructions and Parts Manual Oscillating Spindle Sander Model OSS10 POWERMATIC 427 New Sanford Road La Vergne, TN 37086 Part No. M-PM1-266 Ph.: 800-274-6848 Edition 2 05/2024 www.powermatic.com Copyright © 2024 Powermatic...
-
Page 2: Warranty And Service
Powermatic sells through distributors only. The specifications listed in Powermatic printed materials and on the official Powermatic website are given as general information and are not binding. Powermatic reserves the right to effect at any time, without prior notice, those alterations to parts, fittings, and accessory equipment which they may deem necessary for any reason whatsoever. -
Page 3: Table Of Contents
11.0 Troubleshooting OSS10 Spindle Sander ....................15 12.0 Replacement Parts ............................. 15 12.1.1 OSS10 Oscillating Spindle Sander – Exploded View ................16 OSS10 Oscillating Spindle Sander – Exploded View ..................17 12.1.2 OSS10 Oscillating Spindle Sander – Parts List ................... 18 12.2.1 OSS10 Spindle and Drum Assembly–... -
Page 4: Safety Warnings
“horse- intended use. If used for other purposes, play” are careless acts that can result in serious Powermatic disclaims any real or implied injury. warranty and holds itself harmless from any 21. Maintain a balanced stance at all times so that injury that may result from that use. -
Page 5: About This Manual
SAVE THESE INSTRUCTIONS 4.0 About this Manual This manual is provided by Powermatic and covers the safe operation and maintenance procedures for the Model OSS10 Oscillating Spindle Sander. This manual contains instructions on installation, safety precautions, general operating procedures, maintenance instructions and parts breakdown. Your machine has been designed and constructed to provide consistent, long-term operation if used in accordance with the instructions as set forth in this manual. -
Page 6: Specifications
The specifications in this manual were current at time of publication, but because of our policy of continuous improvement, Powermatic reserves the right to change specifications at any time and without prior notice, without incurring obligations. -
Page 7: Setup And Assembly
Combination wrench – R 6.0 Setup and Assembly 3/4" Spindle – S Spindle hex nut – T Hex wrenches – 2.5, 3, 4, 5, & 6mm – U The sander main unit requires no assembly. Set-up involves only removing sander from pallet, and installing desired table insert and spindle/sleeve 6.2 Additional Tools Required combination. -
Page 8: Removal From Shipping Pallet
machine off using the main power switch and 6.4 Removal from Shipping Pallet disconnect sander from power source at this time. To remove sander from shipping pallet: Remove table insert, if installed, and open rear cabinet door. 1. Open cabinet door (see Figure 6-3) and remove accessories. -
Page 9: Installing And Leveling Table Insert
9. Slightly pull spindle lock knob out and turn 90° to unlocked (horizontal) position (see Figure 6- 4). Release lock knob and it will spring forward into place. Make sure spindle lock knob is in the unlocked, horizontal position before turning sander on. Damage to motor may result if spindle lock is engaged. -
Page 10: Combination Wrench Storage
300 CFM dust collector is recommended. Note: Leveling one insert is sufficient as all inserts are same thickness. Powermatic has a full line of dust collection systems available. See your dealer or visit our website at www.powermatic.com. Connect the hose of your dust collection system to the 4-inch dust port at side of sander (see Figure 6- 8). -
Page 11: Electrical Connections
Before connecting to power source, be sure switch is in off position and the safety key is removed (see Section 9.3). It is recommended that the OSS10 sander be connected to a dedicated 15-amp circuit with a 15- amp circuit breaker or time-delay fuse marked “D”. -
Page 12: Adjustments
8.2.1 Checking and Adjusting 0° (90° to 8.0 Adjustments table) and 45° Stops Tools required: Remove the safety key (A, • Machinist square Figure 8-1) from the power switch to guard • Adjustable wrench against accidental startup while making Refer to Figures 8-1 through 8-4. adjustments. -
Page 13: Operation
Keep fingers clear of sanding drum and table insert hole during operation. 9.2 Power Switch and Spindle Speed Refer to Figure 9-1. To start sander, pull red power switch out from bottom. Adjust spindle speed using the spindle speed knob. Turn knob clockwise to increase speed. -
Page 14: Safety Key
9.4 Safety Key 10.2 Lubrication Refer to Figure 9-3. There are only two places that need lubrication: the quill housing and the trunnion teeth. The power switch has a yellow safety key. With the safety key removed, the sander cannot be started Use good quality lubricating grease. -
Page 15: Troubleshooting Oss10 Spindle Sander
11.0 Troubleshooting OSS10 Spindle Sander Symptom Possible Cause Correction Sander will not start. Sander unplugged from wall or motor. Check all plug connections. Fuse blown, or circuit breaker tripped Replace fuse or reset circuit breaker. in service panel. Cord damaged. -
Page 16: Oss10 Oscillating Spindle Sander - Exploded View
12.1.1 OSS10 Oscillating Spindle Sander – Exploded View... -
Page 17: Oss10 Oscillating Spindle Sander - Exploded View
OSS10 Oscillating Spindle Sander – Exploded View... -
Page 18: Oss10 Oscillating Spindle Sander - Parts List
....OSS10-47A ....Table Assembly (#43, #47, #85) ..............1 48.1 ... OSS10-481 ....Table Insert #1 (only for 4” Rubber Drum at 45°) .......... 1 48.2 ... OSS10-482 ....Table Insert #2 (for 3” & 4” Rubber Drum) ............. 1 48.3 ... - Page 19 Index No Part No Description Size 48.6 ... OSS10-486 ....Table Insert #6 (for 1/4” ~5/8” Rubber Drum at 90°) …........1 49 ....OSS10-49 ....Lock knob ...................... 1 50 ....OSS10-50 ....Handwheel ..................... 1 ....
- Page 20 ............ Warning Label, OSS10 (not shown) ......135x105mm ....1 ............ Arrow Warning Label, OSS10 (not shown) ....40x30mm ...... 1 ............ Oil sticker Warning Label, OSS10 (not shown) ..30x30mm ...... 1 ....JET750-55 ....Hex wrench (not shown) .......... 2.5mm ......1 ....
-
Page 21: Oss10 Spindle And Drum Assembly- Exploded View
12.2.1 OSS10 Spindle and Drum Assembly– Exploded View... -
Page 22: Oss10 Spindle And Drum Assembly- Parts List
310 .... OSS10-310 ..Spindle Assembly (#306~309, #311~313)……………...1/4” ....... 1 311 .... OSS10-311 ..Spindle ................1/4” ........ 1 312 ... OSS10-312 ..Sanding Sleeve (100 Grit) ........... 1/4” x 5” ......1 313 .... OSS10-313 ..Collar (for 1/4” Spindle Assembly) ..............1 314 .... -
Page 23: Electrical Connections
13.0 Electrical Connections... - Page 24 427 New Sanford Road LaVergne, Tennessee 37086 Phone: 800-274-6848 www.powermatic.com...
Need help?
Do you have a question about the OSS10 and is the answer not in the manual?
Questions and answers