Table of Contents
Advertisement
Advertisement
Table of Contents

Subscribe to Our Youtube Channel
Related Manuals for Teka CGX 60 4G IS


Summary of Contents for Teka CGX 60 4G IS
- Page 1 INSTALLATION INSTRUCTIONS AND USE AND MAINTENANCE RECOMMENDATIONS FOR GAS HOBS EINBAUANLEITUNG FÜR GAS-GLASKOCHFELDER MIT BEDIE- NUNGS- UND PFLEGEHINWEISEN INSTRUCTIONS POUR L'INSTALLATION ET RECOMMANDA- TIONS D'UTILISATION ET DE MAINTENANCE DES CUISINIÈRES À GAZ CGX 60 4G IS - CGX 70 5G IS TR...
-
Page 2: Table Of Contents
Índice / Inhalt / Table des matières / Introduction Allgemeines User Guide Bedienungshinweise Installation Einbau Positioning the hobs Einbau des Kochfelds Positioning the oven Einbau des Herdes Fixing the hob Verankerung Connecting the gas Gasanschluss Connecting the electricity Netzanschluss Gas conversion Umrüstung auf eine andere Gasart Technical Information Technische Angaben... - Page 3 Présentation Guide d'utilisation Installation Emplacement des plans de travail de cuisson Emplacement du four Ancrage du plan de travail de cuisson Connexion du gaz Connexion électrique Transformation du gaz Information technique Dimensions et puissances Données techniques Utilisation et Maintenance Conditions particulières avant la mise en service Éléments d'un brûleur Instructions d'utilisation de la...
-
Page 4: Introduction
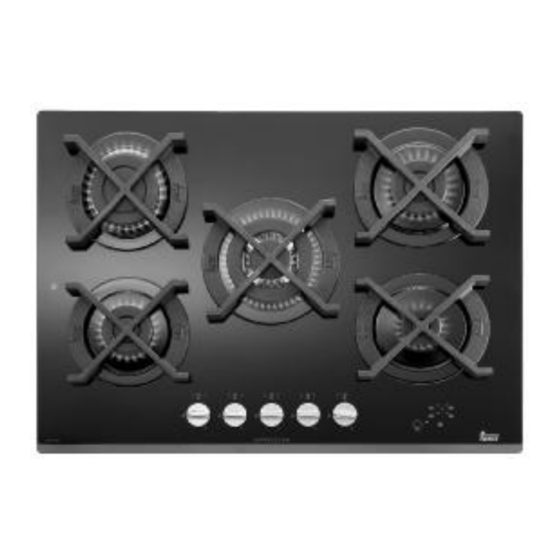
Introduction / Allgemeines / Présentation / Παρουσίαση CGX 70 5G IS TR CGX 60 4G IS 1 2,580 Kcal/h - 3 Kw fast burner. 1 2,580 Kcal/h - 3 Kw fast burner. 2 1,500 Kcal/h - 1.75 Kw semi-fast burner. -
Page 5: User Guide
Likewise, any internal work on the hob should only be done by TEKA's Before installing and using it, please read technical staff, including replacing the this Manual carefully and follow the ins- mains cable. -
Page 6: Installation
20 mm between the lower part of the hob and the upper part of the shelf. The hobs described in this manual can only be installed with TEKA brand ovens. The minimum distance between the cook- ware support surface and the lower part of the kitchen unit or the hood located above the hob should be at least 650 mm. -
Page 7: Positioning The Oven
Screw made to tolerate temperatures of up to Clip 100ºC. TEKA does not assume any res- Note: It is essential that the gasket be ponsibility for any malfunction or placed under the brim of the hob. damage caused by faulty installation. -
Page 8: Connecting The Electricity
If the flexible supply cable fitted to the appliance ever needs to be changed, it Once the gas connection has been carried should be replaced by TEKA's official tech- out, check that it is properly tightened. If nical service. this is done using air, please remember... - Page 9 72 X Auxiliary Ø injector in 1/100 mm TEKA INDUSTRIAL, S.A. will not accept liability for any hob malfunction if the gas conversion or the adjustment of the mini- mums of the burners has not been carried out by TEKA's Technical Service.
-
Page 10: Technical Information
Technical Information Dimensions and powers Models CGX 70 5G CGX 60 IS TR 4G IS Dimensions in mm Length Width Height Thickness of the glass Dimensions for positioning in the kitchen unit mm 660* Length Width Depth Power per burner and cooking element 3.5 Kw triple ring gas burner 3 Kw fast gas burner 1.75 Kw semi-fast gas burner... -
Page 11: Technical Data
ventilation system device should be Technical data installed (mechanical ventilation hood). Intense and prolonged use of the COMMON FEATURES appliance require complementary ven- MODELS WITH AUTOMATIC IGNITION tilation, such as opening a window, or more efficient ventilation, such as The supply voltage and frequency will be increasing the power of the mechanical as shown on the rating plate. -
Page 12: Use And Maintenance
Use and Maintenance Special requirements Touch control panel user before first use instructions Before connecting the hob to the electric CONTROL PANEL ELEMENTS (see fig. 5) mains, check that the voltage and fre- quency of the mains matches what is On/off sensor button. - Page 13 2 Turn on the gas at the mains or turn the fig. 6 gas cylinder tap. 3 Turn and put pressure on the burner knob so that the gas ignites. 4 Place the knob in the desired position. 5 The burner selection light will go on. The control panel has marked zones (A) that indicate the control knob that corres- ponds to each burner.
-
Page 14: Locking The Sensor Buttons Of The Hob
EMERGENCY SHUT-OFF on/off sensor button (1) again for at least 4.5 seconds. The lock indicator light (5) will The appliance may be turned off at any turn off, the light (6) will stay on and it will be time by touching the general on/off sensor possible to once again use the control button (1). -
Page 15: Mechanism To Protect Against Inadvertently Turning The Gas Control Knobs
trol knobs from turning freely from the off position to the on position (and, therefore, For safety reasons, we recom- prevents gas from accidentally escaping mend that you follow the instructions from the burners) if the control knob has provided by the gas company when clo - not previously been pressed down. -
Page 16: Using The Hob
Contact TEKA'S Technical Service. port will heat up excessively. * Do not keep items on the glass surface. * When the burners are in operation, they... -
Page 17: Reminder
Reminder Do not use small cookware on large burners, becau- se the flame will spread away. Use proper cookware for each burner in order to bet- ter utilise the heat. Do not place cookware misaligned over the centre of the burner. Place the cookware properly centred over the burner. -
Page 18: Cleaning And Care
Cleaning and care To properly care for the glass, you should * Do not stand or lean on the glass. It may clean it with suitable products and instru- break and cause injury. ments when the glass is cold. If you clean it every time it is used, it will be easier to To clean and care for other compo- clean and you will keep dirt from different... -
Page 19: Maintenance
Maintenance The symbol on the product or on its packaging indicates that this pro- duct may not be treated as household No part of this appliance requires periodic waste. Instead, it should be handed lubrication. over to the applicable collection point for the recycling of electrical and elec- The burners are operating correctly when tronic equipment. -
Page 20: If Something Doesn't Work
If something doesn't work Before calling the Technical Service, please check the following possible causes and solutions: Problem Possible cause Possible solution There is no spark when the automatic lighting control is pressed Check and repair the The voltage does not power mains reach the plug There is a spark but the burner doesn't light...
Need help?
Do you have a question about the CGX 60 4G IS and is the answer not in the manual?
Questions and answers