Advertisement
Table of Contents
- 1 Table of Contents
- 2 Warning Decal Placement
- 3 Important Precautions
- 4 Before You Begin
- 5 Assembly
- 6 Operation and Adjustment
- 7 How to Fold and Move the Treadmill
- 8 Troubleshooting
- 9 Exercise Guidelines
- 10 Part List
- 11 Exploded Drawing
- 12 Ordering Replacement Parts
- 13 Limited Warranty
- Download this manual
Model No. WLTL37308.0
Serial No.
Write the serial number in the space
above for future reference.
Serial Number
Decal
QUESTIONS?
As a manufacturer, we are com-
mitted to providing complete cus-
tomer satisfaction. If you have
questions, or if parts are missing,
PLEASE DO NOT CONTACT THE
STORE; please contact
Customer Care.
IMPORTANT: You must note the
product model number and ser-
ial number (see the drawing
above) before contacting us:
1-866-699-3756
CALL TOLL-FREE:
Mon.–Fri. 6 a.m.–6 p.m. MST
Sat. 8 a.m.–4 p.m. MST
ON THE WEB:
www.wesloservice.com
CAUTION
Read all precautions and instruc-
tions in this manual before using
this equipment. Save this manual
for future reference.
USER'S MANUAL
Visit our website at
www.weslo.com
new products, prizes,
fitness tips, and much more!
Advertisement
Table of Contents

Related Manuals for Weslo WLTL37308.0


Summary of Contents for Weslo WLTL37308.0
- Page 1 USER'S MANUAL Model No. WLTL37308.0 Serial No. Write the serial number in the space above for future reference. Serial Number Decal QUESTIONS? As a manufacturer, we are com- mitted to providing complete cus- tomer satisfaction. If you have questions, or if parts are missing, PLEASE DO NOT CONTACT THE STORE;...
-
Page 2: Table Of Contents
TABLE OF CONTENTS WARNING DECAL PLACEMENT ............. .2 IMPORTANT PRECAUTIONS . -
Page 3: Important Precautions
14. To purchase a surge suppressor, see your local WESLO dealer or call the telephone 3. Use the treadmill only as described. number on the front cover of this manual and order part number 146148, or see your local 4. - Page 4 19. The treadmill is capable of high speeds. 23. Do not change the incline of the treadmill by Adjust the speed in small increments to avoid placing objects under the treadmill. sudden jumps in speed. 24. Inspect and properly tighten all parts of the 20.
-
Page 5: Before You Begin
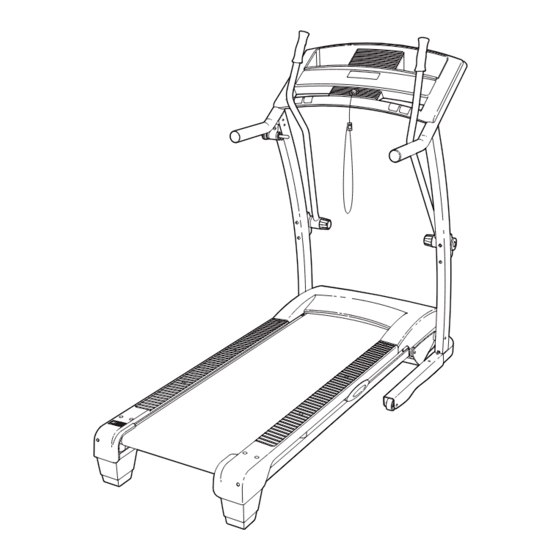
BEFORE YOU BEGIN Thank you for selecting the new WESLO PRO™ ual. To help us assist you, note the product model CROSSWALK 7.8 treadmill. The CROSSWALK 7.8 number and serial number before contacting us. The treadmill offers a selection of features designed to make model number and the location of the serial number your workouts at home more effective and enjoyable. -
Page 6: Assembly
ASSEMBLY To hire an authorized service technician to assemble the treadmill, call 1-800-445-2480. Assembly requires two persons. Set the treadmill in a cleared area and remove all packing materials. Do not dispose of the packing materials until assembly is completed. Note: The underside of the treadmill walking belt is coated with high-performance lubricant. - Page 7 1. Make sure that the power cord is unplugged. Position the Base (52) and the Base Extensions (45) upside-down as shown. Attach six Base Feet (63) to the Base (52) and the Base Extensions (45) with six M4.2 x 25.4mm Tek Screws (26). 2.
- Page 8 3. Attach each Base Extension (45) to the Base (52) with two M8 x 58mm Bolts (13), two M8 Flat Washers (32), and two Base Extension Nuts (43). Note: The heads of the Bolts should be on outside of the Base Extensions. Lower the Base (52) so that it is flat on the floor.
- Page 9 5. See the left inset drawing. Identify the two Frame Spacers (11). Open the included packet of grease, and apply grease to both sides of both Frame Spacers. Then, identify the outer side of each Frame Spacer. Hold a Frame Spacer (11) between the Right Upright (54) and the Lift Frame (23), with the outer side of the Frame Spacer facing the Right Upright.
- Page 10 7. Set the Console Assembly (91) face down on a Console soft surface to avoid scratching the Console Wire Assembly. Hold the Right Handrail (33), which has a large hole in one side, near the Console Assembly. Bracket Next, insert the console wire and the tie into the hole in the side of the Right Handrail (33).
- Page 11 9. Start all six M8 x 15mm Bolts (8) with six M8 Star Washers (5) into the Uprights (53, 54). Then, firmly tighten all six Bolts. 10. Attach the Latch Housing (48) and the Latch Housing Spacer (109) to the Left Upright (53) with two #10 x 1"...
- Page 12 11. With the help of a second person, carefully lower the Uprights (not shown) to the floor. Attach the ground wire on the Wire Harness (39) to the indicated hole in the Base (52) with an M4 x 10mm Ground Screw (84). Hole Ground Wire 12.
- Page 13 13. Attach the Left Crosswalk Arm (117) and a Plastic Spacer (119) to the Left Upright (53) with two 1/4" Flat Washers (114) and two 1/4" x 3" Bolts (111). Make sure that the Left Crosswalk Arm is on the indicated side of the Console (91).
-
Page 14: Operation And Adjustment
Grounded Outlet Box drawing 1 at the right). To purchase a surge sup- Adapter pressor, see your local WESLO dealer or call the Surge Suppressor telephone number on the front cover of this man- ual and order part number 146148, or see your local electronics store. - Page 15 CONSOLE DIAGRAM Clip FEATURES OF THE CONSOLE To turn on the power, see page 16. To use the man- ual mode, see page 16. To use a preset workout, see page 18. To use the information mode, see The treadmill console offers a selection of features designed to make your workouts more effective.
- Page 16 HOW TO TURN ON THE POWER 3. Start the walking belt. IMPORTANT: If the treadmill has been exposed to To start the walking belt, press the Start button, the cold temperatures, allow it to warm to room tem- Speed increase button, or one of the numbered perature before turning on the power.
- Page 17 The lower left display— To measure As you exercise, the your heart rate, stand on the lower left display can foot rails and show the elapsed time hold the con- and the distance that you tacts for ap- have walked or run. In proximately addition, the display will show the incline level of Contacts...
- Page 18 HOW TO USE A PRESET WORKOUT The workout will continue in this way until the last segment of the profile flashes in the display and the 1. Insert the key into the console. last segment ends. The walking belt will then slow to a stop.
- Page 19 THE INFORMATION MODE HOW TO USE THE CROSSWALK ARMS The console features an information mode that keeps As you walk on the treadmill, you can hold the track of treadmill usage information and allows you to handrails or use the crosswalk arms. To exercise your select a unit of measurement for the console.
-
Page 20: How To Fold And Move The Treadmill
HOW TO FOLD AND MOVE THE TREADMILL HOW TO FOLD THE TREADMILL FOR STORAGE Before folding the treadmill, adjust the incline to the lowest position. If you do not do this, you may damage the treadmill when you fold it. Remove the key and unplug the power cord. - Page 21 HOW TO LOWER THE TREADMILL FOR USE 1. Hold the frame with your right hand as shown. Pull the latch knob to the left and hold it. Pivot the frame down until it is past the latch pin. Then, release the latch knob. Latch Knob Latch Pin...
-
Page 22: Troubleshooting
TROUBLESHOOTING Most treadmill problems can be solved by following the steps below. Find the symptom that applies, and follow the steps listed. If further assistance is needed, see the front cover of this manual. PROBLEM: The power does not turn on SOLUTION: a. - Page 23 Locate the Reed Switch (89) and the Magnet (62) on the left side of the Pulley (71). Turn the Pulley until the 1/8 in. Magnet is aligned with the Reed Switch. Make sure that the gap between the Magnet and the Reed Switch is about 1/8 in.
- Page 24 PROBLEM: The crosswalk arms squeak during use SOLUTION: a. (Note: Correcting this problem requires a small amount of white marine grease, available at hard- ware stores.) Turn the Resistance Knob (A) coun- terclockwise and remove it. Next, remove the Resistance Cone (B) and the Left Crosswalk Arm (117), along with the Resistance Plate (C), Washers (D), Spring Washer (E), Thrust Washers (F), and Thrust Bearing (G).
-
Page 25: Exercise Guidelines
EXERCISE GUIDELINES WARNING: Burning Fat—To burn fat effectively, you must exer- cise at a low intensity level for a sustained period of Before beginning this time. During the first few minutes of exercise, your or any exercise program, consult your physi- body uses carbohydrate calories for energy. -
Page 26: Part List
PART LIST—Model No. WLTL37308.0 R0808B To locate the parts listed below, see the EXPLODED DRAWING near the end of this manual. Key No. Qty. Description Key No. Qty. Description M10 x 60mm Patch Bolt Frame M10 x 75mm Bolt Base M4.2 x 13mm Tek Screw... - Page 27 Key No. Qty. Description Key No. Qty. Description Front Roller Washer Hex Key M4.2 x 18mm Screw Hand Grip Left Crosswalk Arm M10 x 58mm Bolt Right Crosswalk Arm Cage Nut Plastic Spacer Caution Decal Resistance Assembly Isolator – 6" Red Wire, M/F M4 x 10mm Controller Screw –...
-
Page 28: Exploded Drawing
EXPLODED DRAWING A—Model No. WLTL37308.0 R0808B... - Page 29 EXPLODED DRAWING B—Model No. WLTL37308.0 R0808B...
- Page 30 EXPLODED DRAWING C—Model No. WLTL37308.0 R0808B...
- Page 31 EXPLODED DRAWING D—Model No. WLTL37308.0 R0808B...
-
Page 32: Ordering Replacement Parts
ORDERING REPLACEMENT PARTS To order replacement parts, please see the front cover of this manual. To help us assist you, be prepared to pro- vide the following information when contacting us: • the model number and serial number of the product (see the front cover of this manual) •...
Need help?
Do you have a question about the WLTL37308.0 and is the answer not in the manual?
Questions and answers