Table of Contents
Advertisement
Advertisement
Table of Contents

Subscribe to Our Youtube Channel
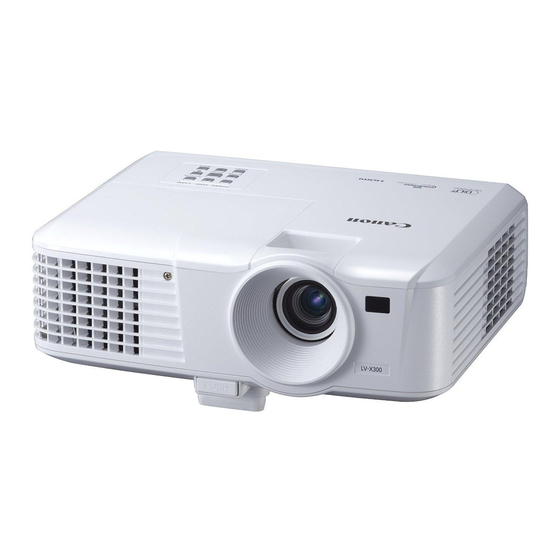
Related Manuals for Canon LV-WX300


Summary of Contents for Canon LV-WX300
- Page 1 MULTIMEDIA PROJECTOR LV-WX300/LV-X300/LV-S300 User’s Manual...
-
Page 2: Table Of Contents
Controlling the projector remotely through a web browser Contents of package ..... 13 (e-Control™) Projector exterior view ....14 (LV-X300/LV-WX300 only) ..47 Controls and functions ....15 Controlling the projector using PJLink™ application Positioning your projector ..19 (LV-X300/LV-WX300 only) ..49 Choosing a location ......19... -
Page 3: Safety Instructions
If your projector does not seem to be operating properly, read this manual again, check operations and cable connections, and try the solutions in the “Troubleshooting” section in the user’s manual. If the problem still persists, contact the Canon Customer Support Center. CAUTION... -
Page 4: Safety Precautions
Safety Precautions WARNING: • THIS APPARATUS MUST BE GROUNDED. • TO REDUCE THE RISK OF FIRE OR ELECTRIC SHOCK, DO NOT EXPOSE THIS APPLI- ANCE TO RAIN OR MOISTURE. • This projector produces intense light from the projection lens. Do not stare directly into the lens, otherwise eye damage could result. - Page 5 Do not install the projector near the ventilation duct of air-conditioning equipment. This projector should be operated using only the type of power source indicated on the marking label. If you are not sure of the type of power supplied, contact the Canon Customer Support Center or local power company.
-
Page 6: Ac Power Cord Requirement
For more information about the recycling of this product, please contact your local city office, waste authority, approved scheme or your household waste disposal service or visit www.canon-europe.com/ weee, or www.canon-europe.com/battery. -
Page 7: Federal Communication Commission Notice
Federal Communication Commission Notice Multimedia Projector, Model: LV-WX300 / LV-X300 / LV-S300 This device complies with Part 15 of the FCC Rules. Operation is subject to the following two conditions: (1) This device may not cause harmful interference, and (2) this device must accept any interference received, including interference that may cause undesired operation. -
Page 8: Precautions For Use
Warning If the following situations occur, turn the power off, remove the power plug from the power outlet and contact the Canon Customer Support Center. Failure to do so could cause a fire or result in an electric shock. • If smoke is emitted •... -
Page 9: Precautions For Installation
• Do not remove the cabinet from the projector or disassemble it. The interior of the projector contains high-voltage components as well as parts that are hot. These could cause an electric shock or burn. If inspection, maintenance or repair is required, contact the Canon Customer Support Center. -
Page 10: Precautions On The Lamp
• Be sure to remove the power plug from the power outlet before replacing the lamp. • When the lamp is damaged, shards of glass may be scattered inside the projector. Contact the Canon Customer Support Center for cleaning and inspection of the projector interior and lamp... - Page 11 Caution When handling the lamp, pay attention to the following points. • Be sure not to handle the lamp immediately after it has been used. Be sure to switch off the power and wait for approximately 45 minutes for the lamp and the projector to cool down sufficiently. Failure to do so could result in a burn or personal injury due to heat from the lamp or projector.
-
Page 12: For Safe Use
For Safe Use Pay attention to the following points when carrying or transporting the projector. • This projector is a precision instrument. Do not knock it over or subject it to impacts. Doing so may cause a malfunction. • Do not reuse any packaging or shock-absorbent materials that were supplied with the projector at the time of purchase for transporting or shipping the projector. -
Page 13: Contents Of Package
Contents of package (US) (EU) (China) Projector Power cord 1.8 m (70.8") Computer cable 1.8 m (70.8") (5K.1VC09.501) CD & QSG Important Information Warranty card Remote control (type number: LV-RC08) Battery (type number: CR2025) -
Page 14: Projector Exterior View
13. PC input terminal x 2 14. CONTROL port 15. Video input terminal 16. S-Video input terminal 15 16 17. Audio input terminal Audio output terminal 18. AC power cord inlet 19. Kensington lock LV-X300/LV-WX300 20. Quick-release foot 21. Security bar 22. Rear adjuster foot... -
Page 15: Controls And Functions
Controls and functions Projector MENU Turns on the On-Screen Display (OSD) menu. Goes back to previous OSD menu, exits and saves menu settings. See "Using the menus" on page 29 for details. TEMPerature indicator light Lights up red if the projector's temperature becomes too high. - Page 16 Remote control: LV-RC08 MUTE Temporarily mutes the audio. See "Adjusting the sound" on page 42 for details. MENU Turns on the On-Screen Display (OSD) menu. Goes back to previous OSD menu, exits and saves menu settings. See "Using the menus" on page 29 for details.
- Page 17 Using the remote control for the first time Pull the tab before using the remote control. Remote control effective range Infra-Red (IR) remote control sensor is located on the front of the projector. The distance between the remote control and the sensor should not exceed 8 meters (~ 26 feet).
- Page 18 SOFTWARE, EVEN IF ADVISED OF THE POSSIBILITY OF SUCH DAMAGE. Third party software support Canon Inc., Canon's affiliated companies, as well as sales companies do not offer any support services for these programs. We are unable to respond to questions or inquiries from you or any other parties regarding...
-
Page 19: Positioning Your Projector
Positioning your projector Choosing a location Your room layout or personal preference will dictate which installation location you select. Take into consideration the size and position of your screen, the location of a suitable power outlet, as well as the location and distance between the projector and the rest of your equipment. -
Page 20: Obtaining A Preferred Projected Image Size
4:3 projection display area. 16:10 is the native aspect ratio of LV-WX300. To be able to project a complete 16:9 (widescreen) aspect ratio image, the projector can resize and scale a widescreen image to the projector's native aspect width. -
Page 21: How To Determine The Position Of The Projector For A Given Screen Size
How to determine the position of the projector for a given screen size Select your image size. Refer to the table and find the closest match to your image size in the left columns labeled "Image size". Using this value, look across this row to the right to find the corresponding average distance from screen value in the column labeled "Distance from the screen: L". - Page 22 The above figures are approximate and may be slightly different from the actual measurements. Canon recommends that if you intend to permanently install the projector, you should physically test the projection size and distance using the actual projector in suit before you permanently install it, so as to make allowance for this projector's optical characteristics.
-
Page 23: Connection
LV-S300 Notebook or desktop computer Audio cable LV-X300/LV-WX300 (option) Many notebooks do not turn on their external video ports when connected to a projector. Usually a key combo like FN + F3 or CRT/LCD key turns the external display on/off. Locate a function key labeled CRT/LCD or a function key with a monitor symbol on the notebook. -
Page 24: Connecting Video Source Devices
Connecting Video source devices You can connect your projector to various Video source devices that provide any one of the following output sockets: • HDMI (LV-X300/LV-WX300) • Component Video • S-Video (LV-X300/LV-WX300) • Video (composite) You need only connect the projector to a Video source device using just one of the above connecting methods, however each provides a different level of video quality. -
Page 25: Connecting A Component Video Source Device
RGB (D-Sub) adaptor cable (option) Speakers LV-S300 Audio LV-X300/LV-WX300 cable (option) AV device If the selected video image is not displayed after the projector is turned on and the correct video source has been selected, check that the Video source device is turned on and operating correctly. -
Page 26: Connecting A Composite Video Source Device
The final connection path should be like that shown in the following diagram: S-Video cable (option) Audio cable (option) Speakers Audio LV-X300/LV-WX300 cable (option) AV device • If the selected video image is not displayed after the projector is turned on and the correct video source has been selected, check that the Video source device is turned on and operating correctly. - Page 27 LV-S300 Audio cable (option) LV-X300/LV-WX300 AV device • If the selected video image is not displayed after the projector is turned on and the correct video source has been selected, check that the Video source device is turned on and operating correctly.
-
Page 28: Operation
Operation Starting up the projector Plug the power cord into the projector and into a wall socket. Turn on the wall socket switch (where fitted). Check that the POWER indicator light on the projector lights orange after power has been applied. -
Page 29: Using The Menus
20 min Position Phase Auto Power Off Disable H. Total Dots Panel Key Lock D.Zoom Sleep Timer Disable Splash Screen Canon Normal 3D Sync Exit Analog RGB MENU Analog RGB Exit MENU to highlight the SYSTEM Press / / / to select a preferred SETUP: Basic menu. -
Page 30: Utilizing The Password Function
Utilizing the password function For security purposes and to help prevent unauthorized use, the projector includes an option for setting up password security. The password can be set through the On-Screen Display (OSD) menu. For details of the OSD menu operation, please refer to "Using the menus"... -
Page 31: Disabling The Password Function
Enter the old password. • If the password is correct, another message 'INPUT NEW PASSWORD' is displayed. • If the password is incorrect, the password error message is displayed lasting for three seconds, and the message 'INPUT CURRENT PASSWORD' is displayed for your retry. You can press MENU to cancel the change or try another password. -
Page 32: Switching Input Signal
The native display resolution of this projector is in a 4:3 (LV- LV-S300 S300/LV-X300)/16:10 (LV-WX300) aspect ratio. For best display picture results, you should select and use an input signal which outputs at this resolution. Any other resolutions will be... -
Page 33: Adjusting The Projected Image
Adjusting the projected image Adjusting the projection angle The projector is equipped with 1 quick-release adjuster foot and 1 rear adjuster foot. These adjusters change the image height and projection angle. To adjust the projector: Press the quick-release button and lift the front of the projector. Once the image is positioned where you want it, release the quick-release button to lock the foot in position. -
Page 34: Correcting Keystone
Correcting keystone Keystoning refers to the situation where the projected image is noticeably wider at either the top or bottom. It occurs when the projector is not perpendicular to the screen. To correct this, besides adjusting the height of the projector, you will need to manually correct it following one of these steps. -
Page 35: Magnifying And Searching For Details
Magnifying and searching for details If you need to find the details on the projected picture, magnify the picture. Use the direction arrow keys for navigating the picture. • Using the remote control Press D.ZOOM +/- to display the Zoom bar. Press D.ZOOM + to magnify the center of the picture. - Page 36 16:10 picture 16:10 (LV-WX300 only): Scales an image so that it is displayed in the center of the screen with a 16:10 aspect ratio. This is most suitable for images which 16:9 picture are already in a 16:10 aspect.
-
Page 37: Useful Functions Available During A Presentation
Useful functions available during a presentation Selecting a image mode The projector is preset with several predefined image modes so that you can choose one to suit your operating environment and input signal picture type. To select a operation mode that suits your need, you can follow one of the following steps. -
Page 38: Adjusting Sharpness
Lower setting produces less saturated colors. If the setting is too high, colors on the image will be overpowering, which makes the image unrealistic. Adjusting Tint Highlight Tint in the PICTURE menu and adjust the values by pressing on the projector or remote control. - Page 39 To adjust the settings: Go to the PICTURE menu and highlight 6-axis Color Adjust. Press OK/IMAGE and the 6-axis Color Adjust page is displayed. Highlight Select Color and press to select a color from among Red, Green, Blue, Cyan, Magenta, or Yellow. Press to highlight Hue and press to select its range.
-
Page 40: Setting The Presentation Timer
Setting the presentation timer The presentation timer can indicate the presentation time on the screen to help you achieve better time management when giving presentations. Follow these steps to utilize this function: Go to the SYSTEM SETUP: Basic > Presentation Timer menu and press OK/IMAGE to display the Presentation Timer page. -
Page 41: Hiding The Image
Hiding the image In order to draw the audience's full attention to the presenter, you can use BLANK on the projector or remote control to hide the screen image. Press any key on the projector or remote control to restore the image. -
Page 42: Adjusting The Sound
Adjusting the sound The sound adjustments made as below will have an effect on the projector speaker. Be sure you have made a correct connection to the projector audio input. See "Connection" on page 23 for how the audio input is connected. Muting the sound To temporarily turn off the sound, press MUTE on the remote control, Press MENU and then press /... -
Page 43: Direct Power Off
• If the projector is not properly shut down, to protect the lamp, when you attempt to re-start the projector, the fans will run for a few minutes to cool down. Press POWER again to start the projector after the fans stop and the POWER indicator light turns orange. Direct power off The AC power cord can be pulled out during the projector is on. -
Page 44: Watching 3D Content
Watching 3D content This projector supports 3D content display using the DLP Link system. This projector supports 3D image signals in Frame Sequential/Frame Packing/Top-Bottom/Side-By-Side format. You need the following items to project and watch 3D content. • 3D content capable device. For example, a computer with graphics board and software capable of outputting 3D images •... - Page 45 • Children viewing 3D content should always be accompanied by an adult. Children may not tell you if they are feeling unwell when viewing 3D content, so always be sure to check with the child. The minimum recommended age for viewing 3D content is six years old. •...
-
Page 46: Supervising And Controlling By Computer
With a proper LAN cable connection and LAN Control settings, you can operate the projector from a computer using a web browser or PJLink™ application (LV-X300/LV-WX300 only) when the computer and the projector are connected to the same local area network. -
Page 47: Controlling The Projector Remotely Through A Web Browser (E-Control™) (Lv-X300/Lv-Wx300 Only)
Controlling the projector remotely through a web browser (e-Control™) (LV-X300/LV-WX300 only) Once you have the correct IP address for the projector and the projector is on or in standby state, you can use any computer that is on the same local area network to control the projector. - Page 48 iv. Once set, access to the remote network operation page on this projector has been password- protected. To enable this function, check the box in front of "Enable" and type in your desired password in the New Password column and confirm the new password by re-entering the new password at the Confirm column.
-
Page 49: Controlling The Projector Using Pjlink™ Application (Lv-X300/Lv-Wx300 Only)
& www.crestron.com/getroomview. Controlling the projector using PJLink™ application (LV-X300/ LV-WX300 only) This projector supports standard protocol PJLink™ for projector control and you can control and monitor projector's operations using the same application among projectors of different models and different manufacturers. - Page 50 Tools page. Inquiry about the manufacturer INF1? "Canon" is returned. name INF2? Inquiry about the model name "LV-X300" or "LV-WX300" is returned. INF0? Inquiry about other information DMD resolution is returned. Inquiry about the class CLSS? "1" is returned.
- Page 51 • During standby • During input source switching • During command processing • During AUTO PC execution • Before the splash screen disappears after the power is turned on. • Use 1 computer to control/monitor 1 projector. • For how to control/monitor using PJLink™, see the operation manual of the PJLink™ application you use.
-
Page 52: Menu Operation
Menu operation Menu system Please note that the on-screen display (OSD) menus vary according to the signal type selected. Main menu Sub-menu Options Off*/Light Yellow/Pink/Light Screen Color Green/Blue/Blackboard Auto*/Real/16:10 (LV-WX300 Aspect only)/4:3/16:9 Keystone Position 1. DISPLAY Phase H. Total Dots D.Zoom... - Page 53 Disable*/5 min/10 min/15 min/ Blank Timer 20 min/25 min/30 min Panel Key Lock Off*/On Disable*/30 min/1 hr/2 hr/3 hr/4 hr/ Sleep Timer 8 hr/12 hr Splash Screen Black/Blue/Canon* Quick Cooling On/Off* High Altitude Mode On/Off* Mute On/Off* Audio Settings Volume...
- Page 54 Standby LAN Off*/On PJLink Off*/On Certification SYSTEM Change PJLink Password SETUP: DHCP On*/Off LAN Settings (LV- Advanced X300/LV-WX300 Projector IP Address only) Subnet Mask Default Gateway DNS Server Apply Reset All Settings Input Image Mode Current System Status Color Format...
- Page 55 Description of each menu FUNCTION DESCRIPTION Corrects the projected picture’s color when the projection Screen Color surface is not white. See "Using Screen Color" on page 39 for details. There are several options to set the image's aspect ratio Aspect depending on your input signal source.
- Page 56 FUNCTION DESCRIPTION Pre-defined image modes are provided so you can optimize Image Mode your projector image set-up to suit your program type. See "Selecting a image mode" on page 37 for details. Adjusts the brightness of the image. See "Adjusting Brightness Brightness"...
- Page 57 FUNCTION DESCRIPTION Reminds the presenter to finish the presentation within a Presentation Timer certain time frame. See "Setting the presentation timer" on page 40 for details. Sets the language for the On-Screen Display (OSD) menus. Language "Using the menus" on page 29 for details.
- Page 58 FUNCTION DESCRIPTION Closed Caption Settings Activates the function by selecting On when the selected input signal carries closed captions. • Captions: An on-screen display of the dialogue, narration, and sound effects of TV programs and videos that are closed captioned (usually marked as Closed Caption Settings "CC"...
-
Page 59: Maintenance
Maintenance Care of the projector Your projector needs maintenance from time to time, depending on the environmental circumstances, and should be done by authorized service technicians only. Contact your dealer for instructions. The only thing you can do yourselves on a regular basis is to keep the lens and cabinet clean. Never remove any parts of the projector except the lamp. -
Page 60: Lamp Information
Lamp information Getting to know the lamp hour When the projector is in operation, the duration (in hours) of lamp usage is automatically calculated by the built-in timer. The method of calculating the equivalent lamp hour is as follows: Total Lamp Hour = (hours used in Normal mode) + 5/6*(hours used in Economic mode) "Setting Lamp Mode as Economic"... - Page 61 Timing of replacing the lamp When the lamp indicator lights up red or a message appears suggesting it is time to replace the lamp, please install a new lamp or consult your dealer. An old lamp may cause a malfunction in the projector and in some instances the lamp may explode.
- Page 62 Replacing the lamp Spare lamp: LV-LP37 (LV-X300/LV-S300)/ LV-LP39 (LV-WX300) • Be sure to replace the lamp with a new lamp separately sold that is exclusive to this projector. Contact your dealer for purchase of the lamp. • To reduce the risk of electrical shock, always turn the projector off and disconnect the power cord before changing the lamp.
- Page 63 Remove the lamp cover from the projector. Pull up the lamp cover, pushing up the allow parts of the front panel. • Do not turn the power on with the lamp cover removed. • Do not insert your fingers between the lamp and the projector.
- Page 64 10. Place the lamp protection film supplied with the new lamp on the lamp compartment. 11. As shown in the figure, replace the lamp cover on the projector. 12. Tighten the screws that secure the lamp cover. • Loose screw may cause a bad connection, which could result in malfunction.
-
Page 65: Indicators
Indicators Light Status & Description POWER TEMP LAMP Power events Stand-by mode. Orange Green Powering up. Flashing Normal operation. Green Orange Normal power-down cooling. Flashing FW Download. Color Wheel start fail. Green Scaler shutdown fail (data abort). Flashing Lamp events Lamp error in normal operation. -
Page 66: Troubleshooting
Troubleshooting The projector does not turn on Cause Remedy Plug the power cord into the AC inlet on the projector, and There is no power from the power cable. plug the power cord into the power outlet. If the power outlet has a switch, make sure that it is switched on. -
Page 67: Specifications
Specifications Projector specifications All specifications are subject to change without notice. Model name LV-WX300 LV-X300 LV-S300 Display system 1-CHIP DLP™ Optical system Time division color extraction, sequential display Type 0.65" x 1/16:10 0.55" x 1/4:3 0.70" x 1/4:3 Size / Aspect ratio DLP™... -
Page 68: Dimensions
Model name LV-WX300 LV-X300 LV-S300 HDMI terminal Digital PC, digital video input ANALOG PC / Analog PC, Component (mini D-sub 15-pin) COMPONENT terminal Mini-DIN4 S video input RCA terminal Video input LAN terminal Network connection (100BASE-TX / 10BASE- USB Port... -
Page 69: Timing Chart
Dimensions 282 mm (W) x 114.5 mm (H) x 232 mm (D) / 11.1 in (W) x 4.5 in (H) x 9.1 in (D) (including the protrusion) 282 mm (11.1”) (9.1”) 114.5 91 mm (3.6”) (4.5”) Tolerance:±2 mm (0.08 in) - Page 70 Timing chart Supported timing for PC input Horizontal Resolution Mode Refresh Rate (Hz) Clock (MHz) Frequency (kHz) 720 x 400 720 x 400_70 70.087 31.469 28.3221 VGA_60* 59.940 31.469 25.175 VGA_72 72.809 37.861 31.500 640 x 480 VGA_75 75.000 37.500 31.500 VGA_85 85.008...
- Page 71 Supported timing for HDMI (HDCP) input Supported PC timings Vertical Frequency Horizontal Resolution Mode Clock (MHz) (Hz) Frequency (kHz) 720 x 400 720 x 400_70 70.087 31.469 28.3221 VGA_60* 59.940 31.469 25.175 VGA_72 72.809 37.861 31.500 640 x 480 VGA_75 75.000 37.500 31.500...
-
Page 72: Control Commands
Supported Video timings Horizontal Vertical Dot Clock Timing Resolution Frequency (kHz) Frequency (Hz) Frequency (MHz) 480i* 720(1440) x 480 15.73 59.94 480p 720 x 480 31.47 59.94 576i 720(1440) x 576 15.63 576p 720 x 576 31.25 720/50p** 1280 x 720 37.5 74.25 720/60p**... - Page 73 Control Commands You can control this projector by sending commands via CONTROL port or LAN port. System Requirement CONTROL port Connection Cable 9-pin RS-232-C Cable (Crossover) Communication Mode RS-232-C asynchronous, half-duplex communication Baud Rate 19200 bps Character Length 8 bit Parity Check None Stop Bits...
- Page 74 Presentation IMAGE=PRESENTATION<CR> Standard IMAGE=STANDARD<CR> sRGB IMAGE=SRGB<CR> Image Movie IMAGE=MOVIE<CR> Mode User1 IMAGE=USER_1<CR> User2 IMAGE=USER_2<CR> Image Mode GET=IMAGE<CR> Aspect 4:3 ASPECT=4:3<CR> Aspect 16:9 ASPECT=16:9<CR> Aspect Auto ASPECT=AUTO<CR> Aspect Aspect Real ASPECT=TRUE<CR> Aspect 16:10 ASPECT=16:10<CR> Aspect Status GET=ASPECT<CR> Front Table IMAGEFLIP=NONE<CR> Rear Table IMAGEFLIP=REAR<CR>...
- Page 75 Blank On BLANK=ON<CR> Blank Off BLANK=OFF<CR> Blank Status GET=BLANK<CR> Freeze On FREEZE=ON<CR> Freeze Off FREEZE=OFF<CR> Freeze Status GET=FREEZE<CR> Menu On MENU=ON<CR> Operation Menu Off MENU=OFF<CR> Auto PC RC=AUTOPC<CR> RC=UP<CR> Down RC=DOWN<CR> Right RC=RIGHT<CR> Left RC=LEFT<CR> RC=OK<CR> High Altitude HIGHALT=ON<CR> mode On High High Altitude HIGHALT=OFF<CR>...
- Page 76 Unsupported item: < GET=INVALID<CR> this command e:000A > e:000A parameter can't INVALID_PARAMETER<CR> INVALID_PARAMETER<CR> support • If the projector didn’t receive <CR> to finish a command within 5 seconds, it will timeout and you need to resend the command. • No case sensitive.
- Page 77 CANON Belgium N.V. / S.A. U.S.A. Berkenlaan 3, 1831 Diegem (Mechelen), CANON U.S.A. INC. Belgium One Canon Park, Melville, New York 11747, CANON Netherland NV U.S.A. Neptunusstraat 1, 2132 JA Hoofddorp, The For all inquires concerning this product, call toll Netherlands free in the U.S.
Need help?
Do you have a question about the LV-WX300 and is the answer not in the manual?
Questions and answers