Table of Contents
Advertisement
Quick Links
Advertisement
Table of Contents

Related Manuals for Viking Access Systems T 21


Summary of Contents for Viking Access Systems T 21
- Page 3 T-21 Vehicular Gate Operator • Revision BØ • October 2008...
-
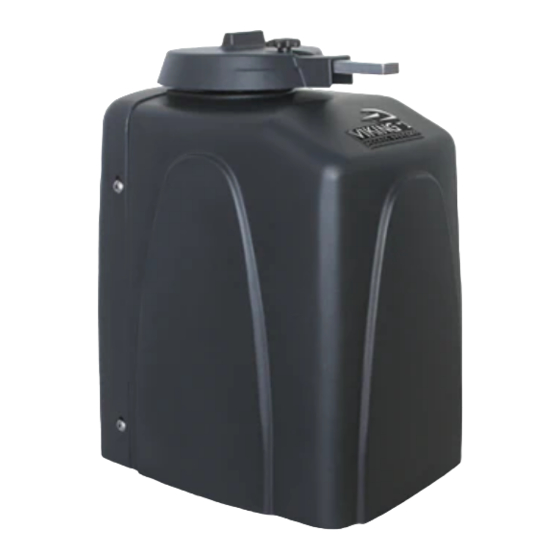
Page 4: Parts Diagram
PARTS DIAGRAM PARTS DIAGRAM Item Description Part No. Overall Dimensions Output Shaft Knob DWOUK10 Output Shaft Cover T21OC10 Clutch Key VAWRCK 20" 7-3/4" Clutch and Handle DWCL10 Output Arm T21TARM Output Shaft DWOP10 Worm Gear #80 30:1 T21GB80 Sprocket 15 pitches, #50, 7/8 bore T215P507/8 Endless #50x36 Pitches T21CH50... -
Page 5: Table Of Contents
TABLE OF CONTENTS TABLE OF CONTENTS Parts Diagram/Parts List ......... . .i Important Safety Information Important Safety Instructions . -
Page 6: Important Safety Information
IMPORTANT SAFETY INFORMATION IMPORTANT SAFETY INFORMATION WARNING - Not following these instructions may cause severe injury or death to persons. IMPORTANT SAFETY INSTRUCTIONS WARNING – To reduce the risk of severe injury or death: 1. READ AND FOLLOW ALL INSTRUCTIONS. 2. - Page 7 IMPORTANT SAFETY INFORMATION IMPORTANT SAFETY INFORMATION WARNING - Not following these instructions may cause severe injury or death to persons. IMPORTANT INSTALLATION INSTRUCTIONS Continued 6. Controls intended for user activation must be located at least six feet (6’) away from any mov- ing part of the gate and where the user is prevented from reaching over, under, around or through the gate to operate the controls.
-
Page 8: Maintenance/General Safety Precautions
IMPORTANT SAFETY INFORMATION IMPORTANT SAFETY INFORMATION WARNING - Not following these instructions may cause severe injury or death to persons. MAINTENANCE Remove the Power Harness from the Control Board (refer to page 15) • Clean and lubricate the turning pins and gate hinges using the recommended lubricant. •... -
Page 9: To Reduce Risk Of Fire Or Personal Injury & Terminology
IMPORTANT SAFETY INFORMATION IMPORTANT SAFETY INFORMATION CAUTION: To Reduce the Risk of Fire or Injury to Persons a) Use only the following type and size of battery(ies): Yuasa NP7-12 b) Do not dispose of the battery(ies) in fire. The cells may explode. Check with local codes for possible dis- posal instructions. -
Page 10: Photo Beam (Non-Contact Sensor) Installation
IMPORTANT SAFETY INFORMATION IMPORTANT SAFETY INFORMATION WARNING - Not following these instructions may cause severe injury or death to persons. NOTE - This type of installation DOES NOT reverse the gate all the way back to its limits when the photo-beam is obstructed. -
Page 11: Edge Sensor (Contact Sensor) Installation
IMPORTANT SAFETY INFORMATION IMPORTANT SAFETY INFORMATION WARNING - Not following these instructions may cause severe injury or death to persons. Edge Sensor (contact sensor) Installation Secondary Entrapment Protection 3-Sided Edge Sensor 3-Sided Edge Sensor Siren Loop Connector Open Commands Guard Station Radio Station Master/Slave N.O. -
Page 12: Audible Alarm Reset Switch Installation
IMPORTANT SAFETY INFORMATION IMPORTANT SAFETY INFORMATION WARNING - Not following these instructions may cause severe injury or death to persons. Audible Alarm Reset Switch Installation Manual Reset for the Audible Alarm UL325 standard requires an audible alarm to go off after two consecutive events detected by the primary entrapment protection of the gate operator (obstruction sensor). -
Page 13: Important Installation Information
IMPORTANT INSTALLATION INFORMATION IMPORTANT INSTALLATION INFORMATION CAUTION - FOR USE WITH GATES OF A MAXIMUM OF 12 FT IN LENGTH AND 2000 LBS. IN WEIGHT OR 20 FT IN LENGTH AND 1200 LBS. IN WEIGHT. WARNING - TO REDUCE THE RISK OF SEVERE INJURY OR DEATH TO PERSONS: This is NOT a pedestrian gate operator Do NOT Install the gate operator to lift gates 12'-0"... -
Page 14: Plans Of Installation
PLANS OF INSTALLATION PLANS OF INSTALLATION The gate must be installed in a location so that enough clearance is supplied between the gate and adjacent structures when opening and closing to reduce the risk of entrapment. Swinging gates shall not open into public access areas. Gate in Closed Position Outside Inside... -
Page 15: Plan Of Installation - Concrete Pads
1. Follow the local building code to determine the required depth of the concrete pad. 2. Pad measurements recommended by Viking Access Systems are at lease 20” long, 20” wide and 30” deep to ensure the stable operation of the operator, and a minimum of 6”... -
Page 16: Gate Operator Installation
GATE OPERATOR INSTALLATION GATE OPERATOR INSTALLATION CAUTION - If mounting bar is not welded to a frame member that runs the full length of the gate, the gate operator may damage the gate. Do not weld the bar or backing plate to a few pickets. STEP 1 Release the clutch (see page 7). -
Page 17: Gate Operator Installation
GATE OPERATOR INSTALLATION GATE OPERATOR INSTALLATION Step 4 Upon observation of the satisfactory arrangement of the articulated arm and bracket, weld all pieces securely. Paint the arm to protect it from rusting. STEP 5 Insert Clutch Key Upon test of the installation, loosen the clutch and rotate it until it lines up with the notches in the Output Shaft. -
Page 18: Electrical Installation Electrical Installation
ELECTRICAL INSTALLATION ELECTRICAL INSTALLATION Caution – Do not connect the power harness to the board until the installation is ready for verification. The Gate Operator requires a single phase AC Black line to operate and charge the batteries. 1. Turn off the main switch or breaker for the power line being used. -
Page 19: Single Unit Connections
ELECTRICAL INSTALLATION – SINGLE UNIT ELECTRICAL INSTALLATION – SINGLE UNIT Power Connections Connect the wire harness to the “OPEN RIGHT” connector if the gate opens to the right. Connect the wire harness to the “OPEN LEFT” connector if the gate opens to the left. OPEN RIGHT Gate opens towards right OPEN LEFT... -
Page 20: Step 6 - Limit Switch Setup
LIMIT SWITCH SET-UP LIMIT SWITCH SET-UP Limit Switch Setup Cam Wheel Clutch Guide Pin Limit Switch Cam STEP 7 A. Loosen the screws on the Limit Switch Cams. B. With the operator cover still off, remount the articulated arm, making sure the cam wheel pin is engaged with the clutch. -
Page 21: Limit Switch Connections
LIMIT SWITCH SET-UP LIMIT SWITCH SET-UP Opening/Closing Setup 1. Setup the limit switches manually at the desired open and close position. 2. Allow the gate operator to run a full open and close cycle (from limit to limit) without interruption. Note: During the first full open and close cycle: The gate operator doesn’t slow down prior to reaching its limits. -
Page 22: Battery & Emi Board Location
BATTERY & EMI BOARD LOCATION BATTERY & EMI BOARD LOCATION The Batteries are Located Behind the Panel Door The EMI Board is Located Behind the Panel Door TECHNICAL SUPPORT 1 800 908 0884... -
Page 23: Master/Slave Connections
ELECTRICAL INSTALLATION – MASTER/SLAVE ELECTRICAL INSTALLATION – MASTER/SLAVE Master/Slave Connections Outside Interconnecting Conduit Inside Master Unit Slave Unit Caution – Do not run Master/Slave communication cable in the same conduit as the power supply (120-220V) cable. Conduit Shielded Cable NOTE: Use 16 Gauge Wire for runs up to 100'... -
Page 24: Vehicular Loop Detector Installation
VEHICULAR LOOP DETECTOR INSTALLATION VEHICULAR LOOP DETECTOR INSTALLATION Note: Not all loops may be necessary for every installation. Check local regulations and accepted best- practice design requirements Dimension A – 5’ for Single Gate Operator 6’ for Master/Slave Gate Operator Outside Inside Center... -
Page 25: Installation Guidelines
VEHICULAR LOOP DETECTOR INSTALLATION VEHICULAR LOOP DETECTOR INSTALLATION W W A A R R N N I I N N G G – – C C o o n n s s u u l l t t t t h h e e i i n n s s t t a a l l l l a a t t i i o o n n i i n n s s t t r r u u c c t t i i o o n n s s f f r r o o m m t t h h e e l l o o o o p p d d e e t t e e c c t t o o r r m m a a n n u u f f a a c c t t u u r r e e r r . . T T h h e e f f o o l l l l o o w w i i n n g g s s t t a a t t e e m m e e n n t t s s a a r r e e p p r r o o v v i i d d e e d d a a s s a a g g u u i i d d e e b b u u t t d d i i f f f f e e r r e e n n t t r r e e q q u u i i r r e e m m e e n n t t s s m m a a y y b b e e r r e e q q u u i i r r e e d d b b y y t t h h e e v v e e h h i i c c u u l l a a r r l l o o o o p p d d e e t t e e c c t t o o r r m m a a n n u u f f a a c c t t u u r r e e r r . -
Page 26: Optional Accessory Connections
OPTIONAL ACCESSORY CONNECTIONS OPTIONAL ACCESSORY CONNECTIONS Safety Connections Safety Photo Loop Beam Center Detector Edge Sensor Loop Detector Connection Locations Vehicle loop detectors must be installed to decrease the possibility of vehicle Radio Station Loop Connector Open Commands Guard entrapment on the gate (see page 20). N.O. -
Page 27: Radio Receiver
OPTIONAL ACCESSORY CONNECTIONS OPTIONAL ACCESSORY CONNECTIONS Radio Receiver When connecting the Radio Receiver carefully verify the proper connections. The maximum voltage that the control board provides for external accessories is the maximum voltage of the battery, which is about 28 volts. In the event of an electrical short in the power to the accessories, the board will protect itself by shutting down and will remain shut down until the short is corrected. -
Page 28: Optional Electromagnetic Lock
Lock Kit) Green Black 24VDC White Loop Conne Radio Station N.O. N.C. This Magnetic Lock is an OPTIONAL ACCESORY available from Mag. Lock Viking Access Systems. Please order part number VA-MAG13. TECHNICAL SUPPORT 1 800 908 0884 Motor Sensor Low Battery... -
Page 29: Magnetic Lock; Solenoid Connection; Guard Station
Relay Contact 10A-250VAC Radio Station N.O. Connection Locations N.C. Viking Access Systems can supply an Mag. Lock excellent Magnetic Lock unit (part number VA-MAG13). See page 24 for more details. Motor Sensor... -
Page 30: Special Features
SPECIAL FEATURES SPECIAL FEATURES Auto-Open Feature The Auto-Open feature in Viking Gate Operators enables the following functionality in the event of power failure: a) Open the gate in case of power failure (120 or 220 VAC). b) Keep the gate at the open position as long as the there is no power. c) Resume to normal operation when the power has been restored. -
Page 31: Intelligent Obstruction Sensor (Primary Entrapment Protection)
Open Stop 30sec Mag. Hold Open SPECIAL FEATURES SPECIAL FEATURES Lock Timer Limit Intelligent Obstruction Sensor (Primary Entrapment Protection) Sensor min. Battery Power Radio Safety Center Obstruction Rec. Sensor Loop Loop Overlap Delay Charger Sensor Trim Pot Location The Obstruction Sensor detects obstructions Turning the Trim Pot clockwise in the path of the traveling gate. -
Page 32: Fail Safe/Fail Secure Operation; Hold Open Timer
60sec N.C. 1sec Open 30sec SPECIAL FEATURES SPECIAL FEATURES Mag. Hold Open Lock Timer Limit Fail Safe/Fail Secure Operation Motor Sensor min. The gate operator contains a unique design that Low Battery allows the user to move the gate manually in case Power Radio Safety... -
Page 33: Gate Overlap Setting
Loop Connector Open Commands Guard Station Radio Station N.O. SPECIAL FEATURES SPECIAL FEATURES 60sec Gate Overlap Setting N.C. 1sec Open Stop Close Setting the Overlap Delay Pot to “0” will cause the master and the slave units to 30sec open and close at the same time Mag. -
Page 34: Solar Panel Installation
OPTIONAL SOLAR PANEL INSTALLATION OPTIONALSOLAR PANEL INSTALLATION For Viking Vehicular Gate Operators Connect the Solar Panel Controller as shown. Use one 24V 80W solar panel or two 12V 40W solar panels. Solar Input Battery Input Load Input – – – Remove the existing Power Harness and use the power... - Page 35 *With a 80 Watt (24VDC) Panel System. 1. The greater capacity of the batteries, the longer the system will operate on cloudy days. 2. If more specific information is needed, please consult with Viking Access Systems. For more information regarding solar energy refer to http:/www.nrel.gov.
-
Page 36: Loop Rack Installation
LOOP RACK INSTALLATION LOOP RACK INSTALLATION Outside Twist Wire Outside the Outside Safety Loop 6 Twists/Foot Viking Loop Rack Loop Until Its Connection to the Loop Rack Exit Center Reopen Exit Center Loop Center Exit Center Reopen Reopen Inside Safety Loop Exit Loop... - Page 37 TECHNICAL SUPPORT 1 800 908 0884...
- Page 38 TECHNICAL SUPPORT 1 800 908 0884...
-
Page 39: Troubleshooting
TROUBLESHOOTING TROUBLESHOOTING Gate does not run – Motor Sensor indicator comes ON Check all motor connections to be fully engaged. Refer to page Check the 15 Amp fuse in the Check that the reset switch is control board. set in the “Reset’ position. Gate does not run –... - Page 40 TROUBLESHOOTING TROUBLESHOOTING Gate does not open or close Check all motor connections to be Check that limit switches are Check that the stop command fully engaged. Refer to page 15. connected to the common and is not active. Refer to page 8 the normally close position.
- Page 41 TROUBLESHOOTING TROUBLESHOOTING Gate opens after few second delay Set the overlap delay trim pot Note: Overlap trim pot is to 0. Refer to page 29. normally recommended to use in overlapping gates. Refer to page 29. Gate opens. Closes or stops on its own Ensure that the key for manual Make sure that the ‘Charger’...
- Page 42 Notes...
Need help?
Do you have a question about the T 21 and is the answer not in the manual?
Questions and answers