
Summary of Contents for FENDT MAN D 0836 LE
- Page 1 Werkstatthandbuch Workshopmanual Manuel de réparation Manuel d´atelier Manuale per I´officina Motor Engine Moteur Motore MAN D 0836 LE (Mechanical part) X990.005.039.010...
- Page 2 MAN D 0836 LE Favorit 916 916/../3001- Favorit 920 920/../3001- Favorit 924 924/../3001- Favorit 926 926/../3001- Herausgegeben von der Abt. Kundendienst der Fa. ACGO GmbH & Co., Marktoberdorf Alle Rechte vorbehalten – Printed in Germany. Diese Druckschrift darf ohne unsere schriftliche Genehmigung Weder ganz noch auszugsweise vervielfältigt werden.
- Page 3 WORKSHOPMANUAL MANUEL D´ATELIER MANUAL DE TALLER MANUALE PER L‘OFFICINA MOTOR / ENGINE / MOTEUR / MOTORE MAN D 0836 LE (Mechanical part) Ausgabe 05/2001 Xaver FENDT GmbH & CO. Ein Unternehmen der AGCO-Corp. Maschinen- und Schlepperfabrik, Marktoberdorf / Bayern Germany...
- Page 4 VORWORT FOREWORD Das vorliegende Werkstatthandbuch wurde für die This workshop manual was compiled for our agent´s Reparaturwerkstätten unserer Vertretungen zusam- repair workshops and contains all the dismantling and mengestellt und enthält alle Demontage- und Mon- assembly procedures necessary in connection with tagevorgänge, die im Zusammenhang mit Ein- adjustments and replacement of parts.
- Page 5 AVANT PROPOS PROLOGO Le présent Manuel de Réparation a été concupour El presente Manual de Rparaciones ha sido les Ateliers de Réparation de nos dépositaires et il elaborado para los talleres de nuestros servicios contient toutes les instructions de démontage et de oficiales y comprende todos los trabjos de montaje montage nécessitées par les travauc de réglade et y desmontaje qu son necesarios para la sustitución...
- Page 6 PREMESSA Il presente manuale è stato redatto per le officine dei nostri concessionari e contiene tutte le indicazioni relative allo smontaggio ed al montaggio che si rendono necessari per la registrazione e la sostituzione di ricambi. Se ci sono parti da sostituire devono essere utilizzati assolutamente ricambi originali.
-
Page 7: Table Of Contents
Table of contents Page Specifications ..........................9 Service data..........................10 Tightening torque values.......................24 Turbocharger, troubleshooting ......................28 View of engine D 0836 LE 501 ......................30 Checking compression .........................31 Checking valve timing........................32 Setting valve clearance.........................33 Reassembling and refitting intake pipe...................35 Removing and refitting turbocharger....................36 Removing and refitting manifold ....................38 Removing and refitting cylinder head.....................39 Dismantling and reassembling the rocker arm assembly..............43... - Page 8 Table of contents Page Replacing cylinder liners ......................103 Layout of engine lubrication ......................104 Replacing oil filter........................105 Removing and refitting oil cooler ....................106 Removing and refitting oil pan ..................... 108 Removing and refitting oil pump....................111 Removing and refitting splash nozzle................... 114 Checking Start of Delivery VP44 ....................
-
Page 9: Specifications
Généralités Fav 900 from chassis number 23/3001and up Fav 900 Engine / Generalities Specifications Text-module Engine Design In-line vertical 4- Stroke Diesel with turbocharger and inter- Principle of operation cooler Method Direct injection Number of cylinders Compresssion ratio 18 : 1 Bore 108 mm (4.25") 125 mm (4.92") -
Page 10: Service Data
General Fav 900 chassis number 23/3001and up Fav 900 Engine / Generalities Service Data Text-module Crankcase PM-Picturemodule PMTAB_Picture 1. 116,0-116,1 mm (4.4567 - 4.4570 ") 2. Standard size: 4,00-4,03 mm (.157 - .159") Oversize: 4,20-4,23 mm (.165 - .167") 3. Standard size: 111,50-111,52 mm (4.389 - 4.390") Oversize 0,5 mm: 112,00-112,02 mm (4.409 - 4.410") - Page 11 General Fav 900 chassis number 23/3001and up Fav 900 Engine / Generalities Service Data Crankshaft PM-Picturemodule PMTAB_Picture 1. Dimensions: Standard: 76,981-77,000 mm (3.031 - 3.032“) Under size: 0,10 mm (.004"): 76,881-76,900 mm (3.027 - 3.028") 2. Con-rod bearing journal diameter: Standard : 69,981-70,000 mm (2.755 - 2.756") Under size: 0,10 mm (.004"): 69,881-69,900 mm (2.751 - 2.752")
- Page 12 General Fav 900 chassis number 23/3001and up Fav 900 Engine / Generalities Service Data Main bearing PM-Picturemodule PMTAB_Picture 1. Standard size: 2,468-2,480 mm (.097 - .098") Oversize 0,10 mm (.004"): 2,518-2,530 mm (.099 - .100") 2. Fitted bearing inner Ø for main bearing : Standard size : 77,040-77,086 mm (3.033 - 3.035") Undersize 0,10mm (.004"): 76,940-76,986 mm...
- Page 13 General Fav 900 chassis number 23/3001and up Fav 900 Engine / Generalities Service Data Text-module Connecting rod PM-Picturemodule PMTAB_Picture 1. 42,050-42,066 mm (1.655 - 1.656") 2. 32,78-32,88 mm (1.290 - 1.294") Con-rod journal width: 33,0-33,1mm (1.299 - 1.303") PM-Picturemodule PMTAB_Picture Fit con-rod bearing caps (without shells).
- Page 14 General Fav 900 chassis number 23/3001and up Fav 900 Engine / Generalities Service Data Piston PM-Picturemodule PMTAB_Picture 1. Compresion height: 63,90-64,00 mm (2.516 - 2.519") with undersizes 0,2 mm (.008"): 63,70-63,80 mm (2.508 - 2.511") with undersizes 0,4 mm (.016"): 63,50-63,60 mm (2.500 - 2.503") Piston projection above crankcase: 0,0093-0,391 mm (.004 - .015")
- Page 15 General Fav 900 chassis number 23/3001and up Fav 900 Engine / Generalities Service Data Text-module Cylinder head PM-Picturemodule PMTAB_Picture 1. 10,000-10,015 mm (.3937 - .3942") at intake and exhaust valves 2. 14,1-14,15 mm (.555 - .557") 3. 97,8-98,0 mm (3.850 - 3.860") Minimum: 96,8 mm (3.811") alpha = 60°...
- Page 16 General Fav 900 chassis number 23/3001and up Fav 900 Engine / Generalities Service Data Valves PM-Picturemodule PMTAB_Picture 1. Intake valve: 9,965-9,980 mm (.3923 - .3929") Exhaust valve: 9,950-9,965 mm (.3917 - .3923") Wear limit: max. 0,1 mm (.0039") 2. Valve recess: Intake valve : 0,25-0,71 mm (.010 - .028") Exhaust valve: 0,45-1,05 mm (.018 - .041") PM-Picturemodule...
- Page 17 General Fav 900 chassis number 23/3001and up Fav 900 Engine / Generalities Service Data Valve operation PM-Picturemodule PMTAB_Picture Rocker arm 1. 20,000-20,001 mm (.78740 - .78744") Diameter of rocker arm bearing: 19,957-19,970 mm (.7857 - 7862") Wear limit: 0,08 mm (.003") PM-Picturemodule PMTAB_Picture Valve tappets...
- Page 18 General Fav 900 chassis number 23/3001and up Fav 900 Engine / Generalities Service Data PM-Picturemodule PMTAB_Picture Valve timing 1. Engine direction of rotation 2. Intake valve opens 18° before TDC. 3. Exhaust valve closes 29° after TDC. 4. Exhaust valve opens 63° before TDC. 5.
- Page 19 General Fav 900 chassis number 23/3001and up Fav 900 Engine / Generalities Service Data Engine lubrication Valve opening pressures Bypass valve for full flow oil filter 2-3 bar (29 - 44 PSI) Oil pump pressure relief valve 5-6 bar (73 - 87 PSI) Pressure valve of oil nozzles Opening pressure 1,9-2,1 bar (27.5 - 30.5 PSI)
- Page 20 General Fav 900 chassis number 23/3001and up Fav 900 Engine / Generalities Service Data Cooling system PM-Picturemodule PMTAB_Picture Water pump (engine) 1. Gap between impeller and housing: 0,5-0,9 mm (.020 - .035") 2. Impeller diameter: 136 mm (5.354") 3. Bearing location in housing: 54,940-54,970 mm (2.163 - 2.164").
- Page 21 General Fav 900 chassis number 23/3001and up Fav 900 Engine / Generalities Service Data Turbocharger Manufacturer D 0836 LE 501/502/503/504 HX40-8274AW/H18WA8 PM-Picturemodule PMTAB_Picture Axial play 1. 0,038-0,093 mm (.0015 - .0037") PM-Picturemodule PMTAB_Picture Radial play 1. 0,329-0,501 mm (.0130 - .0197") Text-module Index Date...
- Page 22 General Fav 900 chassis number 23/3001and up Fav 900 Engine / Generalities Service Data Fuel system Injection nozzles Manufacturer Bosch Type : DSLA 154 P 625 N° of orifices Nozzle opening pressure : Nozzle holder new : 320 + 8 bar (4641 +116 PSI) Nozzle holder used : 300 + 8 bar (4351 +116 PSI) Nozzle injection pump with vane-cell feed pump...
- Page 23 General Fav 900 chassis number 23/3001and up Fav 900 Engine / Generalities Service Data PM-Picturemodule PMTAB_Picture Starter Manufacturer : Bosch Type : EV operationg method : pre-engaged drive Starter pinion gear Number of teeth: 11 Module: 3 Nominal voltage: 24 Volt Nominal output : 4 kW (5.36 HP) PM-Picturemodule PMTAB_Picture...
-
Page 24: Tightening Torque Values
General Fav 900 from chassis number 23/3001and up Fav 900 Engine / Generalities Tightening Torque values Text-module Note: All threaded unions not specified in this table must be tightened according to our works standard M 3059. Bolts and screws must be lightly oiled before tightening ! Plugs DIN 908 M 14*1,5;... - Page 25 General Fav 900 from chassis number 23/3001and up Fav 900 Engine / Generalities Tightening Torque values Cooling system Screw plug in coolant pipe (M14*1,5) 20 Nm (14,75 lbf-ft) Hose clips : Clamping range 12 to 31 mm, 9 mm wide 3,6 Nm (2,66 lbf-ft) over 32 mm, 13 mm wide 5 Nm (3,69 lbf-ft)
- Page 26 General Fav 900 from chassis number 23/3001and up Fav 900 Engine / Generalities Tightening Torque values Assembly tightening torques to works standard M 3059 External or internal hexagon nuts and bolts, heads without collar or flange. Tread size * Pitch Property class / Tightening torque in Nm (lbf-ft) at 8,8/8 at 10,9/10...
- Page 27 General Fav 900 from chassis number 23/3001and up Fav 900 Engine / Generalities Tightening Torque values Cylinder head bolts Tightening cylinder head bolts following repair work (new engine) Only for Torx-head screws. No tightening for Torx-head screws. Tightening cylinder head bolts following repair work (cold engine) Only for Torx-head screws.
-
Page 28: Turbocharger, Troubleshooting
Faults Fav 900 chassis number 23/3001 and up Fav 900 Engine / General system Turbocharger, troubleshooting Text-module Before replacing the turbocharger, check the following: Excessive engine oil consumption, lack of power and abnormal intake or exhaust noises are a frequent cause of unnecessary turbocharger replacement. - Page 29 Faults Fav 900 chassis number 23/3001 and up Fav 900 Engine / General system Turbocharger, troubleshooting Oil in intake pipes and intercooler Oilspray within the intake system is necessary. It lubricates inlet valve seats. If too much oil is encountered to such an extent that puddles can be found within the air box of the intercooler, there is a serious risk of engine "runaway", an uncontrolled increase of engine speed .
-
Page 30: View Of Engine D 0836 Le 501
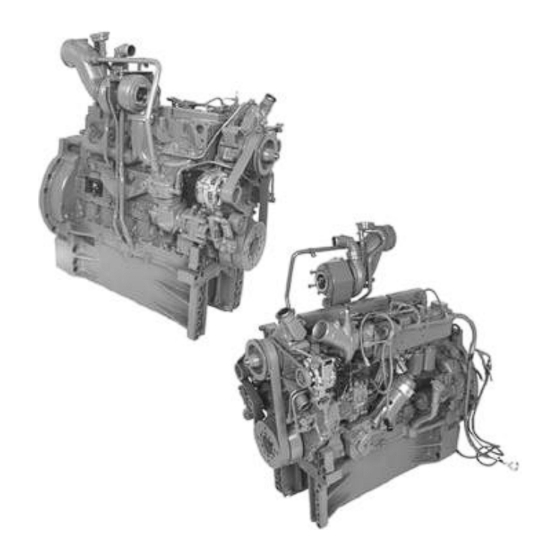
Component Location Fav 900 chassis number 23/3001and up Fav 900 Engine / Generalities View of engine D 0836 LE 501 PM-Picturemodule PMTAB_Picture Text-module Fuel injection pump (VP44) Fuel filters Lubricant cooler Turbocharger Lubricant filter Lubrication oil turbocharger (pressure) Oil filling socket, Oil level indicator Lubrication oil return from turbocharger B10 - Sensor, Engine 1 Air compressor... -
Page 31: Checking Compression
Testing Fav 900 chassis number 23/3001and up Fav 900 Engine / Cylinder head Checking compression PM-Picturemodule PMTAB_Picture Warm up engine until coolant temperature reaches 60 to 80°C (140 - 176°F). Check valves clearance and adjust. Remove all injectors and injector holders. See values of compression in chapter "Service Data". -
Page 32: Checking Valve Timing
Setting and Calibration Fav 900 chassis number 23/3001and up Fav 900 Engine / Cylinder head Checking valve timing Text-module Checking valve timing Shifting of the camshaft drive gear can result in severe engine damage. It is therefore necessary to ensure a correct fit by checking the valve timing after repair. The above takes into consideration that tappet push rods are not distorted! Proceed as follows: Bullet-List... -
Page 33: Setting Valve Clearance
Setting and Calibration Fav 900 chassis number 23/3001 and up Fav 900 Engine / Cylinder head Setting valve clearance PM-Picturemodule PMTAB_Picture Engine must be cold for adjusting valve clearance. (max. coolant temperature 50° C (122°F)) Setting valve clearance. PM-Picturemodule PMTAB_Picture Rotate crankshaft using turning device until the piston of the cylinder to be set is at top dead centre ( TDC ) and the rocker arms are not loaded. - Page 34 Setting and Calibration Fav 900 chassis number 23/3001 and up Fav 900 Engine / Cylinder head Setting valve clearance PM-Picturemodule PMTAB_Picture Insert gauge between valve shaft and rocker . With valve setting tool loosen lock nut and turn setting screw until gauge can be moved with a slight resistance.
-
Page 35: Engine/Cylinder Head Reassembling/Refitting Intake Pipe
Repair Fav 900 chassis number 23/3001 and up Fav 900 Engine / Cylinder head Reassembling and refitting intake pipe PM-Picturemodule PMTAB_Picture Removing intake pipe Note: To avoid engine damage, always ensure clean conditions when working on intake system. Disconnect pressure sensor for intercooler Disconnect wiring to flame booster plug, to solenoid switch ant to the temperature sensors. -
Page 36: Removing And Refitting Turbocharger
Repair Fav 900 chassis number 23/3001 and up Fav 900 Engine / Cylinder head Removing and refitting turbocharger PM-Picturemodule PMTAB_Picture Removing turbocharger Remove crankcase venting (pressure control valve). Remove air intake pipe from compressor to intake manifold. Remove air intake manifold. PM-Picturemodule PMTAB_Picture Remove oil return line and feed line. - Page 37 Repair Fav 900 chassis number 23/3001 and up Fav 900 Engine / Cylinder head Removing and refitting turbocharger PM-Picturemodule PMTAB_Picture Refitting the turbocharger Check intake pipe and exhaust manifold for eventual foreign objects. Examine oil feed and return lines for eventual damage, jamming and leaks.
-
Page 38: Removing And Refitting Manifold
Repair Fav 900 Chassis number 23/3001 and up Fav 900 Engine / Cylinder head Removing and refitting exhaust manifold PM-Picturemodule PMTAB_Picture Removing the exhaust manifold Remove turbocharger. Note: Protect exhaust port on turbocharger from contamination. Unscrew and remove nuts from exhaust manifold. PM-Picturemodule PMTAB_Picture Guidance pins (visible on photograph) may be... -
Page 39: Removing And Refitting Cylinder Head
Repair Fav 900 chassis number 23/3001 and up Fav 900 Engine / Cylinder head Removing and refitting cylinder head PM-Picturemodule PMTAB_Picture Removing the rocker Remove cylinder head cover. PM-Picturemodule PMTAB_Picture Loosen clamping bolts and remove rocker arm. Dismantling, overhauling and reassembling rocker assembly. - Page 40 Repair Fav 900 chassis number 23/3001 and up Fav 900 Engine / Cylinder head Removing and refitting cylinder head PM-Picturemodule PMTAB_Picture Before refitting the cylinder head : Clean all the parts which have been removed. Clean sealing faces of cylinder head and crankcase, and blow out tapped holes in crankcase.
- Page 41 Repair Fav 900 chassis number 23/3001 and up Fav 900 Engine / Cylinder head Removing and refitting cylinder head PM-Picturemodule PMTAB_Picture Refitting the cylinder head Note: Cylinder head gasket must always be replaced. Install a dry new gasket carefully positioned according to the hole pattern .
- Page 42 Repair Fav 900 chassis number 23/3001 and up Fav 900 Engine / Cylinder head Removing and refitting cylinder head PM-Picturemodule PMTAB_Picture Tighten bolts slightly and align rocker arms with valves. Subsequently tighten bolts to specified torque. PM-Picturemodule PMTAB_Picture Set valve clearance, chap 2010 Reg F Refit coolant pipe, Refit exhaust manifold, Refit intake pipe,...
-
Page 43: Dismantling And Reassembling The Rocker Arm Assembly
Repair Fav 900 chassis number 23/3001 and up Fav 900 Engine / Cylinder head Dismantling and reassembling the rocker arm assembly PM-Picturemodule PMTAB_Picture Dismantling the rocker arm assembly Remove rocker arm assembly Clamp rocker bearing bracket in a vise (use non-metallic jaws). - Page 44 Repair Fav 900 chassis number 23/3001 and up Fav 900 Engine / Cylinder head Dismantling and reassembling the rocker arm assembly PM-Picturemodule PMTAB_Picture Reassembling the rocker arm assembly Coat rocker bushes with "Optimol White T"paste. Refit circlip on the rocker shaft. Coat rockershaft and bearing bracket bore with "Optimol White T"...
-
Page 45: Removing And Refitting Valves
Repair Fav 900 chassis number 23/3001 and up Fav 900 Engine / Cylinder head Removing and refitting valves PM-Picturemodule PMTAB_Picture Removing valves Remove rocker arm assembly and cylinder head (Chapter 2010 Reg G). Note: Valve springs and spring plates can be replaced without removing the cylinder head. - Page 46 Repair Fav 900 chassis number 23/3001 and up Fav 900 Engine / Cylinder head Removing and refitting valves PM-Picturemodule PMTAB_Picture Turn cylinder head over. Place valve fitting lever. Fit washer, valve spring and upper spring plate. PM-Picturemodule PMTAB_Picture Compress spring with fitting lever and insert collets.
- Page 47 Repair Fav 900 chassis number 23/3001 and up Fav 900 Engine / Cylinder head Removing and refitting valves PM-Picturemodule PMTAB_Picture 1= Copper - Sealing ring 2 = Injection nozzle projection (2,68 - 3,47mm). Available sealing ring thicknesses : 0,5 / 1,0 / 1,5 / 2,0 / 2,5 / 3,0 mm (.020 / .039 / .059 / .079 / .098 / .118") Date...
-
Page 48: Removing And Refitting Valve Guides
Repair Fav 900 chassis number 23/3001 and up Fav 900 Engine / Cylinder head Removing and refitting valve guides. PM-Picturemodule PMTAB_Picture Removing the valve guide Removing and refitting the cylinder head. Removing and refitting the valves. Position cylinder head on a press with the combustion chamber side facing upwards. -
Page 49: Replacing Valve Seat Insert
Repair Fav 900 chassis number 23/3001and up Fav 900 Engine / Cylinder head Replacing valve seat insert Text-module Remove valve seat insert Note: When replacing valve seat inserts, it is advisable to replace valve guides, since this is the only way to guarantee precise reseating of the new inserts. - Page 50 Repair Fav 900 chassis number 23/3001and up Fav 900 Engine / Cylinder head Replacing valve seat insert PM-Picturemodule PMTAB_Picture Replacing valve seat insert Immerse cylinder head in a hot water bath and heat up to approx. 80°C (176°F). Supercool new insert to approx -200°C (-328°F) and insert into the cylinder head.
-
Page 51: Re-Machining The Valve Seat
Repair Fav 900 chassis number 23/3001and up Fav 900 Engine / Cylinder head Re-machining the valve seats PM-Picturemodule PMTAB_Picture Re-machining the valve seat (with Mira-Precision tvalve seat re-machining tool) 1. Crank 2. Rocker switch 3. Hand grip 4. Lubricating nipple 5. - Page 52 Repair Fav 900 chassis number 23/3001and up Fav 900 Engine / Cylinder head Re-machining the valve seats PM-Picturemodule PMTAB_Picture Release clamping lever, fit solenoid flange on clamping plate, adjust the height to ensure the cutter is clear of valve seat. Set rocker switch at position 1.
- Page 53 Repair Fav 900 chassis number 23/3001and up Fav 900 Engine / Cylinder head Re-machining the valve seats PM-Picturemodule PMTAB_Picture Observe specified seat angle. PM-Picturemodule PMTAB_Picture Note: When re-machining the valve seat inserts, only the minimum of material should be removed. Reference value will be value of valve recess.
-
Page 54: Reseating Valves
Repair Fav 900 chassis number 23/3001 and up Fav 900 Engine / Cylinder head Reseating valves PM-Picturemodule PMTAB_Picture Reseating valves Apply grinding paste to the valve seating face. Lubricate valve guide and insert valve. With a valve grinding tool, regrind valve seat with spinning movements. -
Page 55: Replacing Engine Coolant
Repair Fav 900 chassis number 23/3001 and up Fav 900 Engine /Cooling system Replacing engine coolant Text-module Draining the coolant Caution: Hot coolant may cause severe burns during draining! Drain coolant only on a cooled down engine as described: Note: Collect coolant in a pan and dispose of it properly! PM-Picturemodule PMTAB_Picture... - Page 56 Repair Fav 900 chassis number 23/3001 and up Fav 900 Engine /Cooling system Replacing engine coolant PM-Picturemodule PMTAB_Picture Filling Coolant (only on a cooled down engine) Fill in an adequate mixture of tap water and antifreeze based on Ethylene - Glykol and corrosion preventer.
-
Page 57: Removing And Refitting The Thermostatic Valve
Repair Fav 900 chassis number 23/3001and up Fav 900 Engine / Cooling Removing and refitting the thermostatic valve PM-Picturemodule PMTAB_Picture Removing the thermostatic valve Drain coolant, chapter G 2050 Reg G Disconnect coolant hose from thermostatic valve. Unscrew and remove the two screws (SW) and remove thermostat housing. -
Page 58: Removing And Refitting Water Pump
Repair Fav 900 chassis number 23/3001 and up Fav 900 Engine /Cooling system Removing and refitting water pump PM-Picturemodule PMTAB_Picture Removing the pump lift section Drain coolant. Unscrew fan Remove feed and drain lines. Remove V-belt. Remove cooling lines to air compressor Remove generator belt tensioner screw (1) top left Remove generator pod (2) on the top left... - Page 59 Repair Fav 900 chassis number 23/3001 and up Fav 900 Engine /Cooling system Removing and refitting water pump PM-Picturemodule PMTAB_Picture Refitting the water pump Replace seals on connecting pipe. Install water pump with new gasket. Tighten fscrews to specified torque. Put all removed parts back into place Fill up coolant.
- Page 60 Repair Fav 900 chassis number 23/3001 and up Fav 900 Engine /Cooling system Removing and refitting water pump PM-Picturemodule PMTAB_Picture Using a pressinf bush, press bearing into pump housing until contact is made. Insert circlip. Press pulley into shaft flush with the plate PM-Picturemodule PMTAB_Picture Invert water pump and let it rest on hub and...
- Page 61 Remove plastic cap. PM-Picturemodule PMTAB_Picture Text-module Note: Investigations have shown that in most cases pump damage is caused by the use of unsuitable coolants. For trouble free operation use only radiator anti-corrosives by Fendt . Index Date Version Page Capitel Docu-No.
-
Page 62: Removing And Refitting Coolant Pipe
Repair Fav 900 chassis number 23/3001 and up Fav 900 Engine / Cooling system Removing and refitting coolant pipe PM-Picturemodule PMTAB_Picture Removing the coolant pipe Drain coolant while engine is cold. Use a clean pan with sufficient capacity Remove injection lines Remove intake pipe Disconnect temperature sensor PM-Picturemodule... -
Page 63: Layout Of Fuel System
Documents and Diagrams Fav 900 chassis number 23/3001and up Fav 900 Engine / Fuel system Layout of fuel system PM-Picturemodule PMTAB_Picture Text-module 1. Pre-filter with manual fuel lift pump 2. Fuel lift pump 3. Fuel filter 4. Measuring point for fuel pressure. 5. -
Page 64: Fuel Pre Filter / Cartridge
Repair Fav 900 chassis number 23/3001 and up Fav 900 Engine / Fuel supply system Fuel pre filter / Cartrige PM-Picturemodule PMTAB_Picture Cleaning pre - filter Disassemble pre - filter: Unscrew filter body PM-Picturemodule PMTAB_Picture Clean Filter body (1) and Sieve (2) with clean diesel fuel and dry it with compressed air Re - assemble with a new gasket Tighten filter body... - Page 65 Repair Fav 900 chassis number 23/3001 and up Fav 900 Engine / Fuel supply system Fuel pre filter / Cartrige PM-Picturemodule PMTAB_Picture Removing and refitting main fuel filter Disconnect fuel lines (1) . Remove scews (2) and take off fuel filter. Reassemble in reversed order and connect fuel lines with new sealing rings.
-
Page 66: Purging Air From Fuel Supply System
Repair Fav 900 Chassis Number 23/3001 Fav 900 Engine / Fuel Supply System Purging Air from Fuel Supply System PM-Picturemodule PMTAB_Picture For Operating EDC Injection System, careful purging of the fuel Supply system is compulsory! Unscrew purging screw of the fuel filter by one to two turns. -
Page 67: Removing And Refitting Heater Plug
Repair Fav 900 chassis number 23/3001 and up Fav 900 Engine / Cold start booster Removing and refitting heater plug PM-Picturemodule PMTAB_Picture Remove heater plug Disconnect the heater plug. Unscrew threaded union of fuel line. Release lock nut of heater plug and remove plug. PM-Picturemodule PMTAB_Picture Refitting heater plug... -
Page 68: Power - Belts
Repair Fav 900 chassis number 23/3001and up Fav 900 Engine / Short block Power - belts PM-Picturemodule PMTAB_Picture Generator right Checking condition Power belt is maintenance free Check belts for cracks, oiling-up, and signs of overheating and wear. Replace damaged belt. PM-Picturemodule PMTAB_Picture Checking tension... - Page 69 Repair Fav 900 chassis number 23/3001and up Fav 900 Engine / Short block Power - belts PM-Picturemodule PMTAB_Picture Replacing the powerbelt Place adequate tool onto square shaft. Release tension from tensioner and remove powerbelt from the pulley . Refitting : Place powerbelt onto pulleys of crankshaft , generator and coolant pump.
- Page 70 Repair Fav 900 chassis number 23/3001and up Fav 900 Engine / Short block Power - belts PM-Picturemodule PMTAB_Picture Position tension gauge (2) in the center between the generator pulleys and the crankshaft. Slowly push pressure pad (3) down until the spring snaps out audibly and the indicator arm moves upwards.
-
Page 71: Removing And Refitting The Starter Engine
Repair Fav 900 chassis number 23/3001and up Fav 900 Engine / Short block Removing and refitting the starter engine PM-Picturemodule PMTAB_Picture Removing the starter Disconnect earth terminal from battery. Remove cables terminal 30 (thick cable) and terminal 50 from the starter. PM-Picturemodule PMTAB_Picture Unscrew the screws and a nut from the starter... -
Page 72: Removing And Refitting Generator
Repair Fav 900 chassis number 23/3001and up Fav 900 Engine / Short block Removing and refitting generator PM-Picturemodule PMTAB_Picture Generator right Removing generator Disconnect earth cable from the battery. Remove connections B+, D+ and W from the generator. PM-Picturemodule PMTAB_Picture Remove V-belts. - Page 73 Repair Fav 900 chassis number 23/3001and up Fav 900 Engine / Short block Removing and refitting generator PM-Picturemodule PMTAB_Picture Loosen bolts(1), (3) and (4) from the generator and unscrew tensioning nut (2). Push generator toward the engine and take off the power belt.
-
Page 74: Removing And Refitting Air Compressor
Repair Fav 900 Chassis number 23/3001 and up Fav 900 Engine / Short block Removing and refitting air compressor PM-Picturemodule PMTAB_Picture Removing the compressor Remove hydraulic pump or rear end cover, Unscrew fan frame support bracket. Remove oil feed line, air intake line and compressed-air line. - Page 75 Repair Fav 900 Chassis number 23/3001 and up Fav 900 Engine / Short block Removing and refitting air compressor PM-Picturemodule PMTAB_Picture Tighten compressor drive gear (1) with 4 screws (4) on mounting plate (3) to 30 Nm (22.13 lbf-ft). Loosen nut (2) . Press out drive gear, fit mounting plate (3) with 4 screws (4) at the bottom side of the drive gear (2).
- Page 76 Repair Fav 900 Chassis number 23/3001 and up Fav 900 Engine / Short block Removing and refitting air compressor PM-Picturemodule PMTAB_Picture Place compressor drive gear (1) onto compressor crankshaft using mounting plate (2) (Special Tool). Note: Drive gear must be mounted free of grease or oil.
- Page 77 Repair Fav 900 Chassis number 23/3001 and up Fav 900 Engine / Short block Removing and refitting air compressor PM-Picturemodule PMTAB_Picture Due to the slanting teeth cut of the drive gear, the crankshaft will turn by approx 15° by placing the compressor into the timing case.
- Page 78 Repair Fav 900 Chassis number 23/3001 and up Fav 900 Engine / Short block Removing and refitting air compressor PM-Picturemodule PMTAB_Picture Mount dial gauge onto the rear part of the compressor. Place shaft extension with dial gauge lever onto drive fork and tighten it in such a manner that the scanning finger of the dial gauge rests without clearance on the gauge lever.
-
Page 79: Replacing Crankshaft Front Seal
Repair Fav 900 chassis number 23/3001 and up Fav 900 Engine / Short block Replacing crankshaft front seal PM-Picturemodule PMTAB_Picture Removing vibration damper Remove fan frame. Remove power belt. Unscrew vibration damper, remove vibration damper. Check vibration damper and washer for damage; replace if necessary. -
Page 80: Removing And Refitting Flywheel
Repair Fav 900 chassis number 23/3001 and up Fav 900 Engine / Short block Removing and refitting flywheel PM-Picturemodule PMTAB_Picture Remove flywheel Loosen screws, holding starter ring gear in place with a large screwdriver, if necessary. Unscrew and remove two screws on opposite side, replace with two guide mandrels (special tool). - Page 81 Repair Fav 900 chassis number 23/3001 and up Fav 900 Engine / Short block Removing and refitting flywheel PM-Picturemodule PMTAB_Picture Replacing the starter ring gear Remove fly wheel. Drill starter ring gear and force open with a chisel. Warning: Do not damage the flywheel. PM-Picturemodule PMTAB_Picture Note:...
-
Page 82: Removing And Refitting Crankshaft Seal (Flywheel)
Repair Fav 900 chassis number 23/3001 and up Fav 900 Engine / Short block Removing and refitting crankshshaft seal (flywheel). PM-Picturemodule PMTAB_Picture Rermoving shaft seal Remove flywheel. Lever out sealing ring with special tool. PM-Picturemodule PMTAB_Picture Refitting the shaft seal Apply a thin coat of multi-purpose grease to lips of new sealing ring. -
Page 83: Removing And Refitting Flywheel
Repair Fav 900 chassis number 23/3001 and up Fav 900 Engine / Short block Removing and refitting flywheel housing. PM-Picturemodule PMTAB_Picture Removing flywheel housing Unscrew and remove the two screws (M16). PM-Picturemodule PMTAB_Picture Then remove the two screws (M8), screw into the flywheel housing. - Page 84 Repair Fav 900 chassis number 23/3001 and up Fav 900 Engine / Short block Removing and refitting flywheel housing. PM-Picturemodule PMTAB_Picture Remove starter. Remove flywheel. Unscrew and remove the fixing bolts. Note: For easy assembly use two fairly long guide pins.
-
Page 85: Removing And Refitting The Timing Case
Repair Fav 900 chassis number 23/3001and up Fav 900 Engine / Short block Removing and refitting the timing case. PM-Picturemodule PMTAB_Picture Removing case cover Remove fan frame, vibration damper and air compressor. Remove screws of timing case cover. Remove cover. PM-Picturemodule PMTAB_Picture 1. - Page 86 Repair Fav 900 chassis number 23/3001and up Fav 900 Engine / Short block Removing and refitting the timing case. PM-Picturemodule PMTAB_Picture Replacing crankshaft axial stop If necessary, replace cranshaft axial stop (thrust washer). PM-Picturemodule PMTAB_Picture Removing timing case Unscrew and remove screws (SW13) between oil pan and timing case.
- Page 87 Repair Fav 900 chassis number 23/3001and up Fav 900 Engine / Short block Removing and refitting the timing case. PM-Picturemodule PMTAB_Picture Refitting crankshaft timing gear Slide crankshaft timing gear onto the centering pin. After fitting the intermediate gear tighten screws at the specified torque.
- Page 88 Repair Fav 900 chassis number 23/3001and up Fav 900 Engine / Short block Removing and refitting the timing case. PM-Picturemodule PMTAB_Picture Refit timing case cover with new gasket. Insert screws and tighten. Refit vibration damper, Centaflex-coupling, front axle support, trunnion, alternator, Visco-fan and Power-belt.
-
Page 89: Removing And Refitting Camshaft
Repair Fav 900 chassis number 23/3001and up Fav 900 Engine / Short block Removing and refitting camshaft PM-Picturemodule PMTAB_Picture Removing camshaft Remove oil pan Remove timing case cover, idler gear and camshaft gear. Remove flywheel housing Remove rocker arm assembly and pushrods. Unscrew axial stop screws and remove axial stop. - Page 90 Repair Fav 900 chassis number 23/3001and up Fav 900 Engine / Short block Removing and refitting camshaft PM-Picturemodule PMTAB_Picture Using a mandrel and in new bushes towards fan until flush with the crankcase. Note: Bearing bushes must be machined to the required size.
-
Page 91: Removing And Refitting Intermediate Flange
Repair Fav 900 chassis number 23/3001 and up Fav 900 Removing and refitting intermediate flange PM-Picturemodule PMTAB_Picture Removing intermediate flange Unscrew and renove dispstick guide tube and undo oil fliter cap. Place a jack, unscrew and remove screws (1) PM-Picturemodule PMTAB_Picture Insert 2 (M8x60) screws (arrowed) and carefully separate oil pan and intermediate flange. -
Page 92: Removing And Refitting The Con-Rod Bearing Shells
Repair Fav 900 chassis number 23/3001 and up Fav 900 Engine / Short block Removing and refitting con-rod bearing shells PM-Picturemodule PMTAB_Picture Remove piston and con-rod assembly. Note: Con-rod bearing shells of open bearings can be used again as long as they produce perfect running. -
Page 93: Removing And Refitting The Crankshaft
Repair Fav 900 chassis number 23/3001and up Fav 900 Engine / Short block Removing and refitting the crankshaft PM-Picturemodule PMTAB_Picture Removing and refitting the crankshaft Remove oil pan, oil line and idler gear. Remove timing case and flywheel housing. Remove cylinder head. Remove piston and con-rod. - Page 94 Repair Fav 900 chassis number 23/3001and up Fav 900 Engine / Short block Removing and refitting the crankshaft PM-Picturemodule PMTAB_Picture Checking bearing shell spread Place bearing shells together on a level surface. Measure and note dimension "A",repeat for "B". Spread= A - B. PM-Picturemodule PMTAB_Picture Refitting the cranshaft...
- Page 95 Repair Fav 900 chassis number 23/3001and up Fav 900 Engine / Short block Removing and refitting the crankshaft PM-Picturemodule PMTAB_Picture Match bearing caps to relevant bearing shells. Lubricate running surfaces of bearing shells and fit caps. Insert bearing cap screws and gradually tighten from the center outwards at specified torque.
-
Page 96: Removing And Refitting Con-Rod
Repair Fav 900 chassis number 23/3001 and up Fav 900 Engine / Short block Removing and refitting con-rod PM-Picturemodule PMTAB_Picture Removing piston from con-rod Remove oil pan, suction line and intermediate flange. Remove cylinder head. Remove con-rod bearing cap bolts. PM-Picturemodule PMTAB_Picture Remove con-rod bearing caps and bearing shells,... - Page 97 Repair Fav 900 chassis number 23/3001 and up Fav 900 Engine / Short block Removing and refitting con-rod PM-Picturemodule PMTAB_Picture Determining piston play Measure cylinder inside diameter with an internal micrometer at three levels (top to bottom) and radially at 45° to each other. make a note of the values.
- Page 98 Repair Fav 900 chassis number 23/3001 and up Fav 900 Engine / Short block Removing and refitting con-rod PM-Picturemodule PMTAB_Picture Guide con-rod and insert piston until big end makes contact with the bearing journal. PM-Picturemodule PMTAB_Picture Fit con-rod bearing shells into bearing caps. Fit bearing caps, making sure the numbers are matching.
- Page 99 Repair Fav 900 chassis number 23/3001 and up Fav 900 Engine / Short block Removing and refitting con-rod PM-Picturemodule PMTAB_Picture Press out piston pin, securely holding the piston. Remove piston and depose it safely. Note: If the con-rod needs replacing, use ready-to-fit new bush or reconditioned con-rod.
- Page 100 Repair Fav 900 chassis number 23/3001 and up Fav 900 Engine / Short block Removing and refitting con-rod PM-Picturemodule PMTAB_Picture Measuring the piston projection Remove the cylinder heads. Turn relevant piston to TDC. Position gauge holder with dial on crankcase sealing face.
-
Page 101: Removing And Refitting The Piston Rings
Repair Fav 900 chassis number 23/3001 and up Fav 900 Engine / Short block Removing and refitting the piston rings PM-Picturemodule PMTAB_Picture Piston ring arrangement 1. Compression ring ( keystone ring) 2. Compression ring ( chamfered ring) 3. Oil scraper ring (D-ring) PM-Picturemodule PMTAB_Picture Removing piston rings... - Page 102 Repair Fav 900 chassis number 23/3001 and up Fav 900 Engine / Short block Removing and refitting the piston rings PM-Picturemodule PMTAB_Picture Refitting piston rings Using piston ring pliers, insert piston rings in relevant groove with "Top" facing upwards. PM-Picturemodule PMTAB_Picture Using a feeler gauge, determine piston ring end play in the relevant piston ring grooves at several...
-
Page 103: Replacing Cylinder Liners
Repair Fav 900 Chassis number 23/3001 and up Fav 900 Engine / Short block Replacing cylinder liners PM-Picturemodule PMTAB_Picture Checking cylinder liners Measure cylinder inside diameter with an internal micrometer at three differeent levels (top to bottom) and radially at 45° to each other: Make a note of these values. -
Page 104: Layout Of Engine Lubrication
Documents and Diagrams Fav 900 chassis number 23/3001and up Fav 900 Engine / Lubrication Layout of engine lubrication PM-Picturemodule PMTAB_Picture Text-module 1. Lubrication Gear pump 2. Pressure relief valve 3. Oil cooler 4. Main stream oil filter 5. Oil filter Bypass valve 6. -
Page 105: Replacing Oil Filter
Repair Fav 900 chassis number 23/3001and up Fav 900 Engine / Lubrication Replacing oil filter PM-Picturemodule PMTAB_Picture Replacing oil filter Caution: The cartridge is filled with hot oil. Danger of severe burns. Loosen filter lid 2 turns, wait about 5 minutes until all the remaining oil has drained from the oil filter housing in the oil pan. -
Page 106: Removing And Refitting Oil Cooler
Repair Fav 900 chassis number 23/3001and up Fav 900 Engine / Lubrication Removing and refitting oil cooler PM-Picturemodule PMTAB_Picture Removing oil filter Note: Used oils and filter cartridges are hazardous waste! Dispose properly! Remove oil filter. Unsrew drain plug (arrowed) from oil filter head and drain fluid into a container of adequate size. - Page 107 Repair Fav 900 chassis number 23/3001and up Fav 900 Engine / Lubrication Removing and refitting oil cooler PM-Picturemodule PMTAB_Picture Refit oil cooler Fit oil cooler to the oil filter head with new gaskets. Position oil filter head on engine block, using new gasket.
-
Page 108: Removing And Refitting Oil Pan
Repair Fav 900 chassis number 23/3001 and up Fav 900 Engine / Lubrication Removing and refitting oil pan PM-Picturemodule PMTAB_Picture Removing oil pan Note: Used oils are hazardous waste. Dispose properly ! Respect safety regulations! Pull out dipstick and remover filling cover.. Remove drain plug (Arrows) and drain oil. - Page 109 Repair Fav 900 chassis number 23/3001 and up Fav 900 Engine / Lubrication Removing and refitting oil pan PM-Picturemodule PMTAB_Picture Remove screws from flywheel housing ( 3 on each side of engine). Position jack with cradle inderneath the oil pan and remove all externally accessible screws from the oil pan.
- Page 110 Repair Fav 900 chassis number 23/3001 and up Fav 900 Engine / Lubrication Removing and refitting oil pan PM-Picturemodule PMTAB_Picture Refitting the oil pan Coat oil pan sealing surface with sealing compound "Terostat 63" avoiding bore holes. Note: The lenght of time between applying "terostat 6"...
-
Page 111: Removing And Refitting Oil Pump
Repair Fav 900 chassis number 23/3001and up Fav 900 Engine / Lubrication Removing and refitting oil pump PM-Picturemodule PMTAB_Picture Removing the oil pump gear wheel Remove the fan frame, Power belt, vibration damper, air compressor, generator and the timing case cover. Unscrew nut of pump gear wheel, holding the crankshaft with a rotating device. - Page 112 Repair Fav 900 chassis number 23/3001and up Fav 900 Engine / Lubrication Removing and refitting oil pump PM-Picturemodule PMTAB_Picture Reassembling the oil pump Insert gear wheel in bush (2). Fit oil shaft. Slide on spacer sleeve (1) and press in shaft flush with the edge of the sleeve.
- Page 113 Repair Fav 900 chassis number 23/3001and up Fav 900 Engine / Lubrication Removing and refitting oil pump PM-Picturemodule PMTAB_Picture Refitting the oil pump gear. With the inner core free of grease, slide oil pump gear onto the ungreased drive shaft cone.Fit washer, screw on nut and tighten to specified torque.
-
Page 114: Removing And Refitting Splash Nozzle
Repair Fav 900 chassis number 23/3001and up Fav 900 Engine / Lubrication Removing and refitting splash nozzle PM-Picturemodule PMTAB_Picture Removing oil splash nozzle Remove oil pan and intermediate flange. Note: the nozzle can be removed and refittited without removing the crankshaft. In the illustration on hthis page the crankshaft has been removed to allow a clear picture. -
Page 115: Checking Start Of Delivery Vp44
Testing Fav 900 Chassis Number 23/3001 and up Fav 900 Engine / Injection Pump Checking Start of Delivery VP 44 PM-Picturemodule PMTAB_Picture Remove cover (Arrows). PM-Picturemodule PMTAB_Picture Set actuation tool (X 899.980.220.000). PM-Picturemodule PMTAB_Picture Set 1st Cylinder in Top Dead Point (TDP) position (arrow). - Page 116 Testing Fav 900 Chassis Number 23/3001 and up Fav 900 Engine / Injection Pump Checking Start of Delivery VP 44 PM-Picturemodule Important: PMTAB_Picture 1. Cylinder (fan side) is in TDP Position, when the flat part of the control shaft can be recognized through the TDP measuring hole.
- Page 117 Testing Fav 900 Chassis Number 23/3001 and up Fav 900 Engine / Injection Pump Checking Start of Delivery VP 44 PM-Picturemodule PMTAB_Picture Turn crankshaft back toward TDP until displacement (X . XX) which is indicated on the injection pump will be reached . E.g.: Indicated Value on Injection Pump: 0.79 Consequently: Adjust TDP to reach 0,79 mm on dial gauge...
- Page 118 Testing Fav 900 Chassis Number 23/3001 and up Fav 900 Engine / Injection Pump Checking Start of Delivery VP 44 PM-Picturemodule Important: PMTAB_Picture Do not loosen first visible screw (M8) (TDP Screw). PM-Picturemodule PMTAB_Picture Turn crankshaft using the actuation tool and loosen the visible screws 2,3 and 4 .
- Page 119 Testing Fav 900 Chassis Number 23/3001 and up Fav 900 Engine / Injection Pump Checking Start of Delivery VP 44 PM-Picturemodule PMTAB_Picture Turn crank shaft back by at least 20° before TDP and then set dial gauge with adaptor (X 899.980.245.000) into the TDP measuring hole.
- Page 120 Testing Fav 900 Chassis Number 23/3001 and up Fav 900 Engine / Injection Pump Checking Start of Delivery VP 44 PM-Picturemodule Important: PMTAB_Picture Bock injection pump. (Note sequence!) - Loosen locking screw (Pos. A). - Remove spacer washer (Pos. B). - Tighten locking screw (Pos.
- Page 121 Testing Fav 900 Chassis Number 23/3001 and up Fav 900 Engine / Injection Pump Checking Start of Delivery VP 44 PM-Picturemodule PMTAB_Picture - Loosen locking screw (Pos..2) - Put spacing washer (Pos. 1) into place - Tighten locking screw (Pos.2) . Check start of delivery as decribed.
-
Page 122: Fuel Injection Pump Vp 44 - Mounting - Dismounting
Repair Fav 900 Chassis number 23/3001 and up Fav 900 Engine / Injection Pump Fuel Injection Pump VP 44 - Mounting - Dismounting PM-Picturemodule PMTAB_Picture Remove cover (arrows - left engine side). PM-Picturemodule PMTAB_Picture Put actuation tool (X 899.980.220.000) into place PM-Picturemodule PMTAB_Picture Set first cylinder into Top Dead Point position... - Page 123 Repair Fav 900 Chassis number 23/3001 and up Fav 900 Engine / Injection Pump Fuel Injection Pump VP 44 - Mounting - Dismounting PM-Picturemodule Important: PMTAB_Picture 1. Cylinder will be in TDP Position, if the flat section of the control shaft appears in the TDP hole.
- Page 124 Repair Fav 900 Chassis number 23/3001 and up Fav 900 Engine / Injection Pump Fuel Injection Pump VP 44 - Mounting - Dismounting PM-Picturemodule PMTAB_Picture Put first cylinder into TDP position (Arrow) using the actuation tool. PM-Picturemodule Important: PMTAB_Picture 1. Cylinder will be in TDP Position, if the flat section of the control shaft appears in the TDP hole If the flat section does not appear on the...
- Page 125 Repair Fav 900 Chassis number 23/3001 and up Fav 900 Engine / Injection Pump Fuel Injection Pump VP 44 - Mounting - Dismounting PM-Picturemodule PMTAB_Picture 3 - digit Number. Marking (arrows) is possible on following positions. PM-Picturemodule PMTAB_Picture Move crank shaft again into TDP Position until the marked displacement (X .
- Page 126 Repair Fav 900 Chassis number 23/3001 and up Fav 900 Engine / Injection Pump Fuel Injection Pump VP 44 - Mounting - Dismounting PM-Picturemodule Important: PMTAB_Picture Block injection pump (follow sequence) - Loosen locking screw (Pos. A). - Remove spacing washer ( Pos. B ). - Tighten locking screw ( Pos.
- Page 127 Repair Fav 900 Chassis number 23/3001 and up Fav 900 Engine / Injection Pump Fuel Injection Pump VP 44 - Mounting - Dismounting PM-Picturemodule PMTAB_Picture Pull out connector lock into arrow direction and then remove connector X046 (Pos. A) from injection pump.
- Page 128 Repair Fav 900 Chassis number 23/3001 and up Fav 900 Engine / Injection Pump Fuel Injection Pump VP 44 - Mounting - Dismounting PM-Picturemodule PMTAB_Picture Settings of a new injection pump VP 44. - Start of delivery from TDP of first cylinder (Fan Side) .
- Page 129 Repair Fav 900 Chassis number 23/3001 and up Fav 900 Engine / Injection Pump Fuel Injection Pump VP 44 - Mounting - Dismounting PM-Picturemodule PMTAB_Picture Tighten 4 x nuts (M8) from pump flange (arrows) at 25 Nm . PM-Picturemodule PMTAB_Picture Tighten first visible screw (M8) at 25 Nm .
- Page 130 Repair Fav 900 Chassis number 23/3001 and up Fav 900 Engine / Injection Pump Fuel Injection Pump VP 44 - Mounting - Dismounting PM-Picturemodule PMTAB_Picture Put rear pump bracket into place. PM-Picturemodule PMTAB_Picture Put cold start lines into place PM-Picturemodule PMTAB_Picture Put Injection lines into place.
- Page 131 Repair Fav 900 Chassis number 23/3001 and up Fav 900 Engine / Injection Pump Fuel Injection Pump VP 44 - Mounting - Dismounting PM-Picturemodule PMTAB_Picture Note: Purge air from the fuel supply system. Chapter 2060 Reg. G Index Date Version Page Capitel Docu-No.
-
Page 132: Checking Injection Nozzles
Testing Fav 900 chassis number 23/3001and up Fav 900 Engine / Injection valves Checking injection nozzles PM-Picturemodule PMTAB_Picture Checking injection nozzles With injection nozzle tester (manual test appliance) check nozzle for : - opening pressure (spray pressure) - leak tightness and - spray pattern. - Page 133 Testing Fav 900 chassis number 23/3001and up Fav 900 Engine / Injection valves Checking injection nozzles Nozzles meeting these three requirements may be used again. PM-Picturemodule PMTAB_Picture Dismantling injection nozzle With the inlet opening facing downwards, fit nozzle holder and nozzle assembly into the holding device and clamp unit into the vise.
- Page 134 Testing Fav 900 chassis number 23/3001and up Fav 900 Engine / Injection valves Checking injection nozzles PM-Picturemodule PMTAB_Picture Terst intermediate washer for wear. Fit pressure pin and intermediate washer. PM-Picturemodule PMTAB_Picture Dip nozzle and needle separately into filtered diesel fuel, and check slide resistance. When the needle is withdrawn from the nozzle body by one third and released, it must drop back into the position by its own weight.
-
Page 135: Replacing Injection Valve With Needle Motion Sensor
Repair Fav 900 Chassis number 23/3001 and up Fav 900 Engine / Injetion valves Replacing Injection valve with needle Motion sensor PM-Picturemodule PMTAB_Picture Disconnect connector X173 ( Needle motion sensor EDC ). PM-Picturemodule PMTAB_Picture Disconnect fuel line from injector PM-Picturemodule PMTAB_Picture Disconnect return lines from all Injectors. - Page 136 Repair Fav 900 Chassis number 23/3001 and up Fav 900 Engine / Injetion valves Replacing Injection valve with needle Motion sensor PM-Picturemodule PMTAB_Picture Lead Cable through special tool ( MAN 80996030246 ), Place special tool and unscrew the injector. PM-Picturemodule PMTAB_Picture New Injector and Needle Motion Sensor PM-Picturemodule...
- Page 137 Repair Fav 900 Chassis number 23/3001 and up Fav 900 Engine / Injetion valves Replacing Injection valve with needle Motion sensor PM-Picturemodule PMTAB_Picture Put new "usit" gaskets on the hollow screw on both sides of the return line . PM-Picturemodule PMTAB_Picture Put return Linmes back into place.
-
Page 138: Special Tools
General Fav 900 chassis number 23/3001and up Fav 900 Engine / Generalities Special tools PM-Picturemodule PMTAB_Picture Date Version Page Capitel Index Docu-No. Special tools 19/03/2001 9920 000004... - Page 139 General Fav 900 chassis number 23/3001and up Fav 900 Engine / Generalities Special tools Text-module Schema - Description Reference Dial gauge for checking and setting start of delivery. 08.71000-1205* Scanning extension for 1 80.99605-0266* Adaptor for 1 899.980.245.00- Special wrench (SW 17) for injection pressures lines 80.99605-6002* Optical Signal generator for setting start of delivery 80.99605-6002*...
- Page 140 General Fav 900 chassis number 23/3001and up Fav 900 Engine / Generalities Special tools PM-Picturemodule PMTAB_Picture Date Version Page Capitel Index Docu-No. Special tools 19/03/2001 9920 000004...
- Page 141 General Fav 900 chassis number 23/3001and up Fav 900 Engine / Generalities Special tools Text-module Diagram Description Reference Percussion type extractor to 18 80.99602-0016* Slip-on grip for all pressing plates 80.99617-0129* Pressing plate for front crankshaft seal 80.99617-0073* Pressing plate for front crankshaft seal, flywheel end 80.99614-0032* Dial for torque wrench and torque angle.
- Page 142 General Fav 900 chassis number 23/3001and up Fav 900 Engine / Generalities Special tools PM-Picturemodule PMTAB_Picture Date Version Page Capitel Index Docu-No. Special tools 19/03/2001 9920 000004...
- Page 143 X899.980.219** Guide mandrel (2 off) for fitting flywheel, see sketch for manufacturing. Crankshaft actuating device. X899.980.220.0- 00** Text-module Note: * MAN-tools without a Fendt-spare part number can be ordered by MAN-Service-Centres. ** Fendt-spare part number Index Date Version Page Capitel Docu-No.
- Page 144 General Fav 900 chassis number 23/3001and up Fav 900 Engine / Generalities Special tools Text-module Tools to be manufactured Guide mandrel for flywheel assembly Material: made from M14*140 PM-Picturemodule PMTAB_Picture Text-module Pressing mandrels for sealing caps Ø 50,1 mm, Ø 62,1 mm PM-Picturemodule PMTAB_Picture Date...
Need help?
Do you have a question about the MAN D 0836 LE and is the answer not in the manual?
Questions and answers
Hi there I need to understand how to fix injection pump timing
To fix the injection pump timing on a FENDT with part number MAN D 0836 LE:
1. Refit Injection Pump Gear: Ensure the injection pump gear is correctly positioned before securing it.
2. Align Timing Marks: Align the camshaft and crankshaft with the appropriate markings.
3. Insert Intermediate Gear: Position the intermediate gear so that:
- The crankshaft timing gear aligns with the intermediate gear at the marking "*-*-1".
- The camshaft timing gear aligns with the intermediate gear at the marking "2-2-2".
4. Secure Fasteners: Insert and tighten the screws of the intermediate and camshaft gear to the specified torque.
5. Use Loctite 648: If replacing studs on the injection pump, apply "Loctite 648" before inserting them.
6. Ensure Correct Gasket Fit: Check that the gasket is properly placed to prevent leaks.
Following these steps ensures the correct timing of the injection pump.
This answer is automatically generated
There's but not clear for me