Table of Contents
Advertisement
Advertisement
Table of Contents
Troubleshooting

Related Manuals for Foster Solo Plus


Summary of Contents for Foster Solo Plus
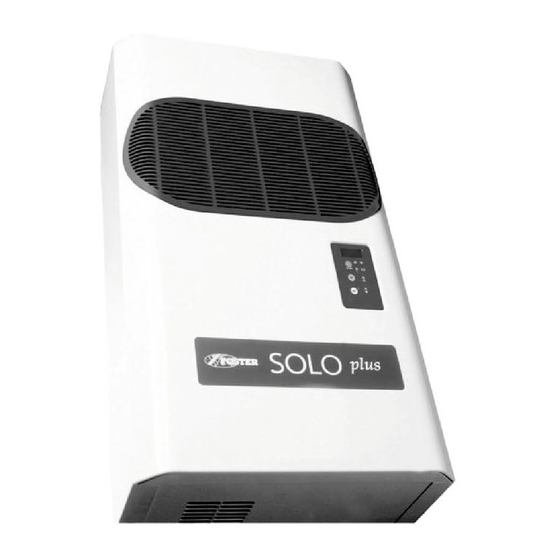
- Page 1 Solo Plus Units 2001...
- Page 3 SP201HW, SP301HW SP201LW, SP401HW 830 264 790 620 280 510 585 SP501HW SP301LW, SP601HW 830 364 982 620 350 632 585 Ceiling Mounted Units Solo Plus DRWG 1 d + e DIMENSIONS MODEL CONDENSER UNIT EVAPORATOR UNIT PLUG SIZE CUT-OUT SIZE...
-
Page 5: Controller Operation
3. ACCESS TO THE UNIT COMPARTMENT / EVAPORATOR HOUSING WALL MODEL Front Panel: Grasp each side of the front panel and “pull forward” releasing it from the spring clips located down each edge,it may be necessary to separate the front panel from the main body using a flat blade screwdriver and gently ease away. - Page 6 CONTROL LED (Green): Lit: Compressor running, unit is refrigerating. FLASHING: Compressor is in start delay mode (waiting for signal to start) OFF: Compressor is OFF. Room is down to set temperature. CONTROL LED (Green): LIT: Evaporator fan(s) running. FLASHING: Evaporator fan(s) in start delay mode (waiting for signal to start ) OFF: Evaporator fan (s) OFF Control LED (Yellow): LIT: Unit in defrost mode (auto or manual)
- Page 10 CONTROLLER ALARMS AND FAULT FINDING. When an alarm condition occurs the unit will display an alarm code ERR (this will differ according to the nature of the alarm): • Alarm LED will illuminate (4) • Buzzer will sound (if remote alarm is fitted) •...
-
Page 11: Trouble Shooting
Defrost sensor fault (E2) The red LED, buzzer and remote alarm relay are activated; the label ERR will flash on the display alternating with the room temperature: alarm code E2 in the alarm menu. Possible causes are: • Faulty defrost sensor •... - Page 12 7. PARAMETER LIST Medium Unit of Hot gas Hot gas Label Description Range measure defrost defrost Display Readout °C or °F ( 0=°C. 1=°F) Flag 0 or 1 Calibration of room sensor °C -12 to +12 Compressor rE1 menu. coP Differential °C/1 Maximum set point...
-
Page 13: Electrical Connections
The unit operates from a 220/240v1-50hz or a 400v- 3-50hz electrical supply as denoted in the technical data. For 60hz application consult Foster. The selection of mains cable depends on the unit (Amps) and on the siting of the cable itself. - Page 14 -10°C 42,450 +30°C 8,313 -20°C 67,740 +20°C 12,090 -30°C 111,300 +10°C 17,960 -40°C 188,400 10. FUSE RATINGS FOSTER CODE Internal fuse Wiring diagram SP101HW 16 A J1018 SP201HW 16 A J1018 SP301HW 20 A J1018 SP401HW 25 A J1018 SP501HW...
-
Page 15: Wiring Diagrams
11. WIRING DIAGRAMS COMPONENT IDENTIFICATION ROOM SENSOR EMERGENCY ‘STAT CONDENSER ALARM SENSOR ALARM DEFROST SENSOR CONTACTOR SPEED REGULATOR DEFROST CONTACTOR BVRS SPEED REGULATOR SENSOR COMPRESSOR MOTOR Nr.1 DEFROST HEATER DOOR MICROSWITCH(ROOM) RESISTENZA CARTER COMPRESSORE CONDENSER FAN MOTOR COMPRESSOR CRANKCASE HEATER EVAPORATOR FAN MOTOR P1MX DOOR HEATER CIRCUIT... - Page 19 PART 1B Ceiling Mounted Solo January 2003 Controller Settings Dimensions SP1/SP2 SP3/SP4 Description Condensing unit and Evaporator (evaporator plaed in an insulated box) located outside of the coldroom. Air inlet and outlet to the evaporator located inside the coldroom. Electrical control panel located in the condensing unit enclosure. Wall mounted control panel.
- Page 21 Control LED (GREEN) ON: Compressor running, unit refrigerating. FLASHING: Compressor is in Start Delay mode. OFF: Compressor off, Room down to temperature Control LED (GREEN) ON: Evaporator fan running. FLASHING: Evaporator fan in start delay mode. OFF: Evaporator fan off. Unit in defrost mode. Control LED (YELLOW) ON: Unit in Automatic or Manual defrost.
- Page 22 ON/OFF key: When pressed for 2 seconds it turns the unit off or on. 10. ENTER key: Allows access to the menu and submenus. Access to the programming mode should only be attempted after reading and fully understanding the service manual, as inserting incorrect information will effect the operation of the unit.
- Page 23 Press the SET key to display the value of the parameter selected. To change the value press either the UP/DEFROST key or the DOWN/INTERIOR LIGHT key until you reach the new value. Press the SET key to confirm the value. Repeat the operation to modify the required parameters.
- Page 25 5,828 -10° C42,450 +30°C 8,313 -20° C67,740 +20°C 12,090 -30° C111,300 +10°C 17,960 -40° C188,400 FUSE RATINGS FOSTER CODE INTERNAL FUSE VOLTAGE WIRING DIAGRAM SP1HC 16 A 230/1/50 81800LSB SP2HC 20 A 230/1/50 81800LSB SP3HC 20 A 230/1/50 81800LSB SP4HC...
- Page 26 High Pressure Alarm (HH) Each time the pressure switch trips, the buzzer and red LED are activated. If more than ten trips occur during a 1-hour period then the unit will shut down automatically. The remote relay will be activated and the label ERR will flash on the display alternating with the room temperature.
- Page 29 SOLO PLUS Service Manual...
- Page 30 D=100mm Solo Plus 3D DRWG 1 Ceiling mounted lus DRWG 1 a + b + c CEILING MOUNTED UNITS Solo Plus 3D DRWG 2 Solo Plus DRWG 1 d + e DIMENSIONS MODEL CONDENSER UNIT EVAPORATOR UNIT PLUG SIZE CUT-OUT SIZE...
- Page 31 SOLO PLUS REFRIGERATION SYSTEM CONTENTS PAGE INTRODUCTION Introduction Solo Plus is a range of packaged refrigeration systems comprising of 10 Wall Models and 8 Technical Data Ceiling Models. The systems are pre-charged with refrigerant and Access pre-wired ready for installation into a coldroom with only electrical connections to be made.
- Page 33 ACCESS TO THE UNIT COMPARTMENT / EVAPORATOR HOUSING WALL MODEL Front Panel: Remove the 2 fixing screws located under the base of the front panel and “pull forward” releasing it from the 4 “spring clips” located in each corner. Condenser Fan After removing the front panel “pull upwards”...
- Page 34 5) DISPLAY When the machine is not in operation, the label “OFF” and the cell temperature are intermittently displayed one after the other on the digital display. When the machine is in operation, during the normal working cycle, the display indicates the room temperature. Parameters being set will be displayed during programming. A “Fault Code”...
- Page 35 INSTRUCTIONS FOR PARAMETER MODIFICATION 1. HOW TO SET THE PARAMETERS: 1A. Keep the keys pressed together for more than 5 seconds. 1B. “00” will be displayed. 1C. Press the key to display 22 (password) 1D. Confirm with 1E. The first parameter to be changed will be displayed. To modify parameters see next section “Parameters modification”.
- Page 36 PARAMETERS DESCRIPTION TEMPERATURE PROBE SETTING C: CALIBRATION It allows to add an offset to the measured value. It is active only with the air probe, while the evaporator probe cannot be calibrated. DIGITAL FILTER It allows to define the coefficient used in the digital filter of the measured value. High values for this parameter allow to reduce the noise present in the input lines (but the measure operation is slower).
- Page 37 rL: MINIMUM TEMPERATURE MEASURED DURING rt. Shows the minimum temperature measured by the air probe during the time interval rt. C0: DELAY AFTER RESET It delays the compressor and fan activation after the power on of the device, so to dispose the power consumption. It also protects the compressor against repeated activations in case of power loss.
- Page 38 It allows to activate a defrost cycle when the device is turned on. The selection of the after-reset defrost option has priority over the compressor regulation and over the continuous cycle activation. d5: DEFROST DELAY AFTER RESET OR EXTERNAL TRIGGER It defines the time interval between the reset and the beginning of a defrost.
- Page 39 A4: DIGITAL INPUT 1 It defines the function of the digital input 1 A5: NUMBER 2 DIGITAL INPUT CONFIGURATION Establishes the meaning of the number 2 digital input, where present. A6: COMPRESSOR FAILURE DUE TO AN EXTERNAL ALARM If an external alarm is active, the compressor remains active for a period of time equal to A6. The compressor’s off-time is a fixed 15 minute period (the compressor’s arrow flashes intermittently).
- Page 40 OTHER SETTINGS H0: SERIAL ADDRESS It defines the device network address for serial link. H1: LIGHT/ALARM RELAY It allows to define the function of the fourth relay : LIGHT, normally off ALARM or normally on ALARM. P0: PRESSURESTAT It is the maximum number of pressure alarms; when reached the machine gets the blocked status. If the number of alarms is less than the one defined by this parameter, an autoresettable block situation is generated anyway.
-
Page 41: User Parameters
USER PARAMETERS MANUFACTURER STANDARDS OPERATING RANGE HOT GAS DEFROST UNIT OF LABEL MEASURE Range °C/F° flag flag °C/F° 19,9 °C/F° °C/F° flag °C/F° flag °C/F° °C/F° flag °C/F° flag flag flag °C/F° flag °C/F° °C/F° °C/F° flag °C/F° flag flag flag flag CODE... - Page 42 INPUTS Air Temperature Probe - Senses coldroom internal temperature. Negative temperature/resistance coefficient thermistor probe. Evaporator Temperature Probe - Senses temperature at the suction line outlet from the evaporator, required to terminate defrosting. Negative temperature/resistance coefficient thermistor probe. OUTPUTS Compressor - Relay output switching single phase mains supply to the compressor direct or via a contactor for three phase models.
- Page 43 ELECTRICAL CONNECTIONS 1. Check that the mains supply to the SOLO corresponds to the rating stamped on the serial no.plate.Tolerance: +/- 10% of the nominal value. 2. Connection should always be made from a fused isolator or a switch-disconnector with fuses. We advise also the use of a circuit breaker fitted in the line.
- Page 44 LIST OF FUSES POWER INTERNAL FUSES CURRENT FUSE SOLO CARD FUSE Type DIAZED Power fuse Auxiliary fuse MOD. Voltage n° n° n° n° SP1 HC 230V/1~/50 9x36 SP2 HC 230V/1~/50 9x36 SP3 HC 230V/1~/50 5x20 F SP4 HC 400V/3~/50 5x20 F SP5 HC 400V/3~/50 5x20 F...
- Page 45 CONTROLLER ALARMS AND FAULT FINDING When a fault is detected, the red Led in key (4) will be lit and a fault code displayed on the screen (5). This code enables a speedy identification of the problem and should be reported when making the service call. (The audible alarm will also sound if fitted) LOW TEMPERATURE ALARM HIGH TEMPERATURE ALARM...
-
Page 46: Routine Maintenance
CONTROLLER EMERGENCY REPAIR In case of fault or malfunctioning of the electronic control panel, if a short-term replacing is not possible, an EMERGENCY SYSTEM” can be used to keep the unit running until a new control panel may be installed. The “EMERGENCY SYSYEM”... - Page 53 PMI Food Equipment Group (Malaysia) Inc. Tel: 603 780 6779. Fax: 603 781 4535. Singapore PMI Food Equipment Group (Singapore) Inc. Tel: 65 665 0487. Fax: 65 665 0487. Foster Refrigerator Group of Companies, Oldmedow Road, King’s Lynn, Norfolk PE30 4JU England Tel: 01553 691122...
Need help?
Do you have a question about the Solo Plus and is the answer not in the manual?
Questions and answers