Table of Contents
Advertisement
TORNADO INDUSTRIES
7401 W. LAWRENCE AVENUE
CHICAGO, IL 60706
(708) 867-5100 FAX (708) 867-6968
www.tornadovac.com
Tornado
Operation & Maintenance Manual
For Commercial Use Only
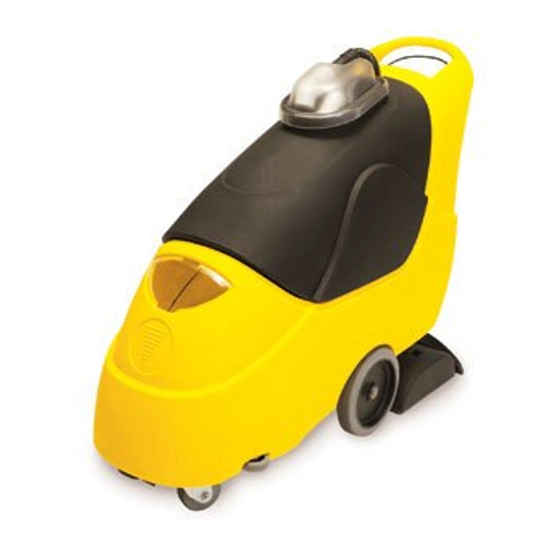
Marathon 2000 Forward Only Extractor
CATALOG NO.
98190 (115V, 60 HZ)
L8190CF 6/04 2004 Tornado Industries
All rights reserved.
Advertisement
Table of Contents

Related Manuals for Tornado Marathon 2000 98190


Summary of Contents for Tornado Marathon 2000 98190
- Page 1 7401 W. LAWRENCE AVENUE CHICAGO, IL 60706 (708) 867-5100 FAX (708) 867-6968 www.tornadovac.com Tornado Operation & Maintenance Manual For Commercial Use Only Marathon 2000 Forward Only Extractor CATALOG NO. 98190 (115V, 60 HZ) L8190CF 6/04 2004 Tornado Industries All rights reserved.
- Page 2 NOTES...
-
Page 3: Table Of Contents
All-non wear item parts purchased after warranty expiration are warranted for 90 days. Warranty starts from the date of sale to the consumer or, at Tornado’s discretion, 6 months after dealer purchased the unit from Tornado, whichever comes first. -
Page 4: Safety Instructions
IMPORTANT SAFETY INSTRUCTIONS FOR COMMERCIAL USE WHEN USING AN ELECTRICAL APPLIANCE, BASIC PRECAUTIONS SHOULD ALWAYS BE FOLLOWED INCLUDING THE FOLLOWING: READ ALL INSTRUCTIONS BEFORE USING THIS MACHINE WARNING: TO REDUCE THE RISK OF FIRE, ELECTRIC SHOCK, OR INJURY: Do not leave machine when plugged in. Unplug from outlet when not in use and before servicing. - Page 5 This machine will assure years of satisfactory service if operated and maintained according to recommendations in the manual. If additional information is needed, please contact your local distributor or call: TORNADO INDUSTRIES, INC. 7401 W. LAWRENCE AVE. CHICAGO, IL 60706...
-
Page 6: Preparation & General Precautions
GENERAL PRECAUTIONS • Make sure the machine is plugged into an electrical outlet with the same voltage and frequency rating as shown on the nameplate of the machine. Do not attempt to plug a 115 volt machine in a 230 volt outlet. •... -
Page 7: Grounding Instructions
ELECTRICAL This machine operates on a standard, 15AMP,115 volt AC circuit and has a grounded plug.* Make sure the machine is connected to an outlet having the same configuration as the plug. No ungrounded adapter should be used with this machine. *Special voltage models available. - Page 8 STRAIN RELIEF Attaching the strain relief/cord retainer to the 50’ power cord. 1. Make a loop in power cord approximately 12” from receptacle end. 2. Slide cord loop through slot in retainer and over retainer arm. Pull slack cord back through slot to secure. Attach retainer to handle. EXTENSION CORD If an extension cord is used, the wire size must be at least one size larger, (12-3) than the power cord on the machine.
-
Page 9: Cleaning Tips
CLEANING TIPS • Check the condition of the carpeting. If the carpet is loose, heavily soiled, stained, spotted or badly worn, point this out to the person in charge. • Locate an inconspicuous spot on the area to be cleaned. Test carpet for colorfastness before proceeding. -
Page 10: Machine Specifications
MACHINE SPECIFICATIONS ELECTRICAL : 115 V, 15 A, 60 HZ. DURABLE EXTENSION CORD : 75’ DRIVE SYSTEM : TRANSAXLE W/ VARIABLE SPEED, (0-100 FT/MIN) VACUUM MOTOR: 3 STAGE, 1 HP., 120 CFM VACUUM SHOE : 22” WIDE, CAST ALUMINUM, ADJUSTABLE, FLOATING ARM BRUSH : 19”... -
Page 11: Operation Instructions
OPERATION INSTRUCTIONS Main Controls: Your extractor is equipped with (4) main switches, which control the spray bar, the brush motor, the vacuum motor and the main power. The main switch must be activated before operating the transaxle drive. The machine will glide easily across the floor when pushed forward (without power). - Page 12 Set Up and Operation: Your Marathon is shipped complete and ready for carpet cleaning. This style of machine is sometimes referred to as a self-contained extractor, since everything is included in the body of the extractor. 1. Install recovery tank cover to the top of the tank and connect the suction hose to the cover.
-
Page 13: Maintenance Issues
If not, the hose can become crushed and you will not get good airflow from the vacuum nozzle. • Be sure to use Tornado genuine parts and service is provided by an authorized Tornado Service Center. Use of non-O.E.M. parts will void the warranty. - Page 14 PROTECT FROM FREEZING - Caution! If it becomes necessary to store in temperatures that could drop below 40 degrees F, the pumping system, hoses and valves must be protected from freezing with a methyl hydrate window washer antifreeze solution. Do not use ethylene glycol or cooling system antifreezes.
-
Page 15: Troubleshooting Table
Troubleshooting Table: Problem Solution No Power, Nothing Works * Plug in Cord, Check Circuit Breakers * Activate Main Power Switch * Check For Loose Wiring * Call Service Machine Will Not Move Forward * Reset Circuit Breaker * Turn Speed Control Knob Clockwise * Call Service Brush Does Not Rotate * Reset Circuit Breaker... -
Page 16: Main Assembly
MAIN ASSEMBLY... -
Page 17: Upper Tank Assembly
UPPER TANK ASSEMBLY (REF. #30642) - Page 18 UPPER TANK ASSEMBLY (REF. #30642)
-
Page 19: Lower Tank Assembly
LOWER TANK ASSEMBLY (REF. #98190) - Page 20 LOWER TANK ASSEMBLY (REF. #98190)
- Page 21 LOWER TANK ASSEMBLY (REF. #98190) BOTTOM VIEW BACK VIEW...
-
Page 22: Control Panel Assembly
CONTROL PANEL ASSEMBLY (REF. # 30644) * NOT SHOWN... - Page 23 CONTROL PANEL ASSEMBLY (REF. # 30644)
-
Page 24: Brush Assembly
BRUSH ASSEMBLY (REF. # 30643) - Page 25 BRUSH ASSEMBLY (REF. #30643) ITEM DESCRIPTION PART # NUT, HEX. LOCK, KEPS, #10-32 02625 BEARING, RADIAL BALL 05209 NUT, HEAVY HEX JAM 5/16-18 05282 WASHER, LOCK #10 11007 WASHER, PLAIN ½” 16581 WASHER, LOCK 3/8” 16586 SCREW, HEX-HEAD CAP 3/8-16 X 7/8 16907 SCREW, HEX HEAD CAP 1/4-20 X 3/4 17160...
-
Page 26: Pump Assembly
PUMP ASSEMBLY (REF. # 30645) -
Page 27: Recovery Dome Assembly
RECOVERY DOME ASSEMBLY (REF. # 30646) -
Page 28: Wiring Diagrams
WIRING DIAGRAM (REF. # 30702) - Page 29 WIRING DIAGRAM (REF. # 30702)
Need help?
Do you have a question about the Marathon 2000 98190 and is the answer not in the manual?
Questions and answers