Table of Contents
Advertisement
Advertisement
Table of Contents

Related Manuals for Antelope Orion³²


Summary of Contents for Antelope Orion³²
- Page 3 Owner’s Manual...
-
Page 5: Table Of Contents
Contents 1. Safety Notes ..........................5 2. Introduction ..........................6 3. Features ............................7 4. Quick Start ........................... 8 5. Front Panel Explained ........................9 6. Rear Panel Explained ........................ 10 7. Software Control Panel ....................... 11 8. Advanced User Tips ........................17 8.1. -
Page 7: Safety Notes
1. Safety Notes To reduce the risk of electrical shocks, fire, and related hazards: ● Do not remove screws, cover, or cabinet. There are no user serviceable parts inside. Refer servicing to qualified service personnel. ● Do not expose this device to rain, moisture or spillover of liquid of any kind. ●... -
Page 8: Introduction
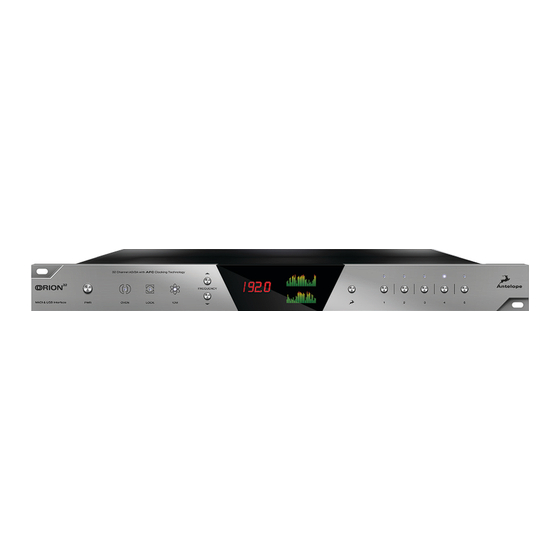
Orion³² is a 32-channel AD/DA converter and audio master clock, supporting both MADI and USB interfaces, clocked by Antelope’s renowned 64-bit Acoustically Focused Clocking (AFC) technology. Orion³² allows up to 192 kHz I/O streaming of up to 32-channels of I/O digital audio through its custom-built USB chip. -
Page 9: Features
● 8 channels I/O via Fiber Optic ADAT ● 2 channels I/O via S/PDIF ● Antelope’s renowned 64-bit Acoustically Focused Clocking with Atomic input ● Antelope’s proprietary Oven Controlled Oscillator for supreme clocking stability ● Four word clock outputs and one word clock input ●... -
Page 10: Quick Start
4. Quick Start It only takes a few moments to harness the benefits of the Orion³² sound. Follow these simple steps to connect Orion³² to your system setup: 1. Connect to the AC power source via rear panel connector (9). 2. -
Page 11: Front Panel Explained
A multi-function button that pressed in combination with some of the preset buttons provide the following functions: 1. Antelope + Preset 1 = Restore Factory Defaults 2. Antelope + Preset 2 = Calibration Mode (needs Atomic Clock attached) 3. Antelope + Preset 3 = Displays Device Info (SN, HW rev., FW rev.) -
Page 12: Rear Panel Explained
This BNC Input Connector allows the Orion³² to receive timing reference from an Atomic Clock such as the Antelope 10M, to increase the Oscillator accuracy. If the device is in Oven mode, plugging in the 10M causes the “Atomic LED” light to illuminate on the device front panel and the atomic device becomes the primary timing reference, thus providing better sample accuracy, more detailed sound and greater stability. -
Page 13: Software Control Panel
1 x MADI Connector providing 64 tracks input and 64 tracks output. 16. USB High-Speed Orion³² uses USB connector Type B and operates up to 192kHz sample rate with Antelope ASIO on Windows & Mac OS X. 17. D-SUB 25pin Analog Outputs (on top) Four connectors enable you to attach breakout cables, each with 8 lines. - Page 14 2. Display Two independent precise 32-track peak meters, each with a dropdown menu from which you can select the source that you wish to be represented on the displays. 3. Display brightness control This slider allows you to adjust brightness for the front display/peak meter of your Orion³². 4.
- Page 15 Madi in S-Mux / Madi out S-Mux: Check this box if the Orion³² is connected to a device that is outputting an S-Mux signal or if you’d like the Orion³² to output an S-Mux MADI signal. ADC/DAC Trim: The analog Inputs and Outputs of the AD/DA converter can be finely trimmed by the options available in the drop-down menus.
- Page 16 5. If there is a new firmware version you will be able to see it in the ‘View newer updates’. If not, your device is up to date. (If you want to ‘roll back’ to a previous version of the firmware, simply click on the ‘View all updates’...
- Page 17 6. Clock Source This dropdown menu allows you to select how the Orion³² is to be synchronized. Select Oven/10M for internal sync (with or without 10M atomic clock reference), W.C. (Word Clock) to sync the Orion³² to an external device through the Word clock input, or MADI, ADAT, S/PDIF for syncing with incoming digital signals.
- Page 18 You can reset the presets to the factory setting: With the Orion³² in operating mode, press and hold the Antelope button whilst pressing Preset button 1. This will restore factory defaults settings. Now press the Antelope button to return to operating mode.
-
Page 19: Advanced User Tips
10. Inputs & Outputs Router This panel enables you to select inputs and route them to your chosen outputs by simply dragging and dropping channels. Each input has its own unique color. When routing channels, the input color will be copied from whichever input you select to whichever output you select. In order to select multiple tracks hold ‘Shift button’... -
Page 20: Calibration Procedure
● Connect the 10M to Orion³² via the dedicated 10M input; ● Power on the 10M and wait until it reaches operating temperature; ● With the Orion³² in standby mode, press and hold the Antelope button whilst pressing Preset button 2;... - Page 21 Atomic Clock 1 x 10M Input @ 75 Ohms 1Vpp on BNC Word Clock 1 x Input @ 75 Ohms 3Vpp on BNC 32 - 192kHz Outputs Analog Outputs 4 x D-SUB 25 (32 channels), +20 dBu, 56 Ohms Digital Outputs 1 x Fiber Optic MADI 2 x ADAT 1 x S/PDIF...
- Page 24 Version 1.0 / 06.12.2012...
Need help?
Do you have a question about the Orion³² and is the answer not in the manual?
Questions and answers