Table of Contents
Advertisement
Advertisement
Table of Contents

Subscribe to Our Youtube Channel
Related Manuals for Seiko Precision QR-6550


Summary of Contents for Seiko Precision QR-6550
- Page 1 QUARTZ TIME RECORDER USER’S MANUAL...
- Page 3 INTRODUCTION Thank you for purchasing our Quartz Time Recorder. For safe and proper operation, please carefully read this manual before using it and save it for reference. Bescheinigung des Herstellers/Importeurs Dies Gerät entspricht den Bedingungen der Niederspannungs-Vorschrift 73/23/EEC und dem EMVG nach 89/336/EEC. This unit complies with the Low Voltage Directive 73/23/EEC and the EMC Directive 89/336/EEC.
-
Page 4: Table Of Contents
TABLE OF CONTENTS PRECAUTIONS FEATURES Environmental Conditions GETTING STARTED Unpacking the QR-6550 / 6560 Overview Installing Ribbon Cassette OVERVIEW OF OPERATION SETTINGS Preparation for Settings Overview of Control Buttons Selecting the Hour Display Format Setting the Time Setting the Date Selecting the Card Type Setting Pay Period Ending Date/Day Monthly / Weekly / Bi-weekly... -
Page 5: Precautions
1. PRECAUTIONS This operation manual is prepared for safe and proper use of the unit. Please follow all the instructions to avoid possible danger to yourself or others and damage to the unit. Signs Various warnings and cautions are provided throughout this manual along with signs. Remember each sign and its explanation listed below for your safety and proper operation of the unit. - Page 6 If foreign matter should get in the unit (including a piece of metal, water, or liquid), disconnect the plug from the outlet immediately and contact your dealer for servicing. There is a danger that further use may cause a fire or electric shock. Do not plug or unplug the unit with a wet hand.
- Page 7 Vorsichtsmassnahmen Dieses Bedienerhandbuch stellt die sichere und ordnungsgemäße Verwendung des Geräts sicher. Befolgen der Anweisungen schützt den Bediener und andere vor Verletzungen und verhindert die Beschädigung des Geräts. Warnschilder Nachfolgend werden Schilder mit Warn- und Vorsichtshinweisen dargestellt. Um das Gerät sicher und ordnungsgemäß...
- Page 8 Geraten Fremdkörper (einschließlich Metallstücke, Wasser oder sonstige Flüssigkeiten) in das Gerät, sofort den Stecker aus der Netzsteckdose ziehen und den Kundendienst des Händlers benachrichtigen. Die weitere Verwendung könnte ein Feuer verursachen oder zu einem elektrischen Schlag führen. Den Stecker des Geräts nicht mit nassen Händen in die Netzsteckdose einstecken bzw. herausziehen, da dies zu einem elektrischen Schlag führen könnte.
-
Page 9: Features
2.FEATURES QR-6550 QR-6560 FEATURES Up to 6 columns Weekly Program P.28 Up to 48 programs can be set Automatic IN/OUT printing column shift 2-color print: black or red Special mark " " for irregular recognition Output signal for external chimes Built-in melody (5 melodies) Card Type P.16... -
Page 10: Getting Started
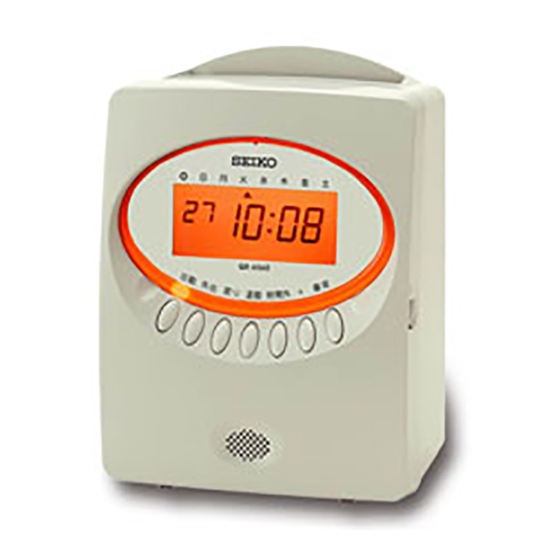
3. GETTING STARTED Unpacking the QR-6550 / 6560 Ribbon Cassette User's Manual Keys (this book) Wall Mount Fittings Overview <Front view> <Back view> Card slot Cover Display hole Control button Wall-mounting Front case holes < Display > Daylight saving time indication Day of the week indication Current date Current time... -
Page 11: Installing Ribbon Cassette
Installing Ribbon Cassette Please do not turn the key while the front case is open. Please do not move print head with your hand unnecessarily, and do not touch cables when you install the ribbon. It might cause a malfunction of the unit. Make sure the power is on before installing. - Page 12 Turn the knob of the cassette in the Close the front case, and turn the key counter clockwise to tighten the to "L" position. Make sure "date" and ribbon. "time" are indicated on the display and "colon" is flashing. When the flat cable connected to the print head comes off from the holder, please set the cable as shown in the following figure.
-
Page 13: Overview Of Operation
4. OVERVIEW OF OPERATIONS Once the AC line code is plugged into the outlet, the unit can be used immediately. Please refer to "3. GETTING STARTED" section before you start. It is easy to operate the unit. Just insert a time card. The card is then automatically pulled in, printed and then ejected. - Page 14 Printing OUT time with a special mark for "OVERNIGHT" To print OUT time with a special mark " ", first push the OVERNIGHT button and insert a time card. Note OUT time with " " mark is printed in the previous day line. Push the OVERNIGHT button.
-
Page 15: Settings
5. SETTINGS Preparation for Settings Make sure the power is on before making setting. Put your fingers in the depressions at While pushing, turn the key to "O" the lower side of the cover, and pull it position. At that moment, display will toward you. -
Page 16: Overview Of Control Buttons
Overview of Control Buttons Control Buttons DATE/TIME button Use the DATE/TIME button when you want to change the date and/or time. (Make sure to push it for 1 second before going to setting mode.) FUNCTION button Use the FUNCTION button when you want to change the pay period, print format, and so on. -
Page 17: Selecting The Hour Display Format
Selecting the Hour Display Format You can select desired hour display format from following 2 options. Order options 1. AM / PM 2. 24 Hour The clock default is "2: 24 Hour". Before you start setting, make sure to see "Preparation for Setting". Example Change the format to "1: AM / PM". -
Page 18: Setting The Time
Setting the Time Before you start setting, make sure to see "Preparation for Setting". Example Change the time from 10:08 to 10:09. Hour Second Push the DATE/TIME button for 1 Minute TIME second and position the " " under the "TIME"... -
Page 19: Setting The Date
Setting the Date Before you start setting, make sure to see "Preparation for Setting". Example Change the date from Oct. 26, 2006 to Oct. 27, 2006. Year Month Push the DATE/TIME button for 1 Date second and position the " " under the DATE "DATE"... -
Page 20: Selecting The Card Type
Selecting the Card Type The card type can be selected from the following six options. Order Options Card Type Blank Line 1. V/VN Card* 1 Monthly, both sides / Weekly, one side / Bi-weekly, one side 2. S Card Monthly, both sides 3. - Page 21 Before you start setting, make sure to see "Preparation for Setting". Example Change the Card Type to "6: Other A Card" and the Blank Line to "1st line". Card Blank Push the FUNCTION button for 1 CARD Type Line TYPE second and position the "...
-
Page 22: Setting Pay Period Ending Date/Day
Setting Pay Period Ending Date/Day Monthly /Weekly/Bi-weekly This function is available if you select "monthly card" in the card type setting. The clock default is "31". Before you start setting, make sure to see "Preparation for Setting". Example Change the Pay Period Ending Date to the 20th. Pay Period 1. - Page 23 Weekly Monthly/ /Bi-weekly This function is available if you select "weekly card" in the card type setting. You can set the desired day, which comes within a week from today. The pay period ending date is the number of days from the date you are setting the clock. The clock default is "0 (today)".
- Page 24 Bi-weekly Monthly/Weekly/ This function is available if you select "bi-weekly card" in the card type setting. You can set the desired day, which comes within two weeks from today. The pay period ending date is the number of days from the date you are setting the clock. The clock default is "0 (today)".
-
Page 25: Setting The Day Advance Time
Setting the Day Advance Time The Day Advance Time refers to the time when printing shifts to the next line on a time card for the next day. This function enables the punch out time record to print on the same line of the previous working day even if leaving time is after midnight. -
Page 26: Selecting The Print Format
Selecting the Print Format You can select desired Line Format (6 types) and Minute Type (2 types). Line Format Print Example: Order Options Line Format Monday, 21, 3:30 p.m. date, 24hour, minute 1. DD 24HR 21 15 : 30 day of the week, 24hour, minute 2. -
Page 27: Selecting The Language
Selecting the Language You can select desired languages from following 6 options. Order options Print example: Thursday 3:30 p.m. 1. English TH 15 : 30 2. Spanish JU 15 : 30 3. German DO 15 : 30 4. French JE 15 : 30 5. -
Page 28: Setting The Daylight Saving Time
Setting the Daylight Saving Time Daylight saving time function D.S.T. execution time At 2:00 a.m. on the first day of summer time, the clock automatically gains one hour to show 3:00 a.m. When 3:00 a.m. comes on the last day of the summer time period, it loses one hour and returns to 2:00 a.m. - Page 29 Setting the Starting Date of Daylight Saving Time Before you start setting, make sure to see "Preparation for Setting". " " mark means "starting date". Month Date Year DAYLIGHT SAVING Push the FUNCTION button for 1 TIME second, and position the " " next to the "DAYLIGHT SAVING TIME"...
-
Page 30: Setting The Ending Date Of Daylight Saving Time
Setting the Ending Date of Daylight Saving Time " " mark means "ending date". Month Date Year Change the "Year". DAYLIGHT SAVING Next, push the SET button. At that TIME moment, the flashing will change "Year" to "Month". FUNCTION DAYLIGHT SAVING Change the "Month". -
Page 31: Deleting The Daylight Saving Time Settings
Deleting the Daylight Saving Time Settings Before you start setting, make sure to see "Preparation for Setting". Point To delete and cancel the daylight saving time settings, change the display of "Month" of the starting date to " ". Example To change March 26, 2006 of "starting date"... -
Page 32: Setting The Weekly Program
Setting the Weekly Program QR-6550 Weekly Programs enable the clock to memorize the following functions for specified time periods. Times are always printed in 1st Column for the time period unless any program for print column is set. Function No. Function Automatic IN/OUT printing column shift Special mark "... - Page 33 QR-6550 Print Example The following is the print example based on the case of the previous page. Date D.O.W. 21st Thu. 8:46 17:48 22nd Fri. 8:50 11:53 14:10 19:22 23rd Sat. 9:22 17:50 24th 25th Mon. 9:06 17:51 29th Fri. 8:46A 10:29 2:30...
- Page 34 QR-6550 Before you start setting, make sure to see "Preparation for Setting". Point To complete the "Weekly Program" settings, follow the procedure below. Preparation Select the Select applicable the Set the for settings "Program No." "Day of the Week" "Starting time" Select the Select the Finish...
- Page 35 QR-6550 Hour Minute Set the "Starting Time". SU MO TU WE TH In case of the example, push the + or - PROGRAM button to set "Hour" at "9" and then push the SET button. At that moment, flashing of the display Column Shift Mark will change from "Hour"...
- Page 36 QR-6550 Select the "Print Irregular Mark". Print Irregular Order options Mark Function No. Not selected SU MO TU WE TH Mark on Mark off PROGRAM *Current status remains. Column Shift Mark In case of the example, push the + or - FUNCTION button to set at "1"and push the SET button.
- Page 37 Setting the Weekly Program QR-6560 Weekly Programs enable the clock to memorize the following functions for specified time periods. Times are always printed in 1st Column for the time period unless any program for print column is set. Function No Function Automatic IN/OUT printing column shift Automatic selection of print color (Black or Red)
- Page 38 QR-6560 Before you start setting, make sure to see "Preparation for Setting". Point To complete the "Weekly Program" settings, follow the procedure below. Preparation Select the Select applicable the Set the for settings "Program No." "Day of the Week" "Starting Time" Select the Select the Select the "Duration...
- Page 39 QR-6560 Hour Minute Set the "Starting Time". SU MO TU WE TH In case of the example, push the + or - button to set at "9" and then push the PROGRAM SET button. At that moment, flashing of the display Column Shift Print Color Relay...
- Page 40 QR-6560 Print Color Function No. Select the "Print Color". SU MO TU WE TH Order options Not selected PROGRAM Black Column Shift Print Color Relay Melody FUNCTION *Current status remains. In case of the example, push the + or - button to set at "1"...
- Page 41 QR-6560 Melody Function No. Select the "Melody". SU MO TU WE TH Order options Disabled Long Long Ago PROGRAM Westminster Chime Home, Sweet Home Greensleeves Danny Boy Column Shift Print Color Relay Melody FUNCTION You can select volume of melodies from "Standard" or "High"...
-
Page 42: Confirming The Weekly Program
Confirming the Weekly Program Refer to the Step 1 and Step 2 in the previous setting section, the program No. changes by pushing + button (01 03...) and you can confirm each setting. Note You can confirm each function with " " mark on, if it is selected. Program No. -
Page 43: Setting Duration Of External Time Signal (Qr-6560)
Setting Duration of External Time Signal QR-6560 You can set desired durations up to three patterns. Duration Duration No. (default value) Duration 1 5 sec. Duration 2 10 sec. Duration 3 20 sec. Note Selectable from 1 to 30 seconds. Before you start setting, make sure to see "Preparation for Setting". -
Page 44: Selecting Volume Of Melodies (Qr-6560)
Selecting Volume of Melodies QR-6560 You can select volume of melodies from 2 levels. Order Options 1. Standard 2. High The clock default is "1: Standard". Before you start setting, make sure to see "Preparation for Setting". Example Change the volume level to "2: High". Push the FUNCTION button for 1 second, and position the "... -
Page 45: Setting The Password
Setting the Password Once the password is set, you are requested to enter the current password before changing any setting. If the password you entered does not coincide with the setting, you cannot change the setting values. You can select any 4-digit number from 0001 to 9998 as your password. Note Numbers "0000"... -
Page 46: How To Change Settings When The Password Is Set
How to Change Settings When the Password Is Set Once the password is set, you are requested to enter the current password before changing any setting. Before you start setting, make sure to see "Preparation for Setting". Example The current password is "1234" and go into the "FUNCTION" setting mode. Push the FUNCTION button for 1 second. -
Page 47: Canceling The Password
Canceling the Password Before you start setting, make sure to see "Preparation for Setting". Point To cancel the Password, the current one must be changed to "0000". Example The current password is "1234" and cancel it. Push the FUNCTION button for 1 second and then enter the Password. -
Page 48: Printing List Of Setting Information
6. PRINTING LIST OF SETTING INFORMATION With this function, you can check following information. List No. Printing List Setting Information Program Settings Note Total pages are not always 2 pages. Make sure the key is locked ("L" position) before you go into this mode. List No. - Page 49 Print Example QR-6560sp01 Setting Information P2/2 Weekly Program Summary TIME C-I-R-M 12:00 6-1-0-0 S-----S 09:00 2-1-1-1 -MTWTF- 17:00 4-2-0-0 -MTWTF Number of 3 program Column Monday Sunday Irregular Wednesday Tuesday Relay Friday Thursday Melody Saturday "0" means " ". Date Push the SETTING END button to get out of the setting information mode.
-
Page 50: Resetting
7. RESETTING Note All settings will be deleted and will revert to the factory defaults when the reset switch is pushed. To make new settings, please refer to "5. SETTINGS". Reset switch (Small round hole) Push these buttons at the same time Make sure the key is open ("O"... -
Page 51: Card Resetting (Qr-6560)
Only for V/ VN Card Users QR-6560 Card Resetting This function is available if you select "1: V/VN Card" in the "Card Type" setting. Example The number of the card you want to reset is "003". The number of cards Push the reset switch with a pointed implement while... -
Page 52: Mounting Unit On Wall
8. MOUNTING UNIT ON WALL The unit can be mounted on a wall using the supplied mounting fittings. To mount the unit on a wall, take the following steps: Template Install the supplied long screws into a wall 3.94 inches (10 cm) apart. Be sure to keep about 0.12 inches (3 mm) of the screw head out of the wall. -
Page 53: Installing The Optional Battery Back-Up
9. INSTALLING THE OPTIONAL BATTERY BACK-UP This option allows for printing without AC power. Remove the cover of the battery compartment on the back of the unit by pushing the knob and then pull it toward you. Knob Position the battery as shown in the figure on the left. -
Page 54: Connecting External Time Signal
10. CONNECTING EXTERNAL TIME SIGNAL QR-6560 When a signal is activated the internal contacts close completing the circuit. These internal contacts are "dry" and supply no voltage. Voltage applied to these contacts must not exceed 30 volts. Connection Specifications for External Time Signal Contact •... - Page 55 Anschluss-Schema für Externes Signal QR-6560 Sofern ein Signal aktiviert wird, schliesst der Relais-Kontakt. Hierbei handelt es sich um einen spannungsfreien Kontakt. Die zugeführte Spannung darf 30 Volt nicht uebersteigen. Anschluss-Spezifikation fuer den Signal-Relaiskontakt Kontakt-Ausgang: Spannungsfrei Kontakt-Last: 30 V, 2A max. (Ohmsche Last) Internes Relais Terminal...
-
Page 56: Troubleshooting
11. TROUBLESHOOTING Error No. appears Error contents Action E-00 CPU error. Contact the store from whom you bought the unit. E-01 The remaining life of lithium battery for memory back-up is short. E-03 The front and back of the time card inserted is Correctly insert the time card. - Page 57 Other failures • The unit does not operate. Check whether the power cord is properly in an AC outlet. • The unit does not print. Check whether the ribbon is installed in place. • Print is not located in the right place. Check whether the setting of the pay period ending date is set correctly.
-
Page 58: Specifications
12. SPECIFICATIONS Monthly accuracy ±15 sec. Clock accuracy (at ordinary temperatures) Year up to 2099. Automatically adjusted to leap years, 31-day Calendar months and months with thirty or fewer days, and the days of the week. Printing system Dot matrix imprint Power failure Three years of cumulative power failure hours after the date of Compensation... - Page 59 Spezifikation Monatliche Abweichung ± 15 sec. Uhr-Genauigkeit (normale Umgebungstemperatur) bis zum Jahr 2099, automatische Erkennung der Monatslaenge, Kalender Monatstage und Schaltjahr Drucksystem Nadeldrucker Datenerhalt bei 3 Jahre nach Spannungsausfall Spannungsfehler Nonstromversorgung Gangreserve für ca. (Option) 24 Std. oder 100 Registrierungen. Anschluss eines externen Signalgebers (QR-6560) Externes Signal (Kontakt-Ausgang: Spannungsfrei)
-
Page 60: Time Card Specifications
13.TIME CARD SPECIFICATIONS (1) V / VN Card Monthly, both sides, with barcode Front Side Back Side NAME NAME DEPT. DEPT. Signature From: VN Signature Unit: mm... - Page 61 (2) S Card Monthly, both sides Front Side Back Side NAME NAME DEPT. PAY PERIOD ENDING DEPT. PAY PERIOD ENDING REGULAR TIME OVERTIME REGULAR TIME OVERTIME Signature Signature Unit: mm Note Recommended Paper Thickness : 0.45 ± 0.05mm...
- Page 62 (3) Weekly Card (4) Bi-Weekly Card Weekly, one side Bi-weekly, one side Unit: mm Note Recommended Paper Thickness : 0.45 ± 0.05mm...
- Page 63 (5) Other A Card Monthly, both sides Front Side Back Side Unit: mm Note Recommended Paper Thickness : 0.45 ± 0.05mm...
- Page 64 (6) Other B Card Monthly, both sides Front Side Back Side Unit: mm Note Recommended Paper Thickness : 0.45 ± 0.05mm...
-
Page 65: Template For Wall Mounting
Template for wall mounting... - Page 68 ALL RIGHTS RESERVED © 2006 Q0310-61201...
Need help?
Do you have a question about the Precision QR-6550 and is the answer not in the manual?
Questions and answers