Table of Contents
Advertisement
Advertisement
Table of Contents

Related Manuals for Seiko QR-350


Summary of Contents for Seiko QR-350
- Page 1 QUARTZ TIME RECORDER OPERATION MANUAL...
- Page 2 INTRODUCTION Thank you for purchasing our Quartz Time Recorder. For safe and proper operation, please carefully read this manual before using it and save it for reference. Bescheinigung des Herstellers/Importeurs Dies Gerät entspricht den Bedingungen der Niederspannungs-Vorschrift 73/23/EEC und dem EMVG nach 89/336/EEC. This unit complies with the Low Voltage Directive 73/23/EEC and the EMC Directive 89/336/EEC.
-
Page 3: Table Of Contents
TABLE OF CONTENTS PRECAUTIONS FEATURES BEFORE USING THE TIME RECORDER Accessories Features Installing Ribbon Cassette Wall Mounting Environmental Conditions DAILY OPERATIONS SETTING Preparation for setting Setting the Pay Period Monthly Closing Weekly Closing Bi-Weekly Closing Setting the Time Setting the Date Setting the Day Advance Time Setting the Print Style Setting the Print Language... -
Page 4: Precautions
1. PRECAUTIONS This operation manual is prepared for safe and proper use of the unit. Please follow all the instructions to avoid possible danger to yourself or others and damage to the unit. Signs Various warnings and cautions are provided throughout this manual along with signs. Remember each sign and its explanation listed below for your safety and proper operation of the unit. - Page 5 If foreign matter should get in the unit (including a piece of metal, water, or liquid), disconnect the plug from the outlet immediately and contact your dealer for servicing. There is a danger that further use may cause a fire or electric shock. Do not plug or unplug the unit with a wet hand.
-
Page 6: Features
•It is possible to select one of three pay periods: weekly, bi-weekly or monthly. •The SEIKO S Card automatically senses the front or back of the card, thereby ensuring that the time is printed on the correct side of a monthly card. -
Page 7: Before Using The Time Recorder
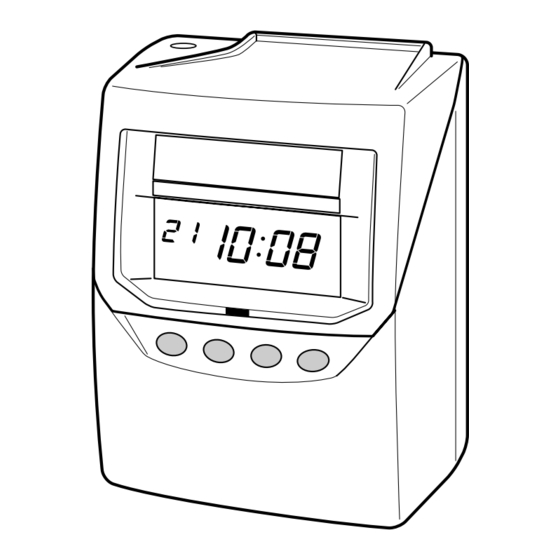
3. BEFORE USING THE TIME RECORDER Accessories Keys Ribbon Cassette Operation Manual Wall Mount Screws Features <Front view> <Back view> Card slot Key hole Cover Wall-mounting Display hole Control button < Display > Day of the week indication Daylight saving time indication Current date Current time Column indication... -
Page 8: Installing The Ribbon Cassette
Installing the Ribbon Cassette Make sure the power is on before setting. Hold the left and right sides of the cover Turn the knob of the new ribbon cassette and lift up. in the same direction as the arrow to tighten the ribbon. - Page 9 4 Precautions to take when replacing the ribbon Take the following precautions when inserting a new ribbon cassette. Install the ribbon cassette so that the ribbon is between the print head and the ribbon mask (see the figure on the left). Printing will not come out properly if the ribbon is placed behind the ribbon mask (see the figure on the right).
-
Page 10: Wall Mounting
Wall Mounting The unit can be mounted on a wall using the wall mount screws supplied. To mount the unit on a wall, take the following steps: Install wall mount screws (supplied) into a wall 3.94 inches (10 cm) apart. Be sure to keep about 0.12 inch ( 3 mm) of the screw head out of the wall. -
Page 11: Daily Operations
4. DAILY OPERATIONS Once the AC line cord is plugged into the outlet, the unit can be used immediately. Basic operations, including the time and closing dates, are preset. See "3. BEFORE USING THE TIME RECORDER" It is easy to operate the unit. Just insert a time card. The card is then automatically pulled in, printed and then ejected. -
Page 12: Setting
5. SETTING Preparation for setting To prepare for setting: Make sure the power is on before making setting. Unlock the cover. Hold the sides of the cover with both hands, and lift it. Key hole Make settings using the control button After the setting has been completed, while watching the display. -
Page 13: Setting The Pay Period
Setting the Pay Period The closing date is factory-set at the end of a month (31st). Monthly Closing 1 Monthly closing 2 Weekly closing 3 BI-Weekly closing 1. MONTHLY 2. WEEKLY Push the SELECT button and position Closing date 3. BI-WEEKLY the "... -
Page 14: Weekly Closing
Weekly Closing 1 Monthly closing 2 Weekly closing 3 BI-Weekly closing Push the SELECT button to position the " " mark at the upper side of the 1. MONTHLY 2. WEEKLY Today's display next to the first item from 3. BI-WEEKLY printing line the left, "PAY PERIOD". -
Page 15: Bi-Weekly Closing
Bi-Weekly Closing 1 Monthly closing Push the SELECT button to position 2 Weekly closing 3 BI-Weekly closing the " " mark at the upper side of the display next to the first item from 1. MONTHLY 2. WEEKLY Today's left, "PAY PERIOD". 3. -
Page 16: Setting The Time
Setting the Time To change the time Example To change the time from 10:08:45 to 10:09:15. Hour Second Push the SELECT button to position Minute TIME the " " mark at the upper side of the display next to the second item from left. -
Page 17: Setting The Date
Setting the Date To change the date Example Change the date from October 20, 2001 to October 21, 2001. 'YY MM-DD Year Month Push the SELECT button to position 'YY=Year MM=Month Date the " " mark at the upper side of the DD=Date DATE display next to the third item from... -
Page 18: Setting The Day Advance Time
Setting the Day Advance Time The day advance time refers to the time when printing shifts to the next line on a time card for the next day. This function enables the punch out time record to print on the same line of the previous working day even if leaving time is after midnight. -
Page 19: Setting The Print Style
Setting the Print Style The print style can be selected from the following six styles. Print Order Options Line Format Example:Monday, 21, 3:30 p.m. 1. DD 24HOUR date, 24hour, minutes 15 : 30 day of the week, 2. D.O.W. 24HOUR 15 : 30 24hour, minutes 3. -
Page 20: Setting The Print Language
Setting the Print Language This setting is available only if "D.O.W. 24 HOUR" has been selected in the previous print style. The print language can be selected from the following six types. Order Options Print Example:Thursday 3:30 p.m. 1. ENGLISH 15 : 30 2. -
Page 21: Setting The Minutes Printing 1/60 Or 1/100 Printing
Setting the Minutes Printing 1/60 or 1/100 printing Order Options Print Example: 21, 2:58 p.m. 1. 1/60 14 : 58 2. 1/100 14 . 96 1. 1/60 Push the SELECT button to position 2. 1/100 MINUTES the " " mark at the upper side of the display next to "MINUTES". -
Page 22: Setting The 12/24 Hour Format
Setting the 12/24 HOUR format The 12/24 hour changes the display only. Order Options Display 1. 12 HOUR PM 3 : 30 2. 24 HOUR 15 : 30 Push the SELECT button to position the " " mark at the upper side of 1. -
Page 23: Setting The Daylight Saving Time (D.s.t.)
Setting the Daylight Saving Time (D.S.T.) Daylight saving time function D.S.T. execution time At 2:00 a.m. on the first day of summer time, the clock automatically gains one hour to show 3:00 a.m. When 2:00 a.m. comes on the last day of the summer time period, it loses one hour and returns to 1:00 a.m. -
Page 24: Setting The Starting Date Of Daylight Saving Time
Setting the starting date of daylight saving time Example If daylight saving time starts on Sunday, March 25, 2001 Month Year Date Push the SELECT button to position START the " " mark at the right side of the display next to "START". The flashing number can be SELECT CHANGE... -
Page 25: Setting The Ending Date Of Daylight Saving Time
Setting the ending date of daylight saving time Example If daylight saving time ends on Sunday, October 28, 2001 The setting procedure is the same as Month Date Year that for the starting date of daylight saving time. Push the SELECT button to position the "... -
Page 26: Setting The Time Table Program
Setting the Time Table Program By setting the Time Table Program, automatic column shift and special mark "*" printing can be set. This function is useful when columns need to be changed to print in/out time without pushing a button or when a clear distinction for late in and early out is needed. "Automatic column shift"... - Page 27 Follow the steps to set time table programs. Print Column Program No. Hour Minute COL.1 COL.2 COL.3 COL.4 Push the SELECT button to position the " " mark at the right side of the display next to "PROGRAM". PROGRAM SELECT CHANGE Hour COL.1 COL.2 COL.3 COL.4...
- Page 28 Print Column Push the CHANGE button to position COL.4 the " " to Column 4. Then push the SET button. This completes the setting of automatic printing in Column 4. PROGRAM SELECT CHANGE To add another program, push the SET button once and then the CHANGE button once.
- Page 29 The following is the time table based on above case. Special mark (*) Program No. Time Example: *10:00 9:00 17:00 • One programmed day begins at the day advance time. See "Setting the Day Advance Time" in this section for details. •...
- Page 30 Minute Print column COL.1 COL.2 COL.3 COL.4 *ON *OFF Push the CHANGE button to move the "Minute" to "00". Then push the SET button. The flashing will change from the PROGRAM "Minute" to the " " of Column 1. SELECT CHANGE Special mark ON/OFF...
- Page 31 To confirm the programs that have been set, flash "Program No." and push the CHANGE button. To delete a program, flash "Hour", and push the CHANGE button. Change the display of the Hour to " ". PROGRAM SELECT CHANGE Then, push the SET button three times to complete deletion of the program. (The figure to the lift is an example of the display when the P2 program is deleted.)
-
Page 32: Resetting
Resetting To return all settings to their factory defaults, push the reset switch with a pointed implement. Reset switch (inside the small round hole) Please note that all your custom settings will be deleted and will revert to the factory defaults when the reset switch is pushed. -
Page 33: Installing The Ni-Cd Battery
6. INSTALLING THE Ni-Cd BATTERY (OPTIONAL) Remove the lid of the battery compartment on the back of the unit Clasp by pushing up the center of the lid, and then release it from the two clasps. Battery Position the battery as shown in the figure to the left . -
Page 34: Troubleshooting
7. TROUBLESHOOTING Error No. appears Refer to the following list for proper operation. Error contents Action E-01 The remaining life of lithium battery for Contact the store from whom you bought the memory back-up is short. unit. E-03 The front and back of the time card inserted is Correctly insert the time card. -
Page 35: Specifications
8. SPECIFICATIONS Monthly accuracy ± 15s (at ordinary temperature) Clock accuracy Year up to 2098. Automatically adjusted to leap years, 31-day Calendar months and months with thirty or fewer days, and the days of the week. Printing system Dot matrix Power failure Five years of cumulative power failure hours after the date of compensation... -
Page 36: Time Card Specifications
9.TIME CARD SPECIFICATIONS Note : Recommended Paper Thickness : 0.45 ± 0.05mm Monthly Card S Card (double-sided) Front Side Reverse Side... -
Page 37: Weekly Card
Weekly Card Bi-Weekly Card... - Page 38 M E M O...
- Page 39 Q0100-6120-3 0107-70A01 Printed in Japan...
Need help?
Do you have a question about the QR-350 and is the answer not in the manual?
Questions and answers