Table of Contents
Advertisement
Installation & Operations Manual
Ashby
Multi-Fuel Insert
"Please read this entire manual before installation and use of this pellet fuel-
burning room heater.
Failure to follow these instructions could result in
property damage, bodily injury or even death."
"Contact local building or fire officials about restrictions and installation
inspection requirements in your area.
Save these Instructions
709
Ashby Insert
1
Advertisement
Table of Contents

Related Manuals for St. Croix Ashby


Summary of Contents for St. Croix Ashby
- Page 1 "Please read this entire manual before installation and use of this pellet fuel- burning room heater. Failure to follow these instructions could result in property damage, bodily injury or even death." "Contact local building or fire officials about restrictions and installation inspection requirements in your area. Save these Instructions Ashby Insert...
-
Page 2: Table Of Contents
TABLE OF CONTENTS General Information ...................... 4 Installation Check List ....................5 Ashby Layout Diagram....................6-7 Ashby Dimensions, Location & Clearances .............. 8-9 Approved Installations ....................10 Installing as a Zero-Clearance Unit ................11 Surround Instructions....................12 Exhaust Venting......................14 Venting - Approved Materials ............... - Page 3 Safe Operation ......................54 Wiring Schematic......................55 Troubleshooting & Frequently Asked Questions ..........56-59 Parts Breakdown (Specific to Versa Grate System ) ............ 60 Parts Breakdown (Multi-Fuel Pot & Common parts) ..........61-62 Warranty ........................63 Ashby Info & Notes ...................... 64 Ashby Insert...
-
Page 4: General Information
DISCLAIMER OF WARRANTY Since Even Temp Company has no control over the installation of the Ashby, Even Temp Company grants no warranty, implied or stated, for the installation of the Ashby and assumes no responsibility for any special, incidental or consequential damages. -
Page 5: Installation Check List
4. Caution: The high temperature paint can be easily scratched prior to burning the Multi-Fuel Insert. CAUTION FAILURE TO FOLLOW THE INSTRUCTIONS IN THE INSTALLATIONS MANUAL MAY RESULT IN A HOUSE FIRE. PLEASE FOLLOW INSTALLATION AND MAINTENANCE INSTRUCTIONS. TABLE OF CONTENTS Ashby Insert... -
Page 6: Ashby Layout Diagram
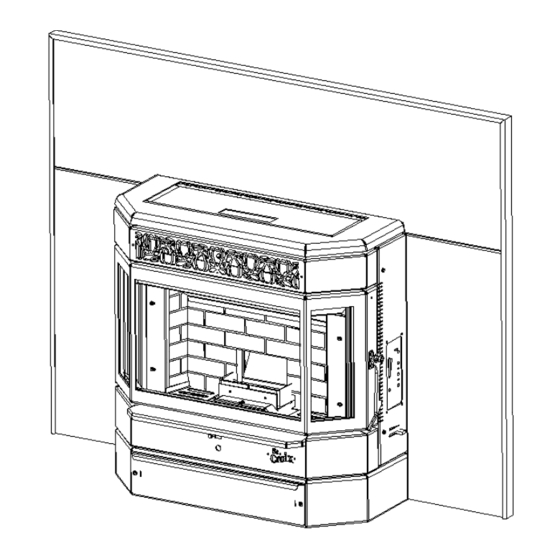
Stove Layout Figure 1 There are two burn systems used in the Ashby. These systems are interchangeable in the stove body. The first is the St. Croix Patent Pending “Clinker Removal System”. This burn pot allows the clinker to be removed without loosing the fire in the pot. This eliminates the need of having to constantly re-light the Ashby after removing the clinker. - Page 7 Figure 2 Multi-Fuel Burn System Pellets, Corn, Wheat, Rye, Cherry Pits & Distillers Grain Pellets Figure 3 Versa Grate System Pellets & Cherry Pits Ashby Insert...
-
Page 8: Ashby Dimensions, Location & Clearances
INSERT DIMENSIONS Figure 4 Ashby Insert... -
Page 9: Clearance To Combustibles
The Hearth must extend a minimum of 6” (152 mm) in Front of Unit and beyond each side of the Fuel Loading and Ash Removal Opening(s). If the hearth is too short a non-combustible Hearth Extension must be installed. Ashby Insert... -
Page 10: Approved Installations
Chimney must be listed per UL 127 or ULC S610 standards. 3. As a Zero Clearance Fireplace. When building the unit in as a Zero-Clearance Fireplace, St. Croix factory Built Cabinet, part # 80P53963, must be used. Follow instructions on page 10. -
Page 11: Installing As A Zero-Clearance Unit
Installing as a Zero-Clearance unit Figure 8 When installing the insert as a Zero-Clearance unit, it must be installed into the St. Croix metal cabinet part number 80P53963. The cabinet must be installed on five 4x8x16 concrete blocks as shown in figure 8 above. The framing dimensions listed above are based on using 4x8x16 block. -
Page 12: Surround Instructions
5. Slide the assembled surround around the insert and in front of the fireplace opening. Slowly slide the insert back and insert the side panels into the slot on each side of the surround as shown in Figure 9. Figure 9 Ashby Insert... - Page 13 Wheat, & Rye have higher moisture content than pellets and can be more susceptible to condensation forming in certain types of installations. Install the Ashby with a minimum of the Vent system exposed to the cold temperatures outside the envelope of the house. Insulate the vent system if in doubt. Check with the manufacturer of your venting system that they honor the warranty of their PL Vent with the use of corn.
-
Page 14: Exhaust Venting
VENTING: APPROVED MATERIALS The Ashby requires a venting system approved for pellet or corn venting by a certified testing lab. Approved pellet or corn venting materials are: 1) PL vent, a double wall vent with a stainless steel liner; and 2) Single wall rigid or flexible stainless steel pipe. PL Vent and Single wall vent is available through manufacturers such as: Energy Vent LTD, James A. -
Page 15: Venting-Typical Pl Vent Components
TYPICAL PL VENT COMPONENTS RAIN CAP VERTICAL OR WALL THIMBLE CHIMNEY SUPPORT BRACKET HORIZONTAL ADAPTER ADJUSTABLE LENGTH SINGLE TEE SINGLE REDUCTION DOUBLE TEE PIPE w/TEE CAP TEE w/TEE CAP w/TEE CAP PIPE ADAPTER INCREASER ELBOW ELBOW Ashby Insert... -
Page 16: Venting: Determining Materials
4. A clean out “tee” has been built into the Ashby. This cleanout system is to assist in periodically cleaning the vent pipe. The exhaust system can periodically be cleaned from the inside of the unit without having to pull the unit from the fireplace. -
Page 17: Venting: Termination Requirements
10a. Figure 10a 4’ (1.2 m) BELOW a door, window, cavity, or air vent 4’ (1.2 m) HORIZONTALLY FROM a door, window, cavity, or air vent 1’ (305 mm) ABOVE a door, window, cavity, or air vent Ashby Insert... - Page 18 50000 BTU/Hr shall be located not less than 12” from the opening. Figure 10b 9” (229 mm) ABOVE, BELOW OR HORIZONTALLY FROM a door, window, cavity, or air vent. Ashby Insert...
-
Page 19: Venting: Termination Clearance Requirements
1’ (305 mm) FROM The wall penetration point 3’ (915mm) FROM a gas meter/regulator assembly 2’ (610 mm) FROM any adjacent combustibles such as: Adjacent buildings, fences, protruding parts of the structure, roof eaves or overhangs, plants, shrubs, etc. Ashby Insert... -
Page 20: Venting - Into An Existing Chimney
Outside combustion air may be recommended when certain conditions exist (i.e. negative pressure). A chimney system with known drafting problems may require a liner, which may also need to be insulated to keep vent system warm in cold chimney environment. Ashby Insert... - Page 21 Figure 13 Positive Connection to an existing Chimney with outside air (optional). The stove may be connected to an existing Class A chimney or a masonry chimney which meets the minimum requirements of NFPA 211. Ashby Insert...
- Page 22 (Masonry Fireplaces or as a built-in Zero-Clearance unit only) ATTENTION: We strongly recommend using a battery backup system if the stove is installed using horizontal venting only. This prevents any smoke from entering your home in the event of a power failure. Ashby Insert...
-
Page 23: Combustion Air
COMBUSTION AIR 1. Under certain conditions it is recommended that the Ashby be connected to an outside source of combustion air to improve performance. Flexible metal hose, or rigid metal pipe, (conduit), must be connected around (NOT INSIDE) the combustion air inlet tube. Be careful not to pinch or bend the outside air pipe with too small a radius which may be terminated flush with the outside wall but should be protected from wind and weather by a hood. -
Page 24: Mobile Home Installation
6. Check any other local building codes or other codes that may apply. 7. Do no use components other than those specified for use with this unit. 8. Floor protection requirement must be followed precisely. 9. Approved Venting materials are Single Wall Stainless, Stainless Flex, PL Vent and Corn Vent. Ashby Insert... -
Page 25: Thermostat Hook-Up
USE OF A THERMOSTAT St. Croix Pellet stoves offer our customers the optional feature of thermostatically controlling your new stove. By using a thermostat to control the operation of your Pellet stove, you can benefit two ways. First of all, after setting the thermostat to your desired heating needs the stove will operate accordingly to uniformly maintain your desired temperature setting. -
Page 26: Ashby Operation
Local Building Codes. Installation Requirements are described in the first section of this manual. Verify the installation is correct before firing up the Ashby for the first time. When burning corn, wheat or rye, care should be taken in how the venting system is installed. To burn corn, wheat or rye the moisture content should be 15% or less. -
Page 27: Approved Fuels
PELLETS - Contact your dealer for more information on PFI approved wood pellet fuels. St. Croix Corn stoves come equipped with a burn pot installed that has removable side shields. When burning pellets or any other fuels mixed with pellets, the side shields must be removed. Failure to remove the side shields will prevent fuel from spilling into the ashpan in the event the pot overloads. - Page 28 Rye is also a small lightweight grain, more residue will blow out of the burnpot as it burns. If an excessive amount seems to be blowing out of the pot, adjust the damper by closing it a small amount at a time. (Read the section covering the Combustion Air Damper on page 37 - 40) Ashby Insert...
- Page 29 The shields must be removed when burning Pellets, Cherry Pits & Distiller’s Grain Pellets. The above figure also shows how to access the firebox ash pans, by removing the lower panel and opening the firebox ashpan door. Ashby Insert...
-
Page 30: Operating Instructions
9. Smoke detectors, installed in the same general area as the Ashby, may be activated if the insert door is left open and smoke is allowed to enter the area. -
Page 31: Control Board Features
Settings the Ashby is running on. page 34 for more details. 1. The On/Off button not only turns the Ashby On and Off, it also resets the board if one of the sensors has detected a problem and the board is flashing a Diagnostic code. - Page 32 T-Stat Mode. The Multi-Fuel Insert is hooked to a Thermostat and when calling for heat the Ashby will advance to the Heat level set at the Control board. Once the Heat demand has been met the Insert will drop to the #1 Heat Level setting and pilot.
-
Page 33: Pre-Lighting & Lighting Instructions
1 - Program 1. The Cycle Time is 11.5 seconds. This program will be the default program when the Ashby is first plugged in. This program does not offer self ignition. This program is for use with Pellets, Corn, Wheat and Rye, Cherry Pits &... - Page 34 At this point all that needs to be done is to monitor the burn pot to make sure the stove starts up properly. Once the On/Off button has been pushed the Start Up program takes over. The Start up Program works as follows: Ashby Insert...
- Page 35 The board will check for P.O.F. one more time. If the board still fails to sense the Proof of Fire switch, the stove will go into “Safety shutdown” (See Diagnostic Features on page If the stove fails to start, repeat steps listed above. CAUTION: NEVER ADD FIRE STARTER TO A HOT STOVE. Ashby Insert...
-
Page 36: Shutting Off The Insert
The board essentially goes into “Safety shutdown”. 2. As long as the temperature within the Ashby remains above 110°F the both Fans will continue to run. When the P.O.F. switch drops out, the room fan shuts of and the Combustion fan will run for another 10 minutes and finally shut down completely. -
Page 37: Safety Features
WARNING: The Insert has been Safety Tested by an accredited, independent laboratory. These safety features are designed to protect life and property. Bypassing these features voids all warranties and the safety listing of the Furnace. Ashby Insert... -
Page 38: Combustion Air Damper - Location And Adjustments
If you notice a difference in the operation of the Ashby, first check to see if the Insert needs cleaning. Then check to see if there is a change in the fuel you are burning. The moisture content of your corn, wheat or rye may be too high or the quality of the pellets you are burning may have changed. - Page 39 Once the Ashby has been lit for the first time, the damper will need to be adjusted. The process is different for Corn, wheat, rye, Distillers Grain Pellets than Pellets & Cherry Pits. This may take some time, so please be patient during this process. This Damper Adjustment process only needs to be done once.
- Page 40 (See point 9 in the Troubleshooting & Frequently Asked Questions Section in the back of the manual) If the Ashby has been connected to an existing Chimney system that has good natural draft, the procedure mentioned in the last 2 points above may actually require that the damper gets closed slightly instead of opened to compensate for the additional draft in the chimney system or use the Trim button to adjust the Combustion Fan voltage.
-
Page 41: Thermostat Control & Pilot Settings
(See point 9 in the Troubleshooting & Frequently Asked Questions Section in the back of the manual) If the Ashby has been connected to an existing Chimney system that has good natural draft, the procedure mentioned in the last 2 points above may actually require that the damper gets closed slightly instead of opened to compensate for the additional draft in the chimney system or use the Trim button to adjust the Combustion Fan voltage. -
Page 42: Ashby Maintenance
Very little residue ends up in the ash pan. When burning Pellets in the Ashby, ash will build up in a similar manner as the clinker does when burning corn, wheat or rye. The pot is maintained the same way as described in the following section covering the removal of the clinker. -
Page 43: St. Croix Clinker Theory
Once a clinker/ash has formed in the burn pot, it must be removed or the unit will go out. The St. Croix Burn system is designed to remove the clinker/ash without loosing the fire in the burn pot. It is a 3-part system. -
Page 44: Daily Maintenance (Multi-Fuel Pot)
Approximately every 18 hours. This may vary depending on the quality of Corn, wheat, rye or pellets used. The daily maintenance will mainly focus on 4 areas in the Ashby; removing the clinkers from the ash pan (if needed), dropping the clinker from the burnpot, cleaning the heat exchange tubes and cleaning the glass. - Page 45 Rod Handle tool that came with the unit. Figure 24 4. The control board. Set the heat setting to #1 for a few seconds and return to the setting it was on. This initiates the time delay for dropping the clinker. Ashby Insert...
- Page 46 2. If the Ashby has been running for an extended period of time on the #5 setting, the clinker will sometimes stick to the burn pot. If that happens, pull the coal rake back out.
-
Page 47: Versa Grate System
When you first operate your stove or whenever you change fuels check to determine needed cleaning frequency. First, let’s become familiar with the burn system in a St. Croix Pellet stove. Remember, cleaning frequency may change dramatically from one fuel to another. Pellets with high ash content or that have increased amounts of impurities or high moisture content. -
Page 48: Daily Maintenance (Versa Grate System)
Clean as needed. With proper precautions the grate may be partially cleaned while the stove is hot. Follow these steps: a. Wear a leather glove that covers the lower arm. b. Turn the Stove to Heat Level 1 and allow the flame to burn down to a low burn. Ashby Insert... - Page 49 6. Burn the stove at the HI fuel setting for at least 20 to 30 minutes each day. This helps keep the window, firebrick and firebox area clean. A daily high burn also aids in maintaining the overall efficiency and performance of the stove. Ashby Insert...
-
Page 50: Periodic Maintenance
Remove the screw that holds the burn pot in place and lift the pot out of the insert. To remove the Slide-out Bottom remove the lower panel and open the firebox ash pan door. Slide the bottom out of the insert. Ashby Insert... - Page 51 1.25” outside diameter. Frequency of cleaning depends on the amount of fuel being burnt and the quality of the Corn, wheat, rye or pellets. Failure to clean the ash traps will cause the Insert to become plugged with Fly Ash. Ashby Insert...
- Page 52 Fuel with low ash content is recommended. Failure to clean the baffle can cause the Multi-Fuel Insert to become plugged with fly ash. To remove the baffle, simply lift the baffle up off of the brick and remove from the insert. Figure 30 Ashby Insert...
-
Page 53: Yearly Maintenance
Many dealers offer a Service Contract that will cover Yearly Maintenance. Contact your St. Croix Dealer for assistance in maintaining your Ashby in top condition. Yearly maintenance is designed to assure safe operation, prolong the life of the Ashby and help preserve its aesthetic appeal. -
Page 54: Safe Operation
Insert. If creosote has accumulated, it should be removed to reduce the risk of a chimney fire. 4. Do not Overfire this unit. Follow all instructions regarding the proper use of this heater. Ashby Insert... -
Page 55: Wiring Schematic
2 Amp with out the igniter running. The minimum recommended circuit is 15 Amp. A dedicated circuit for the Insert is recommended. CAUTION: The electrical components of the Ashby are not owner serviceable. Call your dealer for proper diagnosis of electrical problems and service to those components. -
Page 56: Troubleshooting & Frequently Asked Questions
Proof of Fire Switch no longer senses a fire in the Insert. First check to see if there are pellets in the hopper. If there are pellets in the hopper, we need to figure why the Insert went out. Ashby Insert... - Page 57 Check the fuse on the back of the control board. Replace with a 125 Volt, 5 Amp fuse. Why is my glass dirty? Normal operation of your St. Croix Insert will produce a light build-up on the glass that wipes off with a dry paper towel. However extended burning on the low setting only will produce a tan color.
- Page 58 LED’s. The default setting is the center LED. This gives 2 adjustments increasing the voltage (LED’s 4 & 5) and 2 adjustments decreasing the voltage. (LED’s 1 & 2) The voltage is increased or decreased 2.5 volts with each adjustment. Figure 34 Ashby Insert...
- Page 59 Step 4 – Observe the LED light flashing as described in point 10 above. Changing the Cycle Time will change the BTU Input of the Insert. The longer the Cycle time the lower the BTU rating. Figure 35 Ashby Insert...
-
Page 60: Parts Breakdown (Specific To Versa Grate System )
80P52376-R CAM CONNECTOR ROD 80P53695-R SHAFT/CAGE WELDMENT 80P52953-R VERSA GRATE BRACKET ASSEMBLY 80P50560-R 80P52955-R REAR BUSHING ASSEMBLY 80P53914-R IGNITER TUBE WELDMENT 80P52727-R IGNITER 80P50553-R SPACER 98355A070-R COTTER PIN 80P52038-R SHAKER PLATE 80P53884-R GRATE WELDMENT 80P52954-R FRONT BUSHING ASSEMBLY Ashby Insert... -
Page 61: Parts Breakdown (Multi-Fuel Pot & Common Parts)
DAMPER ROD EXTENSION COLLAR 80P52630-R TERMINAL BLOCK 80P30368-R DAMPER INTAKE EXTENSION ROD 80P52628-R VACUUM SWITCH 80P30457-R VACUUM SWITCH BRACKET 80P30456-R RIGHT CONVECTION FAN 80P53957 RIGHT SIDE PANEL WITH CLINCH STUDS 80P30523 CONTROL BOARD 80P30550 MAGNET BRACKET 80P30553 MAGNET Ashby Insert... -
Page 62: Ashby Insert
LEFT DECORATIVE GRILL 80P53770 HOT AIR BOX W/ CLINCH STUDS 80P30599 STEEL BRICK PANEL, RIGHT 80P30606 STEEL BRICK PANEL, BACK 80P30362 HEAT EXCHANGE BAFFLE 80P30353 ASH DOOR HINGE BRACKET - LEFT 80P30429 SIDE PANEL - LEFT 80P20183 HANDLE PULL P2-54 Ashby Insert... -
Page 63: Warranty
All costs of removal, shipment to and from the dealer or manufacturer, any losses during shipment and reinstallation and any other losses due to the Ashby being removed shall be covered by the owner of the Multi- Fuel Insert. -
Page 64: Ashby Info & Notes
Draft Trim: Circle one (See point 4 on page 32) LED #1 LED #2 LED #3 LED #4 LED #5 FUEL: Circle One PELLETS CORN WHEAT RYE CHERRY PITS DISTILLERS GRAIN PROGRAM: Circle one (see Figure 19 on page 34) Serial Number: Date of Purchase: Dealer Information: Ashby Insert... - Page 65 Even Temp, Inc. P.O. Box 127 Waco, NE 68460 EMAIL: SUPPORT@EVENTEMPINC.COM WEB ADDRESS: www.eventempinc.com Ashby Insert...
Need help?
Do you have a question about the Ashby and is the answer not in the manual?
Questions and answers