Table of Contents
Advertisement
Quick Links
Advertisement
Table of Contents

Related Manuals for FLY SLT100


Summary of Contents for FLY SLT100
- Page 1 SLT100 User Manual...
-
Page 2: Table Of Contents
CONTENTS YOUR PHONE ............ 03 GETTING STARTED ........... 13 MAKING AND RECEIVING CALLS ....17 (Phonebook, Call History) MESSAGING ............27 (SMS, MMS, E-Mail, Voicemail, Broadcast Message) MULTIMEDIA ............45 (Camera, Image Viewer, Video Recorder/Player, Photo Editor, Sound Recorder, FM Radio, Schedule FM Record, Melody Compose, TV Out) FUN .............. -
Page 3: Your Phone
YOUR PHONE... - Page 4 IN THE BOX Thank you for purchasing this product. Please check to ensure you have all of the items below.* Handset Battery User’s Guide Travel Adapter Ear/Microphone TV Out Cable PC Sync CD & USB Cable (*Images may vary slightly from the actual product.)
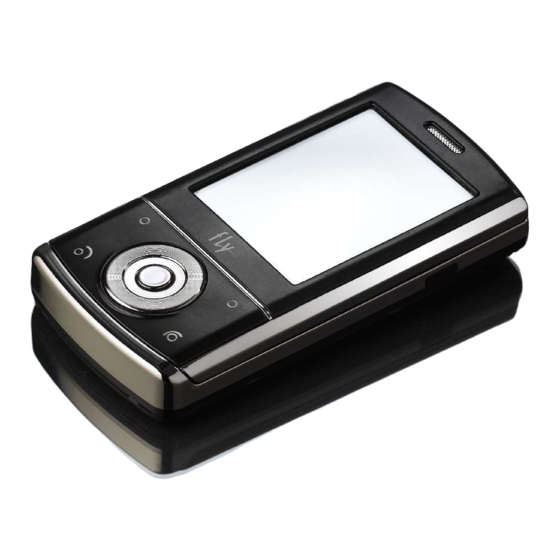
- Page 5 DESCRIPTION OF THE PHONE Phone Layout Notes: • All illustrations, simulated screen and related images used in this manual are for reference only. There may be slight differences between the handset and keys and content of display used in this manual and those of your handset.
- Page 6 KEY DEFINITION Soft Keys Perform functions identified on the bottom line of the display. Navigation Keys Move up, down, left and right through menus or in normal editing mode. WAP Key ([OK] Key) • In idle mode, press to access the WAP menu or press and hold to launch the WAP browser.
- Page 7 Alphanumeric Keys • Press to enter numbers, letters and special characters. • In idle mode, press and hold [1] to access the Voice Mail function. Special Function Keys Press to enter special characters to perform various functions. Power on/off Key Press and hold to switch the phone on/off.
- Page 8 DISPLAY LAYOUT The idle screen display includes the following information: Icons Displays various icons Text & Graphics Display messages, instructions, and information you enter. The Current Date & Time Dedicated Icons Soft Function Indicators Show the current functions assigned to the soft keys.
- Page 9 ICONS Signal Strength: Tells you the strength of the network signal – the more bars, the stronger the signal. GPRS: Shows GPRS is in range and the strength of the signal. Roaming: Roaming on other networks is enabled. Missed Calls: You have missed an incoming call(s).
- Page 10 Call Barring On: All incoming calls are barred. Call Forward: All incoming calls are diverted to another number. IrDA: The IrDA function is switched on Bluetooth: Bluetooth function switched on. Bluetooth Headset: Appears when Bluetooth hands-free headset is connected. Bluetooth Connected: Appears when the Bluetooth device is connected.
- Page 11 Lock: The phone is locked. Battery Strength: Shows the level of your battery - the more bars, the more power remaining. Headset: The profile is set to Headset. ACCESSING THE MENU FUNCTIONS The phone’s menu functions can be accessed by using the soft keys.
- Page 12 Notes: Always use the stylus pen for tapping or making stokes on the phone screen. Never use an actual pen, pencil or other sharp object to write on the phone screen to prevent the screen from becoming scratched.
-
Page 13: Getting Started
GETTING STARTED... - Page 14 SWITCHING THE PHONE ON AND OFF To switch the phone On or Off, press and hold the power on/off key on the top of the phone. If the phone asks for a PIN (Personal Identity Number), enter your PIN. The phone will search for your network and, once located, will display the idle screen.
- Page 15 Note: Turn off the phone when inserting the SIM card to prevent accidental damage to the SIM card or phone. CHARGING THE BATTERY Your phone comes with a battery, and a travel charger. You can also use the USB data cable to charge your phone via a computer.
- Page 16 The phone will switch off automatically if the battery is too weak to operate. Note: If the battery is discharged completely and not used for a while, the phone will not display the charging image for about the first 30 minutes of charging.
-
Page 17: Making And Receiving Calls
MAKING AND RECEIVING CALLS... - Page 18 MAKING A CALL From the idle screen, enter the phone number and touch the telephone icon on the display screen or press the [Send] key. To end the call, press the [End] key or close the phone. RETRIEVING A PHONE NUMBER Select [Name] from the idle screen and highlight a name or enter the name you want to search for then press the [Send] key to make a call.
- Page 19 Choose the number you wish to assign the speed dial for by selecting [Add] or pressing the left soft key. Now when you press and hold that number key, the assigned phone number will be called. Note: Key [1] is reserved for your voice mail server. MAKING A CALL FROM A SMS/MMS MESSAGE When viewing a message, touch [Option] or press the left soft key and select [Use Number].
- Page 20 THE PHONE BOOK You can use the Phone Book to store names and phone numbers to the phone’s memory or to a SIM card. access the Phone Book menu, from the idle screen, select [Menu] and then choose [Phonebook]. STORING A PHONE NUMBER As you enter a phone number, the left soft key [Save] lets you store the number to your phonebook.
- Page 21 Search Entry Allows you to search the Phonebook by name, enter the name you want to search or even a start letter in the input box and choose [Option]. Select [Search] and the entry will appear. To call the number press the [Send] or the telephone icon.
- Page 22 • Associate Video: assign a video to a person/group. • Member List: assign numbers to the group member list. Speed Dial Allows you to set up and edit eight frequently dialled numbers as speed dial. See page 17 for instructions on setting up and using the Speed Dial function Special Number Allows you to view and edit your Owner Number, Service...
- Page 23 CALL HISTORY Your phone keeps a list of calls you recently dialled, received or missed. The most recent calls are listed and the oldest calls are deleted as new ones are added. To access the Call History menu, from the idle screen choose [Menu] and select [Call History].
- Page 24 Received Calls Displays the most recently received calls. In the list of Received Calls, you can view the details of the time and date of a call by choosing [Ok]. Selecting [Option] enables you to Dial the number or alternatively Delete, Save to Phonebook or Edit the entry.
- Page 25 GPRS Counter Allows you to see how much data has been sent or received by the phone. IN CALL OPTIONS Your phone provides access to a number of options for use during a call. Press the left soft key [Option] during a call to access any of the following options: Hold Allows you to place the current active call on hold by...
- Page 26 Message Centre Allows you to access the SMS menu to make or read text messages during a call. The [Message Centre] menu also provides access to the [Voice Mail] and [Broadcast Message ]functions. Sound Recorder Allows you to record the current call Mute Allows you to mute the call.
-
Page 27: (Phonebook, Call History) Messaging
MESSAGING... - Page 28 MESSAGE CENTRE The Message Centre menu allows you to send and receive text messages (SMS), multimedia messages (MMS), voice mail and cell broadcast messages. To access the menu from the idle screen, choose [Menu] and then select [Messages Centre]. Note: Before you start, make sure the number of your service centre is set.
- Page 29 alphanumeric keys. Once your message is complete, press [Option] and then select [Done] to choose one of following send options: • Send Only: send to the recipient phone number. • Save and Send: save and send the message to the required recipient. •...
- Page 30 Tip: If you receive a call while writing a message, the message will be saved and you can return to it once the call is complete without losing the data. The following can also be accessed by selecting [Messages] from the [Message Centre] menu. Inbox This folder stores all received SMS messages and allows you to view new or previously read messages.
- Page 31 Outbox Allows you to view and edit unsent messages that you have saved. You can select the options above from the outbox menu. Sent Allows you to view and edit sent messages that you have saved. You can select the options above from the outbox menu.
- Page 32 Message Settings Allows you to set up default Message Information for the following: • Profile Settings: Profile Name, SC Address, Valid Period, Message Type • Common Setting: Delivery Report, Reply Path • Memory Status • Preferred Storage: SIM, Phone. • Pref.
- Page 33 Writing a Message Allows you to write a message and insert an Image, Sound, or Attachment. From the [Message Centre] menu and choose [Write Message] and then [Multimedia Message]. You will then be able to insert phone numbers or email addresses to the following fields: [To], [CC], [BCC].
- Page 34 A Success or Fail message will be displayed on the screen for all recipients when the message is sent to multiple people. Note: If you receive a call while writing a message, the message will be saved and you can return to it once the call is complete.
- Page 35 The following options can be accessed by selecting [E-Mail] from the [Multimedia] menu. Write Email Enables you to compose an E-Mail message by inputting the following fields: • To: the recipient’s e-mail address. • CC: the e-mail addresses of any carbon copy recipients.
- Page 36 Draft Displays a list of draft e-mails which have been composed but not yet sent. Delete All Folder Allows you to delete all e-mails in a selected folder. E-mail Profile Allows you to configure various servers and Profile related settings. All the configurable items are grouped into entities called Profiles.
- Page 37 BROADCAST MESSAGE If this service is available, the phone may display Broadcast Messages for topics such as weather and traffic as soon as they are received by the phone. The [Receive Mode] option needs to be set to [On]; and the message channel needs to be set to the correct channel.
- Page 38 Using Handwriting Mode: Your phone uses character recognition software allowing you to convert your handwriting into typed characters accurately and efficiently. Tips for using Handwriting Mode: • Because of the touch screen’s sensitivity, choices displayed may differ each time you write a character. •...
- Page 39 Entering a Word When using Handwriting Mode the screen will be displayed as follows: Location Function Display the selected menu Text input field Change to the keyboard mode Change to the symbol mode Clear the last input Enter a space Enter a character on the next line Change the text input method...
- Page 40 To enter a word, select an input mode from the screen then write one character at a time on the Text Input field. Where several choices of spelling are offered, tap the one required to enter it into text. Sequences of Pen strokes: You should refer for the following tables of pen strokes when using the English alphabet, numbers and/or symbols:...
- Page 41 Using Keyboard Mode on touch screen: You can choose either the alphabetic, numeric or symbolic keyboard and then enter characters using the onscreen keyboard by tapping them with the stylus pen. In Keyboard Mode, the screen is displayed as follows:...
- Page 42 Location Function Display the selected menu Text input field Display available choices Display the character you selected Change to Handwriting Mode Clear the last input Change to the Symbol Mode Enter a space Change the text input mode...
- Page 43 T9 TEXT INPUT T9 Text Input uses a built in dictionary to recognise commonly used words for each sequence of key presses. When writing T9 messages, you press each key only once even if the letter you want is not the first letter on the key. To activate T9 text editing mode, you need to be in the [Write Message] menu in SMS or MMS.
- Page 44 • Press the [*] key to toggle and select upper and lower cases of abc, Abc, and ABC. • Press [1] to enter full stops and other punctuation marks. • Press [0] to insert a space.
-
Page 45: (Sms, Mms, E-Mail, Voicemail, Broadcast Message) Multimedia
MULTIMEDIA... - Page 46 MULTIMEDIA To access the Multimedia menu, from the idle screen, press [Menu] and select [Multimedia]. The Multimedia menu provides access to the following features: • Camera: to take pictures. • Image Viewer: to view images. • Video Recorder: to record video. •...
-
Page 47: Key Setting
Taking and Saving a Photo Choose [Camera] option from the [Multimedia] menu and a preview will be displayed on the screen. To take a picture, press the centre navigation key. Your picture will be automatically saved to the [Image Viewer] facility and can be viewed by tapping the icon at the top right hand corner of the screen. - Page 48 Setting Effect Settings (Normal, Grayscale, Sepia, Sepia Green, Sepia Blue, Color Invert, Gray Invert, Blackboard, Whiteboard, Copper Carving, Blue Carving, Embossment, Contrast, Sketch) White Balance (Auto, Daylight, Tungsten, Fluorescent, Cloud, Incandescence) Flash Light (On, Off) Delay Timer (Off , 5sec, 10sec, 15sec) Continuous Shot (Off, 3Shot, 5Shot, 9Shot, Burst Shot) Go to Image Viewer...
- Page 49 IMAGE VIEWER Allows you to see the photos stored on the phone by selecting [Image Viewer] from the [Multimedia] menu. Your photos will be displayed as thumbnails with the image name and image size. By choosing [Option] the following options will be available: •...
- Page 50 Video Recorder Settings: As with the Camera function, the Video Recorder settings can be changed by pressing the alphanumeric keys or by pressing the left soft key [Option] (see page 47 for instructions). VIDEO PLAYER Gives you access to all of the videos stored on the phone/memory card.
- Page 51 PHOTO EDITOR Allows you to edit photos and images taken on the camera or received by selecting [Photo Editor] from the [Multimedia] menu. You can edit a photo image by selecting the file from the [Photo Manager] menu. This takes you to the [File Manager] menu and the various file folders on the phone.
- Page 52 The [Image Tile] option allows you to edit an image by combining several saved shots in one frame. By selecting [Slide Show] you can view a sequential presentation of the images in a folder. AUDIO PLAYER You can use your phone to play MP3, MIDI, WAV, AMR or iMelody files using the navigation keys to play, rewind, fast forward and stop, as well as skipping between tracks.
- Page 53 • Display Setting: Skin, Spectrum Display Style. • Sound Effects: Audio Equalizer, Play Speed, Audio 3D Effect. To create a Play List Select [Audio Player] and press the left soft key [List]. Then choose [Settings] from the Option list and turn the [List Auto Generation] setting to [Off].
- Page 54 FM RADIO Your phone allows you to listen to FM stations and also to record live radio broadcasts. Listen to FM radio To access the FM Radio, first connect the earphone to the phone and then choose the [FM Radio] option from the [Multimedia] menu.
- Page 55 Storage (Phone/Card). • Record: record the radio. • Append: attach additional recordings to the previously recorded file. • File List: display the list of files. SCHEDULE FM RECORD You can preset your phone to record up to 4 programmes at specific times using the following options: •...
- Page 56 1: Do, 2: Re, 3: Mi, 4: Fa, 5: Sol, 6: La, 7: Ti 8: Vibration – vibrates the phone. 9: Light – lights the LED 0: Rest – indicates a rest place. * : toggles options, such as notes rest # : changes the accidentals.
- Page 57 To Manage your Melody Files: If you have more than one melody file, the following options are available : • Play: play the selected file. • Edit: edit composed music. • Add: compose a new melody file. • Rename: rename the selected file. •...
- Page 58 When the TV is set to External Input mode, the phone display switches to TV Out mode and its display will be viewed on the TV screen. From the [TV Out] menu, the following options are available: • Settings (Output format, Audio Output) •...
- Page 60 Fun provides access to the Java interface and Games. To access the Fun menu, from the idle screen, press [Menu] and select [Fun]. JAVA™ Lets you play embedded Java games and download Java games and applications from the internet via WAP. To see a list of Java games preinstalled on your mobile phone, from the [Fun] menu highlight [Java].
- Page 61 GAMES Your phone is pre-loaded with embedded games. Please note the instructions for each game. To access these games, from the [Fun] menu highlight [Games] and press [Ok]. Once selected, the following options are available: • Start Game: start playing the game. Press the right soft key [Back] to return to the menu.
-
Page 62: (Java, Games) Organise
ORGANISE... - Page 63 ORGANISE The Organise menu allows you to use a Calendar and To- Do List to keep track of your schedule as well as providing helpful features like Alarm, World Clock, Calculator, Unit Converter, Health and Stopwatch. These functions can be accessed by pressing [Menu] from the idle screen and then selecting [Organise].
- Page 64 • Edit Task: edit the selected task. • Delete Task: delete the selected task. • Delete All: delete all tasks listed on the selected date. • Send vCalendar: send a task. ALARM Allows you to set up to five alarms to ring at specific times, using the following options: •...
- Page 65 As the time line moves, the current day and time of the chosen time zone is displayed. The screen also shows the Day or Night icon ( CALCULATOR Allows you to perform the basic arithmetic and memory functions by using the touch screen or navigation keys. UNIT CONVERTER Allows you to perform simple conversions from one type of unit to another.
- Page 66 STOPWATCH Allows you to measure times by selecting one of the following: • Typical Stopwatch: features Split Timing for measuring each player’s record from the start, and Lap Timing to measure each lap record. The saved timing records can be displayed by selecting [View Record] from the menu.
-
Page 67: (Calendar, To Do List, Alarm, World Clock, Calculator, Units Converter, Health, Stopwatch, E-Book) Settings
SETTINGS... - Page 68 SETTINGS The Settings menu allows you to set your phone up in the way which suits you most or to reset the settings to their default values. To access the settings menu, from the idle screen, choose [Menu] and select [Settings]. PHONE SETUP The Phone Setup menu allows you to change the way your phone operates.
- Page 69 • Ring Type: sets the ring type for the ring tone to Single, Repeat, Ascending. • Extra Tone: sets an on/off alert for Warning, Error, Camp On, Connect. • Answer Mode: lets you select to answer an incoming call by Slide Answer (by opening the phone), Any Key Answer, Send Key Answer or Auto Answer (when in Headset Mode).
- Page 70 Display Settings Allows you to customise the following phone display features: • Wallpaper • Screen Saver • Power On/Off Display • Themes • Greeting Text • LCD Backlight • Show Date and Time Dedicated Icon Press one of the navigation keys from the idle screen to get quick access to the following functions: •...
- Page 71 CALL SETUP Note: Call Setup features are network services. Please contact your network provider to check availability, and pricing and to subscribe to these feature. Each of the following functions can be accessed by selecting the [Call Setup] option from the [Settings] menu. Caller ID Allows you to hide or display your number when making a call, using the following options:...
- Page 72 • Divert All Voice Calls • Divert If Unreachable: divert calls if you are not in a coverage area of your service provider. • Divert If No Answer: divert calls if you do not answer the phone. • Divert If Busy: divert calls if you are already on another call.
- Page 73 Auto Redial Allows you to redial automatically when the call receiver is busy. If you set [Auto Redial] on, it will redial up to 10 times. Closed User Group Allows you to add closed user group settings by entering a name and index.
- Page 74 GPRS Connection Press the left soft key [Change] to change the setting for the GPRS connection and select [Always] or [When Needed]. Band Selection Allows you to choose the frequency band from [Auto], [900/1800], [900], [1800], [1900]. SECURITY SETUP There are six types of security setting, and you can optimise security by choosing sub menus from the [Security Setup] menu.
- Page 75 Fixed Dial When Fixed Dial is enabled, calls can only be made to phone numbers stored in the Fixed Dial List. The following options are available in Fixed Dial Mode once PIN2 has been entered: • View and Edit: view and edit an FDN entry. •...
- Page 76 PEN SETUP Allows you to personalise the stylus to suit your own handwriting by using [Pen Calibration] to optimise the touch screen and using [Handwriting Setup] to set the pen speed. SOUND EFFECT Allows you to choose from the following sound effect settings: •...
- Page 77 Tip: When not using Bluetooth, set the Bluetooth Mode to Off to save battery power. Search for Device This option will search for Audio device(s) within range of your phone. To search, put the device as near as possible to your phone, make sure your phone and the Bluetooth device are both turned on and that your phone has Bluetooth mode switched on.
- Page 78 Settings The following Bluetooth settings can be changed, allowing you to customise your phone: • Visibility: set your phone as visible to other Bluetooth devices. • My Phone Name: Change the name displayed to other Bluetooth devices searching for your phone •...
-
Page 79: (Phone/Call/Network/Security/Pen Setup, Sound Effect, Irda, Bluetooth, Restore Factory Settings) Services
SERVICES... - Page 80 SERVICES This menu allows you to use services including SIM card additional services, WAP and Data Services. The following functions can be accessed from the idle screen by pressing the left soft key [Menu] and selecting [Services] assuming that these services are supported by your network provider. Please contact your network provider for further information.
- Page 81 Recent Pages Allows you to open the most recently viewed WAP page. Enter Address Allows you to go directly to a site by inputting the URL. WAP Push Allows you to receive WAP service messages and save them in the WAP Push. Messages can be read in the Inbox. Settings Allows you to set WAP settings, using the following options: •...
- Page 82 SIM TOOLKIT The SIM Toolkit will be displayed if you are using a SIM card that provides additional services. For details, please refer to your SIM card instructions or contact your service provider. DATA ACCOUNT You can change the settings for GSM and GPRS network services.
- Page 83 address of the GPRS network gateway. • User Name: enter the user name required to connect to the GPRS network. • Password: enter the password required to connect to the GPRS network. • Auth. Type: Normal or Secure authorisation type.
-
Page 84: (Sim Toolkit, Wap, Data Account) File Manager
FILE MANAGER... - Page 85 FILE MANAGER The File Manager allows you to view files stored on your phone or memory card and can be accessed from the idle screen by pressing [Menu] and selecting [File Manager]. You can check the remaining free memory of the phone and SIM Card, navigate the directories and files stored on the phone, and view/play and setup files.
- Page 86 • Detail: displays file, date and size information. • Rename: allows you to edit the file name. • Copy/Copy All: allows you to copy the file(s) to another folder or storage. • Move: lets you move the file to another folder or storage.
-
Page 87: Important Information
IMPORTANT INFORMATION... -
Page 88: Important Safety Precautions
IMPORTANT SAFETY PRECAUTIONS This section contains important information for the safe and efficient operation of your mobile device. For your safety, please refer to the guideline prior to using the phone. Note: Failure to comply with the following precautions may be dangerous or illegal. Road Safety: Do not use your phone while driving. - Page 89 When the phone is switched on, avoid any unnecessary contact with the antenna. ACCESSORIES AND BATTERIES Use only FLY approved batteries and accessories, such as headsets and PC data cables. Use of any unauthorised products could incur damage to you or your phone.
- Page 90 If left unused, a fully charged battery will discharge itself over a period of time. • Use only FLY approved chargers and disconnect from the power supply when not in use. Do not leave a battery connected to a charger for more than a week, since overcharging may shorten the battery life.
- Page 91 USING THE CHARGER Please read this manual before using the charger, for the correct operation of the appliance. Important Safety Instructions: The charger should be used for Li-lon battery charging only. • Do not charge other types of battery with this charger. •...
- Page 92 Damaged Products: If your phone or battery has been submerged in water, do not use it until you have sought advice from an FLY authorised and/or qualified service centre. Do not attempt to dry it with an external heat source.
- Page 93 USE AND CARE: Your phone should always be treated with care. suggestions below will help you fulfil the warranty obligations and enjoy this product for many years. • Keep the products and all its parts out of the reach of small children and pets to prevent injury to themselves or others, or accidental damage to the phone.
- Page 94 • Do not put the phone in or on heating devices such as a microwave, oven or radiator. The phone may explode when overheated. • Do not use your phone’s flash or light too close to the eyes of people or animals. •...
- Page 95 OPERATING ENVIRONMENT • Remember to follow any special regulations in force in the area you are in, and switch off your phone whenever it is forbidden to use it, or when it may cause interference or danger. When connecting the phone or any accessory to another device, read its user’s guide for detailed safety instructions.
- Page 96 • As with other mobile radio transmitting equipment, users are advised that for the satisfactory operation of the equipment and for the safety of personnel, it is recommended that the equipment should only be used in the normal operating position (held to your ear with the antenna pointing over your shoulder).
- Page 97 Potentially explosive environments: Switch off your phone in any area with a potentially explosive atmosphere and obey all signs and instructions. Such areas are not always clearly marked but include areas below decks on boats, chemical transfer or storage facilities, and vehicles using liquefied petroleum gas such as propane or butane, areas where the air contains chemicals or particles such as grain, dust or metal powders, and any...
- Page 98 SIM card becomes invalid. If this happens, please contact your network provider. EUROPEAN UNION DIRECTIVES CONFORMANCE STATEMENT Hereby, Fly Mobile Ltd declares that this product is in compliance with: • essential requirements other relevant provisions of Directive 1999/5/EC.
- Page 99 EUROPEAN RF EXPOSURE INFORMATION Your mobile device is a radio transmitter and receiver. It is designed not to exceed the limits for exposure to radio waves recommended by international guidelines. These guidelines were developed by the independent scientific organization ICNIRP and include safety margins designed to assure the protection of all persons, regardless of age and health.
- Page 100 device to keep the mobile phone away from the head and body. Additional information can be found on the websites of the World Health Organisation (http://www.who.int/emf). FCC RF EXPOSURE INFORMATION In August 1996 the Federal Communications Commission (FCC) of the United States, with its action in Report and Order FCC 96-326, adopted an updated safety standard for human exposure to radio frequency (RF) electromagnetic energy emitted by FCC regulated transmitters.
- Page 101 The exposure standard for wireless handsets employs a unit of measurement known as the Specific Absorption Rate, or SAR. The SAR limit set by the FCC is 1.6 W/kg. The tests are performed in positions and locations (eg. At the ear and worn on the body) as required by the FCC for each model.
- Page 102 The following information is for EU member states only: The use of this symbol indicates that this product may not be treated as household waste. By ensuring the correct disposal of this product, you will help prevent potential negative consequences to the environment and human health, which could otherwise be caused by inappropriate waste handling of this product.
-
Page 103: Menu Map
MENU MAP... - Page 104 OVERVIEW OF MENU FUNCTIONS To access Menu mode, press [Menu] in Idle mode. Note: Some menus are operator, network or subscription dependent. 1. Phonebook 1.1 Quick Search 1.6 Caller Group 1.2 Search Entry 1.7 Speed Dial 1.3 Add New Entry 1.8 Special Number 1.4 Copy All 1.9 Settings...
- Page 105 5. Multimedia 5.1 Camera 5.6 Sound Recorder 5.2 Image Viewer 5.7 FM Radio 5.3 Video Recorder 5.8 Schedule FM Record 5.4 Video Player 5.9 Melody Composer 5.5 Photo Editor 5.10 TV Out 6. Fun 6.1 Java 6.3 Games 6.2 Java Settings 6.4 Games Settings 7.
- Page 106 FLY Mobile Ltd. The Bluetooth word mark and logos are owned by the Bluetooth SIG, Inc. and any use of such marks by FLY Mobile is under license. Other trademarks and trade names may be used in this website to refer to the products.
Need help?
Do you have a question about the SLT100 and is the answer not in the manual?
Questions and answers