Table of Contents
Advertisement
Quick Links
Download this manual
See also:
Service Manual
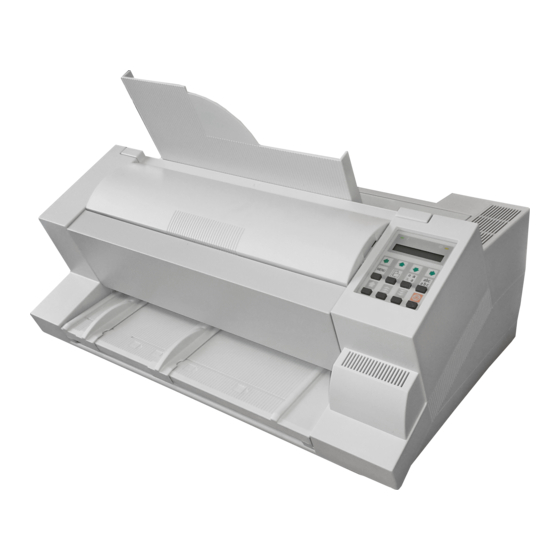
LA600 MultiPrinter
Field Service Manual
The information in this document is subject to change without notice and should not be construed as a
commitment by Digital Equipment Corporation. Digital Equipment Corporation assumes no
responsibility for any errors that may appear in this document.
Copyright © by Digital Equipment Corporation 1998.
All rights strictly reserved. Reproduction or issue to third parties in any form is not permitted without
written authorization from the publisher.
Order No.: ER-LA600-SV
Pub. No. 5112 991 12933
November 1998
Advertisement
Table of Contents

Related Manuals for Digital Equipment LA600 MultiPrinter


Summary of Contents for Digital Equipment LA600 MultiPrinter
- Page 1 Field Service Manual The information in this document is subject to change without notice and should not be construed as a commitment by Digital Equipment Corporation. Digital Equipment Corporation assumes no responsibility for any errors that may appear in this document.
-
Page 2: Table Of Contents
Table of Contents Table of Contents 5. Printer Subassemblies ........5-1 5.1 Basic Elements of the Printer . - Page 3 Table of Contents Table of Contents 7. Procedures for Removal and Reassembly of Spare Parts ..7-1 Kit V-Transport ......... . 7-48 Housing 405 .
-
Page 4: Introduction
Introduction 1. Introduction proper handling of the wearing parts of the printer. List of Spares and Repairs This chapter lists all actually defined Spare Parts and Wearing Parts and contains the relevant reference to the different chapters of this manual as far as requested. - Page 5 2. Safety Precautions S Some of the maintenance procedures described in this section require that the printers top housing is removed. This exposes the internal working parts of the printer. During operating touching some of these parts may be potentially dangerous. S All replacement and cleaning procedures should be performed with the printer switched OFF and the mains connector disconnected.
-
Page 6: Basic Rules
Keeping the Printer Running 3. Keeping the Printer Running Paper insertion Remove ASF cassette. problems Clean pick-up rollers using platen cleaner S/CP 09, and check the paper handling of the 3.1 Basic Rules ASF cassette using a few S Never print over the area of pin holes nor the edges of the fanfold paper. sheets of paper which Otherwise the print head can be damaged. -
Page 7: Print Test3
Keeping the Printer Running Keeping the Printer Running PRINT TEST3 3.2.2 Cleaning Procedure CONFIGURATION 1. Power the printer ON and remove the top cover. 208xxxxx 00000000 208079xx 20807xxx 2080740x 00000000 2. Remove the ribbon cassette. 3. Thoroughly brush and vacuum all accessible areas to remove any paper 1800 TNA1 TNA2... -
Page 8: Status And Error Messages
Keeping the Printer Running Keeping the Printer Running Status and Error Messages TEAR OFF PAPER Displayed when a switch has been initiated from currently tractor to a different The following messages are displayed if a condition exists which prevents paper source and the fanfold paper could not retreat into the parking position. normal operation of the printer. - Page 9 Keeping the Printer Running Display That means... Cause / Action HOR. DRIVE ERROR Horizontal drive - Horizontal drive blocked without function - Paper jam - Distance of platen gap too narrow - AGC procedure on not workable position - Platen incorrectly installed - No AGC ADJUST after print head or platen replacement...
-
Page 10: Specific Printer Functions
Specific Printer Functions 4. Specific Printer Functions 4.1.2 AGC Procedure Print Gap Adjustment Selected AGC Position 4.1.1 Principle The print head carriage is mounted on two parallel guide rails which provide for a precise movement over the whole print range in horizontal direction. The lower rail is built up as an excentric shaft. -
Page 11: Agc Adjust
Specific Printer Functions Specific Printer Functions 4.1.3 AGC Adjust 4.1.4 Automatic Gap Control (AGC) Shuttle Shuttle Mechanical Base Mechanical Base Position Stop No Form inserted !! Position Stop Positioning Shuttling Process Shuttling Process Positioning Form Platen Gap Adjust Platen (-3 ... +4) Platen Assy Assy... -
Page 12: Programmed Copy Control (Pcc)
Specific Printer Functions Specific Printer Functions 4.1.5 Programmed Copy Control (PCC) Print Head - Tilting Principle and related Print Speed Shuttle Base Mechanical Position Stop Form Positioning Process Platen Assy Print Head Ribbon Print Gap Platen Gap Adjust (-3 ... +4) Inclination Position for LQ mode Protection Shield... -
Page 13: Print Speed In Nlq Mode
Specific Printer Functions Specific Printer Functions 4.2.1 Printing Speed in DATA mode 4.2.3 Printing Speed in LQ mode 1 Inclination Position Inclination Position of the Print Head Lug of the Print Head Lug Needle frequency 1.800 Hz Needle frequency 1.800 Hz Number of columns per character: 12, 2x 12 needles in use Number of columns per character: 36 Number of needles per character: 3, each other needle activated... -
Page 14: Positioning System - Horizontal Positioner
Specific Printer Functions Specific Printer Functions Positioning System - Horizontal Positioner Paper Run / Paper In Control The printer is equipped with a combined paper run/in feature realized by the sensor as depicted below. Following functions are realized: Cut Sheet Processing Paper In Detection Detection of the upper edge of the form by means of the “Paper In”... -
Page 15: Paper Path
Specific Printer Functions Paper Path Cut Sheet Ouput Continuous Form Output Automatic Sheet Feeding Paper Sensor Manual Input Continuous Form Input 4.7.1 Paper Transportation Principle Stacker Stacker Exit Print Head Paper In Paper Run Rollers Sensor Sensor Manual Tear Off Platen Assy Tractor Exit Form Feed... -
Page 16: Printer Subassemblies
Printer Subassemblies 5. Printer Subassemblies 5.2 Main Subassemblies The main subassemblies are: S Mechanical Subassembly (A) 5.1 Basic Elements of the Printer S Electronic Subassembly (B) The printer contains of the following use accessable parts: S Power Supply Unit (PSU-40A) S Control Unit (Print CU-40L) S Device Electronics (DEV-40AE) - Top Cover (1) -
Page 17: Internal Wiring Scheme
Printer Subassemblies 5.3 Internal Wiring Scheme... -
Page 18: How To Use This Section
Troubleshooting and Diagnostics Troubleshooting and Diagnostics Power-related Problems Power indicator does not come On when power is switched On Check that the power cord and plug are securely fitted to the printer and to an electrical outlet. How to Use This Section Ask for the power connector connections (and fuse, if fitted) to be verified. - Page 19 Troubleshooting and Diagnostics Troubleshooting and Diagnostics During normal operation the following error messages may occur (for further Display That means ... Cause / Action operator panel messages please refer to section 3.3 Status and Error NV RAM OK Error on the RAM of - Control Unit defective Messages): the Control Unit...
-
Page 20: No Printout
Troubleshooting and Diagnostics Troubleshooting and Diagnostics Operation-related Problems FRAMING ERROR Protocol error - Check protocol setting of printer and host Paper is not positioned at perforation for tear-off feature - Repeat data transfer Select the correct form length using the Set-up feature. Reset top of form by performing a Parking function. -
Page 21: Print Related Problems
Troubleshooting and Diagnostics Troubleshooting and Diagnostics Print-related Problems If the printout or the character set is not ok, the following procedure can help to clear the situation. Print faint or of poor quality. Have you used the correct paper? See User´s Manual Chapter 7 Action Result Check... -
Page 22: Ribbon Or Carriage-Related Problems
Troubleshooting and Diagnostics Ribbon or Carriage-related Problems Ribbon Problems Make sure that the ribbon is: Stretched correctly Not worn thin or dry Not torn or damaged in any other way Not jammed Carriage does not move smoothly Examine the paper pathway. Remove any obstructions. Check that all packing material is removed. - Page 23 7. Procedures for Removal and Reassembly This chapter describes the removal procedures which are necessary for proper handling of the spare parts and subunits of the printer. For detailed order information and description of the spare parts please refer to the Spare Part Catalog (5112 991 1030x).
- Page 24 DEC Field Service Instruction 5112 991 10786 Housing 405 Part: Part No.: 5112 292 3840x DEC P/N.: FD-W03RF-01 Top Cover LA600 Part: Part No.: 5112 292 6826x DEC P/N.: 29-31800-01 Top Cover 40A Part: (2) (PP 405) Part No.: 5112 292 6827x DEC P/N.: FD-W03RH-01 Front Cover 405 Part:...
- Page 25 DEC Field Service Instruction 5112 991 13242 Print Engine LA600 Part: Part No.: 5112 292 6475x DEC P/N.: 29-31790-01 REMOVAL " Set the printer into "LOCAL MODE" " Disconnect the system interface cable " Remove the ribbon cartridge " Switch the printer off and disconnect the mains cable Remove all encasing parts Remove the personality module (1) If present remove the plastic insert of the memory card interface (2)
- Page 26 DEC Field Service Instruction 5112 991 10415 PSU-40A Part: Part No.: 5112 292 3811x DEC P/N.: FD-W028Y-01-A01 PSU-40D Part: Part No.: 5112 292 7627x DEC P/N.: FD-W028Y-01-A02 PSU-40DS Part: Part No.: 5112 292 7628x DEC P/N.: n. a. REMOVAL " Disconnect mains cable "...
-
Page 27: Dev-40A
DEC Field Service Instruction 5112 991 12902 DEV-40AE Part: Part No.: 5112 292 7159x DEC P/N.: 29-31791-01-A02 DEV-40A Detail A Part: (PP 405) *) Part No.: 5112 292 3810x DEC P/N.: FD-W00CS-01 DEV-40LA600 Part: Part No.: 5112 292 6292x DEC P/N.: 29-31791-01-A01 REMOVAL "... -
Page 28: Cu-40K
DEC Field Service Instruction 5112 991 16261 CU-40K Part: (repair only) Part No.: 5112 292 3885x (With Memory Card interface) DEC P/N.:FD-W00CW-01 CU-40LA600 Part: (repair only) Part No.: 5112 292 6299x (With Memory Card interface) DEC P/N.:29-31792-01-A1 REMOVAL " Disconnect mains cable "... -
Page 29: Print Cu-40L
DEC Field Service Instruction 5112 991 16262 Print CU-40L Part: Part No.: 5112 292 7383x (Without Memory Card interface) DEC P/N.: 29-31792-01-A2 REMOVAL " Disconnect mains cable " Remove all encasing parts (see Part: Housing) " Remove DEV-40 (see Part: DEV-40AE) Remove the Personality Module after loosening the two lockscrews (1) Disconnect plug (2) from CU-40 and remove CU-40... -
Page 30: Eeprom Cu-40X
DEC Field Service Instruction 5112 991 11244 EEPROM CU-405 Part: Part No.: 5112 000 4164x DEC P/N.: 29-31802-01 REMOVAL " Disconnect mains cable " Remove all encasing parts (see Part: Housing) " Remove DEV-40 (see Part: DEV-40) " Remove CU-40 (see Part: CU-40) Exchange the EEPROM CU-40X (4) Pay attention, that EEPROM (4) is in correctly position (IC Note:... -
Page 31: Operator Panel 40B
DEC Field Service Instruction 5112 991 10494 Operator Panel 40B Part: Part No.: 5112 292 6418x DEC P/N.: FD-W00CU-01 REMOVAL " Disconnect mains cable " Remove all encasing parts (see Part: Housing) Disconnect the Operator Panel cable (1) Loosen the screw (2) located at the bottom of the Operating Panel Remove the Operator Panel REASSEMBLING "... -
Page 32: Power Switch 40A
DEC Field Service Instruction 5112 991 10713 Power Switch 40A Part: Part No.: 5112 292 3882x DEC P/N.: FD-W02H3-01 REMOVAL " Disconnect mains cable " Remove all encasing parts (see Part: Housing) Loosen the two screws (1) " Remove PSU-40x (see Part: PSU-40) Remove the power switch REASSEMBLING "... -
Page 33: Print Head Cable 405
5112 991 10655 DEC Field Service Instruction Print Head Cable 405 Part: Part No.: 5112 292 3880x DEC P/N.: FD-W02Y2-01 REMOVAL " Disconnect mains cable " Remove all encasing parts (see Part: Housing) Disconnect print head cable from the print head Remove the noise reduction foam (1) from the cable channel Clip the plastic support (2) from the print head carriage, by first releasing clamps (3) -
Page 34: Encoder Stripe 2
5112 991 10503 DEC Field Service Instruction Encoder Strip 2 Part: Part No.: 5112 292 7454x DEC P/N.: FD-W041701 REMOVAL " Disconnect mains cable " Remove all encasing parts (see Part: Housing) Remove the two screws (1) Detail A Remove the encoder strip (2) Move the carriage to the centre position REASSEMBLING "... -
Page 35: Kit Lubrication Felt
5112 991 12393 DEC Field Service Instruction Kit Lubrication Felt Part: Part No.:5112 212 5589x DEC P/N.: 29-31804-01 REMOVAL " Disconnect mains cable " Remove all encasing parts (see Part: Housing) " Remove Encoder Strip (1) (see Part: Encoder Strip) "... -
Page 36: Print H-Encoder
5112 991 10723 DEC Field Service Instruction REASSEMBLING " Execute the REMOVAL procedure in reverse sequence Pay attention that the logic cable is fixed correctly by clamp Note: (10) Print H-Encoder Part: Part No.: 5112 292 4310x DEC P/N.: FD-W0290-01 REMOVAL "... -
Page 37: H-Motor
5112 991 10573 DEC Field Service Instruction H-Motor Part: Part No.: 5112 292 3791x DEC P/N.: FD-W0396-01 REMOVAL " Disconnect mains cable " Remove all encasing parts (see Part: Housing) " Remove DEV-40 (see Part: DEV-40AE) Detail A Dummy Disengage the drive belt (1) from the drive wheel of the horizontal motor by pressing the belt tension element (2), which is located at the left side of the engine, upwards Pull off the belt from the wheel... -
Page 38: Carriage
5112 991 10514 DEC Field Service Instruction Left hand side Right hand side Carriage Part: Part No.: 5112 292 4094x DEC P/N.: FD-W04JL-01 REMOVAL " Disconnect mains cable " Remove all encasing parts (see Part: Housing) " Remove DEV-40 (see Part: DEV-40) "... - Page 39 5112 991 10526 DEC Field Service Instruction Protection Shield Part: Part No.:5112 292 3839x DEC P/N.:FD-W041W-01 REMOVAL " Disconnect mains cable " Open top cover " Remove Ink Ribbon " Remove Platen (4) Disconnect protection shield (1) by loosening the two screws (2). This can easily be done by inserting of a torx screwdriver of at minimum 110 mm length through the holes (3) in the bottom plate and the platen channel...
-
Page 40: Ribbon Gear
5112 991 10565 DEC Field Service Instruction Ribbon Gear Part: Part No.: 5112 292 6384x DEC P/N.: FD-W045M-01 REMOVAL " Disconnect mains cable " Remove all encasing parts (see Part: Housing) " Remove DEV-40 (see Part: DEV-40) Locate the Ribbon Gear (1) Loosen the cable (2) from the cable guide (3) Loosen the spring (4) and remove lever (5) Detail B... -
Page 41: Stepper Motor 7.5 Deg (Palten Gap Control)
5112 991 10583 DEC Field Service Instruction Stepper Motor 7.5 DEG Part: Part No.: 5112 292 4106x (Platen gap control) DEC P/N.: FD-W0394-01 REMOVAL " Disconnect mains cable " Remove all encasing parts (see Part: Housing) " Remove DEV-40A (see Part: DEV-40) Disconnect the four pin motor cables from the motors plug Remove the two screws (1) fixation of the stepper motor Do not loosen the screw (2). - Page 42 5112 991 13501 DEC Field Service Instruction Stepper Motor 1.8 DEG Part: Part No.: 5112 292 6241x (Vertical Paper Transport) DEC P/N.: 29-31798-01 REMOVAL " Disconnect mains cable " Remove all encasing parts (see Part: Housing) " Remove DEV-40 (see Part: DEV-40) Remove the motor cable guide from the DEV-40 Remove the four pin motor cable (1) from the cable guide Remove the two screws (2), of the vertical drive motor...
-
Page 43: Tractor Gear
5112 991 10603 DEC Field Service Instruction Tractor Gear Part: Part No.: 5112 292 3803x DEC P/N.: FD-W045N-01 REMOVAL " Disconnect mains cable " Remove all encasing parts (see Part: Housing) " Remove DEV-40 (see Part: DEV-40) The paper path for output must be set to tractor. By moving the carriage to the uppermost right position the paper path will be changed (an audible "click") Detail B... -
Page 44: Stacker Elements
5112 991 11952 DEC Field Service Instruction Stacker Elements Part: Part No.: 5112 292 4099x DEC P/N.: FD-W04KK-01 REMOVAL " Disconnect mains cable " Remove all encasing parts (see Part: Housing) " Remove DEV-40 (see Part: DEV-40) Loosen the two screws (1) securing the Power ON/OFF switch Remove the two screws (2) which secure the stacker elements plate Remove the circlip (3) which secures the bearing (4) Slide the bearing (4) to the left and remove the Stacker Elements... -
Page 45: Paper Sensor
5112 991 10628 DEC Field Service Instruction Paper Sensor Part: Part No.: 5112 292 3805x DEC P/N.: FD-W04JJ-01 REMOVAL " Disconnect mains cable " Remove all encasing parts (see Part: Housing) Remove circlip (1) and bearing (2). The axle (3) falls down Remove the Paper Sensor (4) Disconnect the cable (5) REASSEMBLING... -
Page 46: Kit Pressure Rolls
5112 991 12402 DEC Field Service Instruction Kit Pressure Rolls Part: Part No: 5112 292 6655x DEC P/N.: 29-31801-01 REMOVAL " Disconnect mains cable " Remove all encasing parts (see Part: Housing) " Remove the encoder strip (see Part: Encoder Strip) Remove the upper screws (1) Remove the foam under the neath of printhead cable Loosen the two screws (2) and remove the metal sheet coner... -
Page 47: Kit V-Transport Xxx
5112 991 10732 DEC Field Service Instruction Kit V-Transport Part: Part No.: 5112 292 3845x DEC P/N.. FD-W02M6-01 Belt Stepper Part: Part No.: 5112 200 0878x DEC P/N.: FD-W032Y-01 Belt Form Feed Part: Part No.: 5112 200 0879x DEC P/N.: FD-W0330-01 Belt Stepper REMOVAL Belt Form Feed... -
Page 48: Kit Belt Pulley 2
5112 991 12003 DEC Field Service Instruction Kit Belt Pulley 2 Part: Part No.: 5112 292 7442x DEC P/N.: FD-W05RM-01 REMOVAL " Disconnect mains cable " Remove all encasing parts (see Part: Housing) " Remove DEV-40 (see Part: DEV-40) Locate the right side of the form feed shaft for exchanging Remove both minipitch belts (1) Pull the belt pulley (2) from the wheel shaft to be exchanged REASSEMBLING... - Page 49 5112 991 10742 DEC Field Service Instruction Kit Cont. Forms Exit Part: Part No.: 5112 292 3846x DEC P/N.: FD-W02M7-01 REMOVAL " Disconnect mains cable " Remove all encasing parts (see Part: Housing) " Remove DEV-40 (see Part: DEV-40) " Remove stacker elements (see Part:Stacker Elements) Locate the gearwheel (1), remove the circlip (2) and the washer (3), remove gearwheel (1) and bearing (4) from the wheel shaft...
-
Page 50: Kit Tractor 2
5112 991 10752 DEC Field Service Instruction Kit Tractor 2 Part: Part No.: 5112 292 7441x DEC P/N.: FD-W02M8-01 REMOVAL " Disconnect mains cable " Remove all encasing parts (see Part: Housing) " Snap out the paper supports (1) Locate the bearing (2) and (3) on the left side of the printer Press the two locking tabs on the bearing (2) and remove it Press the three locking tabs on the bearing (3) and remove it For removal, slide the entire tractor kit first to the left and then... -
Page 51: Kit H-Drive Belt
5112 991 10761 DEC Field Service Instruction Kit H-Drive Belt Part: Part No.: 5112 292 3848x DEC P/N.: FD-W02M5-01 REMOVAL " Disconnect mains cable " Remove all encasing parts (see Part: Housing) " Remove the print head Disengage the drive belt (1) from the drive wheel horizontal motor by pressing the belt tension elements on pos. - Page 52 5112 991 15071 DEC Field Service Instruction Kit ASF Lever 2 Part: Part No.: 5112 292 6875x DEC P/N.: FD-W0487-01 REMOVAL of the Force Adjustment Levers (Figure 2) " Remove the ASF-Cassette from the printer and remove any paper loaded, and the paper support (if mounted).
-
Page 53: Kit Spring D-Axis
5112 991 12351 DEC Field Service Instruction Kit Spring D-Axis Part: Part No.: 5112 292 4107x DEC P/N.: 29-31803-01 REMOVAL " Disconnect mains cable " Remove all encasing parts (see Part: Housing) Remove lever (1) from D-axis (the plastic snap-in will be destroyed) Remove the torsion spring (2) REASSEMBLING Insert the new spring and grease the hole in the engine plate and the... -
Page 54: Kit Screws And Springs
5112 991 13021 DEC Field Service Instruction Kit Screws and Springs Part: Part No.: 5112 292 3849x DEC P/N.: FD-W05RK-01 Location of Screws and Springs 18 Spring Tractor Exit 20 Torsion Spring Tractor Gear 11 Spring 0.6x4x23 ST F. Paper Run 16 Spring Print Head Shifter 21 Spring Manual Front Insertion 12 Spring 0.3x4.5x20 ST Ribbon Gear... -
Page 55: Noise Absorber
5112 991 14621 DEC Field Service Instruction Noise Absorber Part: Part No.: 5112 212 7043x DEC P/N.: ____________ REMOVAL " Disconnect mains cable " Remove all encasing parts (see Part: Housing) Remove the noise reduction foam (1) from the cable channel REASSEMBLING "... -
Page 56: Rep Kit Asf-Cassette
5112 991 15321 Field Service Instruction Rep Kit ASF-Cassette Part: Part No.: 5112 292 7235X DEC P/N.: ____________ REMOVAL " Remove the ASF-Cassette from the printer. Remove any paper loaded and the paper support (if mounted). Remove the cover (1) of the ASF-Cassette by releasing the snaplocks (2). -
Page 57: Wearing Parts
8 Wearing Parts This chapter describes the removal procedures which are necessary for proper handling of the wearing parts of the printer. All removal procedures consists of several steps indicated with a: Note: " to show preparation and to indicate the main removal steps. In terms of preventive actions for keeping the printer running, following operation for the life time of wearing parts is given: - Ribbon Cartridge:... -
Page 58: Print Head Dh3024/2
Installing the new print head (5) DEC Field Service Instruction Ensure that the printer is switched OFF. For print head installation, the carriage should be aligned with the cut-out on the paper guide plate (green insert). (Same position as for Removal procedure). Print Head DH3024/2 Part: Part No.: 5112 292 6652x... - Page 59 5112 991 10352 To install the Platen Assy (2) DEC Field Service Instruction L Ensure that the printer is switched OFF. Place platen (2) in the vacant space between print head and metal bar. Platen Assembly Part: Part No.: 5112 292 3801x Move print head from its right hand position into the centre.
-
Page 60: Asf Pick-Up Rollers
5112 991 10361 To install the Pick-up Rollers (62) DEC Field Service Instruction Slide the new pick-up rollers (62) onto the bar (65). ASF Pick-up Rollers Part: Part No.: 5112 292 4100x Insert the free end of the bar into its mounting, ensuring that each DEC P/N.: LA60X-PR roller flange (67) is positioned so that they mate with the slots (68) -
Page 61: List Of Spare Parts
List of Spares and Repairs 9 List of Spares and Repairs Item Part No. DEC P/N. Page Print H-Encoder 5112 292 4310x FD-W0290-01 7-26 H-Motor 5112 292 3791x FD-W0396-01 7-28 9.1 List of Spare Parts Carriage 5112 292 4094x FD-W04JL-01 7-30 Item Part No. -
Page 62: List Of Wearing Parts
List of Spares and Repairs Item Part No. DEC P/N. Page 9.2 List of Wearing Parts Item Part No. DEC P/N. Print Head DH3024 / 2 5112 292 6652x FD-52920-01 Platen Assy 5112 292 3801x LA60X-PN Pick-up Rolls ASF A and B 5112 292 4100x LA60X-PR...
Need help?
Do you have a question about the LA600 MultiPrinter and is the answer not in the manual?
Questions and answers