Table of Contents
Advertisement
Advertisement
Table of Contents

Related Manuals for Gorenje BPSA6747A08XWI


Summary of Contents for Gorenje BPSA6747A08XWI
- Page 1 INSTRUCTIONS FOR USE OF A BUILT-IN OVEN...
- Page 2 Instructions for installation and connection are supplied on a separate sheet. Instructions for use, installation and connection are also available at our website: http://www.gorenje.com The following symbols are used throughout the manual and they have the following meanings: INFORMATION!
-
Page 3: Table Of Contents
Contents Safety precautions ........................Safe and correct use of the oven during pyrolytic cleaning ............. Other important safety warnings ................... Appliance description ......................Rating plate product information ................... Control unit ..........................Appliance equipment ......................Control lights ..........................Guides ............................Oven door switch ........................Cooling fan .......................... - Page 4 Disposal ........................... Compliance information ......................Cooking test ..........................
-
Page 5: Safety Precautions
Safety precautions IMPORTANT SAFETY PRECAUTIONS CAREFULLY READ THE INSTRUCTIONS AND SAVE THEM FOR FUTURE REFERENCE. Appliance must be connected to fixed wiring which has incorporated means of disconnection. Fixed wiring must be made in accordance with the wiring rules. Means for disconnection must be incorporated in the fixed wiring in accordance with the wiring rules. -
Page 6: Safe And Correct Use Of The Oven During Pyrolytic Cleaning
WARNING: The appliance and some of its accessible parts may become very hot during use. Care should be taken to avoid touching heating elements. Children less than 8 years of age shall be kept away unless continuously supervised. The appliance is not intended to be controlled by external timers or separate remote controll system. -
Page 7: Other Important Safety Warnings
During the automatic cleaning process, the oven heats up to a very high temperature and it is very hot on the outside as well. Risk of burns! Keep children away from the oven. Other important safety warnings The appliance is intended for household use. Do not use it for any other purpose, such as room heating, drying of pets or other animals, paper, fabrics, herbs etc. - Page 8 Pyrolytic cleaning involves very high temperatures that may cause smoke and fumes to be released form food residues. We recommend that you ensure thorough ventilation of the kitchen during the pyrolytic cleaning process. Small animals, or pets, are highly sensitive to any fumes released during pyrolytic cleaning of ovens.
-
Page 9: Appliance Description
Appliance description INFORMATION! Appliance functions and equipment depend on the model. Basic equipment of your appliance includes wire guides, shallow baking tray, and a wire rack. 1. Control unit 6. Temperature probe socket 2. Water tank knob 7. Guides cooking levels 3. -
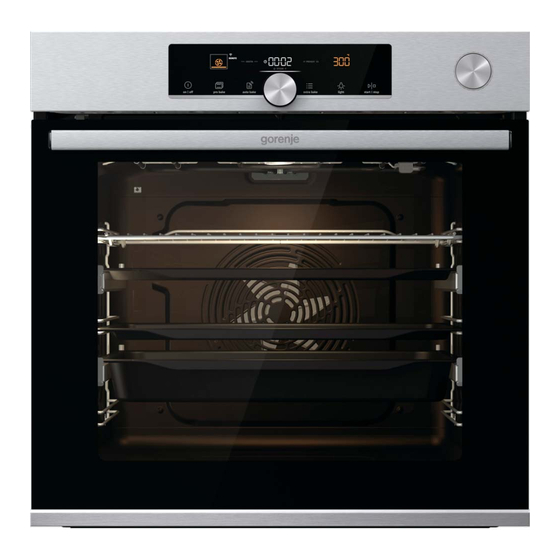
Page 10: Control Unit
Control unit (depending on the model) 1. on I off key 2. (pro bake) professional mode key 3. (auto bake) automatic mode key 4. Settings selection and confirmation knob - rotate the knob to choose a setting - press the knob to confirm the setting 5. -
Page 11: Appliance Equipment
Appliance equipment Control lights Oven light: oven light is switched on when you open or close the oven door, when you switch on the oven, at the end of the baking process, and when you touch the oven light key on the control unit. Guides •... -
Page 12: Oven Door Switch
Click-on pull-out guides (depending on the model) The click-on pull-out guide can be inserted into any space between two wire guides. Place the guide symmetrically onto the wire guides on the left and the right side of the oven cavity. First, hook the upper clip of the guide under the wire of the wire guide. - Page 13 The WIRE RACK is used for grilling/broiling or as support for a pan, baking tray or baking dish with the food you are baking. INFORMATION! There is a safety latch on the wire rack. Therefore, the wire rack has to be lifted slightly at the front when pulling it out from the oven.
-
Page 14: Before First Use
Before first use • Remove oven accessories and any packaging (cardboard, polystyrene foam) from the oven. • Wipe the oven accessories and interior with a damp cloth. Do not use abrasive or aggressive cloths or cleaners. • Heat an empty oven for approximately one hour with the top and bottom heater system at a temperature of 250 °C. -
Page 15: Testing Water Hardness
Testing water hardness Cleaning of the steam system depends on both frequency of baking with steam injection and on the hardness of the water used. Soak the test paper strip (supplied with the appliance) in water for one (1) second. Wait one minute, then note the number of stripes on the paper. -
Page 16: Choosing The Settings
Choosing the settings The interface allows choosing several operating modes: • Professional mode (pro bake) • Automatic mode (auto bake) • Extra functions (extra bake) • Step program (STEP) in the professional mode (pro bake) • Automatic programs in automatic mode (auto bake) INFORMATION! •... - Page 17 When the selected temperature is reached, the preheating process stops and an acoustic signal is emitted. door will appear on the display unit. Open the door and insert the food. The program will automatically continue baking with selected settings. INFORMATION! When the fast preheat function is activated, delayed start function cannot be used.
- Page 18 Table continued from last page Symbol TOP AND BOTTOM HEATER WITH FAN Use this system for even baking on a single rack and for making soufflés. Steam injection results in better browning and a crunchier surface. LARGE GRILL WITH FAN For baking poultry and large cuts of meat on the grill.
- Page 19 Example: Current time: 12:00 (noon) Cooking time: 2 hours End of cooking: at 18:00 (6 p.m.) The cooking duration symbol will appear on the display unit. Choose the setting and confirm it by pressing the KNOB (in our case, 2:00). Press the KNOB again and rotate it to select the symbol .
- Page 20 STEP PROGRAM This function allows baking in two steps or stages (two consecutive baking steps are combined in a single cooking process). A1 first cooking step STEP1, (STEP2) C program duration/end of program (see chapter Timer Functions) E temperature Step: STEP1 In the pro bake mode, set the baking system and temperature.
- Page 21 STEAM INJECTION DURING BAKING Steam injection results in better browning and a crunchier crust. Water from the tank drips in a controlled manner into a tray next to upper heaters. This way, just the right amount of steam is generated, resulting in better browning and crunchier crust, while the crumb or core remains springy and fluffy.
- Page 22 Filling the water tank The water tank allows for independent water supply to the steam oven. Water tank capacity is approximately 1.3 dl. Always fill the tank with clean tap water or bottled water without additives. Water poured into the water tank should be at room temperature, i.e.
-
Page 23: Automatic Mode (Auto Bake)
AUTOMATIC MODE (auto bake) In this mode, you may choose between special baking systems or automatic programs (preset programs for particular types of food). Special baking systems Touch the auto bake key and set the following: B special baking systems C program duration (see chapter Timer functions) E temperature Rotate the KNOB and choose your settings. - Page 24 INFORMATION! When the fast preheat function is activated, delayed start function cannot be used. Automatic programs In the automatic mode (auto bake), you may choose between numerous automatic programs (the appliance will recommend the optimum cooking method, temperature, and cooking duration depending on the type of food specified).
- Page 25 Table continued from last page Indication Program name Equipment Level Preheating Turning Pr12 roasted beef small baking dish on wire rack Pr13 poultry whole wire rack with a drip after 2/3 of tray cooking time Pr14 poultry smaller wire rack with a drip after 2/3 of pieces tray...
-
Page 26: Choosing Extra Functions (Extra Bake)
CHOOSING EXTRA FUNCTIONS (extra bake) Touch the extra bake key to display extra functions with their respective preset values on the display unit. C cooking duration D program E preset temperature Rotate the KNOB and select the program. Preset values will be displayed: Some programs allow setting the temperature and cooking time. -
Page 27: Child Lock
Child lock To activate the child lock, press and hold (for 5 seconds) the light key . Loc will appear on the display unit. When you long-press the light key again, the child lock is deactivated. • If the lock is activated with no timer function engaged (only clock is displayed), then the oven will not operate. -
Page 28: Starting The Cooking Process
Starting the cooking process Start the cooking process by pressing the start | stop key. Until the set temperature is reached for the first time, the current and the set temperature will alternate on the display unit. The temperature symbol flashes at first. -
Page 29: End Of Cooking By Touching
End of cooking by touching Touch the start | stop key to stop the operation. End appears on display unit and an acoustic signal is emitted. After three minutes, the clock will appear on the display unit. Steam injection during the baking process If you have used steam injection during the baking process then the sign UnFil will appear on the display unit once the oven has cooled down, asking the user whether the water tank should be emptied... -
Page 30: General Settings
General settings Press and hold the extra bake key. SEtt will appear on the display unit for a few seconds. Then, the general settings menu will appear. INFORMATION! Rotate the KNOB to scroll through the settings. Confirm each setting by pressing the KNOB or the start | stop key. - Page 31 Automatic fast preheating This function allows automatic addition of fast preheating to the baking systems that allow it. Rotate the KNOB to select the Auto setting. Choose On or OFF. Sabbath The Sabbath function allows keeping the food warm in the oven without having to switch the oven on or off.
- Page 32 Descaling You can activate the descaling function yourself, or it can be suggested by the oven after a certain number of steam function use cycles (dEcL will appear on the display unit). To activate the function, rotate the KNOB to select YES; to deactivate it, select OFF.
-
Page 33: Internet Connectivity (Wi-Fi)
Internet connectivity (Wi-Fi) The oven is fitted with a Wi-Fi wireless connection module that allows connection between the appliance and a mobile device, e.g., a smart phone or a tablet. Connectivity allows remote monitoring of the appliance, as well as remote control of some oven functions. The Connectlife app has to be installed on your mobile device, and a user account has to be registered (see chapter Connecting the appliance to a mobile device). - Page 34 To turn off the connection and return to previous menu, select OFF. 2. Setting up the Wi-Fi module connection To set the connection between the Wi-Fi module and the local network, choose SEt in the the Conn menu. Rotate the KNOB and confirm your selection.
- Page 35 INFORMATION! Remote control access menu can also be accessed via a shortcut. When the Wi-Fi module is enabled and the connections have been successfully set up, long-press the auto bake key to activate remote oven control rEEn. INFORMATION! For safety reasons, some functions are not available via remote access. •...
-
Page 36: General Tips And Advice For Baking
General tips and advice for baking • Remove all unnecessary equipment from the oven during baking • Use equipment made of heat-resistant non-reflective materials (supplied baking trays and dishes, enamel-coated cookware, tempered glass cookware). Bright-coloured materials (stainless steel or aluminium) materials reflect heat. As a result, thermal processing of food in them is less effective. •... -
Page 37: Cooking Table
Cooking table NOTE: Dishes requiring a fully pre-heated oven are indicated with a single asterisk * in the table. Dishes for which a 5-minute pre-heating cycle suffices are indicated with two asterisks ** . In this case, do not use the rapid preheat mode. Dish PASTRY AND BAKERY PRODUCTS pastry/cakes in moulds... - Page 38 Table continued from last page Dish meringue 80-100 * 120-150 meringue, 2 levels 2, 4 80-100 * 120-150 macarons 130-140 * 15-20 macarons, 2 levels 2, 4 130-140 * 15-20 bread rising and proofing 40-45 30-45 bread on a baking tray 190-200 40-55 bread on a baking tray, 2 levels...
- Page 39 Table continued from last page Dish beef steaks, well done, thickness 220-230 25-30 4 cm burgers, thickness 3 cm 220-230 25-35 veal roast, 1.5 kg 160-170 120-150 pork pork roast, rump, 1.5 kg 200-220 100-200 pork roast, shoulder, 1.5 kg 180-190 90-120 pork loin, 400 g...
- Page 40 Table continued from last page Dish baked potatoes, halved 200-210 * 40-50 stuffed potato (jacket potato) 190-200 30-40 French fries, home-made 210-220 * 20-30 mixed vegetables, wedges 190-200 30-40 stuffed vegetables 190-200 30-40 CONVENTIONAL PRODUCTS FROZEN French fries 210-220 20-25 french fries, 2 levels 2, 4 190-210...
-
Page 41: Cooking With A Temperature Probe
Cooking with a temperature probe ( BAKESENSOR) (depending on the model) The temperature probe allows for accurate monitoring of the core temperature of the food during cooking. WARNING! The temperature probe should not be in direct vicinity of the heating elements. Stick the metal end of the probe into the thickest part of the food. - Page 42 INFORMATION! During the cooking process, set and current food core temperature alternate on the display unit. You may change the cooking temperature or the target food core temperature during the cooking process. Correct use of the probe, by type of food: •...
-
Page 43: Recommended Doneness Levels For Different Types Of Meat
Recommended doneness levels for different types of meat blue medium medium Type of food medium well done (raw) rare well BEEF beef, roast 46-48 48-52 53-58 59-65 68-73 beef, sirloin 45-48 49-53 54-57 58-62 63-66 roast beef/rump steak 45-48 49-53 54-57 58-62 63-66... -
Page 44: Cleaning And Maintenance
Cleaning and maintenance WARNING! Before cleaning, unplug the appliance from the power mains and wait for the appliance to cool down. Children should not clean the appliance or perform maintenance tasks without proper supervision. For easier cleaning, oven cavity and baking tray are coated with special enamel for a smooth and resistant surface. -
Page 45: Automatic Oven Cleaning Pyrolysis
Automatic oven cleaning pyrolysis Using high temperatures, the function makes it easy to clean the interior of the appliance, as well as some of the equipment supplied with it. During cleaning, fat residues and other impurities are incinerated. There are three pyrolysis (cleaning intensity) levels available, with varying duration of the process: Level Cleaning intensity Cleaning purpose... - Page 46 WARNING! During pyrolysis, unpleasant odours and smoke, as well as irritating vapours and gases, may be emitted. Therefore, make sure that the room is well-ventilated during the procedure and do not stay in that room for prolonged periods of time. Do not allow children or pets to come close to the oven.
-
Page 47: Using The Aqua Clean Program To Clean The Oven
Using the Aqua Clean program to clean the oven This program makes it easier to remove any stains from inside the oven. The function is the most effective if used regularly, after each use. Before running the cleaning program, remove all large visible chunks of dirt and food residues from the oven cavity. -
Page 48: Cleaning The Evaporator Tray
Cleaning the evaporator tray WARNING! After use, the evaporator tray can be hot, and there can still be some water in it. To avoid scalding, wait for the oven to cool down completely. Remove the tray and manually clean the evaporating tray with a hand washing up liquid or in the dishwasher. -
Page 49: Cleaning The Steam System
Cleaning the steam system Cleaning depends on how often you use the steam injection function and on the hardness of the water used. 1. Insert the all-purpose deep baking tray into the 5th (top) guide level to allow the water drip into it. 2. -
Page 50: Removing And Replacing The Oven Door And Glass Panes
Removing and replacing the oven door and glass panes First, fully open the door (as far as it will go). Oven door is attached to the hinges with special supports that also include safety levers. Rotate the safety levers towards the door by 90°. -
Page 51: Replacing The Bulb
Replacing the bulb The bulb is a consumable and therefore not covered by warranty. Before replacing the bulb, remove all accessories from the oven. Halogen lamp: G9, 230 V, 25 W Unscrew and remove the cover (in anti-clockwise direction). Remove the halogen bulb. -
Page 52: Troubleshooting Table
Troubleshooting table Special warnings and fault reporting During the warranty period, only a service center authorized by the manufacturer may carry out any repairs. Before making any repairs, make sure the appliance is disconnected from the power mains either by removing the fuse or by disconnecting the power plug from the wall outlet. - Page 53 We reserve the right to any changes and errors in the instructions for use. Compliance information Radio equipment type: Wi-Fi module Operating frequency range: 2.412GHz - 2.472GHz Maximum output power: 17.7dBm EIRP Maximum antenna gain: 2.7dBi GORENJE declare that the radio equipment mentioned above is in compliance with Directive 2014/53/EU.
- Page 54 Cooking test EN60350-1: Only use equipment supplied by the manufacturer. Always insert the baking tray all the way to the end position on the wire guide. Place pastry or cakes baked in moulds as shown in the image. * Preheat the appliance until it reaches the set temperature. Do not use the rapid preheat mode. ** Preheat the appliance for 10 minutes.
- Page 55 BROILING mould Dish Equipment placement toasted bread wire rack wire rack + shallow pljeskavica (minced baking sheet as drip 25-40 *** meat patty) tray...
- Page 56 855089-a11...
Need help?
Do you have a question about the BPSA6747A08XWI and is the answer not in the manual?
Questions and answers