Table of Contents
Advertisement
Quick Links
Advertisement
Table of Contents

Subscribe to Our Youtube Channel
Related Manuals for Planet WAP-4050


Summary of Contents for Planet WAP-4050
- Page 1 802.11g Wireless LAN Travel Kit WAP-4050 User’s Manual...
-
Page 2: Federal Communication Commission Interference Statement
Copyright Copyrightã 2004 by PLANET Technology Corp. All rights reserved. No part of this publication may be reproduced, transmitted, transcribed, stored in a retrieval system, or translated into any language or computer language, in any form or by any means, electronic, mechanical, magnetic, optical, chemical, manual or otherwise, without the prior written permission of PLANET. - Page 3 All guidelines of this and of the computer manufacture must therefore be allowed at all times to ensure the safe use of the equipment. Revision User’s Manual for PLANET 802.11g Wireless LAN Travel Kit Model: WAP-4050 Rev: 1.0 (September, 2004)
-
Page 4: Table Of Contents
TABLE OF CONTENTS CHAPTER 1 INTRODUCTION ....................6 1.1 P ......................6 ACKAGE ONTENTS 1.2 F ......................... 6 EATURES 1.3 P ......................6 HYSICAL EATURES 1.4 S ........................8 PECIFICATION 1.5 W ....................9 IRELESS ERFORMANCE 1.6 N ....................... 9 ETWORK ETUP 1.6.1 AP Mode ........................ - Page 5 3.3.6 PC Database ......................41 3.3.7 Security ........................42 3.4 C ........................46 LIENT CHAPTER 4 TROUBLESHOOTING..................51...
-
Page 6: Chapter 1 Introduction
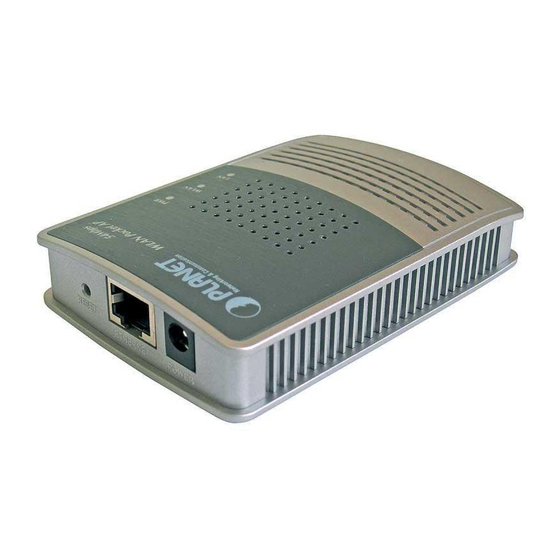
Thank you for purchasing WAP-4050. As small as a box of poker cards, the WAP-4050 is not only a wireless access point but also a wireless NAT router and Ethernet adapter. With these three most commonly used operating mode, WAP-4050 provides greater flexibility for a mobile user in various environments. - Page 7 Restart (reboot) - press & release. · Set all settings to factory defaults - press & hold (for 8 seconds), then release. Note: This should not be done while connected or using the WAP-4050. Ethernet Port Connect the 10/100BaseT Ethernet cable here. ·...
-
Page 8: Specification
· In Config mode, this should be directly connected to your PC. · In Client mode, this is connected to the Ethernet port of a network device. Power Connect the supplied power adapter here. 1.4 Specification Standard IEEE 802.11b, IEEE 802.11g Signal Type DSSS (Direct Sequence Spread Spectrum) Modulation... -
Page 9: Wireless Performance
Note: While you can change modes at any time, please pay attention to the following points: · Whenever the mode is changed, the WAP-4050 will restart. You need to wait for the restart to be completed, which will take a few seconds. When the restart is completed, the Wireless LED will be ON. -
Page 10: Ap/Router Mode
1.6.2 AP/Router Mode In AP/Router mode, the WAP-4050 allows wireless clients to share a single Internet connection. 1.6.3 Client Mode In Client mode, the WAP-4050 converts an Ethernet-ready device into a wireless device. - 10 -... -
Page 11: Chapter 2 Initial Configuration
1. Switch the mode selector to position 3 to enter Config mode. 2. Power up and wait for the Wireless LED to turn on. This indicates the WAP-4050 is ready. Note: ONLY use the power adapter supplied with the WAP-4050. Otherwise, the product may be damaged. -
Page 12: System Configuration
2.3 System Configuration The settings of System Configuration screen will apply to all modes. - 12 -... - Page 13 Admin Administrator PC This is used to identify your PC. If you normally use the same PC, MAC Address you should provide this information. The MAC address is also called the "Physical Address". This address can be determined by checking the Properties for the desired network interface, but the provided Set to my PC buttons make this unnecessary.
-
Page 14: Upgrade Firmware
Re-enter the new password in this field, to ensure it is correct. System Device Name The name of the WAP-4050. You can change this if you wish. Firmware version This displays the current version of the firmware. Click the Upgrade Firmware button if you wish to install a new version of the firmware. -
Page 15: Config File
2. Use Browse button to specify the firmware file. 3. Click Start Upgrade button to perform the task. Note: WAP-4050 is unavailable during the upgrade process, and must restart when the upgrade is completed. Any connections to or through the WAP-4050 will be lost. -
Page 16: Chapter 3 Configuring The Wireless Access Point
Chapter 3 Configuring the Wireless Access Point 3.1 AP Mode WAP-4050 is not allowed to be configured in AP mode. Configuration for AP mode must be performed while in Config Mode. Please follow the procedures described in section 2.2 to access the Mode Configuration screen and click on the Configure button in AP Mode. -
Page 17: Wireless Security
& b - Both 802.11.g and 802.11b Wireless stations will be able to use the WAP-4050. · g only - Only 802.11g Wireless stations can use the WAP-4050, and obtain better performance than in g & b mix mode.. Channel No. - Page 18 WEP Wireless Security Authentication Normally, this should be left at the default value of "Auto". Before changing to "Open System" or "Shared Key", please ensure that your Wireless Stations use the same setting. Key Size Select the desired option. Wireless Stations must use the same setting.
-
Page 19: Trusted Stations
Enter the PSK (Pre-shared Key), sometimes called the network key. Wireless clients must use the same key. Key Lifetime Specify a time period for WAP-4050 to renew the encryption value. Encryption Select the desired encryption algorithm. Currently, WAP-4050 supports TKIP only. Wireless stations must use the same setting. -
Page 20: Ap/Router Mode
Select All Select all of the Stations listed in the Other Stations list. Select None Select none of the Stations listed in the Other Stations list. Edit To change an existing entry in the Trusted Stations list, select it and click this button. - Page 21 (The channel list changes according to the selected region.) SSID This field allows you to set the SSID of WAP-4050 in AP mode. The SSID is an identification string that differentiates from other WLANs. AP Mode and AP/Router mode must use different SSIDs. Using the same SSID for both modes would confuse Wireless clients.
- Page 22 · The WAP-4050 is not in AP/Router mode. · The WAP-4050 is in AP/Router mode, but there is no active connection on the Ethernet (WAN) port. Note: In AP/Router mode, the WAP-4050 has 2 IP addresses, one for the Wireless interface, and another for the Ethernet (WAN) port.
-
Page 23: Wireless Security
Ethernet (WAN) port is using the same IP address range (192.168.0.1 ~ 192.168.0.254). The recommended value to change to is 192.168.1.1 Note: In AP/Router mode, the WAP-4050 has 2 IP addresses, one for the Wireless interface, and another for the Ethernet (WAN) port. Subnet Mask The subnet mask for the IP address above. - Page 24 Connection Type Connection Type The default setting is Travel Mode (Hotel) See the following section for details of the other options, and the settings associated with each option. IP Address IP Address is Also called Dynamic IP Address. This is the default, and the most assigned common IP assignment method.
- Page 25 Apart from Travel Mode (Hotel), the other connection possibilities are: · PPPoE - this is the most common login method for DSL modems. Normally, your ISP will provide some software to connect and login. If using the WAP-4050, this software is not required, and should not be used. ·...
- Page 26 - 26 -...
- Page 27 · PPPoE - this is the most common login method for DSL modems. Normally, your ISP will have provided some software to connect and login. If using the WAP-4050, this software is not required, and should not be used. ·...
-
Page 28: Ethernet (Wan) Port Status
WAP-4050 to your PC. 3.2.5 Ethernet (WAN) Port Status This screen is accessible only when you log in the WAP-4050 in active AP/Router mode (Mode Selector is in position 2). You can have the connection status by clicking the Status button, and the information displayed is depending on the current connection method. - Page 29 Fixed/Dynamic IP Address If your access method is Travel Mode or No Login, a screen like the following example will be displayed when the Status button is clicked. Internet Physical Address The hardware address of this device, as seen by remote devices on the Internet.
- Page 30 IP Address from the ISP's DHCP Server. · If an IP Address has been allocated to the WAP-4050 (by the ISP's DHCP Server), this button will say "Release". Clicking the "Release" button will break the connection and release the IP Address.
- Page 31 Port interface. If using DHCP, and there is no current connection, this will be blank or 0.0.0.0. Network Mask The Network Mask associated with the IP Address above. PPPoE Link Status This indicates whether or not the connection is currently established.
- Page 32 Idle time-out reached The connection has been idle for the time period specified in the "Idle Time-out" field. The connection will now be terminated. Disconnecting The current connection is being terminated, due to either the "Idle Time-out" above, or "Disconnect" button being clicked. Error: Remote Server ISP's Server did not respond.
- Page 33 IP Address The IP Address of this device, as seen from the Ethernet (WAN) Port interface. If using DHCP, and there is no current connection, this will be blank or 0.0.0.0. PPTP Status This indicates whether or not the connection is currently established.
- Page 34 Connection Physical Address The hardware address of this device, as seen by remote devices on the Internet. (This is different to the hardware address seen by devices on the local LAN.) IP Address The IP Address of this device, as seen from the Ethernet (WAN) Port interface.
-
Page 35: Ap/Router Mode - Advanced
new messages. Refresh Update the data on screen. 3.3 AP/Router Mode - Advanced The following advanced features are provided in AP/Router mode. · Advanced Internet · Communication Applications · DMZ · Port Forwarding · Dynamic DNS · Network Diagnostics · Option ·... -
Page 36: Port Forwarding
Send this This field lists the PCs on your wireless LAN. · Application’s For each application listed above, you can choose a incoming calls to destination PC. · If necessary, you can add PCs manually, using the PC Database menu option. ·... - Page 37 Service Service This field lists a number of pre-defined Services, plus any Services defined by yourself. Details of the selected Service are shown in the Properties area. Properties Enable Enable/Disable Port Forwarding for this Service, as required. PC (Server) Select the PC to be used as the Server for this Service. The PC must be running the appropriate Server software.
-
Page 38: Ddns
Note: You can only delete Servers you have defined. Pre-defined Server cannot be deleted. Connecting to your Servers Once configured, anyone on the WAN or Internet can connect to your Servers. They must use the WAN (Internet) IP Address of WAP-4050: e.g. http://203.70.212.52 ftp://203.70.212.52 It is more convenient if you are using a Fixed IP Address, rather than Dynamic. - Page 39 Enter your DDNS data on the WAP-4050's DDNS screen. The WAP-4050 will then automatically ensure that your current IP Address is recorded at the DDNS server. If the DDNS Service provides software to perform this "IP address update"; you should disable the "Update"...
-
Page 40: Network Diag
Password/Key Enter your current password for the DDNS Service. Domain Name Enter the domain name allocated to you by the DDNS Service. If you have more than one name, enter the name you wish to use. 3.3.4 Network Diag This screen allows you to perform a "Ping" or a "DNS lookup". These activities can be useful in solving network problems. -
Page 41: Options
The PC Database is used whenever you need to select a PC (e.g. for the "DMZ" PC). PCs which are "DHCP Clients" are automatically added to the database, and updated as required. The WAP-4050 uses the "Hardware Address" to identify each PC, not the name or IP address. The "Hardware Address"... -
Page 42: Security
Known PCs This field lists all current entries. Data displayed is name (IP Address) type. The type indicates whether the PC is connected to the LAN. Name If adding a new PC to the list, enter its name here. It is best if this matches the PC's hostname. - Page 43 Firewall If enabled, DoS (Denial of Service) attacks will be detected and blocked. Enable DoS The default is enabled. It is strongly recommended that this setting be Firewall left enabled. Note: · A DoS attack does not attempt to steal data or damage your PCs, but overloads your Internet connection so you cannot use it - the service is unavailable.
- Page 44 The ICMP protocol is used by the "ping" and "traceroute" programs, and Respond to ICMP by network monitoring and diagnostic programs. · If checked, the WAP-4050 will respond to ICMP packets received via the WAN port. · If not checked, ICMP packets from the WAN port will be ignored.
- Page 45 Advanced PC Database Known PCs This field lists all current entries. Data displayed is name (IP Address) type. The type indicates whether the PC is connected to the LAN. Edit Use this to change the data for the selected PC in the list. The data for the selected PC will then be shown in the Properties area, where it may be edited.
-
Page 46: Client Mode
Clear the Properties box, ready for entering data for a new PC. Refresh Update the data on screen. Standard Screen Click this to view the standard PC Database screen. 3.4 Client Mode You CANNOT connect to the WAP-4050 wirelessly while it is in Client mode. Configuration for Client - 46 -... - Page 47 mode must be performed while in Config Mode. Please follow the procedures described in section 2.2 to access the Mode Configuration screen and click on the Configure button in Client Mode. Wireless Profiles All available profiles are listed. For each profile, the following data is displayed: ·...
- Page 48 General Profile Name Enter a suitable name for this profile. Each profile must have a unique name. SSID Enter the SSID of the wireless network you wish to join. · In Infrastructure mode, this may be left blank; this device will then join any wireless network it can.
- Page 49 Security Security Select the desired option, and then enter the settings for the selected method: · Disabled - No security is used. Data is not encrypted before transmission. · The 802.11b standard. Data is encrypted before transmission. You have 2 options: ·...
- Page 50 WPA - PSK Enter the PSK (Pre-shared Key), sometimes the network key, used on the Access Point. WPA Encryption This must match the Encryption method used on the Access Point. - 50 -...
-
Page 51: Chapter 4 Troubleshooting
Chapter 4 Troubleshooting This chapter covers some common problems that may be encountered while using the WAP-4050 and some possible solutions to them. Problem 1: Can't connect to the WAP-4050 to configure it. Solution 1: Try using the wired Ethernet connection and the WAP-4050's IP address. - Page 52 RF Shielding Your environment may tend to block transmission between the wireless stations. This will mean high access speed is only possible when close to the WAP-4050. Problem 5: When I enter a URL or IP address I get a time out error.
Need help?
Do you have a question about the WAP-4050 and is the answer not in the manual?
Questions and answers