Table of Contents
Advertisement
Available languages
Available languages
Quick Links
Advertisement
Table of Contents

Related Manuals for ESX VM701S


Summary of Contents for ESX VM701S
- Page 1 7" (17,8 cm) TFT/LCD 16:9 Car Monitor Bedienungsanleitung · Owner's Manual...
-
Page 2: Table Of Contents
Inhaltsverzeichnis Sicherheitshinweise Anschluss-Diagramm Installation Basisfunktionen: Monitor & Fernbedienung Basisfunktionen: OSD Menü Fehlerbehebung OWNER'S MANUAL in english on Page 9 MODE D'EMPLOI en français www.audiodesign.de/french Technische Daten 7” (17,8 cm) TFT/LCD 16:9 Auto Monitor Installation freistehend oder in Kopfstütze Auflösung 1400 x 234 px Auflösung RGB 480 x 234 px Kontrast Verhältnis 300:1 Lumineszenz 350cd/m2... -
Page 3: Sicherheitshinweise
Sicherheitshinweise Bitte lesen Sie vorliegende Bedienungsanleitung gut durch, bevor Sie das Gerät installieren und benutzen. Behalten Sie die Bedienungs- anleitung für eine etwaige spätere Benutzung. VERKEHR Der Fahrer sollte das Gerät während der Fahrt nicht bedienen, bzw. bildgebende Medien abspielen, die den Fahrer vom Verkehrsgeschehen ablenken könnten. EINBAUORT Alle TV-Einbauten im Auto müssen so erfolgen, dass sie sich außerhalb des Sicht- feldes des Fahrers befinden. -
Page 4: Anschluss-Diagramm
Anschluss-Diagramm Cinch gelb Video Signal 1 VIDEO Cinch gelb Video Signal 2 Cinch gelb Monitor 1 HINWEIS: Bitte achten Sie beim Anschließen der einzelnen Komponenten auf korrekte Polung der Kabel, bzw. auf die richtigen Kennfarben der Cinch- Stecker. -
Page 5: Installation
Installation Methode 1: Installation mit Standfuß Ziehen Sie nun die Rändel- Befestigen Sie zunächst Entfernen Sie vorsichtig den schraube (C) des Standfußes den Standfuss an einer Einbauramen des Monitors. fest, nach dem Sie die geeigneten Stelle, z.B. Schieben Sie dann den gewünschte Position des auf dem Armaturenbrett Monitor an der Einschub-... - Page 6 Basis-Funktionen Monitor 1. Infrarot-Sensor für Fernbedienung 2. Operationsanzeige Fernbedienung 1. Ein- und Auschalter 2. Bild spiegeln oder drehen 3. Aktiviert das OSD-MenŸ 4. Stummschaltung 5. Taste schaltet zwischen Audio Video Signal 1 oder 2 6. Lautstärke 7. Helligkeit 8. Farbe 9.
-
Page 7: Basisfunktionen: Osd Menü
Basis-Funktionen OSD Menü Die Bild-Einstellungen des Monitors können nur per Fernbedienung gewählt werden. Helligkeit/Brightness: Drücken Sie die "Menü"-Taste auf dem Display oder auf der Fernbedienung, um zu den Einstellungen für "Helligkeit/Brightness" zu gelangen. Danach drücken Sie die "LINKS" oder "RECHTS" Taste auf dem Display oder die "HOCH "... -
Page 8: Fehlerbehebung
Fehlerbehebung STROMVERSORGUNG FŸr den Betrieb des Produkts ist eine 12 Volt-Stromversorgung mit negativem Masse-Anschluss vorgesehen. Falscher Anschluss oder nicht ausreichende Stromversorgung kann die Funktionalität erheblich beeinträchtigen. REPARATUREN Nehmen Sie selbst keine Reparaturen vor, sondern lassen Sie das Gerät nur von fachkundigen Technikern oder geschultem Personal einbauen und reparieren. -
Page 9: Specifications
Table of Content Saftey Advice Wiring Diagram Installation Basic Functions: Monitor & Remote Basic Functions: OSD Menu Trouble Shooting Specifications 7” (17,8 cm) TFT/LCD 16:9 Car Monitor Stand-alone or Headrest Installation Resolution 1400 x 234 px Resolution RGB 480 x 234 px Contrast Ratio 300:1 Brightness 350cd/m2 Viewing Angle Vertical 160°, Horizontal 160°... - Page 10 Safety Advice Before you start with the installion, Please read this Operation Manual carefully . Keep this Operation Manual for later use. TRAFFIC The Driver should never operate these products while the vehicle is in motion! Installation of all TV monitors must be out of the driver`s field of vision. BUILD-IN POSITION Installation of all TV monitors must be out of the driver`s field of vision.
- Page 11 Wiring-Diagram RCA yellow Video Signal 1 VIDEO RCA yellow Video Signal 2 RCA yellow Optional Monitor 2 Monitor 1 CAUTION: Please observe the right polarity of the connections and the right colours of the RCA-Plugs.
- Page 12 Installation Method 1: Installation with Stand Adduct the knurled head screw Mount at first the stand at At first remove carefully the (C) of the stand, after you have an appropriate position. mounting frame of the found the right position by f.i.
-
Page 13: Remote Control
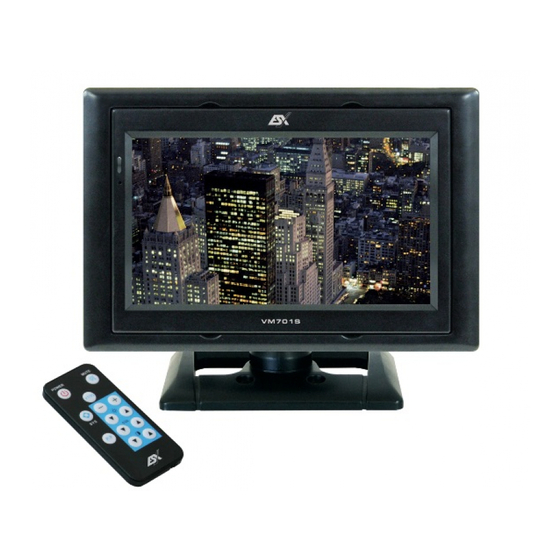
Basic Functions Monitor 1. Infrared-Sensor for Remote 2. Operation LED Remote Control 1. Power on/off 2. Display Overturn 3. Activates OSD-Menu 4. Mute Audiosignal 5. Selector for AV-Signal 1 or 2 6. Volume 7. Brightness 8. Color 9. Contrast... -
Page 14: Osd Menu
Basic Functions OSD Menu The Monitor settings can be adjusted only with the remote control. Brightness: Press "Menu" on the Display or on the Remote, to activate the settings for "Brightness". Then press "LEFT" or "RIGHT" on the Display or "UP" or "DOWN" on the Remote to adjust the settings. Contrast: Press "Menu"... -
Page 15: Trouble Shooting
Trouble Shooting POWER This product is designed for operation with a 12 Volt DC, negative ground vehicle. Too low voltage or wrong polarity may cause malfunctions. SERVICE Do not try and service these products yourself, seek only a qualified service center or factory service center. DAMAGES Be careful not to drop or apply undue pressure to the frontpanel of your video monitor. - Page 16 Distribution: Audio Design GmbH Am Breilingsweg 3 76709 Kronau / Germany Tel. +49(0)7253/9465-0, Fax 9465-10 www.audiodesign.de...
Need help?
Do you have a question about the VM701S and is the answer not in the manual?
Questions and answers