Table of Contents
Advertisement
Quick Links
Advertisement
Table of Contents

Related Manuals for Oki C834DN


Summary of Contents for Oki C834DN
-
Page 2: About The Product Warranty
All rights are reserved by Oki Data Corporation. You must not copy, transfer, translate, etc. the content herein without authorization. You must obtain written permission from Oki Data Corporation before doing any of the above. -
Page 3: Emergency First Aid
Tokyo 108-8551, Japan For all sales, support and general enquiries contact your local distributor. ● Importer to the EU/Authorized representative ● OKI Europe Limited (trading as OKI Printing Solutions) Blays House Wick Road Egham Surrey, TW20 0HJ United Kingdom For all sales, support and general enquiries contact your local distributor. -
Page 4: For Your Safety
● For Your Safety ● Read the User’s Manual for your safety before using the product. Cautions related to safety A warning provides additional information which, if ignored, may result in a risk of personal WARNING injury. A caution provides additional information which, if ignored, may result in equipment CAUTION malfunction or damage. -
Page 5: Manual Composition
● Manual Composition ● The following manuals are included with this product. ● Quick Guide This notes brief descriptions of how to install this printer. ● User’s Manual (Setup) ---- This document Basic operations are described to aid understanding of this printer. The initial setup descriptions including printer placement and the network initial setting are noted along with troubleshooting and maintenance procedures. - Page 6 Notation used in this manual The following notations may be used in this manual. ● C831n/C831dn→ C831 ● C841n/C841dn→ C841 ● PostScript3 Emulation→ PSE, POSTSCRIPT3 Emulation, POSTSCRIPT3 EMULATION ● Microsoft Windows 7 64-bit Edition operating system→ Windows 7 (64bit version) * ®...
-
Page 7: Table Of Contents
Contents About the Product Warranty ..............2 Emergency first aid .................3 Manufacturer ..................3 Importer to the EU/Authorized representative ..........3 Environmental information ...............3 For Your Safety ..................4 Manual Composition ................5 About This Manual ...................5 1. Setup ................. 10 Checking Products ................. 11 Checking Package Contents .................. - Page 8 Contents 2. Printing Basic Operation ............ 57 Supported Paper ................... 57 How to Print from the Tray ..............62 How to Print from the MP Tray ..............63 Convenient Print Functions ..............68 Canceling Printing ................. 73 Setting the Time that Elapses Before Entering the Power Save Mode .... 74 Setting the Time that Elapses Before Entering the Sleep Mode ....
- Page 9 Contents 4. Maintenance ..............110 Replacing Consumables and Maintenance Units ........110 Replacing Toner Cartridges ..................111 Replacing the Image Drum ..................116 Replacing the Belt Unit ...................119 Replacing the Fuser Unit ..................121 Cleaning .................... 124 Cleaning the Surface of the Printer ................124 Cleaning Paper Feed Rollers..................124 Cleaning LED Heads ....................126 Moving or Transporting Your Printer ............
-
Page 10: Setup
1. Setup How to set up is explained in this chapter. „ Setup Flow 1. Checking Products ● Checking package contents ● Checking names of the operator panel and how to operate ● Checking names of product parts ● Checking options 2. -
Page 11: Checking Products
Checking Products ● Checking Products ● This section gives an overview of the printer. Checking Package Contents ● Quick Guide ● Software DVD-ROM Check that you have everything shown below. CAUTION It may cause injury! ● At least two people are needed to lift the printer safely because it weighs about 37 Kg or 40 Kg. -
Page 12: Operator Panel
Operator Panel ● Operator Panel ● This section explains the names and functions of components on the operator panel and how to enter text. Name Function Display screen Displays operating instructions and the status of the printer. <ON LINE> button Switches between on line and off line modes. -
Page 13: How To Use The Function Key
Operator Panel Function No. Function menu How to Use the Function Key Legal Paper (Tray 2) Other Size (Tray 2) Press numeric keys after pressing the <Fn> key when the message “Ready To Print” Paper Size (Tray 3) appears on the display screen. The function X Dimension (Tray 3) menu corresponding to the number entered is Y Dimension (Tray 3) -
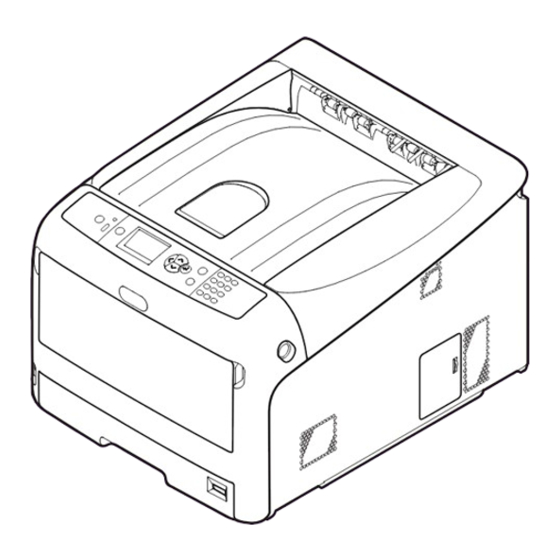
Page 14: Names Of Components
Operator Panel Names of Components Name Multipurpose tray Paper set cover Name Front cover Front cover open lever Operator panel Power switch Top cover Multipurpose tray Tray 1 Air vents Name Faceup stacker AC power socket Interface part Access cover Duplex unit (Only for the model of the name with dn) ●... -
Page 15: Available Options
Operator Panel Available Options The following options are available for your printer: ● Additional tray unit (tray 2/3/4) ● Additional RAM (256 MB or 512 MB) ● 16 GB SD memory card kit Reference ● For details on how to install the options, refer to “Installing Options”... -
Page 16: Checking The Placement Environment
Checking the Placement Environment ● Checking the Placement Environment ● Placement Environment Placement Space Your printer must be placed in the following Place your printer on a flat surface that is wide environment: enough that the printer’s feet securely on the surface. -
Page 17: Preparing Your Printer
Preparing Your Printer ● Preparing Your Printer ● This section explains how to unpack your printer and how to turn it on and off. Unpacking Installing Consumables Insert your finger into the recess on CAUTION It may cause injury! the right side of the printer and pull the ●... - Page 18 Preparing Your Printer Remove the protective sheets from four Put all four image drums back into a image drums. printer. Place an image drum on a newspaper. Remove a tape (6) stuck on a protective sheet (5) and open it. Remove a desiccant (7) from an Turn the blue lever (8) of the toner image drum.
-
Page 19: Installing Accessories
Preparing Your Printer Close the front cover (2). Loading Paper Note ● The front cover cannot be closed securely if the top cover Reference is not closed. ● Please refer to “Supported Paper” P.57 for information on how to load paper into the printer. Pull out the paper tray (1). - Page 20 Preparing Your Printer Slide the paper guide (3) and paper Load paper with the print side face down stopper (4) to the size of paper to be and press it from above. loaded. Note ● Do not load paper exceeding the [▼] mark (5) of the paper guide.
-
Page 21: Turning On/Off The Power
Preparing Your Printer Turning On the Power Turning On/Off the Power Plug the AC cord (1) into the AC power Power Supply Conditions socket of your printer. The power supply must meet the following conditions: Current: 110 - 127 VAC (Range 99 - 140 VAC) 220 - 240 VAC (Range 198 - 264 VAC) Frequency: 50/60 Hz ±... -
Page 22: Turning Off The Power
Preparing Your Printer Turning Off the Power Power Save Mode and Sleep Mode Two-phase power conservation enables you to Hold down the power switch (1) for save on power consumed by the printer. about a second. The message “Shutting down Please wait. „... -
Page 23: Installing Options
Preparing Your Printer Auto Power Off Function Installing Options When a certain period of time elapses after This section explains how to install options on printing, this printer will turn off automatically. your printer. The following options are available: Memo ●... - Page 24 Your printer supports 256 MB and 512 MB RAM. Note ● Use only genuine Oki Data products. The performance cannot be guaranteed when using other products. Memo ● For banner printing, installing additional memory is recommended.
- Page 25 Preparing Your Printer Slide the metal plate (2) upward to Install the metal plate (2). remove. Note ● If the SD memory card socket is attached, remove the SD memory card. Note ● Attach the SD memory card socket before installing the metal plate if the SD memory card socket was attached to the printer.
- Page 26 ● The SD memory socket is attached to the SD memory card. Note ● Use only genuine Oki Data products. The performance cannot be guaranteed when using other products. Check that the value of ● You can not use the SD memory card with the protection [Total Memory ] has increased.
- Page 27 Preparing Your Printer Remove the metal plate (2) by sliding it Install the SD memory socket to the upward. printer with the screw (6) and tab (7) for the SD memory card socket and attach the connector (8). Make sure the LED (3) indicated by the arrow turns off.
- Page 28 Preparing Your Printer Press the <ENTER> button on the Check that the value of [SD Card ] is operator panel. [16 GB]. Check that [Configuration] is selected Note and press the <ENTER> button. ● [15 GB] may be displayed in [SD Card]. This is not an error.
-
Page 29: Test Printing From The Printer
Preparing Your Printer Test Printing from the Printer Check that you can print with the printer. Check the detailed settings and status of your printer by printing the contents of the settings (Menu Map). Note ● When a printer is in the power saving mode, press the <POWER SAVE>... -
Page 30: Connecting To A Computer
Connecting to a Computer ● Connecting to a Computer ● This section explains how to connect your printer to a computer and install a printer driver software using the provided “Software DVD-ROM”. Prepare a computer with a DVD drive. „ Connection Method You can select either of the following connection methods: ●... -
Page 31: Network Connection
Connecting to a Computer Installing a Printer Driver Network Connection (for Windows) Perform the following procedure to connect your To complete the network connection with a printer to a computer via network. Windows computer, first set IP addresses for the printer, and then install a printer driver on the Connecting an Ethernet Cable computer. - Page 32 Connecting to a Computer ‰ First, Set the IP address of the printer. Press the to select [IP Address Set], and press the <ENTER> button. Turn on the printer. Press the <ENTER> button on the operator panel. If setting the IP address manually, press the scroll button and select [Manual], and press the <ENTER>...
- Page 33 Connecting to a Computer Enter the IP address using the numeric Enter the default gateway address and (0-9) keys, and press the <ENTER> press the <ENTER> button. button. To move to the next box, press the <ENTER> button. To move to the next box, press the <ENTER> button.
- Page 34 Connecting to a Computer ‰ Next, install the printer driver on the Select a check box for the driver to computer. install from [PCL driver], [PS driver] or [XPS driver] under [Software]. Ensure that your printer and the computer are turned on and connected, and then insert the “Software DVD-ROM”...
- Page 35 - If the printer is not detected, the Click [Start] > [Devices and Printers]. [Check for the installed devices] screen is displayed. Proceed to step 11. Check that the [OKI C831] icon is displayed. Click [Restart search] to restart the device search.
-
Page 36: Installing A Printer Driver
Connecting to a Computer Installing a Printer Driver Enter the administrator password, using the numeric (0-9) keys. (For Mac OS X) The factory default password is “aaaaaa”. Press To complete the network connection with a Mac the <ENTER> button after each character you operating system, install a printer driver on the input. - Page 37 ‰ Then, install the printer driver on the [Admin Setup] is displayed. computer. Insert the “Software DVD-ROM” into the computer. Double-click the [OKI] icon on the desktop. Double-click [Driver] > [Printer] > [Installer for Mac OSX]. Press the scroll button...
- Page 38 <ENTER> button after each character you input. Press the <ENTER> button. Note ● If [OKI C831(PS)] is not correctly displayed in [Kind], click [-] to remove your printer from [Print & Fax] and then redo the procedure from steps 7 to Close [Print & Fax].
- Page 39 Connecting to a Computer Press the scroll button several times ‰ Finish by test printing from a computer. to select [Power Setup], and press the Start up [TextEdit]. <ENTER> button. Open an appropriate file. Start printing. The installation is complete. ‰...
-
Page 40: Using Ethertalk
Connecting to a Computer „ Using EtherTalk Press the <ENTER> button. (For Mac OS X 10.3.9 to 10.4.11) When connecting to the network with EtherTalk, it is necessary to enable EtherTalk and disable the sleep mode on the printer. After doing that, install the driver on the computer. - Page 41 Close [Network]. Insert “Software DVD-ROM” in the Press the <ON LINE> button to exit the computer. menu mode. Double-click the [OKI] icon on the desktop. Double-click [Driver] folder > [Printer] folder > [Installer for Mac OSX]. - 41 -...
- Page 42 [TextEdit]. Select the [File] menu > [Page Setup]. Select the name of your printer from [Format for]. Check that the [OKI C831(PS)] is If the [You have no printers available] dialog displayed correctly under [Format for]. box appears, click [Add].
- Page 43 Connecting to a Computer Press the scroll button several times Press the scroll button to select to select [Admin Setup], and then [Enable], and press the <ENTER> press the <ENTER> button. button. Enter the administrator password, using Press the <ON LINE> button to exit the the numeric (0-9) keys.
-
Page 44: Using Bonjour
Connecting to a Computer „ Using Bonjour Press the scroll button several times to select [Power Setup], and press the (For Mac OS X 10.5 and 10.6) <ENTER> button. When connecting to the network with Bonjour, it is necessary to disable the sleep mode in the printer. - Page 45 Double-click [Driver] folder > [Printer] [Print Using]. folder > [Installer for Mac OSX]. The name of your printer is displayed in the format of “OKI-C831- (the last six digits of the Enter the administrator’s password, and MAC address)”. then click [OK].
- Page 46 Connecting to a Computer ‰ Next, enable the sleep mode on the Press the scroll button several times printer. to select [Power Setup], and press the <ENTER> button. Note ● If using the Bonjour, disable the sleep mode. Press the <ENTER> button on the operator panel.
- Page 47 Connecting to a Computer „ Using Bonjour (Rendezvous) ‰ Finish by test printing from a computer. (for Mac OS X 10.3.9 to 10.4.11) Start up [TextEdit]. When connecting to the network with Bonjour, it is necessary to disable the sleep mode in the Open an appropriate file.
- Page 48 Close [Network]. Insert “Software DVD-ROM” into the computer. Press the scroll button to select Double-click the [OKI] icon on the [Disable], and press the <ENTER> desktop. button. Double-click [Driver] folder > [Printer] folder [Installer for Mac OSX]. Enter the administrator’s password, and then click [OK].
- Page 49 [Format for]. check that [OKI C831(PS)] is displayed in [Print Using]. The name of your printer is displayed with the format of “OKI-C831- (the last six digits of the MAC address)”. Click [OK]. Remove “Software DVD-ROM” from the computer.
- Page 50 Connecting to a Computer Press the <ENTER> button. ‰ Finish by test printing from a computer. Start up [TextEdit]. Open an appropriate file. Start printing. The installation is complete. ‰ If installing the options such as an Press the scroll button several times additional tray unit or the SD memory to select [Power Setup], and press the...
-
Page 51: Usb Connection
Connecting to a Computer Installing a Printer Driver USB Connection (For Windows) Perform the following procedure to connect your Note printer to a computer via USB. ● You must be logged in as an administrator to complete this procedure. Connecting a USB Cable Ensure that your printer is turned off and the USB cable is unplugged from the Prepare a USB cable (1). - Page 52 Check that the [OKI C831] icon is appears, click [Install this driver displayed. software anyway]. Right-click the [OKI C831] icon and select one of the menu items, and then check that all the printer drivers installed are displayed in the submenu.
- Page 53 Click [Print & Fax]. [OKI C831(PS)] is displayed in [Kind]. Note ● If [OKI C831(PS)] is not correctly displayed, click [-] to remove your printer from [Printers] and then redo the procedure from steps 8 to 10. - 53 -...
- Page 54 Depending on your OS, the description may be different. Select the name of the printer where [Connection] is [USB], and then check Ensure that your printer and the that [OKI C831(PS)] is displayed in computer are turned on and connected. [Print Using]. Reference ●...
-
Page 55: When Adding Options
„ For Windows PCL Driver Start up [TextEdit]. Click [Start] > [Devices and Printers]. Open an appropriate file. Right-click the [OKI C831] icon and select [Properties]. (If you have Start printing. installed multiple printer drivers, select The installation is complete. - Page 56 „ For Mac OS X PS Driver Click [Start] > [Devices and Printers]. (Mac OS X 10.3.9 to 10.4.11) Right-click the [OKI C831] icon and Memo then select [Properties]. (If you have ● The following procedure uses Mac OS X 10.4.11 as an example.
-
Page 57: Printing Basic Operation
2. Printing Basic Operation This chapter describes how to print documents from a computer. ● Supported Paper ● Supported Paper Types For high-quality printing, be sure to use paper types that satisfy requirements such as those for material quality, weight, and surface finish. Please use digital photo print paper. If not using recommended paper, please check the print quality and the movement of the paper sufficiently beforehand to make sure that there are no problems. -
Page 58: Paper Recommendations
Supported Paper Paper Type Paper Size mm (inch) Paper Weight Envelope Com-10 104.8 x 241.3 Envelopes should be 24lb paper, and (4.125 x 9.5) flap parts of envelopes should be folded 110 x 220 (4.33 x 8.66) 162 x 229 (6.4 x 9) 229 x 324 (9 x 12.76) -
Page 59: Storing Paper
Supported Paper Storing Paper Store paper under the following conditions to maintain quality. ● Inside a cabinet or other dry and dark place ● On a flat surface ● Temperature: 20°C ● Humidity: 50% RH (relative humidity) Do not store in the following locations. ●... -
Page 60: Paper Capacity
Supported Paper Paper Loaded on the Tray Your printer has two built-in trays (tray 1 and the MP tray) and an additional tray unit (tray 2/3/4). Refer to the list below to check the supported paper and capacities of each tray. Note ●... - Page 61 Supported Paper Tray Supported paper size Paper capacity Paper weight MP Tray ● A3 ● 100 sheets ● Light ● A4 (when paper weight is 80 g/m (64 to 82 g/m ● A5 ● 10 envelopes ● Medium Light ● B4 (83 to 90 g/m ●...
-
Page 62: How To Print From The Tray
How to Print from the Tray ● How to Print from the Tray ● The following procedure explains how to load paper in tray 1 or tray 2/3/4 (option). Memo ● This procedure explains to load paper in tray 1. The same procedure is applied to tray 2/3/4. Pull out the paper tray (1). -
Page 63: How To Print From The Mp Tray
How to Print from the MP Tray ● How to Print from the MP Tray ● This procedure explains how to load paper in the MP tray. Note ● Do not load paper of different sizes, types or weights at the same time. ●... - Page 64 How to Print from the MP Tray Close the paper guide cover (5). When loading paper vertically or horizontally Com-10, DL, C5 If always printing on same size or type paper from the MP tray, register the paper on the operator panel.
- Page 65 How to Print from the MP Tray Press the <BACK> button until Press the scroll button to select the [MPTray Config] is displayed. weight of the loaded paper and then press the <ENTER> button. Press the scroll button to select [Media Type] and then press the Press the <ON LINE>...
-
Page 66: For Windows Ps Printer Driver
How to Print from the MP Tray For Windows PS Printer Driver Paper Output Your printer outputs to the facedown or faceup From the [File] menu, select [Print]. stacker. Paper types that can be outputted to each stacker are as follows. Click [Preferences] or [Properties]. -
Page 67: Using The Faceup Stacker
How to Print from the MP Tray „ Using the Faceup Stacker Paper is delivered with the print side face up, stacked opposite the order printed. Pull the faceup stacker (1) on the rear side of the printer and open it outward. Unfold the paper support (2). -
Page 68: Convenient Print Functions
Convenient Print Functions ● Convenient Print Functions ● The following convenient print functions are available. For details, refer to the User’s Manual (Advanced). „ Printing on Postcards, Reply „ Changing Print Quality Postcards or Envelopes (Resolution) You can change the print quality to suit your needs. -
Page 69: Printing In Custom Sizes
Convenient Print Functions „ Printing in Custom Sizes Check that [Tray Configuration] is selected and press the <ENTER> To load custom size paper, you need to register the width and length of the paper before button. printing. The range of the sizes you can set differs according to the paper tray. - Page 70 Convenient Print Functions Press the scroll button to select Press the <ON LINE> button to exit the [X Dimension] and then press the menu mode. <ENTER> button. Specify a custom in the following procedures. Enter the paper width value using the ten-key pad and then press the <ENTER>...
-
Page 71: For Windows Pcl Printer Driver
Convenient Print Functions For Windows PCL Printer Driver Open the file you want to print from the application. Click [Start] and select [Devices and Select [PostScript Custom Page Size] Printers]. for a paper size and start printing on the printer driver. Right-click the icon and Your Printer... - Page 72 Convenient Print Functions ‰ Open the file you want to print, and print it in the following procedures. For Windows PCL Printer Driver From the [File] menu, select [Print]. Click [Preferences] or [Properties]. On the [Setup] tab, select a paper size from [Size].
-
Page 73: Canceling Printing
Canceling Printing ● Canceling Printing ● Press the <CANCEL> button on the operator panel to cancel print jobs being currently printed or preparing for a print. When you press the <CANCEL> button is pressed, the following message appears. and then press To cancel printing, select [Yes] the <ENTER>... -
Page 74: Setting The Time That Elapses Before Entering The Power Save Mode
Setting the Time that Elapses Before Entering the Power Save Mode ● Setting the Time that Elapses Before Entering the ● Power Save Mode Note ● When a printer is in the power saving mode, press the <POWER SAVE> button to restore from the mode. ●... -
Page 75: Setting The Time That Elapses Before Entering The Sleep Mode
Setting the Time that Elapses Before Entering the Sleep Mode ● Setting the Time that Elapses Before Entering the ● Sleep Mode Note ● When a printer is in the power saving mode, press the <POWER SAVE> button to restore from the mode. ●... -
Page 76: Constraints When In Sleep Mode
Setting the Time that Elapses Before Entering the Sleep Mode Constraints When in Sleep Mode This section explains constraints when in the sleep mode. The printer may not enter the sleep mode if an error is displayed. Printer Driver Utility Constraints When the printer goes into the sleep mode, the following constraints apply to the printer driver and utility functions. -
Page 77: Cannot Print
Setting the Time that Elapses Before Entering the Sleep Mode Network Function Constraints „ Cannot Search/Cannot Specify Settings In the sleep mode, the following constraints In the sleep mode, you cannot search or specify apply to network functions. settings with the following functions or protocols. ●... -
Page 78: Settings For Turning Power Off Automatically (Auto Power Off)
Settings for Turning Power Off Automatically (Auto Power Off) ● Settings for Turning Power Off Automatically ● (Auto Power Off) Note ● In the factory default, a printer does not enter the auto power off mode while connecting to the network. Setting the Auto Power Off Press the scroll button several times... -
Page 79: Setting The Time That Elapses Before Entering The Auto Power Off Mode
Settings for Turning Power Off Automatically (Auto Power Off) Memo Setting the Time that Elapses Before ● The auto power off time can be selected from the Entering the Auto Power Off Mode followings: - [1 hour] Note - [2 hours] •... -
Page 80: Setting The Buzzer
Setting the Buzzer ● Setting the Buzzer ● You can specify whether to sound a buzzer when an invalid operation is performed on the operation panel or when an error occurs. Press the <ENTER> button on the Press the scroll button several times operator panel. -
Page 81: Troubleshooting
3. Troubleshooting This chapter provides solutions to the problems you may encounter while operating your printer. Memo ● Meanings of symbols in error messages: - “%COLOR%” indicates Cyan (C), Magenta (M), Yellow (Y) or Black (K) - “%TRAY%” indicates tray 1, tray 2, tray 3, tray 4 or the MP tray - “%COVER%”... -
Page 82: When Paper Jams Occurs/When An Error Message Does Not Disappear Even After Jammed Paper Is Removed
When Paper Jams Occurs/When an Error Message does not Disappear Even After Jammed Paper is Removed ● When Paper Jams Occurs/When an Error ● Message does not Disappear Even After Jammed Paper is Removed When paper is jammed inside a printer or when an error message does not disappear even after jammed paper is removed, an error message appears on the display screen. -
Page 83: Error Code
When Paper Jams Occurs/When an Error Message does not Disappear Even After Jammed Paper is Removed Message displayed after the <HELP> Reference Status Message on the Display Screen button is pressed Page Error Code Paper jams 1st Line Open Cover 382, 383, 385 page 87 2nd Line... - Page 84 When Paper Jams Occurs/When an Error Message does not Disappear Even After Jammed Paper is Removed Open the upper duplex unit cover (2) Remove the jammed paper gently in and check for jammed paper. If jammed the direction of the arrow if an edge of paper remains, pull it out gently and jammed paper can be seen, and then close the cover.
- Page 85 When Paper Jams Occurs/When an Error Message does not Disappear Even After Jammed Paper is Removed Error Code 380 Open the upper duplex unit cover (4) and check for jammed paper. If jammed A paper jam has occurred around the front paper remains, remove it, and close the cover.
- Page 86 When Paper Jams Occurs/When an Error Message does not Disappear Even After Jammed Paper is Removed Error Code 381 Cover the removed image drums with paper so that the image drums are not A paper jam has occurred under an image drum. exposed to light.
- Page 87 When Paper Jams Occurs/When an Error Message does not Disappear Even After Jammed Paper is Removed Error Code 382, 383, 385 Return all four image drums into the printer carefully. A paper jam has occurred around the fuser unit. Insert your finger into the recess on the right side of the printer and pull the front cover open lever (1) to open the front cover (2) forward.
- Page 88 When Paper Jams Occurs/When an Error Message does not Disappear Even After Jammed Paper is Removed Cover the removed image drums with Hold the fuser unit handle (6) and lift paper so that the image drums are not the fuser unit out of the printer. exposed to light.
- Page 89 When Paper Jams Occurs/When an Error Message does not Disappear Even After Jammed Paper is Removed Push the left lock lever (5) of the fuser Close the front cover (2). unit backward. Note ● Cannot close the front cover securely if the top cover is not closed.
- Page 90 When Paper Jams Occurs/When an Error Message does not Disappear Even After Jammed Paper is Removed Remove the jammed paper gently by Lower the paper set cover (1). pulling the edge of paper. Task is complete. Remove the paper from the back gently if the edge of paper cannot be seen.
- Page 91 When Paper Jams Occurs/When an Error Message does not Disappear Even After Jammed Paper is Removed Return the tray (1) to the printer. Insert your finger into the recess on the right side of the printer and pull the front cover open lever (2) to open the front cover (3) forward.
-
Page 92: When The Message For Replacement Of Consumables Or Maintenance Unit Appears
When the Message for Replacement of Consumables or Maintenance Unit Appears ● When the Message for Replacement of ● Consumables or Maintenance Unit Appears When the time to replace consumables or maintenance unit is close and replacement must be done, the message “…Low”, “…Near Life”, “…Empty”, “…Life”, “Istall…”, “Replace…”, “Change…”... - Page 93 When the Message for Replacement of Consumables or Maintenance Unit Appears Memo ● “xxx” described on the list below changes according to the printer status. Message displayed after the <HELP> Reference Page or Status Message on the Display Screen button is pressed Remedy Error Code Toner Cartridge 1st Line...
- Page 94 When the Message for Replacement of Consumables or Maintenance Unit Appears Message displayed after the <HELP> Reference Page or Status Message on the Display Screen button is pressed Remedy Error Code Image Drums 1st Line Install New Image Drum 680, 681, 682, 683 page 116 2nd Line Printing disabled due to low...
-
Page 95: When The Message For Paper Replacement Or Paper Size Error Appears
When the Message for Paper Replacement or Paper Size Error Appears ● When the Message for Paper Replacement or ● Paper Size Error Appears When the media type or media size loaded in a tray does not match the settings specified in the printer driver, the message “Change Paper...”... -
Page 96: Other Error Messages
Other Error Messages ● Other Error Messages ● This section explains the causes and remedies for an error message and the function of the <ATTENTION> indicator. An error message appears on the display screen of the operator panel. To display an error code, press the <HELP> button on the operator panel. Error Messages Error <ATTENTION>... - Page 97 Other Error Messages Error <ATTENTION> Message Cause/Remedy code indicator Install New Belt Unit Blinks The belt unit is at the end of its life. Belt Unit Life Replace it with a new belt unit. Please see HELP for details File System is Full Lights up The file system is full.
- Page 98 Other Error Messages Error <ATTENTION> Message Cause/Remedy code indicator %COLOR% Toner Not Installed Lights up The toner cartridge of the indicated color is not installed correctly. Install the toner cartridge correctly. %TRAY% Empty Lights up The indicated tray is empty. Load the indicated size paper.
-
Page 99: When You Cannot Print From The Mp Tray
When You Cannot Print from the MP Tray ● When You Cannot Print from the MP Tray ● If you print from the MP tray without moving down the paper set cover, the message “Install Paper MPTray” appears on the display screen. Check the message and deal with the problem. -
Page 100: Other Issues
Other Issues ● Other Issues ● This section explains the issues you may encounter while operating your printer and how to solve them. Unable to Print from a Computer Memo ● If the following information does not solve the issue, contact your dealer. ●... -
Page 101: Network Connection Problems
Remedy Reference The printer is off line. Right-click the OKI C831 icon, and then select [See what's printing] (> [OKI C831(*)] when multiple printer drivers are installed). In the dialog box, select the [Printer] menu and then remove the check from [Use Printer Offline]. -
Page 102: Unable To Install A Printer Driver Successfully
8. In the [Devices and Printers], right-click the icon of the second or subsequent driver and select [Printer properties] ( [OKI C831(*)] when multiple printer drivers are installed). *Select the type of a printer driver you want. 9. From the [Ports] tab, select [USBxxx] from the list. -
Page 103: Os-Specific Constraints
Other Issues OS-Specific Constraints Constraints with Windows 7/Windows Vista/Windows Server 2008 R2/ Windows Server 2008 Item Symptom Cause/Remedy Printer drivers [Help] is not displayed. The [Help] function is not supported on PS printer drivers. The [User Account Control] When you launch an installer or utility, the dialog appears. -
Page 104: Image Quality Issues
Other Issues Item Symptom Cause/Remedy Configuration tool Unable to find a printer. If the [Don't allow exceptions] check box is selected on the [General] tab of Windows Firewall, you cannot search for a printer in a segment that is connected to another router. - Page 105 Other Issues Symptom Point to check Remedy Reference Printed images are The paper is too moist or dry. Use paper stored in proper page 57 partially faded. temperature and humidity Spots and lines conditions. appear. [Paper Black Setting] or [Paper Press the <ENTER>...
- Page 106 Other Issues Symptom Point to check Remedy Reference Glossiness is not The settings of media type and Press the <ENTER> button page 57 uniform. weight are incorrect. and select [Menus] > [Tray Configuration] > the paper tray configuration you are using, and then select the proper values for [Media Type] and [Media Weight].
-
Page 107: Feeding Issues
Other Issues Feeding Issues Memo ● If the following information does not solve the issue, contact your dealer. Symptom Point to check Remedy Reference ● The paper often The printer is tilted. Place the printer on a flat surface. page 16 jams. -
Page 108: Machine Issues
Other Issues Symptom Point to check Remedy Reference The paper twists The settings of media weight and Press the <ENTER> button and page 57 around the rollers type are incorrect. then select [Menus] > [Tray in the fuser unit. Configuration] > [(tray name) Config] >... - Page 109 Other Issues Symptom Point to check Remedy Reference There is an The printer is tilted. Place the printer on a flat surface. abnormal sound. There is a piece of paper or foreign Check the inside of the printer and object inside the printer. remove any objects.
-
Page 110: Maintenance
● Use only genuine Oki Data consumable items to ensure optimum quality. ● Service for problems due to use of consumable items other than genuine OKI consumables will incur fees even in the warranty period or the maintenance contract period. -
Page 111: Replacing Toner Cartridges
Replacing Consumables and Maintenance Units Note Replacing Toner Cartridges ● Have a new print cartridge ready, as the print quality declines after more than one year following breaking the seal. Note ● Toner powder may spill if you remove a toner cartridge ●... - Page 112 Replacing Consumables and Maintenance Units Procedure for Replacement Lift the toner cartridge (4) from the right side, and remove it from the printer. (for K (black) Toner Cartridge) Possible to get WARNING Memo burned. ● When replacing the C, M, Y toner cartridges, refer to “Procedure for Replacement ●...
- Page 113 Replacing Consumables and Maintenance Units Insert a new toner cartridge (6) by Please recycle toner cartridges. aligning its left side indentation (7) with Memo the protrusion (8) on the image drum so ● If you must dispose of a toner cartridge, put it in a plastic the toner cartridge and image drum [K] bag or similar container and dispose of it in accordance with your municipality’s ordinances or guidelines.
- Page 114 Replacing Consumables and Maintenance Units Procedure for Replacement Identify an empty toner cartridge by its label color (5). (for C (cyan), M (magenta), Y (yellow) Toner Cartridges) Memo ● When replacing the K toner cartridge, refer to “Procedure for Replacement (for K (black) Toner Cartridge)”...
- Page 115 Replacing Consumables and Maintenance Units Unpack the replacement toner cartridge, Turn the blue lever (6) of the toner and gently shake it up and down and cartridge in the direction of the arrow side to side. fully while pressing the top of the toner cartridge.
-
Page 116: Replacing The Image Drum
● Service for problems due to use of consumable items other than genuine OKI consumables will incur fees even in the warranty period or the maintenance contract period. (Use of consumable items other than genuine OKI consumables does not always cause problems, but please exhibit caution when using those.) - Page 117 Replacing Consumables and Maintenance Units Remove the image drum (6) from the Remove the protective sheets. printer in the direction of the arrow and Place a new image drum (9) on a flat place the image drum on a flat surface. surface.
- Page 118 Replacing Consumables and Maintenance Units Turn the blue lever (7) of the toner Close the front cover (2). cartridge in the direction of the arrow Note fully while pressing the top of the toner ● The front cover cannot be closed if the top cover is cartridge.
-
Page 119: Replacing The Belt Unit
Replacing Consumables and Maintenance Units Insert your finger into the recess on Replacing the Belt Unit the right side of the printer and pull the front cover open lever (1) to open the front cover (2) forward. Life Span of Belt Unit When the “Belt Unit Near Life”... - Page 120 Replacing Consumables and Maintenance Units Cover the image drums you took out Hold the handle of a new belt unit with with paper so that the image drums do one hand and support lower part with not expose to the light. other hand.
-
Page 121: Replacing The Fuser Unit
Replacing Consumables and Maintenance Units Return all the four image drums to the Replacing the Fuser Unit printer. Life Span of Fuser Unit When the “Fuser Unit Near Life” message appears on the display screen, prepare a replacement fuser unit. You can keep printing approximately 1250 pages until the next message appears. - Page 122 Replacing Consumables and Maintenance Units Insert your finger into the recess on Hold the fuser unit handle (6) and lift the right side of the printer and pull the the fuser unit out of the printer. front cover open lever (1) to open the front cover (2) forward.
- Page 123 Replacing Consumables and Maintenance Units Close the top cover (4) by pushing the both sides of the cover firmly. Close the front cover (2). Note ● The front cover cannot be closed if the top cover is not closed securely. Please recycle fuser unit.
-
Page 124: Cleaning
Cleaning ● Cleaning ● This section explains how to clean each part of your printer. Cleaning the Surface of the Wipe the two paper feed rollers (2) inside the printer with a wet cloth that Printer has been wrung out well. Note ●... - Page 125 Cleaning Release the tab (3) of the paper feed Wipe the two paper feed rollers (6) with roller cover by pressing the right arm (4) a wet cloth that has been wrung out inward while lifting up the MP tray (1) well.
-
Page 126: Cleaning Led Heads
Cleaning Hook one tab (3) of the paper feed roller Cleaning LED Heads cover by pressing the right arm (4) inward while lifting up the MP tray (1) Clean the LED heads if vertical lines appear, lightly. images are fading vertically, or the periphery of letters is smudged in the printouts. - Page 127 Cleaning Lightly wipe the lenses (5) of the LED heads with soft tissue paper. Close the top cover (4) by pushing the both sides of the cover firmly. Close the front cover (2). Note ● The front cover cannot be closed if the top cover is not closed securely.
-
Page 128: Moving Or Transporting Your Printer
Moving or Transporting Your Printer ● Moving or Transporting Your Printer ● This section explains how to move or transport your printer. Moving Your Printer Unplug all the cables. ● AC cord and ground wire. It may cause CAUTION ● Ethernet or USB cable. injury. - Page 129 Moving or Transporting Your Printer Hold the toner cartridges with both Close the top cover (4) by pushing the hands and remove them with the image both sides of the cover firmly. drums. Remove all the toner cartridges and image drums, and place them on a flat surface.
- Page 130 Moving or Transporting Your Printer Protect your printer with packing materials. Lift your printer and put it in a box. Note ● Use the packing materials attached to your printer when purchased. ● After transporting or when setting up again, remove the vinyl tape used to secure the image drum and toner cartridges - 130 -...
-
Page 131: Appendix
5. Appendix This chapter explains the specifications of your printer. ● Menu List of the Operator Panel ● Checking the Printer’s Status with the Display Screen From the <ENTER> button on the operator panel, you can check the status of your printer. Checking the Device Status You can check the residual life of the consumables, counter information, network settings and system information on the display screen. -
Page 132: Menu List Of The Operator Panel
Menu List of the Operator Panel Menu List of the Operator Panel The function number is described on the right of each item. Functions Configuration Tray Count MPTray Tray1 Tray2 Tray3 Tray4 Supplies Life Cyan Drum Magenta Drum Yellow Drum Black Drum Cyan Toner Magenta Toner... - Page 133 Menu List of the Operator Panel Memo ) indicates the factory default setting. Menus Tray Configuration MPTray Config Paper Size (A4 or Letter Fn90 X Dimension (210mm or 8.5inch) Fn91 Y Dimension (297mm or 11inch) Fn92 Media Type (Plain) Fn93 Media Weight (Light) Fn94 Tray Usage (Do Not Use)
- Page 134 Menu List of the Operator Panel Admin Setup Network Setup TCP/IP (Enable) IP Version (IPv4) : You must input a password. NetBEUI (Disable) NetBIOS over TCP (Enable) NetWare (Disable) EtherTalk (Disable) Frame Type (Auto) IP Address Set (Auto) IPv4 Address Subnet Mask Gateway Address Web (Enable)
- Page 135 Menu List of the Operator Panel IBM 5577 Setup Left Margin (6millimeter) Right Margin (6millimeter) Top Margin (6millimeter) Bottom Margin (6millimeter) Image Wrap Mode (On) Landscape Direction (Reverse Landscape) CAN Function (On) Japanese Font (Mincho) Auto Scale (On) Scale Adjustment (0%) Scale (100%) Japanese Font Size (9.5point) Default Edit Size (Auto)
- Page 136 Menu List of the Operator Panel HP-GL2 Setup Rotate (0) Auto Rotate (Off) Auto Scale (Off) Merge (Off) Palette Source (Software) Palette Pen 0 Width (0.13mm) Color (0) Pen 1 Width (0.18mm) Color (1) Pen 2 Width (0.25mm) Color (2) Pen 3 Width (0.35mm) Color (3)
- Page 137 Menu List of the Operator Panel Color Setup Ink Simulation (Off) UCR (Low) CMY 100% Density (Disable) CMYK Conversion (On) Memory Setup Receive Buffer Size (Auto) Resource Save (Off) Flash Memory Setup Initialize SD Card Setup Initialize Resize Partition PCL (20) Format Partition (PCL) Common (50) PS (30)
- Page 138 Menu List of the Operator Panel Boot Menu USB Setup USB (Enable) Speed (480Mbps) To display the [Boot Menu], Soft Reset (Disable) turn on the power while Offline Receive (Disable) pressing the <ENTER> Serial Number (Enable) button. : You must input a Security Setup Job Limitation (Off) password.
-
Page 139: Basic Steps In Windows
Displays the Printer Setting Screen „ For Windows Vista/Windows Server 2008 Click [Start], and select [Control Panel] > [Printer]. Right-click on the OKI C831 icon, and select [Printing preferences]. „ For Windows XP/Windows Server 2003 Click [Start], and select [Printers and Faxes]. -
Page 140: Specifications
Specifications ● Specifications ● Model Model Number C831/ES8431 N35100A, N35100B, N35102A, N35102B C841/ES8441 N35101A, N35103A, N35103B „ General Specifications C831/ES8431 C841/ES8441 PowerPC464FP, 800 MHz Memory Resident 256 MB Option 256 MB/512 MB Flash RAM NAND : 64 MB NOR : 2 MB Serial NOR : 512 KB Storage Device SD memory card kit... -
Page 141: Printing Specifications
Specifications „ Printing Specifications C831/ES8431 C841/ES8441 Printing method Dry electrophotographic recording method with LED (Light-emitting diode) Emulation language PCL6 (XL3.0 and PCL5c), PostScript 3 Resident fonts PCL: 86 european fonts PS: 80 european fonts Resolution 600 x 600 dpi, 600 x 1200 dpi, 1200 x 1200 dpi, 600 x 600 dpi 600 x 600 dpi 2bit Color... -
Page 142: Network Specifications
Specifications C831/ES8431 C841/ES8441 Operating environment ● When in operation 10 - 32°C / Relative Humidity of 20 - 80% (maximum wet bulb temperature of 25°C, maximum dry bulb temperature of 2°C) ● When not in operation 0 - 43°C / Relative Humidity of 10 - 90% (maximum wet bulb temperature of 26.8°C, maximum dry bulb temperature of 2°C) Conditions for the guarantee ●... -
Page 143: Printer Dimensions
Specifications „ Printer Dimensions TOP VIEW 449 mm SIDE VIEW 1107 mm 255 mm 552 mm 300 mm 400 mm 760 mm 420 mm 360 mm OPTION-INSTALLED VIEW (TRAY2/3/4) 498 mm 774 mm 138 mm 138 mm 138 mm - 143 -... -
Page 144: Index
Index ATTENTION indicator .... 96 Other Error Messages ... 96 Belt Unit ......119 Paper Jams ......82 Paper Size ....57, 60, 69 Paper Tray .....60, 69 Paper Weight ....57, 60 Custom Sizes ...... 69 Placement Environment ..16 Placement Space .... -
Page 145: Oki Contact Details
Fax: +420 22 232 6621 e-mail: info@oki.ua Website: www.oki.cz, www.oki.sk Website: www.oki.ua Oki Systems (Deutschland) GmbH OKI Printing Solutions OKI Sistem ve Yazıcı Çözümleri Tic. Hansaallee 187 Platinium Business Park II, 3rd Floor Ltd. Şti. 40549 Düsseldorf ul. Domaniewska 42... - Page 146 Fax: +45 43 66 65 90 Website: www.oki.ch Website: www.oki.dk Oki Systems (Finland) Oy Oki Data do Brasil, Ltda. Oki Data(S) P Ltd. Malaysia Rep Office Polaris Capella Rua Alexandre Dumas, 2220-80 andar Suite 21.03, 21st Floor Menara IGB, Vänrikinkuja 3 Chácara Santo Antonio...
- Page 147 44902802EE Rev2...
Need help?
Do you have a question about the C834DN and is the answer not in the manual?
Questions and answers