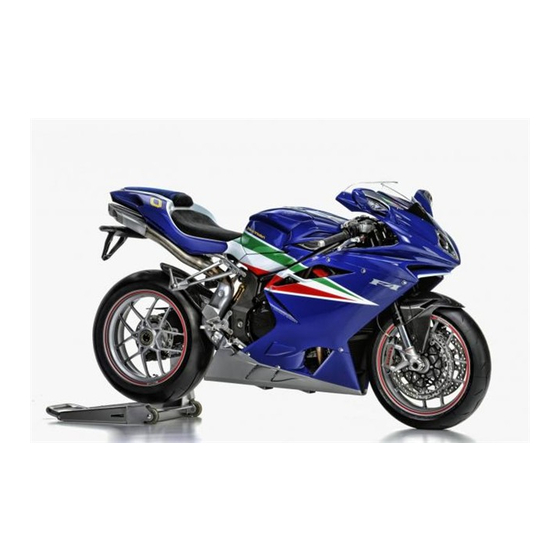
MV Agusta F4 Frecce Tricolori Owner's Manual
F4 frecce tricolori
Hide thumbs
Also See for F4 Frecce Tricolori:
- User manual (437 pages) ,
- Owner's manual (142 pages) ,
- Workshop manual (506 pages)
Table of Contents
Advertisement
Quick Links
Advertisement
Table of Contents

Related Manuals for MV Agusta F4 Frecce Tricolori


Summary of Contents for MV Agusta F4 Frecce Tricolori
- Page 2 Owner’s Manual...
- Page 3 © 2010 This document may not, in whole or in part, be reproduced without prior consent, in writing, from MV Agusta S.p.A. Part No. 8000B5372 - Edition No. 1 Printed in September 2010...
- Page 4 These results can only come from a methodical and constant engagement, aimed to the unceasing research of perfection in any action. MV Agusta shares, in its history, in its brand and in its people, the same inspiring principles of the legendary “Frecce Tricolori”, as well as the awareness of being an icon of the Italian style in the world.
-
Page 5: Table Of Contents
CONTENTS chap. Subjects covered page chap. Subjects covered page GENERAL INFORMATION 2.1.14 Suggestions against theft Purpose of this manual Safety labels - Location General safety information Safety - Visual and acoustic signals Symbols CONTROLS AND INSTRUMENTS Warranty Booklet and Service Coupons Location of controls and instruments Identification data Kickstand... - Page 6 CONTENTS chap. Subjects covered page chap. Subjects covered page 4.4.4 Chronometer Adjusting the rear suspension 4.4.5 NIGHT/DAY Mode 5.8.1 Rebound damper (rear suspension) 4.4.6 IMMOBILIZER Mode 5.8.2 High speed compression damper 4.4.7 How to select the mapping of the control unit (rear suspension) 4.4.8.
- Page 7 CONTENTS chap. Subjects covered page chap. Subjects covered page 6.12 Checking the idle speed TROUBLESHOOTING FLOW CHART 6.13 Periodic emission check Engine problems 6.14 Evaporative emission control system Electrical equipment problems 6.15 Emission control system warranty TECHNICAL INFORMATION obligations Motorcycle overview 6.15.1 Your warranty rights and obligations 8.1.1 Front brake system...
- Page 8 INDEX Accessories Chain – check – installation – lubrication Adjustments Chronometer – clutch lever Cleaning the motorcycle – front brake lever Clutch – front suspension – fluid level, check – headlight – lever, adjustment – rear suspension – system – rearview mirrors Competitions Controls and instruments, location –...
- Page 9 INDEX Electrical equipment, troubleshooting Identification data Emissions Idle speed, check – control system Ignition switch and steering lock – control system warranty Instruments and warning lights – periodic check Engine Kickstand – lubrication – oil level, check Levels – oil level, topping up –...
- Page 10 INDEX Tampering, note Purpose of manual Tires, check – puncturing Rearview mirrors, adjustment – replacement Refuelling Tools and accessories supplied Replacing parts, general information Topping up – coolant Safety – engine oil – labels, location Troubleshooting flow chart – safe riding –...
-
Page 11: General Information
GENERAL INFORMATION 1.1. Purpose of this manual Carefully read, understand and follow the instructions given in this manual. It is an essential part of the motorcycle as is intended to familiarize you with the controls, characteristics and features of the motorcycle. Keep it in a safe place for future reference. -
Page 12: Symbols
GENERAL INFORMATION 1.3. Symbols NOTE: Indicates important information rel- evant to the motorcycle, motorcycle use The words and symbols used below are used to or to the sections of this documentation to help you recognize information that is important to which particular attention must be paid. -
Page 13: Warranty Booklet And Service Coupons
IMPORTANT The copy of the Warranty and Pre-Delivery Certificate to be sent to MV Agusta must be filled in by the dealer and returned to MV Agusta USA within 10 days from the date of registration. Every time the vehicle is serviced by a dealer, the user must... -
Page 14: Identification Data
GENERAL INFORMATION 2) engine serial number 1) vehicle identification number 1.5. Identification data 1) vehicle identification number 2) engine serial number Motorcycle identification The motorcycle is identified by the vehicle identi- We recommend writing down the main numbers in the spaces provided below. fication number. - Page 15 ZCG G C F T W X Y V 000000 Manufacturer’s Letter Code Motorcycle Type Progressive vehicle number The vehicle identification number must be provided each time you need to contact the MV Agusta Technical Assistance Service, in order to guarantee the traceability of your motorcycle. - 14 -...
- Page 16 The key identification number is located on the MV Code Card equipped with the ignition keys. “F4 Frecce Tricolori” identification plate Your F4 motorcycle has been produced in a limited series. Each vehicle is identified by a silver plate placed on the steering head, which reports the number and the code of the Acrobatic Team’s aeroplane corresponding...
-
Page 17: Safety Information
2.1. Safety 2.1.2. NOISE EMISSION WARRANTY 2.1.1. HOW TO REPORT A SAFETY-RELATED MV Agusta S.p.A. warrants that, at the time of DEFECT sale, the exhaust system conformed to all applic- able U.S. EPA (Environmental Protection Agency) If you believe that your vehicle has a defect noise control regulations. - Page 18 SAFETY INFORMATION 2. The use of the vehicle after such device or ele- NOTE ment of design has been removed or rendered Never ride your motorcycle with a defective muf- inoperative. fler. This will effect not only the motorcycle’s sound level, but its performance as well. Riding Acts presumed to constitute tampering include: with a defective muffler can also subject you to 1.
-
Page 19: Information On The Emission Control System
This system prevents the escape of fuel highly toxic. MV Agusta uses a sequential multi- vapors from the fuel tank. point electronic injection system and other meth- ods designed to cut carbon monoxide and hydro- Problems relating to the vehicle’s emissions... -
Page 20: Safe Riding
In addition to obtaining the to others. Avoid wearing dark colored clothing necessary driver’s license, MV Agusta strongly because that makes it more difficult for others to recommends that you take a certified course see you on the roadway, even in the daytime. - Page 21 Never attach any key ring or other object to your motorcycle to a MV Agusta dealer. Do not your ignition key, as they could interfere with your ride until any damage is repaired by an authorized ability to steer your motorcycle.
-
Page 22: Maintaining Your Motorcycle
Section 6. make any noise, immediately stop riding your motorcycle. Have your motorcycle professionally b. Maintenance, repair and service of your inspected and repaired by an MV Agusta dealer, motorcycle require specialized knowledge, tools as necessary. and experience. General mechanical aptitude may not be sufficient to properly maintain, repair or service your motorcycle. -
Page 23: Before You Ride
SAFETY INFORMATION 2.1.7. BEFORE YOU RIDE a. Your motorcycle, like all products, may wear d. Be sure that your tires are inflated to the cor- over time. Before each ride, make sure you rect pressure and that there is no damage what- perform all pre-ride checks as stated in Section soever in the tread or sidewall of the tire. -
Page 24: While You Ride
SAFETY INFORMATION 2.1.8. WHILE YOU RIDE a. Your motorcycle is a very high performance d. When the motorcycle is being ridden at high vehicle. Do not confuse the enhanced capabili- speed, gearing down several times in rapid suc- ties of your motorcycle with your own capabili- cession can cause the engine to overspeed. - Page 25 SAFETY INFORMATION g. Sudden gusts of wind can cause you to lose you do ride in these conditions, travel at low control of your motorcycle. Reduce your speed speed and avoid abrupt maneuvers. and exercise extreme caution when you are over- taken by a vehicle of large dimensions, when you l.
- Page 26 MV Agusta or hidden, latent p. Never exceed the stated speed limit. By avoi- or obvious defects in the product, and agrees to ding speeding, you reduce the risk of accidents.
-
Page 27: After You Ride
SAFETY INFORMATION 2.1.9. AFTER YOU RIDE a. The engine, exhaust pipes and other compo- d. Never park your motorcycle on soft or uneven nents will be hot after riding and present a risk of surfaces because that could cause the motorcy- burn injury to adults or children. -
Page 28: Installing Accessories
MV Agusta dealer to insure that the most WARNING appropriate accessories are selected. It is essen- Improperly installed accessories can... -
Page 29: Vehicle Load
• weight of the passenger; death. If any accessory results in an unnatural • weight of the load and all the accessories. riding position, immediately see your MV Agusta dealer before riding your motorcycle. Adding electric accessories can cause an... - Page 30 SAFETY INFORMATION WARNING WARNING NEVER OVERLOAD YOUR MOTORCY- Never carry any incorrectly secured CLE! Driving an overloaded motorcycle object on your motorcycle, which might can cause damage to the tires, brakes or shift or fall away during riding that could other structural components of your affect the motorcycle stability.
-
Page 31: Modifications
Modifying the motorcycle immediately voids the warranty and relieves MV MV Agusta has designed a number of special Agusta of all its warranty obligations. components for use in competitions and/or sport- ing events. The use of such components is strict- ly limited to areas closed to traffic. -
Page 32: Suggestions Against Theft
SAFETY INFORMATION 2.1.14. SUGGESTIONS AGAINST THEFT 1. Every time you park your motorcycle, operate NAME: the steering lock and remove the ignition key ADDRESS: (see § 3.5.). 2. Park your motorcycle in a closed garage every PHONE NUMBER: time it is possible. 3. -
Page 33: Safety Labels - Location
13 - Rear wheel hub warning NOTE: The labels in the following pages do not appear in their real size. If you experience difficulties in under- standing any of these labels, contact an authorized MV Agusta dealer. - 32 -... - Page 34 SAFETY INFORMATION 1. ADHESIVE LABEL – FRONT FAIRING FUNCTION 2. ADHESIVE LABEL – DOCUMENTATION WARNING - 33 -...
- Page 35 SAFETY INFORMATION 3. ADHESIVE LABEL – BATTERY WARNING 4. ADHESIVE LABEL – UNLEADED GASOLINE - 34 -...
- Page 36 SAFETY INFORMATION 5. ADHESIVE LABEL – EMISSION CONTROL M O TO R C Y C L E N O I S E E M I S S I O N C O N T R O L I N F O R M AT I O N THIS 2010 MVA44F1000 MOTORCYCLE, MEETS US EPA NOISE EMISSION REQUIREMENT OF 80 dBA AT 7095 RPM BY THE FEDERAL TEST PROCEDURE.
- Page 37 90 R + M/2 TYPE : SYNTHETIC A.P.I. SJ EVAPORATIVE FAMILY: AMVAU0018MHC PERMEATION FAMILY: AMVAPP105R01 CANISTER HOT AIR INLET MANIFOLD 4 MANIFOLD 3 MANIFOLD 2 MANIFOLD 1 Motor s.p.a. VARESE - ITALY MV AGUSTA USA LLC - WILLOW GROVE, PA - 36 -...
- Page 38 SAFETY INFORMATION 7. STAMPING ON EXHAUST SILENCERS – EMISSION INFORMATION - 37 -...
- Page 39 SAFETY INFORMATION 8. ADHESIVE LABEL – MANUFACTURED BY : DATE : CERTIFICATION – TIRE Motor S.p.A. VARESE - ITALY TYPE OF VEHICLE: MOTORCYCLE INFORMATION GVWR 833 lbs 378 kg VIN: G A W R TIRE - DIMENSION - RIM COLD INFL. PRESS. 120 /70 ZR 17 M/C ( 58W ) 3.50 x 17 33.0...
- Page 40 SAFETY INFORMATION 10. ADHESIVE LABEL – REARVIEW MIRRORS OBJECTS IN MIRROR ARE CLOSER THAN THEY APPEAR 11. ADHESIVE LABEL – REAR SHOCK ABSORBER W A R N I N G CONTAINS HIGHLY COMPRESSED GAS USE ONLY PERFECTLY DRY NITROGEN GAS OTHER GASES MAY CAUSE EXPLOSION DO NOT INCINERATE REFER TO OWNER’S MANUAL FOR REGULATING GAS...
- Page 41 SAFETY INFORMATION 12. ADHESIVE LABEL – CHAIN ADJUSTMENT 13. ADHESIVE LABEL – REAR WHEEL HUB WARNING - 40 -...
-
Page 42: Safety - Visual And Acoustic Signals
SAFETY INFORMATION 2.3. Safety - Visual and acoustic signals Before each ride, it is essential to verify the operation of the visual and acoustic signals. Rear side reflector Horn (§3.3.) Turn indicators (§3.3.) Parking lights, low Parking light (§3.3.) and brake light and high beams (§3.3.) Rear side reflector (lights up operating the brakes) -
Page 43: Controls And Instruments
CONTROLS AND INSTRUMENTS 3.1. Location of controls and instruments Instruments and warning lights (§3.7.) Rearview mirror (§5.1.) Rearview mirror (§5.1.) Front brake lever (§5.1.) Clutch lever (§5.1.) Left handlebar electrical controls (§3.3.) Throttle twist grip (§3.4.) Ignition switch and steering lock (§3.5.) Right handlebar electrical controls (§3.4.) Fuel tank cap (§4.5.) Gear lever (§3.6. -
Page 44: Kickstand
CONTROLS AND INSTRUMENTS 3.2. Kickstand The kickstand is equipped with a safe- ty switch that prevents motorcycle operation while the stand is down. If the rider attempts to engage the gears while the engine is running and the stand is down, the safety switch automatically turns off the engine by cutting the current supply. -
Page 45: Handlebar Controls, Left Side
CONTROLS AND INSTRUMENTS 3.3. Handlebar controls, left side High beam flasher button Press the button repeatedly. Low/high beam button Button not pressed in : low beam Button pressed in : high beam Horn button Press to operate the warning horn. Turn indicator switch Shifting the lever to the left or right switches on the left or right turn indicators. - Page 46 CONTROLS AND INSTRUMENTS High beam flasher button It is used to attract the attention of other road users in case of danger or emergency. When the high beam is on, the button is inactive. Low/high beam button Under normal conditions, the low beam is on. The high beam can be switched on by pressing the but- ton when allowed by the traffic and road conditions.
-
Page 47: Handlebar Controls, Right Side
CONTROLS AND INSTRUMENTS 3.4. Handlebar controls, right side Engine stop switch Stops the engine and prevents it from being restarted. Engine start button Starts the engine. To be released as soon as the engine starts. When the engine is running, pressing the button selects the display functions. - Page 48 CONTROLS AND INSTRUMENTS Engine stop switch It is used to switch off the engine in an emergency. The ignition circuit is disabled, preventing the engine from being restarted. To be able to restart the engine, return the switch to its original position. DANGER! If the throttle of your motorcycle sticks, you must use the engine stop switch to stop the delivery of power from the engine.
- Page 49 CONTROLS AND INSTRUMENTS Cold start (choke) lever It facilitates cold starting by slightly enrichening the fuel-air mixture during start-up. NOTE: Apply the choke lever for as short a period as possible. Once the engine idles normally, return the lever to its original position. Throttle twist grip It controls the fuel-air mixture supplied to the engine, which regulates engine speed.
-
Page 50: Ignition Switch And Steering Lock
CONTROLS AND INSTRUMENTS 3.5. Ignition switch and steering lock WARNING: Never attach a ring or any other object to the ignition key as they may hinder the steering action. Failure to observe this warning can lead to loss of control of the motorcycle, resulting in an accident, personal injury or death. - Page 51 CONTROLS AND INSTRUMENTS LOCK position Turn the handlebar to the left or right. Press the key in gently while rotating it to the LOCK position. All electrical circuits are deactivated and the steering is locked. The key can be removed. Left side Right side - 50 -...
-
Page 52: Gear Lever
CONTROLS AND INSTRUMENTS P (PARKING) position Turn the key from the LOCK position to the P position. All electrical circuits are deactivated except the parking lights. The steering is locked. The key can be removed. CAUTION Do not leave the key on the P position for a long time, in order to avoid discharging the battery of your motorcycle. -
Page 53: Instruments And Warning Lights
CONTROLS AND INSTRUMENTS 3.7. Instruments and warning lights The instruments and warning lights are activated by turning the ignition switch to the ON position. After a preliminary check (approx. 7 seconds) the displayed information reflects the current general condition of the motorcycle. Warning lights (§3.7.1.) SET button... -
Page 54: Warning Lights
Lights up when the turn indica- diately. Check the oil level tors are activated. and if necessary have it restored by a MV Agusta Neutral warning lights (green) authorized service center It turns on when the gear is in (see §3.8.). If the warning “Neutral”. -
Page 55: Multifunction Display
If it It displays the length of a trip; from 0 to 999.9 (Km or miles) needs to be filled up, contact a MV Agusta licensed Trip counter 2, “TRIP 2” service center (see § 6.3). If the warning light turns It displays the length of a trip;... -
Page 56: Operation
Everything we do affects the whole planet as well as its resources. MV Agusta, in order to protect the interests of the community, alerts the Customers and the Technical Assistance operators to use the vehicle and dispose of its replaced parts respecting the laws in force concerning environmental pollution and waste disposal and recycling. -
Page 57: Break-In
OPERATION Break-in CAUTION 5500-6000 rpm Failure to observe the indications provided below can reduce performance and shorten the life of the motorcycle. Break-in is generally considered to apply only to the engine. In fact, it should be regarded as an essential phase for other important parts such as the tires, the brakes and the drive chain. - Page 58 OPERATION J 500 to 1000 km (300 to 600 mi) Avoid low or high engine speeds and vary your speed frequently. Do not exceed the engine speed shown in 8000-9000 rpm the figure. J 1000 to 2500 km (600 to 1600 mi) Higher engine performance can be demanded, but it is advisable not to exceed the engine speed shown in the 11000 rpm...
-
Page 59: Starting The Engine
OPERATION 4.3. Starting the engine WARNING Starting the engine in a closed place can be dangerous. Exhaust emissions contain car- bon monoxide, a colorless and odorless gas that can lead to serious harm or even death when inhaled. Only start the engine outdoor, in the open air. As you turn the ignition switch to the ON position, the instruments and the warning lights will go through the self-diagnostic cycle;... - Page 60 OPERATION If the self-diagnostic cycle detects a fault in the vehi- cle, the display shows the warning alert shown in the picture. In particular, this message highlights the vehicle part or device on which the fault has been detected. Press “OK” button to access to “RUN” mode. WARNING If a fault is detected on the vehicle, do not start engine and contact an authorized MV...
- Page 61 OPERATION J Cold starting Turn the “CHOKE” lever without turning the acceler- CHOKE lever ator handle. Press the starter button. START button CHOKE lever As soon as the engine starts, release the button and when just slightly warmed up bring the “CHOKE” lever back to its starting position.
- Page 62 OPERATION J Hot starting START button Press the start button without turning the throttle twist grip. As soon as the engine starts, release the button. CAUTION • Do not press the start button for longer than 5 consecutive seconds, in order to avoid dam- age to the electrical equipment.
-
Page 63: Selecting And Setting The Display Functions
OPERATION 4.4. Selecting and setting the display functions Some of the main measurements of the instruments may be changed. The available options include: - Select an operating mode: “RUN” (Odometer) “TC” (Traction control) “CHRONO” (Chronometer) “NIGHT/DAY” (Night/Day Mode) - Reset the trip counter: Trip counter 1 “TRIP 1”... - Page 64 OPERATION 4.4.1. Selecting the display functions The following settings may be changed on the display: • “RUN” (Odometer) • “TC” (Traction control) • “CHRONO” (Chronometer) • “NIGHT/DAY” (Night/Day Mode) To display the operating modes, press “SET” for less than four seconds. When pressed, the display shows all modes, in a sequence.
- Page 65 OPERATION J “RUN” mode In addition to the speedometer, the display shows the following functions (see §4.4.2.): • Total odometer “TOTAL” • Trip counter 1 “TRIP 1” As an alternative: • Total odometer “TOTAL” • Trip counter 2 “TRIP 2” J “TC”...
- Page 66 OPERATION J “CHRONO” Mode This mode turns on the Chronometer and saves the recorded information (see §4.4.4.). The following is displayed: • Chronometer Current lap “CURRENT LAP” • Chronometer Fastest lap “BEST LAP” • Chronometer Last lap “LAST LAP” • Rev counter Total laps covered “N°...
-
Page 67: Trip Reset
OPERATION 4.4.2. Trip reset To reset “TRIP 1” and “TRIP 2”, proceed as follows. WARNING The display modes may be changed or set when the engine is off, the gear in neutral, the motorbike stationary with your feet on the ground. - Page 68 OPERATION Press the “OK” key for less than four seconds until the partial speedometer 2 function (“TRIP 2”) appears on the display. By pressing the “OK” key for more than four sec- onds, the “TRIP 2” value will be reset to zero. - 67 -...
-
Page 69: Tc Mode
OPERATION 4.4.3. “TC” Mode Press “SET” in order to access to “TC” mode, then press “OK” for less than four seconds until “TC LEVEL” appears. The current traction control level is the same as the one shown on the display. WARNING The display modes may be changed or set when the engine is off, the gear in neutral, the... -
Page 70: Chronometer
OPERATION 4.4.4. Chronometer J Lap time recording Turn on the chronometer (“CHRONO” mode) to record the time taken to cover a lap. Press the headlight button to start recording the time. The colon that separates the minutes from the seconds and from the tenths of a second will start blink- ing. - Page 71 OPERATION Press the headlight button again to record the time taken to cover the 1st lap. At the same time, the instru- ment starts recording the time taken to cover the sec- ond lap. The time measurement for the first lap is stored in the memory and is visualised on the display for ten sec- onds, after which the time measurement for the follow- ing lap appears.
- Page 72 OPERATION J Data display Once all times have been recorded, they may be displayed. Access the “CHRONO” mode; the time of the fastest lap (“BEST LAP”) and the time of the last lap (“LAST LAP”) appears on the display. WARNING The display modes may be changed or set when the engine is off, the gear must be in neutral, the motorbike must be stationary with...
- Page 73 OPERATION By repeatedly pressing the key of the flashing high beam headlight, all the times previously acquired start- ing from the last lap memorised can be displayed in sequence. Once all the data have been displayed, press the “SET” key to return to the “LAPS VIEW” mode and then to the following mode.
- Page 74 OPERATION J How to delete data To delete the saved data, proceed as follows: WARNING The display modes may be changed or set when the engine is off, the gear in neutral, the motorbike stationary with your feet on the ground.
- Page 75 OPERATION Now, press “OK” for over four seconds to delete the value. Otherwise, press “SET” for less than four sec- onds to stop the deletion procedure. Subsequently, by pressing the flashing high beam headlight key followed by the “OK” key for more than four seconds, all the previously acquired times can be cancelled.
- Page 76 OPERATION Resetting of best lap time: Access the “CHRONO” mode and press the “SET” key for less than four sec- onds until the words “BEST LAP RESET” appear on the display. Press the “OK” key for less than four seconds; the value of the fastest last lap time memorised will start flashing.
- Page 77 OPERATION Now, press “OK” for over four seconds to delete the value. Otherwise, press “SET” for less than four seconds to stop the deletion procedure. Once all the data have been cancelled, press the “SET” key to exit the “BEST LAP RESET” mode and then pass to the following mode.
- Page 78 OPERATION Press the “OK” key for less than four seconds; the display will ask you to confirm cancellation of all the data present in the memory. By pressing the “OK” key for more than four sec- onds, all the previously acquired times will be cancelled. By pressing the “SET”...
-
Page 79: Night/Day Mode
OPERATION 4.4.5. “NIGHT/DAY” Mode To convert the display background colour, access the “NIGHT/DAY MODE” and press the “OK” key for less than four seconds. WARNING The display modes may be changed or set when the engine is off, the gear in neutral, the motorbike stationary with your feet on the ground. -
Page 80: Immobilizer Mode
OPERATION 4.4.6. “IMMOBILIZER” Mode The “IMMOBILIZER” lets the engine start only if it recognises the original starter key. This is actually an anti-theft device built into the electronic circuit of the vehicle, since only authorised people are allowed to drive it. Use the dashboard “IMMOBILIZER”... - Page 81 OPERATION WARNING The display modes may be changed or set when the engine is off, the gear in neutral, the motorbike stationary with your feet on the ground. Do not change the display while dri- ving. Press “OK” for less than four seconds to set the first digit of the code.
- Page 82 “IMMOBILIZER”. Repeat the code entry procedure from the start, taking care of setting all the right digits shown on your MV Code Card. If the pro- blem persists, contact a MV Agusta licensed service center. - 81 -...
-
Page 83: How To Select The Mapping Of The Control Unit
OPERATION 4.4.7. How to select the mapping of the control unit In the F4 1000 model you may select a special map- ping of the control unit, which will enable you to achie- ve higher power and efficiency for a briskly driving experience. -
Page 84: Warning/Malfunction Alerts
Press “OK” button to access to “RUN” mode. WARNING If a fault is detected on the vehicle when the engine is off, do not start engine and contact an authorized MV Agusta center. - 83 -... - Page 85 WARNING If a fault is detected during riding, stop the vehicle and contact an authorized MV Agusta center. After the vehicle is stopped, the display shows the warning message highlighting the vehicle part or device on which the fault has been detected.
- Page 86 If the coolant temperature is high, stop the motorbike and check the coolant level. If it needs to be filled up, contact a MV Agusta licensed service center (see § 6.3). If the war- ning alert appears even if the level is adequa- te, stop driving and contact a MV Agusta licensed service center.
-
Page 87: Refuelling
OPERATION 4.5. Refuelling WARNING: Before opening fuel cap, switch off the engine, stop smoking, and keep away from flames, sparks and heat sources. Failure to observe this warning can lead to a fire, resulting in an accident, personal injury or death. - Page 88 OPERATION WARNING: Never over fill the fuel tank. Overfilling may cause the fuel to overflow as a result of the expansion due to the heat from the engine or to exposure to sunlight. Fuel spills can catch fire. The level of the fuel in the tank must never be higher than the base of the filler.
-
Page 89: Glove Compartment
OPERATION 4.6. Glove compartment Insert the key. Push the passenger seat downwards at the back and at the same time turn the key in a clock- wise direction. Lift up the passenger seat at the back end, let it slide backwards and remove. In order to reassemble the above mentioned part, you must perform the following operations: WARNING... -
Page 90: Parking The Motorcycle
OPERATION 4.7. Parking the motorcycle K Using the kickstand WARNING • Park your motorcycle only on firm, level ground. Parking the bike on soft ground can allow the kickstand to dig in, and the motor- cycle can fall over resulting in an accident, personal injury or death. - Page 91 If you notice a malfunction of the kick- stand switch, have it repaired by your MV Agusta dealer before using the motorcycle. J Using the rear stand...
-
Page 92: Checks To Be Performed Before Riding
OPERATION 4.8. Checks to be performed before riding Engine start button / stop switch Check operation (§ 3.4). WARNING: A motorcycle can be in good Clutch lever running order and then become unex- Check fluid level (§ 6.9). pectedly unreliable if it was unused for a Check for fluid leakage. - Page 93 OPERATION Drive chain WARNING Check adjustment and lubrication (§ 6.11). If any component does not pass this Coolant pre-riding inspection, have it repaired Check level (§ 6.6). before operating the motorcycle. Failure Check for leakage. to do so could result in an accident, per- Engine oil sonal injury or death.
-
Page 94: Adjustments
OPERATION 5.1. List of adjustments There are many adjustments that can significantly improve the ergonomics, geometry and safety of the motorcycle. WARNING: Many of these adjustments require specialized knowledge, tools and experience. General mechanical aptitude and tools may not be sufficient to properly inspect, adjust, service or repair your motorcycle. - Page 95 ADJUSTMENTS (E) Rearview mirror adjustment (§5.5.) (F) Steering damper adjustment (§5.6.) (A) Clutch lever adjustment (§5.4.) (C) Gear lever adjustment (§5.2.) (E) Rearview mirror adjustment (§5.5.) (H) Rear suspension adjustment (§5.8.) (M) Headlight adjustment (§5.9.) (D) Rear brake lever adjustment (§5.2.) (L) Drive chain (G) Front suspension adjustment (§5.2.)
-
Page 96: Table Of Adjustments
ADJUSTMENTS 5.2. Table of adjustments G - Front suspension adjustment: The fol- A - Clutch lever adjustment: Optimizes the grip lowing can be adjusted to adapt the response of to suit the rider’s needs (§5.4). the suspension to the rider’s preference: - spring preload (§... -
Page 97: Adjusting The Front Brake Lever
ADJUSTMENTS 5.3. Adjusting the front brake lever 5.4. Adjusting the clutch lever WARNING WARNING Never perform the adjustment while rid- Never perform the adjustment while rid- ing. ing. While gently pulling the lever against the spring, turn While gently pulling the lever against the spring, turn the adjusting ring clockwise or counterclockwise to the adjusting ring clockwise or counterclockwise to move the lever away or toward the hand grip. -
Page 98: Adjusting The Rearview Mirrors
ADJUSTMENTS 5.5. Adjusting the rearview mirrors WARNING Never perform the adjustment while riding. Press the mirror at the points shown in the figure to adjust its position in the four directions. WARNING Check the rearview mirrors adjustment every time you use your motorcycle. 5.6. -
Page 99: Adjusting The Front Suspension
ADJUSTMENTS 5.7. Adjusting the front suspension Rebound damper NOTE The adjustment of the suspensions must be preferably performed with the fuel tank full. Spring preload Spring preload Compression damper - 98 -... -
Page 100: Spring Preload (Front Suspension)
ADJUSTMENTS 5.7.1. Spring preload (front suspension) 5.7.2. Rebound damper (front suspension) See the table in the enclosed sheet for spring pre- See the table in the enclosed sheet for rebound load adjustment. Refer to the number of turns damping adjustment. Refer to the number of from the fully counterclockwise position. -
Page 101: Compression Damper (Front Suspension)
ADJUSTMENTS 5.7.3. Compression damper (front suspension) See the table in the enclosed sheet for rebound damping adjustment. Refer to the number of clicks from from the reference position, which is found by fully turning the screw clockwise and then counterclockwise until you hear the first click. CAUTION: Do not force the adjusting screw past its fully clockwise position. -
Page 102: Adjusting The Rear Suspension
ADJUSTMENTS 5.8. Adjusting the rear suspension WARNING: The high temperature of the exhaust pipes can cause burns. Before adjusting the rear suspension, shut off the engine and wait until the exhaust pipes have thoroughly cooled. WARNING: The rear shock absorber contains highly compressed gas. Do not try to open or disassemble it in any way. -
Page 103: Rebound Damper (Rear Suspension)
ADJUSTMENTS 5.8.1. Rebound damper (rear suspension) High speed compression damper See the table attached to this manual for rebound damping adjustment. Refer to the number of clicks from the reference position, which is found by fully turning the screw clockwise and then counterclockwise until you hear the first click. -
Page 104: High Speed Compression Damper (Rear Suspension)
ADJUSTMENTS 5.8.2. High speed compression damper (rear suspension) See the table attached to this manual for compres- sion damping adjustment. Refer to the number of clicks from the reference position, which is found by fully turning the screw counterclockwise and then clockwise until you hear the first click. -
Page 105: Headlight Adjustment
ADJUSTMENTS 5.9. Headlight adjustment Place the vehicle at a distance of 10 m (32.8 ft) from a vertical wall. Make sure that the motorcycle is placed on an even horizontal surface, and that the headlight’s optical axis is perpendicular to the wall. The vehicle must be held in an upright position. Measure the “X” distance between the headlight center and the ground surface, then trace a small cross on the wall at the same height. - Page 106 ADJUSTMENTS The light beam can be adjusted vertically by turn- ing the screw illustrated. If turned in a clockwise direction: the optical unit tilts upwards. If turned in an anti-clockwise direction: the optical unit tilts Counterclockwise downwards. It can be tilted up to an angle of ±4° Clockwise from the standard position.
-
Page 107: Maintenance
MAINTENANCE 6.1. Tables of scheduled maintenance and checks The periodic checks and maintenance operations that are required to keep your motorcycle safe and in perfect running order are shown in the following tables. WARNING: Many of these services and maintenance tasks require specialized knowledge, tools and expe- rience. - Page 108 Everything we do affects the whole planet as well as its resources. MV Agusta, in order to protect the interests of the community, alerts the Customers and the Technical Assistance operators to use the vehicle and dispose of its replaced parts respecting the laws in force concerning environmental pollution and waste disposal and recycling.
- Page 109 Every time vehicle is used Engine oil Renew At least once a year Replace Engine oil filter ( Use only MV Agusta Every time engine oil is changed genuine spare parts ) Check / Restore level Every time vehicle is used Coolant...
- Page 110 MAINTENANCE Tables of scheduled maintenance 1000 6000 12000 18000 24000 30000 36000 km (mi) covered (600) (3800) (7500) (11200) (14900) (18600) (22400) Pre- Service coupon delivery ESCRIPTION PERATION Check / Replace Timing movable shoe Replace Every time timing chain is replaced Timing chain stretcher Check / Replace Check / Replace...
- Page 111 MAINTENANCE Tables of scheduled maintenance 1000 6000 12000 18000 24000 30000 36000 km (mi) covered (600) (3800) (7500) (11200) (14900) (18600) (22400) Pre- Service coupon delivery ESCRIPTION PERATION Check operation Every time vehicle is used Brakes / Clutch Check operation Check lines for leakage Check wear Every 1000 Km ( 600 mi )
- Page 112 MAINTENANCE Tables of scheduled maintenance 1000 6000 12000 18000 24000 30000 36000 km (mi) covered (600) (3800) (7500) (11200) (14900) (18600) (22400) Pre- Service coupon delivery ESCRIPTION PERATION Flexible controls Check / Adjust and transmissions Check Every 1000 Km ( 600 mi ) Lubricate Every 1000 Km ( 600 mi ) and after riding under the rain Drive chain...
- Page 113 MAINTENANCE Tables of scheduled maintenance 1000 6000 12000 18000 24000 30000 36000 km (mi) covered (600) (3800) (7500) (11200) (14900) (18600) (22400) Pre- Service coupon delivery ESCRIPTION PERATION Rear sprocket spring drive Check / Replace Steering head tube ring Check / Adjust Check / Adjust Steering bearings Lubricate...
- Page 114 MAINTENANCE Tables of scheduled maintenance 1000 6000 12000 18000 24000 30000 36000 km (mi) covered (600) (3800) (7500) (11200) (14900) (18600) (22400) Pre- Service coupon delivery ESCRIPTION PERATION Check operation Every time vehicle is used Kickstand Check operation Check operation Every time vehicle is used Side stand switch Check operation...
- Page 115 MAINTENANCE Tables of scheduled maintenance 1000 6000 12000 18000 24000 30000 36000 km (mi) covered (600) (3800) (7500) (11200) (14900) (18600) (22400) Pre- Service coupon delivery ESCRIPTION PERATION Check operation Every time vehicle is used Instrument panel Check operation Check operation / Every time vehicle is used Replace bulbs Lights / Visual signals...
- Page 116 Information on operations that be performed by your authorized MV Agusta dealer. The “ ” symbol points out the requirement to use a tool or a special equipment in order to correctly perform the described operation. - 115 -...
-
Page 117: Tools And Accessories Supplied
MAINTENANCE 6.2. Tools and accessories supplied A bag in the glove compartment contains the following tools: 1 hexagonal bar with 10 mm (0.4 inch) hexagon; 6 Allen keys with 2.5 - 3 - 4 - 5 - 6 - 8 mm (0.10 - 0.12 - 0.16 - 0.20 - 0.24 - 0.32 inch) hexagons;... -
Page 118: Table Of Lubricants And Fluids
MOTUL CHAIN LUBE ROAD – : MV Agusta suggests to refer directly to its authorized dealers in order to purchase the recommended product. The AGIP Racing 4T 10W/60 engine oil has been expressly produced for the F4 motorcycle engine. If the above described lubricant is not available, MV Agusta... -
Page 119: Removing/Fitting The Right-Hand Side Fairing
MAINTENANCE 6.4. Removing/fitting the right-hand side fairing Pull off the quick fastenings and then remove the side fairing. - 118 -... - Page 120 MAINTENANCE Fit the side fairing, taking care to position the front profile as shown in figure A. Fasten the panel by positioning the tab in the lower part of the fairing as shown in figure B. Side fairing front profile - 119 -...
-
Page 121: Checking The Engine Oil Level
MAINTENANCE 6.5. Checking the engine oil level Check the oil level while the engine is not running, and has been allowed to cool down for at least ten minutes after a ride. The check must be performed after placing the motor- cycle in an upright position on a horizontal surface. -
Page 122: Topping Up The Engine Oil Level
MAINTENANCE 6.5.1. Topping up the engine oil level To top up the engine oil level, first remove the right-hand side fairing (see § 6.4) to expose the oil filler plug. Remove the oil filler plug by using the 10 mm hexagonal bar supplied, assembled on a Oil filler plug proper key (see figure). - Page 123 MAINTENANCE WARNING New or used engine oil can be danger- • Keep new or used engine oil out of ous. Engine oil is highly toxic for people reach of children and domestic animals. and domestic animals. Avoid ingestion • While topping up the engine oil, wear and contact.
-
Page 124: Checking The Coolant Level
MAINTENANCE 6.6. Checking the coolant level Check the coolant level after the engine has been shut off for at least fifteen minutes after riding. If you attempt to check the coolant level while the engine is still warm, you will get an erroneous level indication. WARNING: Never attempt to remove the coo- lant cap when the engine is hot. -
Page 125: Topping Up The Coolant Level
MAINTENANCE 6.6.1. Topping up the coolant level Remove the coolant filler cap and top up with the recommended coolant (see §6.3). WARNING The cooling system is under pressure. Always very carefully remove the coolant filler cap. Never attempt to remove the coolant filler cap until the motor- cycle has completely cooled to room temperature. - Page 126 See your MV Agusta dealer. personal injury. CAUTION WARNING Do not spill coolant on any part of the Coolant is a highly toxic fluid.
-
Page 127: Checking The Wear Of The Brake Pads
If the pads have worn to near the wear limit, have both pads replaced by your MV Agusta deal- er. Never replace just one pad, the pads must always be replaced in pairs. Ensure that the new Wear limit 1 mm pads are suitably broken in, see §... -
Page 128: Checking The Brake Fluid Level
MAINTENANCE Rear brake fluid reservoir Front brake fluid reservoir 6.8. Checking the brake fluid level WARNING The level of the brake fluid decreases as the Before riding, always check the braking brake pads wear down. Ensure that the fluid level system according to the instructions is always between the MAX and MIN marks. - Page 129 MIN decrease of the braking efficiency. This mark, the braking system must be over- could increase the risk of accidents, with hauled by an authorized MV Agusta subsequent serious injury or even death. dealer. WARNING...
-
Page 130: Checking The Clutch Fluid Level
If the clutch fluid level is below the MIN mark, have the clutch system overhauled by an authorized MV Agusta dealer. WARNING Use only the clutch fluid specified in section 6.3. of this manual. -
Page 131: Checking And Replacing The Tires
MAINTENANCE 6.10. Checking and replacing the tires WARNING Before using the motorcycle, always check the pressure and wear of the tires. The tire air pressure must be checked and adjusted on cold tires. Checking the air pressure of each tire is an essential requirement to ensure dri- ving safety. - Page 132 Always check the depth of the tire tread. The tread low speed until you reach the nearest depth must always be at least 1/8 inch (3 mm). MV Agusta dealer and have the tire Verify the absence of crevices at the bottom of the replaced. With a provisionally repaired tread design and fissures on the tire sidewall.
- Page 133 MAINTENANCE Tire repairing must never be performed • The wheel rims of your motorcycle if the tire is punctured on its sidewall, or have been designed for use with tube- if the diameter of the puncture on the less tires only. Do not assemble an air tread is greater than 6 mm (0.24 inch).
- Page 134 MAINTENANCE J Rear wheel disassembling CAUTION If you have the rear tire replaced by a tire dealer that is not an authorized MV Agusta dealer, make sure that the following Polygonal nut tools are used during disassem- bly and reassembly: •...
- Page 135 MV Agusta dealer. Wheel unbalance can adversely accident, personal injury or death. affect performance and handling of the motorcycle, as well as shorten the life of the tires.
-
Page 136: Checking And Lubricating The Drive Chain
If the chain is only partially loosened, it means could be amputated. that some chain links are flattened, seized or elongated. If the distance is greater than 50 mm (1.97 in.), have the chain adjusted by your local MV Agusta dealer. - 135 -... - Page 137 MV Agusta dealer. In order to tighten the screws, apply a tigh- tely replaced by an authorized MV tening torque equal to the value shown Agusta dealer.
- Page 138 MAINTENANCE J Lubrication To ensure proper operation, the drive chain needs to be properly lubricated. Preliminary cleaning - Before lubrication, the dirt accumulated on the chain must be dissolved using kerosene and then removed with a clean rag and/or an air jet. CAUTION Never clean the chain with hot steam, high pressure water jet, gasoline or...
- Page 139 MAINTENANCE Lubrication - Apply a film of lubricant over the whole of the drive chain, taking care not to smear the surrounding parts, and in particular the tires. Direct the lubricant jet on the internal links, in order to lubricate the surface of the O-Rings and penetrate inside the chain roller.
-
Page 140: Checking The Idle Speed
Check the idle speed when the engine has reached the operating temperature. Ensure that the choke control has not been activated. The idle speed should range from 1,150 to 1,250 rpm. If a tune-up is necessary, contact your MV Agusta dealer. - 139 -... -
Page 141: Periodic Emission Check
MAINTENANCE 6.13. Periodic emission check To ensure that your new MV Agusta F4 maintains compliance with emission regulations, have the fol- lowing operations performed by your MV Agusta dealer at the specified intervals. J 1,000 km (600 mi) J 12,000 km (7,500 mi) •... -
Page 142: Evaporative Emission Control System
MAINTENANCE 6.14. Evaporative emission control system MV Agusta F4 motorcycles are equipped with an evaporative emission control system which prevents the escape of fuel vapors from the fuel tank. In order to maintain the efficiency and reliability of this device, have the following... -
Page 143: Emission Control System Warranty Obligations
Also included may be hoses, belts, connectors and other emission-related assemblies. Where a warrantable condition exists, MV Agusta will repair your motorcycle at no cost to you, including diagnosis, parts and labour. 6.15.2. MANUFACTURER'S WARRANTY COVERAGE Class I motorcycles (50-169 cc): for a period of use of five (5) years or 12,000 kilometers (7,456 miles), whichever occurs first. -
Page 144: Owner's Warranty Responsibilities
MV Agusta cannot deny warranty solely for the lack of receipts. You are responsible for presenting your motorcycle to an MV Agusta dealer as soon as a problem exists. The warranty repairs should be completed in a reasonable amount of time, not to exceed 30 days. -
Page 145: Limited Warranty On Emission Control System
MAINTENANCE 6.16. LIMITED WARRANTY ON EMISSION CONTROL SYSTEM MV Agusta S.p.A. Via G. Macchi 144 - 21100 Varese, Italy (hereinafter MV Agusta) warrants that each new 2000 and later MV Agusta motorcycle, which includes as standard equipment a headlight, taillight and stoplight, and is street legal: A. -
Page 146: Limitations
California Administrative Code, may be performed by other than an authorized MV Agusta dealer. An emergency situation occurs when authorized MV Agusta dealer is not reasonably available, a part is not available within 30 days, or a repair is not complete within 30 days. Any replacement part can be used in an emergency repair. -
Page 147: Limited Liability
This warranty does not cover inconvenience or loss of use of the motorcycle or transportation of the motorcycle to or from the MV Agusta dealer. MV Agusta shall not be liable for any other expenses, loss or damage, whether direct, incidental, consequential or exemplary arising in connection with the sale or use of or inability to use the MV Agusta motorcycle for any purpose. -
Page 148: Legal Rights
Any replacement part that is equivalent in performance and durability may be used in the performance of any maintenance or repairs. However, MV Agusta is not liable for these parts. The owner is respon- sible for the performance of all required maintenance. Such maintenance may be performed at a service establishment or by any individual. -
Page 149: Replacing Parts - General Information
MAINTENANCE 6.17. Replacing parts - General information 6.17.1. Replacing the fuses The replacement of the fuses and the light bulbs The battery recharge fuse is located on the can be carried out according to the indications solenoid starter of the motorcycle. To expose it, provided below. - Page 150 MAINTENANCE CAUTION Spare fuse (40 A) Recharge fuse (40 A) Turn the ignition key on the “OFF” posi- tion before checking or replacing the fuses, in order to avoid a short circuit with subsequent damage to other elec- tric parts of the motorcycle. To replace the fuse, you must swap the rechar- ge fuse with the spare fuse.
- Page 151 MAINTENANCE The service fuses are located on the right side. To expose them, remove the side fairing (see § 6.4). Release the two clamps and lift the fuse box cover. CAUTION Turn the ignition key to the “OFF” posi- tion before checking or replacing the fuses, in order to avoid a short circuit and damage to other electric parts of the motorcycle.
- Page 152 MAINTENANCE Replace the blown fuse and refit the cover. To identify the position and function of the fuses, refer to the information shown in the enclo- sed electrical diagram. The reference letters in the figure correspond to those shown in the dia- gram.
-
Page 153: Replacing The License Plate Light Bulb
MAINTENANCE 6.17.2. Replacing the license plate light bulb Remove the fixing screws of the lower cover of the license plate holder. - 152 -... - Page 154 MAINTENANCE Remove the lower cover. Extract the bulb socket sliding it from its seat. - 153 -...
- Page 155 MAINTENANCE Extract the bulb. Insert the new bulb. Reposition the bulb socket. Reassemble the lower cover of the license plate holder. Caution: Before reassembling pay special attention to positioning the tail light harness correctly, in order to avoid any damage (see figure).
-
Page 156: Battery
Avoid any contact with your cause an explosion. eyes, skin and clothes. Always wear Always have the battery replaced by protective glasses when you have to your local MV Agusta dealer. work near the battery. - 155 -... - Page 157 The red wire must be connect- nect the battery cables or have the battery ed to the positive terminal (+), while the removed by an authorized MV Agusta dealer. In black wires must be connected to the nega- case of prolonged inactivity, to avoid shortening tive terminal (-).
-
Page 158: Cleaning The Motorcycle
MAINTENANCE 6.19. Cleaning the motorcycle Periodic careful cleaning is a key fac- tor in preserving the value of the motorcycle, protecting its surface fin- ish and checking for damages, wear and leakage of corrosive fluids. CAUTION Before washing the vehicle, cover the end of the exhaust pipes and protect all electri- cal parts. - Page 159 MAINTENANCE Wash the motorcycle with water, a mild detergent WARNING and a sponge. Wipe the motorcycle with a soft Avoid smearing brakes or tires with oil or cloth. Use an air jet to dry difficult-to-reach areas. wax. If necessary, clean the brake discs with a brake disc detergent or with ace- CAUTION tone, and wash the tires with warm water...
-
Page 160: Prolonged Inactivity
MAINTENANCE 6.20. Prolonged inactivity If the motorcycle is to remain unused for a long time, it is advisable to carry out the following operations: Empty the fuel tank. Remove the battery and store it in a suitable place. Recharge the battery every month. Remove the spark plug caps and the spark plugs. -
Page 161: Troubleshooting Flow Chart
TROUBLESHOOTING FLOW CHART 7.1. Engine problems: ENGINE DOES NOT START Return the engine stop Engine stop switch Problem solved Engine starts switch in rest position depressed Disengage gears or Gears engaged and Problem solved lift stand and pull Engine starts kickstand down clutch lever Correctly perform... - Page 162 Engine starts Problem solved (§6.17.1.) are OK Have the battery rechar- The battery is Engine starts ged by a MV Agusta Problem solved charged authorized service center Insert the code printed The key code has on the MV Code Card...
- Page 163 TROUBLESHOOTING FLOW CHART ENGINE SHUTS OFF DURING RIDING Contact a MV Agusta The dashboard authorized service center is on Fuel tank empty Engine is running Refuel (§4.5.) Problem solved Replace fuses F4 and F6 Fuses F4 and F6 Engine is running Problem solved (§6.17.1.)
- Page 164 TROUBLESHOOTING FLOW CHART ENGINE OVERHEATS Contact a MV Agusta Coolant level is authorized service center correct (§6.6.) Engine cools Replace fuse F5 Fuse F5 Problem solved down to operating (§6.17.1.) is OK temperature Contact a MV Agusta authorized service center...
- Page 165 OIL PRESSURE IS TOO LOW (Engine oil pressure warning light is on with the engine running) Have the oil level resto- Oil pressure is Oil level is correct red by a MV Agusta Problem solved optimal (§6.5.) authorized service center...
-
Page 166: Electrical Equipment Problems
Electrical equipment problems: LIGHTS DO NOT WORK Replace fuse(s) The fuses of the Problem solved Lights work (§6.17.1.) lighting are OK Replace bulb(s) Problem solved Lights work Bulbs are OK (§6.17.) Contact a MV Agusta authorized service center - 165 -... - Page 167 TROUBLESHOOTING FLOW CHART HORN DOES NOT WORK Fuse F1 Replace fuse F1 Problem solved Horn works is OK (§6.17.1.) Contact a MV Agusta authorized service center SPEEDOMETER DOES NOT WORK Fuse F1 Replace fuse F1 Speedometer Problem solved is OK (§6.17.1.)
- Page 168 Fuse F1 Replace fuse F1 Warning lights Problem solved is OK (§6.17.1.) work Contact a MV Agusta authorized service center ALTERNATOR DOES NOT CHARGE BATTERY (Battery charge indicator is on with the engine running) Replace battery Alternator Battery recharge Problem solved...
-
Page 169: Technical Information
TECHNICAL INFORMATION 8.1. Motorcycle overview (N) Instrument panel (B) Ignition - Power supply (I) Battery (O) Exhaust system (G) Front suspension (E) Cooling system (L) Front brake (F) Frame (A) Engine (C) Gearbox (H) Rear suspension (M) Rear brake (D) Final drive - 168 -... - Page 170 TECHNICAL INFORMATION A - Engine: four-stroke, inline four-cylinder. G - Front suspension: upside-down hydraulic Double-overhead camshaft valve train with fork with external adjusting system. radial valves. Wet sump lubrication. H - Rear suspension: progressive, with single- B - Ignition - Power supply: integrated ignition- sided swingarm and single shock absorber injection system.
-
Page 171: Front Brake System
TECHNICAL INFORMATION 8.1.1 Front brake system 1 Brake master cylinder 2 Brake lever 3 Brake line 4 Brake caliper 5 Brake discs - 170 -... -
Page 172: Rear Brake System
TECHNICAL INFORMATION 8.1.2. Rear brake system 1 Brake lever 2 Brake master cylinder 3 Brake line 4 Brake fluid reservoir 5 Brake caliper 6 Brake disc - 171 -... -
Page 173: Clutch System
TECHNICAL INFORMATION 8.1.3. Clutch system 1 Clutch lever 2 Clutch master cylinder 3 Clutch line 4 Clutch cylinder assembly - 172 -... -
Page 174: Engine Lubrication
TECHNICAL INFORMATION 8.1.4. Engine lubrication 1 Oil sump 2 Oil filter 3 Cylinder head oil feed pipe - 173 -... -
Page 175: Coolant System
TECHNICAL INFORMATION 8.1.5. Coolant system 1 Expansion tank 2 Upper radiator 3 Lower radiator 4 Coolant pump - 174 -... -
Page 176: Fuel System
TECHNICAL INFORMATION 8.1.6. Fuel system 1 Throttle bodies 2 Fuel pump 3 Fuel line - 175 -... -
Page 177: Specifications
TECHNICAL INFORMATION 2100 1430 8.2. Specifications Description F4 1000 “Frecce Tricolori” SPECIFICATIONS Wheelbase (*) 1430 mm (56.30 in) Overall length (*) 2100 mm (82.68 in) Max. width 750 mm (29.53 in) Seat height (*) 830 mm (32.68 in) Min. ground clearance (*) 115 mm (4.53 in) Trail (*) 100.4 mm (3.95 in) - Page 178 TECHNICAL INFORMATION Specifications Description F4 1000 “Frecce Tricolori” Dry weight 192 Kg - 423.3 lbs Fuel tank capacity (*) 17 lt (4.49 U.S. gal) Reserve fuel (*) 4 lt (1.05 U.S. gal) Oil in crankcase 3.5 lt (0.92 U.S. gal) ENGINE Type Four-cylinder, four-stroke, 16 valves...
- Page 179 TECHNICAL INFORMATION Specifications Description F4 1000 “Frecce Tricolori” LUBRICATION Type Wet sump IGNITION - POWER SUPPLY Type “Magneti-Marelli” IAW 7BM integrated ignition-injection system with Mikuni throttle body; inductive discharge electronic ignition; “Multipoint” phased sequential electronic injection; variable lenght intake funnel with Torque Shift System (TSS) Spark plugs NGK CR9 EB Spark gap (mm)
- Page 180 TECHNICAL INFORMATION Specifications Description F4 1000 “Frecce Tricolori” Gear ratio (overall ratios) First gear 2.64 (11.39) Second gear 2.06 (8.88) Third gear 1.72 (7.42) Fourth gear 1.50 (6.47) Fifth gear 1.32 (5.69) Sixth gear 1.19 (5.13) FRAME Type CrMo steel tubular trellis (TIG welded) Swingarm pivot plates Aluminium alloy FRONT SUSPENSION...
- Page 181 TECHNICAL INFORMATION Specifications Description F4 1000 “Frecce Tricolori” FRONT BRAKE Type Double steel floating disc Disc diameter 320 mm (12.6 in) Disc flange Aluminium Calipers, piston diameters Radial-type, single-piece with 4 pistons (Ø 34) REAR BRAKE Type Single steel disc Disc diameter 210 mm (8.27 in) Caliper, piston diameter...
- Page 182 TECHNICAL INFORMATION Specifications Description F4 1000 “Frecce Tricolori” Brand and type PIRELLI - Diablo Supercorsa SP DUNLOP - Sportmax Qualifier RR Inflating pressure (*) At a speed lower than 300 km/h At a speed higher than 300 km/h Front PIRELLI: 2.3 bar (33 psi) 2.5 bar (36 psi) DUNLOP:...
- Page 183 TECHNICAL INFORMATION Specifications Description F4 1000 “Frecce Tricolori” Air scoops Thermoplastic material Air box Thermoplastic material Air box side panels Thermoplastic material Front mudguard Thermoplastic material Chain guards Thermoplastic material Exhaust pipe guard Aluminium Heat shield Thermoplastic material License-plate holder Thermoplastic material - 182 -...
-
Page 184: Measure Equivalence Tables For American And Metric Systems
TECHNICAL INFORMATION 8.3. Measure equivalence tables for American and metric systems The following conversion factors have been used in accordance with the current international standards. A. From metric to American system B. From American to metric system 1. Length 1. Length 1 mm = 0.1 cm = 0.0394 in 1 in = 25,4 mm = 2,54 cm 1 m = 3.2808 ft... - Page 185 NOTES ................. . .
- Page 186 SCHEMA ELETTRICO F4 1000 Part. N. 8000B4297 Revisione 2 Gy/R L O C K PA R K O F F F1 F2 F3 F4 F5 F6 F7 58 59 60 61 4 3 2 1 5 9 12 8 2 3 6 7 4 11 3 2 1 R- O - F IGP L- O - R BATT R- O - R R- S W L- S W GND ID-W...
- Page 187 Parts list Parts list Parts list Parts list Wire colors list Fuses list Letter(s) Color Ref. Description Ref. Description Ref. Description Ref. Description Ref. Amperage Application Power unit Coil Side stand switch Immobilizer Antenna Yellow Plate light Alternator Rear brake switch Heater fan relay Speed sensor - Lambda Blue...
- Page 188 SCHEMA MONTAGGIO BATTERIA - BATTERY SCHEME - SCHÉMA BATTERIE - SCHALTPLAN BATTERIE - ESQUEMA MONTAJE BATERIA Part. N. 8000B3603 - Rev. N. 1 Fase 1: Effettuare la carica iniziale della batteria secondo le istruzioni riportate nella rispettiva confezione. Fase 2: Inserire la chiave della motocicletta nella serratura posteriore. Ruotare la chiave in senso orario e contemporaneamente rimuovere la sella passeg- gero.
- Page 189 POLO NEGATIVO (-) POLO POSITIVO (+) CAVO NEGATIVO (-) NEGATIVE POLE (-) POSITIVE POLE (+) NEGATIVE CABLE (-) POLE NEGATIF (-) POLE POSITIF (+) CABLE NEGATIF (-) MINUSPOL (-) PLUSPOL (+) MINUSKABEL (-) POLO NEGATIVO (-) POLO POSITIVO (+) CABLE NEGATIVO (-) CAVO POSITIVO (+) POSITIVE CABLE (+) CABLE POSITIF (+)
- Page 190 TABELLA REGOLAZIONE SOSPENSIONI - SUSPENSION ADJUSTMENT TABLES - TABLEAU DE RÈGLAGE DES SUSPENSIONS - TABELLE DER EINSTELLUNGFEDERUNG - TABLA REGULACIÓN SUSPENSIÓNES Part. N. 8000B4298 Rev. 2 F4 1000 • Dispositivo idraulico di frenatura in compressio- Tipo di assetto - Type of geometry - Type d’assiette - ne (Alta velocità) Einstellungsart - Tipo de equilibrado •...