Table of Contents
Advertisement
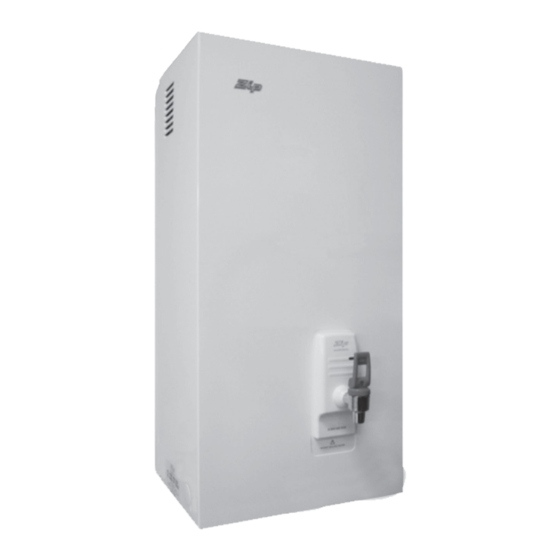
Zip Hydroboil
Instant boiling water
HS010
Hydroboil 10 Litre White
HS110
Hydroboil 10 Litre Stainless Steel
HS015
Hydroboil 15 Litre White
HS115
Hydroboil 15 Litre Stainless Steel
HS025
Hydroboil 25 Litre White
HS125
Hydroboil 25 Litre Stainless Steel
HS040
Hydroboil 40 Litre White
HS140
Hydroboil 40 Litre Stainless Steel
Zip Hydroboil - Installation & Operating Instructions - 81447 - April 2013 v1.03
Installation and Operating Instructions
®
10552
10551
11552
11551
12552
12551
04552
04551
Page 1 of 12
Advertisement
Table of Contents

Subscribe to Our Youtube Channel
Related Manuals for Zip Hydroboil HS010


Summary of Contents for Zip Hydroboil HS010
- Page 1 Hydroboil 25 Litre White 12552 HS125 Hydroboil 25 Litre Stainless Steel 12551 HS040 Hydroboil 40 Litre White 04552 HS140 Hydroboil 40 Litre Stainless Steel 04551 Zip Hydroboil - Installation & Operating Instructions - 81447 - April 2013 v1.03 Page 1 of 12...
-
Page 2: Features
Before Commissioning: Check the unit has been installed correctly. Check all plumbing fittings have been tightened. Ensure the vent pipe is positioned to drain correctly. Check all electrical connections are correct and there are no loose wires. Commission: Flush the supply line before connecting. Turn on the water, allow to fill and check for leaks. Turn on the power. Zip Hydroboil - Installation & Operating Instructions - 81447 - April 2013 v1.03 Page 2 of 12... -
Page 3: Table Of Contents
End of life disposal ..............................10 Spare Parts ..................................11 Warranty / Contact Details ............................12 NOTE: Read all instructions and precautions before proceeding. If in doubt, or need further guidance, please call Zip on 0845 6 005 005. Please leave these instructions with the end user after installation. This unit must be installed in accordance with water supply byelaws, current IEE regulations and relevant local authority byelaws. These products are approved to the LVD and EMC directives and CE endorsed. -
Page 4: Product Specifications / Accessories
SO MAY CAUSE DAMAGE AND/OR PERSONAL INJURY, AND WILL INVALIDATE THE WARRANTY. RETAIN THESE INSTRUCTIONS FOR FUTURE USE. WARNING: Situations that could cause injury to yourself or others. CAUTION: Situations that could cause damage to your appliance or other equipment. NOTE: Notes, usage tips or additional information. Zip Hydroboil - Installation & Operating Instructions - 81447 - April 2013 v1.03 Page 4 of 12... -
Page 5: Installation Requirements
Hydroboil should only be wiped clean with a damp cloth. Never use abrasive cleaning agents or solvents on any part of the Hydroboil, particularly the tap. Installation Requirements Before installing, ensure that the following are available: Sufficient space to position the heater so there is at least 150mm clearance above the heater for service access, 65mm to its left and 20mm to its right – the tap outlet usually should be positioned at least 200mm above a draining board or drip tray. Page 5 of 12 Zip Hydroboil - Installation & Operating Instructions - 81447 - April 2013 v1.03... -
Page 6: Step 1 - Positioning
Front View POSITION shown. Drill holes for water inlet, vent outlet and wiring if it is intended to install the heater with concealed electrical and plumbing connections. Remove cover fastening screws and lift cover away from chassis. Install plumbing and wiring, and prepare pipe ends for connection as shown in step 3. Screw heater chassis to the wall using the supplied fixings, ensure the fixings are suitable for the substrate. If not supply your own suitable fixings. Exposed Concealed Ensure the mounting surface is capable of supporting the weight of the filled Services Services unit, fixings must be capable of supporting the heater weight when filled. See chart on page 7. Zip Hydroboil - Installation & Operating Instructions - 81447 - April 2013 v1.03 Page 6 of 12... -
Page 7: Step 3 - Connecting
Terminal Block plumbed away to waste. Alternatively attach the tundish to the wall (Fig. b) and plumb away to waste. Electrical For concealed electrical connection, connect a power cable from the rear of the heater to the terminal block within the heater as shown. For surface mount installation run the power cable through the cable entry gland at the bottom of the unit to the terminal block within the heater. Ensure the cable is firmly secured. Isolation switches must have a contact separation of at least 3mm in all poles. Do not turn the power ON until water flows from the tap. Surface mount Concealed cable entry cable entry Page 7 of 12 Zip Hydroboil - Installation & Operating Instructions - 81447 - April 2013 v1.03... -
Page 8: Step 4 - Assembling
For instant boiling water, gently pull the tap lever forward. Boiling water will flow until the tap handle is released. This operation gives fingertip flow control for safe filling of cups and mugs. To fill larger vessels such as teapots and saucepans, rotate the lever 180 degrees and depress it until it locks into a horizontal position. Boiling water will flow until the lever is returned to its normal vertical position. This operation allows the vessel to be filled without holding your hand where it may be affected by steam. Zip Hydroboil - Installation & Operating Instructions - 81447 - April 2013 v1.03 Page 8 of 12... -
Page 9: Wall Mounting Template Dimensions
Connect the other test lead to a bare patch of metal (preferably on the edge) of the top of the cover, then to the front cover of the unit, and then to the tap top under the plastic paddle. This can be achieved by inserting the probe up from behind the paddle without losing water. Warning: The water may be boiling - show extra care. Test that in every instance the electrical resistance does not exceed 1ohm. Page 9 of 12 Zip Hydroboil - Installation & Operating Instructions - 81447 - April 2013 v1.03... -
Page 10: Earth Continuity Verification / Wiring Diagram
Overload repeatedly tripping without excessive steam. Maintenance / Cleaning For maintenance and six monthly safety checks, please refer to the Preventative Maintenance sheet No.85695 included with the Hydroboil. Maintenance should be carried out by a Zip authorised technician. Cleaning Case: Do not use strong, corrosive, spray or abrasive cleaners. Clean the case with a soft cloth or brush and mild soap and water. Zip Hydroboil - Installation & Operating Instructions - 81447 - April 2013 v1.03 Page 10 of 12... -
Page 11: Spare Parts
11 SP90110 Fascia light kit 12 SP3947A Thermostat kit 1.5 - 25 litres SP88343 Main tank 10L 12 SP3947A Thermostat kit 40 litre SP88344 Main tank 15L 13 SP1614T Overload kit SP88345 Main tank 25L 14 SP90501 Tap top kit SP88346 Main tank 40L Page 11 of 12 Zip Hydroboil - Installation & Operating Instructions - 81447 - April 2013 v1.03... -
Page 12: End Of Life Disposal
Registering Your Purchase Head Office Registering your Zip installation on the Zip website may help to establish date of installation should it become necessary to service the appliance under terms Zip Heaters (UK) Ltd of the Zip warranty. To register your installation go to www.zipheaters.co.uk 14 Bertie Ward Way and look under the heading “Warranty”. Dereham Norfolk NR19 1TE Website: www.zipheaters.co.uk sales@zipheaters.co.uk Telephone: 0845 6 005 005 Facsimile: 01362 692 448. Page 12 Zip Hydroboil - Installation & Operating Instructions - 81447 - April 2013 v1.03...
Need help?
Do you have a question about the Hydroboil HS010 and is the answer not in the manual?
Questions and answers