Table of Contents
Advertisement
Advertisement
Table of Contents

Subscribe to Our Youtube Channel
Related Manuals for Sharp IQ-7000


Summary of Contents for Sharp IQ-7000
- Page 2 The information provided in this manual is subject to change without notice. NOTICE SHARP strongly recommends that separate permanent written records be kept of all important data. Data may be lost or altered in virtually any electronic memory product under certain circumstances. Therefore, Sharp assumes no responsibility for data lost or otherwise rendered unusable whether as a result of improper use, repairs, defects, battery replacement, use after the specified battery life has expired, or any other cause.
- Page 3 Features of the Organizer Local time zone clock function (HOME time) Displays current date and time. + PAGE 36 International clock function (WORLD time) Displays current date, time, and the difference in time between the city in question and HOME time for 212 cities around the world. 4 PAGE 45 Schedule function Allows you to store important dates and events.
-
Page 4: Before Use
Contents Contents BEFORE USE ..............Inputting and recalling data............QUICK GUIDE ..............Command centre ................Setting the date and local time (HOME time)......... Schedule function ................Calendar function................Telephone directory function ............Connecting the IC cards ..............GETTING STARTED ............ -
Page 5: Table Of Contents
Inputting items from the CALENDAR mode......Inputting items from the SCHEDULE mode......Scheduling items without times..........Recalling scheduled data............... Recalling today’s agenda............Recalling scheduled items from the CALENDAR mode... Recalling scheduled items from the SCHEDULE mode ... Recalling only scheduled dates (i.e., engagements only) .. - Page 6 Contents USING THE TELEPHONE DIRECTORY..a..... 87 Designating the file names ............. Entering listings................Recalling listings ................Recalling a listing with a sequential search ......Recalling a listing with a direct search........Recalling a listing with a keyword search......... Editing listings..
- Page 7 USING THE ALARM FUNCTION ........125 Setting the alarm to ring ..............Setting the schedule alarm ............Displaying the times for which the alarm has been set..... 128 Using the daily alarm function............Setting the daily alarm .............
- Page 8 PERIPHERAL DEVICES ..........Installing the various IC cards............Printing out information stored in the Organizer with the Printing out the telephone directory listings ......Printing out items from the schedule agendas ......Printing out the memos............. Printing out calendar items, anniversaries, and items from the user dictionary ............
-
Page 9: Before Use
Be sure to perform the following procedures before using the Organizer for the first time : 1. Remove the insulation band. The insulation band was inserted in the battery compartment before shipment to prevent battery discharge. It must be removed before use. Pull it out as shown in the illustration. -
Page 10: Inputting And Recalling Data
Before use Inputting and recalling data In this manual, notations such as (1 and a r e i n s t r u c t i o n s press those keys. Also, illustrations such as: describe what will be displayed after pressing the keys the manual tells you to press. - Page 11 Before use 4. Turn the power off. After the data has been input by pressing [I , the power may be turned off. 2. Recalling information stored in the MEMO mode 1. Turn the power on. The MEMO mode will be selected. 2.
-
Page 12: Command Centre
Command centre The top two rows of keys are the Command Centre. Just press the key that’s labelled with the function you need. There are seven functions built 1. Calendar: monthly, weekly, and daily versions appointments and deadlines 2. Schedule: 3. -
Page 13: Setting The Date And Local Time (Home Time)
Setting the date and local time (HOME time) If you set the standard clock to your local time, you can look up the current date and time whenever you wish. In addition, it keeps track of the monthly calendar and the weekly and daily schedules, and keeps track of the time. Setting the standard city For example, set “NEW YORK”... -
Page 14: Quick Guide
Quick guide The countries in which the cities are located are arranged in alphabetical order. If you press (UI , for example, the cities in countries beginning with the letter “U” (U.S.A., etc.) will be displayed. Each time you press pressed, the previous three cities appear on the display. - Page 15 guide 2. Set the new HOME time. 0130 IPM)* In this example, the HOME time is set at 1:30 PM. If “24” is displayed on the left side, press 1 “12” (i.e., to operate using the 1%hour clocksystem) before you input the new HOME time.
-
Page 16: Schedule Function
Schedule function The schedule function allows you to input and recall items on your schedule agenda. A schedule alarm can also be set to remind you of the arrival (or imminent arrival) of appointments. Schedules are also accessible from the CALENDAR mode. For example, to input “January 20, 1989 - 10:OOAM to 2:OOPM - ABC PROJECT MEETING”: 1. - Page 17 guide When “CAPS” appears on the display, capital letters are input, and when not, small letters are input. Pressing -1 alternates between capital and small letters. To enter the date, either press m and input the date directly or press L1] or m until the desired date appears on the display. When these keys are pressed continuously, the date will change continuously, forward and reverse.
- Page 18 Quick auide Move the cursor by pressing m, m, @, or m and select a date. Pressing m or m changes one month at a time. If you hold the key down, the calendar scrolls forwards or backwards. 2. Pressing 1 CALENDAR 1 a second time displays the weekly schedule. Pressing m displays the weekly schedule for the previous week.
-
Page 19: Telephone Directory Function
Quick guide If you press -1 to the built-in clock) will be displayed. When items are scheduled in the morning, ” upper right on the monthly calendar, and for appointments after noon it appears at the lower right of the date. Telephone directory function The telephone directory stores the names, telephone numbers, and addresses of business clients, companies, personal friends, and so on. - Page 20 Quick guide 2. Input the telephone listing name. EDWARDS BOB [I When “CAPS” appears on the display, capital letters are input, and when not, small letters are input. Pressing -1 alternates between capital and small letters. 3. Input the telephone number and the fax number. 201-529-8200 a FAX 265- 1869 -ENTER) 4.
-
Page 21: Connecting The Ic Cards
Quick guide Looking up a telephone listing If you press m when “NAME ?,, appears on the display, the telephone listings will appear one at a time in alphabetical order. If you press m, the listings will be referenced in reverse order. The listing can also be looked up directly using the first letter of the listing by inputting D m, for example, to find a listing beginning with the letter “D”... -
Page 22: Parts Included
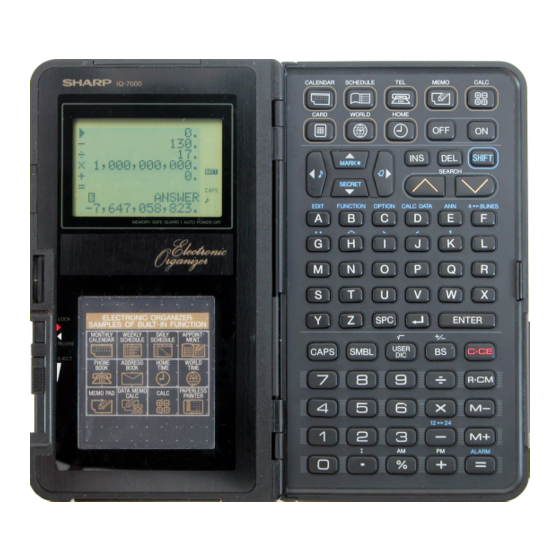
Parts included 1 Spin option jack S H A R P Display ---~ Card lock switch ---- Card removal lever -~~- Transparent guide keys Accessories: Lithium batteries: 3 (installed in the Organizer) Protection card: 1 (inserted in the Organizer) Operation manual: 1... -
Page 23: Command Centre
Getting started -- - Return key... -
Page 24: Display Symbols
Getting staded Display symbols For illustration purposes, all the relevant symbols are CARD visible on the left. However, in actual use, this would never EDIT happen. SHIFT C A P S This symbol appears when the operating battery level is low. -
Page 25: Key Notations
started Getting Key notations This manual uses the following notations for key operations and functions. Note Notation CALENDAR Keys with only one function always appear in the manual with the function enclosed in a box. Keys with multiple functions appear in the manual with only the contextually A or Alphabetical... -
Page 26: Turning The Power On And Off
Getting started Turning the power on and off Power Off Power On Pressing I/ turns the power on. Pressing FJ turns the power Off. Note: When the card lock switch on the left side of the Organizer is in the “RELEASE”... -
Page 27: Contrast Adjustment
Getting started Contrast adjustment Adjusting the display contrast makes the display easier to read. 2. Press any mode key ( ITELI, for example). CAPS 4. Select “2 LCD CONTRAST”. 5. Press m or m to darken or lighten the display as required. The amount of contrast will change continuously when either m or m is held. -
Page 28: The Operational Guide
Getting started The operational guide The Organizer was shipped out from the factory with a protection card inserted in the IC card slot. When you press -1 on the Organizer, the card becomes an operational guide. The operational guide features 12 different pictures showing the different functions of the Organizer. -
Page 29: Inputting Characters
You can enter and correct information in 3 modes: SCHEDULE, TEL, and MEMO. To practice inputting characters and numbers, select the MEMO mode, for example, and input the characters as follows: The power will turn on and the MEMO mode will be selected. display indicates that... - Page 30 Basic entrv Droarammes Inputting non-English characters 1. Input “A” and “ii”, for example. 2. Input “e” and “6”. * “c” marks, etc., are input as symbols. “iitl and “9 can also be input as symbols. Inputting numbers 1. Input “12345”, for example. Inputting graphic symbols and special characters Press -1 to select the symbol or special character display mode, and input the symbols.
- Page 31 Basic entry programmes 10 symbols will be displayed. 2. Switch to the next set of symbols. Each time m is pressed, a new set of 10 symbols will appear in sequence. 3. Input “?“. Press -1 assuming “?” appears next to the number zero. Note: If you press m when the last set of symbols is displayed, the initial symbol display reappears.
-
Page 32: Making Corrections
Basic entrv oroarammes Making corrections Misspellings and incorrect inputs can be corrected using the cursor keys as well as I] and -1 as follows: 1. Correctting misspellings If you have input “NEW YARK” for “NEW YORK”, for example, the input may be corrected as follows: 1. - Page 33 Basic entry programmes 1. First input the incorrect spelling. 2. Next move the cursor over the “R”. CAPS 3. Change the cursor to ” 4 ‘I. 4. Insert the missing letter. When I] is pressed, the cursor mark changes from “a” to set.
- Page 34 Basic entry programmes 2. Move the cursor to the letter “A” to be deleted. CAPS Delete the letter “A”. You can also delete “A” by pressing Editing or correcting previously input data To edit or correct mistakes in data which have already been stored 1.
- Page 35 Basic entry programmes Alternating between the 8-line and 4-line displays For the SCHEDULE, TEL and MEMO modes, the size of the display can be either 8 or 4 lines. The size of each entry will be remembered separately. The 8-line mode displays 16 characters per line to allow more information to be seen at one time, while the 4-line mode displays larger letters at 12 characters per line for easier viewing.
-
Page 36: Displaying The Standard Or World Time
The Organizer features a built-in clock which allows the Organizer to do the following: the CALENDAR mode. 2. To keep track of the items scheduled on the agenda for the current day in the SCHEDULE mode (automatic tracking.) 3. To sound the alarm at pre-set times. (There are two alarms, a schedule alarm and a daily alarm.) 4. -
Page 37: Setting The Standard Clock
Using the standard and world clocks When -1 is pressed, the world clock shows you the current date and local time in any of the world cities you look up. This function is referred to as “the world clock” in contrast to the standard clock. The times appearing on the world clock are set to correspond with the HOME time in the city set as the standard city. - Page 38 Using standard and world clocks 2. Select “2 CITY”. Note: As local “NEW YORK” time was factory preset as the standard city for the built-in clock, “NEW YORK” will appear when setting the HOME time. World cities are listed alphabetically by the first initial of the country in which they are located.
- Page 39 Using the standard and world clocks 4. Recall the display containing “NEW YORK”. (Press m key until New York comes up on the display. If you pass “NEW YORK” press m.) 5. Input the number corresponding to “NEW YORK”. When DST is in effect, press I] and the city number to mark that city as DST-applicable, and then press the city number again.
-
Page 40: Setting The Home Time For The Built-In Clock
Using the standard and world clocks First recall the desired city by pressing m or I, then press When DST is set, “0” appears before the name of the city on the list. To cancel the DST setting, press -1 and the city number a second time so that ”... - Page 41 Using the standard and world clocks 3. Input the date. Input the day and month in 2 digits and the year in 4 digits. For single digit months or days, input “0” before the single digit. Note: The Organizer is initially set to receive this input in the order of month, day, and year.
- Page 42 Setting the time using the continuous 24-hour clock In the above example, the time was set according to the 12-hour AM/PM system. The clock can also be set to display the hours continuously on a 24-hour basis from 0:OO to 2359 hrs. 2.
- Page 43 Using the standard and world clocks 4. Enter the date. 5. Enter the correct starting time. Notes: Use the beepof the time announcements given on the radio, on T.V., or by telephone time services. The clock starts from 0 seconds. (After the set time is displayed, the previous display appears.) 6.
-
Page 44: Changing The Standard City
Using the standard and world clocks Changing the standard city When you stay in a certain city for a long period of time on business trips, etc., you will find it more convenient to set the HOME time of the city you are in as the standard time on the built-in clock, so as to maintain the correct time for schedules and the alarm function and so forth. - Page 45 Using the standard and world clocks 3. Press the number key corresponding to Tokyo. Once “TOKYO” is selected as the standard city, local Tokyo time will automatically become the standard time for the built-in clock. 4. Check the current time for Tokyo, for example. (As the standard city has been changed to Tokyo, local Tokyo time will be displayed when vl is pressed.)
- Page 46 the standard and world clocks Using When looking up the times for world cities, be sure to make a note of when DST should be set for a particular city. ” 0 “will appear in front of the cities on the world clock which are set to DST. The 1 st city on the world clock list is “LONDON”.
-
Page 47: Looking Up The Time For Other Cities On The World Clock
Using the standard and world clocks Indicates that the time for this city has been designated as world time, and also that DST applies. and also that DST does not apply. Looking up the time for other cities on the world clock The world clock can display the time in 212 cities internationally. - Page 48 Using the standard and world clocks 2. Enter “3 SINGAPORE”. Singapore takes the first slot and the city in slot 6 - in this case San Francisco - drops off the list. Every time a new city is referenced, the others all drop a notch in priority. Displaying a city on the main Pressing the key displays the time for the chosen city.
- Page 49 Using the standard and world clocks 3. To look up the time for Tokyo, press the number corresponding to “TOKYO”. (When you do this, the other cities will move down one notch on the main city display.)
-
Page 50: Schedule Function
You can enter important future appointments as well as important dates in the past into the Organizer’s schedule function. These dates are marked with tags on the Organizer’s calendar display so you can always tell what’s coming up that month at a glance. In addition, you can set an alarm to sound just before any agenda item to alert you beforehand to upcoming dates and appointments. -
Page 51: Using The Schedule Function
Using the schedule function 1. Select the CALENDAR mode. * Pressing [m 1 CALENDAR 1 displays the current monthly calendar. Pressing I-1 [ SCHEDULE 1 displays the current daily schedule according to the Organizer’s perception of what day it is. (In this instance, if you set the Organizer’s built-in clock for December 12, at 1:30PM as on page 40, the calendar for December 1988 will displayed.) - Page 52 Using the schedule function 4. Change to the SCHEDULE mode. CAPS The date you have selected (January 20,1989) will appear at the top of the display. The bottom part of the display is reserved for the input of agenda items. 5.
-
Page 53: Inputting Items From The Schedule Mode
Using the schedule function 8. Store the scheduled meeting in the memory. 9. Now, check to see if the data was registered in the memory. Notice the tag ( ) next to “January 20”. It indicates a scheduled item for that date. (Agenda items beginning in the morning result in a tag at the upper right of the date, while those beginning after noon result in a tag appearing at the lower right of the date.) Inputting items from the SCHEDULE mode... - Page 54 Using the schedule function 2. Recall “January 16”. Press m until “January 16” is recalled. 3. Input the schedule item. 2. Scheduling with IJ and the numerical keys When the date is not close to the displayed date, you may find it more convenient to input the scheduled items with the numerical keys.
- Page 55 Using the schedule function 2. Clear the date display. 3. Input the scheduled date. (February 17, 1989) Note: A part of the date may be omitted if it is the same as the previous date. 4. Display the SCHEDULE mode. 5.
-
Page 56: Scheduling Items Without Times
Using the schedule function When only the starting time is input without the finishing time, the schedule clock allows 30 minutes for the scheduled item. Input examples for reference The following agenda items can be input as examples for recall later. Example 1: February 7,1989 02071989 [ SCHEDULE ) 10 I-... -
Page 57: Recalling Scheduled Data
Using the schedule function Recalling scheduled data The following 7 methods may be used to display previously scheduled items to check what is scheduled for any given date. Recalling today’s agenda. 2. Recalling scheduled items from the CALENDAR mode. 3. Recalling scheduled items from the SCHEDULE mode. 4. - Page 58 Using the schedule function For example, to recall the schedule for January 20, 1989: 1. Select the CALENDAR mode. I I 12 13 1'1 I5 I6 II 25 26 21 28 29 30 3 I (If the Organizer clock was set for December 12,1988 at 1:30PM as described on page 40, the calendar for December, 1988 will be displayed.) 2.
-
Page 59: Recalling Scheduled Items From The Schedule Mode
Using the schedule function Recalling scheduled items from the SCHEDULE mode To recall the schedule directly from the SCHEDULE mode in forward or reverse direction, first set the SCHEDULE mode and then press m (to recall the next day and future days) or IAl (to recall the last and previous days) as required. - Page 60 the schedule function 1. Search for all days containing agenda items. 2. Press 11 m repeatedly. After the last agenda item has been found, “NOT FOUND !” is briefly displayed and then the previous display reappears. Pressing , references agenda items in reverse. Pressing [ SCHEDULE 1 I=/ -1 and wj displays the oldest past agenda item.
- Page 61 Using the schedule function 2. Input the date. 02071989 3. Recall the agenda for that date. Recalling scheduled items using the first letter(s) of the item Input the first letter(s) of the schedule item you would like to recall on the display and then press m to display it.
-
Page 62: Recalling Scheduled Items With A Keyword Search
2. Input the first letter(s). Staff 3. Begin the search. Note: When m is pressed, a forward search from the displayed date will begin for scheduled items beginning with the word “Staff”. If IAl is pressed, a reverse search will take place for items scheduled before the date presently appearing on the display. - Page 63 Using the schedule function 2. Input the keyword for the search. meeting 3. Begin the search. The first scheduled item containing the word “meeting” after December 1, 1988 will appear on the display. Repeated search: To search for additional items containing the word “meeting”, press “meeting”...
-
Page 64: Editing Scheduled Data
Using the schedule function Editing scheduled data Previously scheduled data may be edited by recalling and pressing edited directly using 1)1 111 PI m I] and I] etc. For example, to change “SAN FRANCISCO” within a schedule item on February 7, “GO TO SAN FRANCISCO” to “LOS ANGELES”: 2.
Need help?
Do you have a question about the IQ-7000 and is the answer not in the manual?
Questions and answers