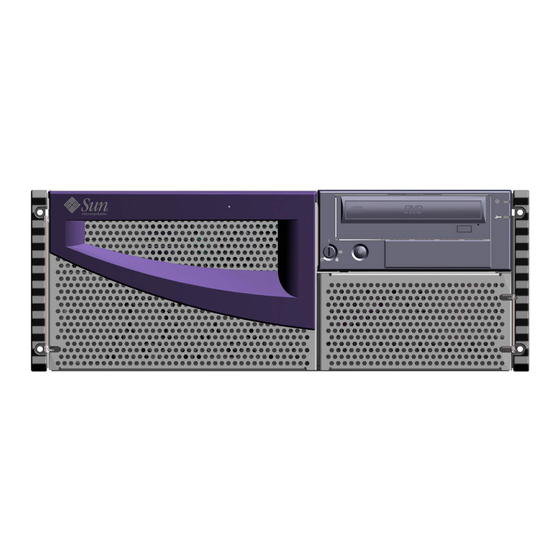
Sun Microsystems Sun Fire 280R Product Notes
Hide thumbs
Also See for Sun Fire 280R:
- Owner's manual (256 pages) ,
- Service manual (252 pages) ,
- Setup and rackmounting manual (42 pages)
Summary of Contents for Sun Microsystems Sun Fire 280R
- Page 1 Sun Fire 280R Server ™ Product Notes Sun Microsystems, Inc. 4150 Network Circle Santa Clara, CA 95054 U.S.A. 650-960-1300 Part No. 806-4808-13 April 2003 Revision A Submit comments about this document at: http://www.sun.com/hwdocs/feedback...
- Page 2 This document and the product to which it pertains are distributed under licenses restricting their use, copying, distribution, and decompilation. No part of the product or of this document may be reproduced in any form by any means without prior written authorization of Sun and its licensors, if any.
-
Page 3: Table Of Contents
Accessing the Latest Documentation You can view, print, or purchase a broad selection of Sun documentation, including localized versions, at: http://www.sun.com/documentation Check this site periodically for the latest revisions of Sun Fire 280R product documentation, including the latest version of these Product Notes. -
Page 4: 900-Mhz, 1.015-Ghz, And 1.2-Ghz Ultrasparc Iii Cu Cpu Modules
1.015-GHz, and 1.2-GHz UltraSPARC III Cu CPU modules meet the requirements described in this document. If you are upgrading a Sun Fire 280R server with an UltraSPARC III Cu CPU module for the first time, you must make sure that the system meets the requirements described in the following sections. -
Page 5: System Software
Solaris 8 or Solaris 9 operating environment. Sun Fire 280R systems using the CPU module at 1.015 GHz require the Solaris 8 02/02 operating environment or a compatible Solaris release that supports the server. -
Page 6: System Firmware
This patch is available on the SunSolve web site. Note – OpenBoot PROM 4.6.6 is not supported on the Sun Fire 280R server. If you installed OpenBoot PROM 4.6.6, you must change your firmware to a supported version of OpenBoot PROM firmware. - Page 7 If you answer no to this prompt, the set up of the operating environment will continue without configuring RSC. If you want to install RSC later, you can install RSC by running the rsc-config script located at /usr/platform/SUNW,Sun-Fire-280R/rsc. Sun Fire 280R Server Product Notes...
- Page 8 You must accept the terms of the license agreement at the Sun Install Check Tool web site in order to run the tool. Follow the directions at the web site to download and use the Sun Install Check Tool.
-
Page 9: Instructions For Installing A Server Into A Sun Rack 900
To install a server into Sun Rack 900, follow the instructions in the Sun Fire 280R Server Setup and Rackmounting Guide. Where the instructions specify 10-32 screws, use the M6 screws included in the rackmounting kit box. - Page 10 For your convenience, a serial port adapter (part number 530-2889) is included in your Sun Fire 280R server ship kit. This adapter enables you to use a standard RJ-45 serial cable to connect directly from the RJ-45 serial connector on the Sun Remote System Control (RSC) card to the serial connector of a Sun workstation with a DB-25 serial connector.
-
Page 11: Software Issues
The booklet shows you how to use that tool to perform the service procedure. Your Sun Fire 280R Server Service Manual states that a torque screwdriver is housed in the chassis between the disk drive bay and the DVD-ROM drive bay. However, the torque screwdriver is not included with this system. - Page 12 Test the disk drive with the OpenBoot Diagnostics test documented in the “Diagnostics, Monitoring, and Troubleshooting” chapter in the Sun Fire 280R Server Service Manual. Sun Fire 280R Server Product Notes • April 2003...
- Page 13 Boot Output to the RSC Console The OpenBoot PROM interface does not redirect all console messages to the RSC console after RSC issues a bootmode -u diag command. Use the Sun Remote System Control 2.0 User’s Guide for instructions to redirect the console to RSC.
-
Page 14: Documentation Errata
The table in the “About Peripheral Component Interconnect (PCI) Buses” section of the Sun Fire 280R Server Owner’s Guide incorrectly states that PCI slot 4 is 32 bits wide and that it can accommodate only 32-bit-wide PCI cards. The correct information is that PCI slot 4 is 64 bits wide and can accommodate both 32-bit and 64-bit PCI cards.


Need help?
Do you have a question about the Sun Fire 280R and is the answer not in the manual?
Questions and answers