
Related Manuals for Tempest BD-21-H-6.5


Summary of Contents for Tempest BD-21-H-6.5
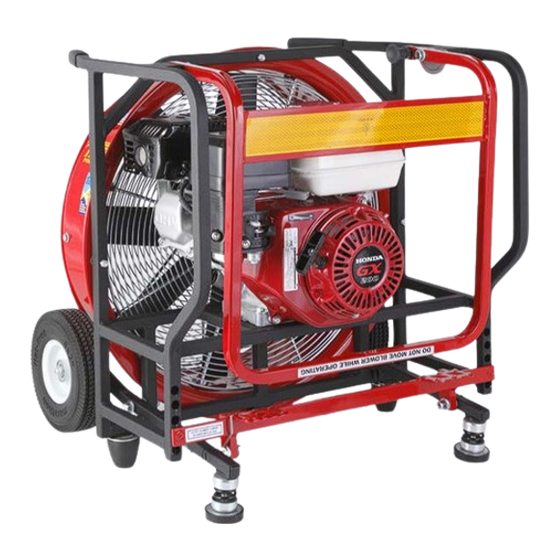
- Page 1 Operations Manual POWER BLOWERS CONE GASOLINE - Direct-Drive (DD) Belt-Drive (BD) Gasoline Direct-Drives (Honda) AMERICAN MADE Gasoline Belt-Drives Gasoline Direct-Drives (Briggs & Stratton)
-
Page 2: Introduction
Tempest has expanded into other industries and found new applications for its products. The TEMPEST POWER BLOWER® and PPV/PPA are used by construction contractors to control dust, fumes and unhealthy gases like carbon monoxide, greatly improving safety in confined spaces. -
Page 3: About This Manual
About This Manual This manual is produced solely for the use of purchasers and operators of TEMPEST TECHNOLOGY CORPORATION® equipment. Any reproduction, retransmission, or other use of the contents of this manual without written consent of TEMPEST TECHNOLOGY CORPORATION® is strictly prohibited. -
Page 4: Table Of Contents
Table of Contents INTRODUCTION ABOUT THIS MANUAL CONTACT INFORMATION SAFETY GUIDE GENERAL INFORMATION BLOWER IDENTIFICATION SERIAL NUMBER LOCATION WARRANTY POWER BLOWER DATA POWER BLOWER INFORMATION OPERATING PROCEDURES 9-11 PRE OPERATION VISUAL INSPECTION ENGINE OIL RECOMMENDED OILS FILLING THE CRANKCASE FUEL OPERATION SET-UP STARTING... -
Page 5: Safety Guide
1. Carefully read this Operation and Maintenance Manual before attempting to operate, service or disassemble any part of your TEMPEST POWER BLOWER®. 2. DO NOT operate the unit when mentally or physically fatigued or impaired. -
Page 6: General Information
General Information Blower Identification Each TEMPEST POWER BLOWER® has a model number as well as a serial number. The model number signifies information such as blade diameter, engine type and horsepower. The serial number relates to information referencing the date of manufacture. -
Page 7: Power Blower Data
Power Blower Data TYPE: Positive Pressure Ventilation Fan - Cone Air Flow DRIVE: 16” Models: Direct-Drive Gasoline - HONDA GX160 or Briggs & Stratton 550 18”, 21” & 24” Models: Direct-Drive Gasoline - HONDA GX200 or Briggs & Stratton 900 Belt-Drive Gasoline - HONDA GX200 27”... - Page 8 Model Part # Blade Size Dimensions (WxDxH) Weight BD-18-H-5.5 700-103 18” 21.50” x 21.00” x 24.25” 85 lbs. 15,023 BD-21-H-6.5 700-021 21” 25.00” x 22.00” x 26.25” 93 lbs. 17,743 BD-24-H-6.5 700-020 24” 28.25” x 22.00” x 31.00” 92 lbs.
-
Page 9: Power Blower Information
The result is fast, efficient ventilation of the entire structure. NOTE: The TEMPEST POWER BLOWER® is the most efficient tool for PPV and PPA for two reasons. First, the exclusive Tempest Turbo 2000 tapered shroud design creates a wide, stable, conical air pattern. Second, the airflex impeller used on all Tempest blowers is designed to create high pressure. -
Page 10: Operating Procedures
Operating Procedures The information and instructions in this section should be routinely reviewed and fol- lowed before the actual operation of TEMPEST POWER BLOWER®. Pre-Operation VISUAL INSPECTION After receiving and unpacking your blower, be sure to carefully inspect it for any dam- age that might have occurred during shipping. -
Page 11: Fuel
Operating Procedures Continued FUEL Always use clean, fresh, lead-free gasoline with an octane rating of 86 or higher. DO NOT USE leaded gasolines. Refer to the engine manufacturers Owners Manual for ac- ceptable substitute gasolines. CAUTION: PRECAUTIONS MUST BE FOLLOWED WHENEVER REFUELING GASOLINE ENGINES. -
Page 12: Operation
Operating Procedures Continued Operation SET-UP, STARTING AND STOPPING Assuming the previous Pre-Operation instructions have been followed the blower is now ready to run. Please review the engine manufacturers Owners Manual regarding starting and stopping as well as the instructions in this section before actually starting the blower. -
Page 13: Maintenance Procedures
Maintenance Procedures Proper maintenance is necessary to ensure that your Power Blower operates as efficiently and trouble-free as possible. By following the instructions in this section you will be providing the maintenance needed to achieve this goal. CAUTION: THE ENGINE MAY START SIMPLY BY ROTATING THE BLADES. -
Page 14: Cleaning Air Filter Elements
2. Do not try to brush the dirt off. Brushing will force dirt into the filter fibers. 3. Replace the element if it becomes excessively dirty. You can order/purchase paper elements through Tempest or your local hardware/home improvement store. COOLING SYSTEM Frequently remove dirt and debris from the cooling fins, air intake screen, levers and linkage. -
Page 15: Carburetor
All carburetors comply with federal & state regulations and are preset by the engine manufacturer. Engine performance may differ at various altitudes and climates. If you feel that the carburetor on your blower needs adjusting contact Tempest or your local engine dealer. -
Page 16: Blade Removal 18"-27
Maintenance Procedures Continued BLADE REMOVAL PROCEDURES FOR 18”, 21”, 24” AND 27” UNITS 1. Remove the eight bolts holding the front grille in place and remove the grille. (Figure 4.1) 2. Remove the three cap screws in the center of the fan blade bushing with an 5/32 hex bit (Allen wrench (Figure 4.2) 3. -
Page 17: Blade Removal 16
Maintenance Procedures Continued BLADE REMOVAL AND INSTALLATION FOR 16” UNITS The following procedures cover removal and installation for 16” Tempest fans. BLADE REMOVAL PROCEDURES 1. Remove the eight bolts holding the front grille in place and remove the grille (Figure 4.1 on page 15). -
Page 18: Maintenance Schedule
Maintenance Procedures Continued 5. Tighten the cap screws progressively with a wrench. Tighten each cap screw partial turns successively until both are tight. Final tightening should be done with torque wrench with the torque set at 7.5 ft.-lbs. for each screw. Over tightening will cause the cap screws to break or crack the blade. -
Page 19: Belt Adjustment
Maintenance Procedures Continued BELT ADJUSTMENT The blower drive belt has been adjusted at the factory prior to delivery. However, the belt should be inspected and checked after the initial three (3) hours of operation as it may require retightening due to belt stretch. It should be inspected after every 25 hours of operating time. -
Page 20: Trouble Shooting
4. If a spark is present, replace the spark plug and wire then try starting the engine. 5. If the blower still does not start contact Tempest or your local engine dealer. POOR BLOWER PERFORMANCE •... -
Page 21: Notes
Notes: Page 20... - Page 22 Notes: Page 21...
- Page 23 Notes: Page 22...
-
Page 24: Direct-Drive Power Blower Explosion View
Direct-Drive Gasoline Power Blowers Exploded View Page 23... -
Page 25: Direct-Drive Power Blower Parts List
Direct-Drive Gasoline Power Blowers Parts List Page 24... -
Page 26: Belt-Drive Power Blower Explosion View
Belt-Drive Gasoline Power Blowers Exploded View Page 25... -
Page 27: Belt-Drive Power Blower Parts List
Belt-Drive Gasoline Power Blowers Parts List Page 26... -
Page 28: Fresno, Ca
Statement Except as otherwise set forth below, any claim by Customer with reference to the Goods sold shall be deemed waived by the Customer unless submitted in writing to Tempest within the earlier of (i) five Making Hazardous (5) business days following the date Customer discovered, or by reasonable inspection should have...
Need help?
Do you have a question about the BD-21-H-6.5 and is the answer not in the manual?
Questions and answers