Table of Contents
Advertisement
Advertisement
Table of Contents

Related Manuals for Vivitek QUMI


Summary of Contents for Vivitek QUMI
- Page 2 Preface Copyright ©2013 Vivitek Corporation. is a trademark of Vivitek Corporation. Other trademarks are the properties of their respective owners. Values, weights and dimensions are approximate. Specifications are subject to change without prior notice. Disclaimer The information in this document is subject to change without notice. The manufacturer...
-
Page 3: Important Safety Information
Important Safety Information Important: It is strongly recommended that you read this section carefully before using the Qumi. These safety and usage instructions that will make sure you enjoy many years of safe use of the Qumi. Keep this manual for future reference. - Page 4 • Make sure that the intake vents do not recycle hot air from the exhaust vent. • When operating the Qumi in an enclosed space, make sure that the surrounding air temperature within the enclosure does not exceed operating temperature while the Qumi is running, and the air intake and exhaust vents are unobstructed.
-
Page 5: Main Features
Cleaning the Qumi • Unplug the cord before cleaning. See Cleaning the Qumi on page 45. Note: The Qumi will be warm after usage. Allow Qumi to cool down before storing in a compartment. Regulatory Warnings Before installing and using the Qumi, read the regulatory notices in the Regulatory Compliance on page 57. -
Page 6: Table Of Contents
OSD Menu Overview ................... 29 Image Menu ......................30 Settings 1 Menu ....................34 Settings 2 Menu ....................39 Chapter 5 Taking Care of Your Qumi ........45 Cleaning the Qumi ....................45 Cleaning the Lens ....................45 Troubleshooting ....................46 Vivitek Support Site .................... -
Page 7: Chapter 1 At A Glance
Open and exit the OSD Change settings in the OSD Left Cursor Navigate and change settings Power Switch in the OSD Turn on/off the Qumi Down Cursor Right Cursor Navigate and change settings Navigate and change settings in the in the OSD... -
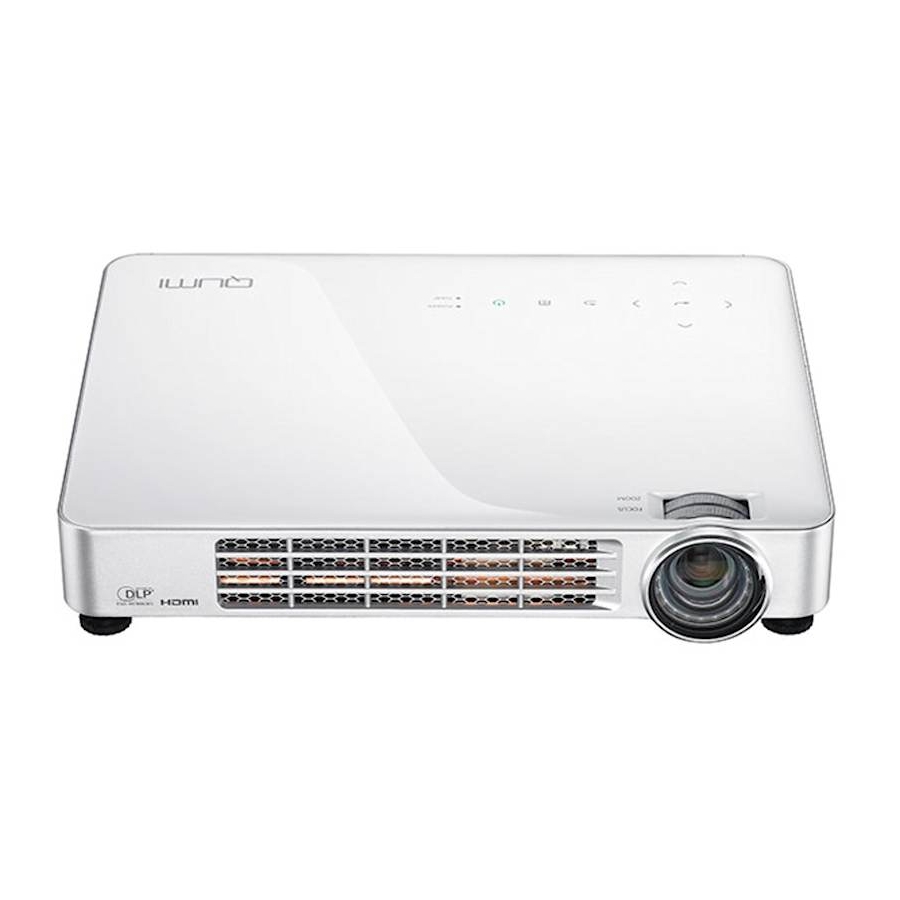
Page 8: Bottom View
Rear/Top/Left View AC In Connect the supplied power cord Connect an USB Flash Disc HDMI 1/ MHL Audio Out Connect a HDMI / MHL cable from a HDMI / MHL device Connect an audio cable to speakers or headphones IR Receiver Audio in (L&R) Receive IR signal from the Connect the Audio in (L&R) -
Page 9: Accessories
Accessories Along with the Qumi, the following accessories are included: Remote Control (With one 3V CR2025 battery) Standard HDMI Cable VGA Cable MHL cable Regional Power Cord Documentation Kit (User Manual, Quick Start Guide, Warranty W A R R A N T Y... -
Page 10: Remote Control
Change the volume. browser. Important: 1. Be sure nothing obstructs the path between the remote control and the Qumi. If the path between the remote control and the Qumi is obstructed, the signal can bounce off certain reflective surfaces. 2. The buttons and keys on the Qumi have the same layout and similar functions as the corresponding buttons on the remote control. -
Page 11: Media Player Screen
Media Player Screen The media player screen is the main interface for the Qumi Q7 Series. If a USB Flash Disc is plugged in when powering on the Qumi, the media player screen appears. In the media player screen, you can choose the type of media to display by selecting: •... -
Page 12: Chapter 2 Getting Started
Chapter 2 Getting Started What You Need Many types of external devices and peripherals can be connected to the Qumi. External or portable music players can be connected to play music. DVD, VCD and VHS players can be connected to play movies. Camcorders and digital cameras can also be used to play videos and display photos. -
Page 13: Setting Up Qumi
Setting Up Qumi Connecting to an HDMI Device Connect your Qumi to an HDMI device by using an HDMI cable. Camera Smartphone HDMI 1 / MHL HDMI 2 AUDIO OUT VIDEO L - AUDIO - R Game Personal Console Computer Connecting to an MHL Device Connect your Qumi to a MHL-compatible device by using an MHL cable. - Page 14 Inserting a USB Flash Disc Connect a USB Flash Disc to the Qumi by inserting the storage device(s) into the appropriate port. HDMI 1 / MHL HDMI 2 AUDIO OUT VIDEO L - AUDIO - R Connecting Video Connect audio/video devices to the Qumi by using the audio/video cable.
- Page 15 Starting and Shutting down the Qumi Connect the AC power cord to the Qumi. Connect the other end of the AC power cord to a wall outlet. Press the POWER button to turn on the Qumi. The Qumi splash screen displays and connected devices are detected.
-
Page 16: Adjusting The Image
Press the POWER button to turn off the Qumi. When the “Power Off? /Press Power again” message appears, press the POWER button. The projector turns off. Adjusting the Image Use the Image-zoom control (on the projector) to resize the projected image and screen size (B). - Page 17 Setting an Access Password (Security Lock) To prevent unauthorized use of the Qumi, you can create a password. When the access password function is enabled, the password must be entered after the Qumi has been turned on. Creating a password can be done by performing the following steps:...
- Page 18 5. Important: Keep the password in a safe place. Without the password, you will not be able to use the Qumi. If you lose the password, contact your reseller for information on resetting the password. Using a Tripod The Qumi can be used with a tripod by connecting the tripod to the bottom of the Qumi.
-
Page 19: Setting Up The Remote Control
Qumi. The remote control functions properly within a radius of approximately 7 meters (23 feet) and 15 degrees above or below the Qumi level (if the remote is not held perpendicular to the sides or rear of the Qumi). -
Page 20: Chapter 3 Qumi Media Suite
Note: 1. Wifi & Web browser functions are only available with Q7’s dongle. 2. Plug a USB hub into Qumi’s USB socket, then plug the Q7 Wi-Fi dongle, keyboard and mouse into the USB hub to surf the Internet easily. -
Page 21: Music
Music Supported Formats: The music player can play music files in the following formats: • MP3 (up to 256Kbps bit-rate) • WMA, MID, MIDI, MP1, MP2, OGG, AAC, AMR, WAV, AC3, M4A, AWB, APE Playing your Track To open the music list, perform the following: 1. - Page 22 The music player provides controls to navigate through a song playlist. The following table provides a description the controls. ACTION DESCRIPTION Toggle speaker output to Left/Right/Stereo Return to previous/Forward to next track Pause/Play track Stop playback Return to the previous menu The order of songs and playback mode can be adjusted.
-
Page 23: Movies
Movies Supported Formats The following video formats are supported: • H.264 video up to 720p at 30 frames per second; Main Profile level 3.1 with AAC-LC audio up to 160 Kbps, 48kHz, stereo audio in .m4v, .mp4, and .mov file formats •... -
Page 24: Photos
Photos Supported Formats The photo viewer can open the following types of image files: • BMP (up to 4000 x 3000 pixels) • PNG (up to 4000 x 3000 pixels) • JPG (up to 4000 x 3000 pixels) Viewing Your Photo When a USB Flash Disc is inserted, the Flash Disc folder icon will display in the file directory. -
Page 25: Office Viewer
Office Viewer Supported Formats The document viewer in the Qumi Media Suite can open the following types of documents: • Microsoft Word (97-2007, .doc/.docx) ® • Microsoft PowerPoint (97-2007, .ppt/.pptx) (not support Animation and slide ® transitions) • Microsoft Excel (97-2007, .xls/.xlsx) ®... -
Page 26: Wifi
Wifi Turning on WiFi Insert the Q7 WiFi dongle in the Qumi to surf the Web through a web browser. To turn on WiFi, perform the following: 1. Press the ◄ or ► button to select the Wifi icon in the media suite menu. - Page 27 WiFi Control Interface The WiFi Setting contains the following controls: ACTION DESCRIPTION Return to Main Window. Enable/Disable WiFi. WiFi configuration.
- Page 28 Configure the IP address of the DNS server here. WiFi hotspot control interface The WiFi hotspot interface lets you enable or disable the use of a hotspot through the Qumi. Select Use default IP or Use other IP, then click Apply to configure the WiFi hotspot interface.
-
Page 29: Web Browser
Web browser Visiting a website 1. Plug the Q7 Wi-Fi Dongle into Qumi’s USB socket. 2. Press ▲ ▼ ◄ ► on the remote control to control the cursor. See Remote Control on page 4. 3. Use the remote control for navigation control. Press the Q icon (bottom-right) to access the address bar. -
Page 30: Wifi Display
Wifi Display Set Wifi Display 1. Plug the Q7 Wi-Fi Dongle into Qumi’s USB socket. 2. Set Network settings > Wifi to Enabled and Wifi hotspot to Enabled. 3. Press the ◄ or ► button to select the Wifi Display icon in the media suite menu. -
Page 31: Settings
Note: The Qumi media suite always supplies an output of 1280x800 resolution to the system, so the OSD displays a resolution of 1280x800 as its received signal. This does not indicate the actual resolution of the actual multimedia files. - Page 32 AutoPlay Option Use the AutoPlay Option menu to configure what the Qumi automatically plays when powered on. The following settings are available when AutoPlay is ON. • AutoPlay – Turn on or off auto play. • AutoPlay Type – Automatically play photo or video files when powered on.
-
Page 33: Chapter 4 On-Screen Display (Osd) Settings
MENU button on the remote control or keypad. If the interface is set on the Qumi Media Suite menu, the OSD menu can be accessed by pressing the MENU button on the remote control or pressing MENU on the keypad. -
Page 34: Setting The Osd Language
Setting the OSD Language The language that is displayed in the OSD can be changed. To change the language in the OSD, perform the following steps: 1. Enter the OSD menu. Press the ◄ or ► button to select the Setting 1 and press 2. -
Page 35: Osd Menu Overview
OSD Menu Overview Use the following illustration to quickly find a setting or determine the range for a setting. Image Display Mode Presentation, Bright, Game, Movie, TV, sRGB, User, User1 Brightness Contrast Computer Horizontal Position Vertical Position Frequency Tracking Auto Image Advanced Brilliant Color Sharpness... -
Page 36: Image Menu
Image Menu To access the Image menu and adjust the settings, perform the following steps: 1. Enter the OSD menu. 2. Press the ◄ or ► button to select the Image menu. 3. Press the ▲ or ▼ button to move the cursor up or down in the Image menu and press 4. - Page 37 Press the ◄ or ► button to adjust the A/D sampling dot. Note: Items in the Computer menu can only be modified when the Qumi is connected to a PC through a VGA cable. Settings that are not enabled or that cannot be modified are gray in...
- Page 38 Advanced To access the Advanced menu and adjust the settings, perform the following steps: 1. Enter the OSD menu. 2. Press the ◄ or ► button to select the Image menu. 3. Press the ▲ or ▼ button to move to the Advanced menu and press 4.
-
Page 39: Color Manager
Color Manager To access the Color Manager menu and adjust the settings, perform the following: 1. Enter the OSD menu. 2. Press the ◄ or ► button to select the Image menu. 3. Press the ▲ or ▼ button to move the cursor up or down in the Color Manager menu and press 4. -
Page 40: Settings 1 Menu
Settings 1 Menu To access the Settings 1 menu and adjust the settings, perform the following steps: 1. Enter the OSD menu. 2. Press the ◄ or ► button to select the Settings 1 menu. 3. Press the ▲ or ▼ button to move the cursor up and down in the Settings 1 menu and press 4. - Page 41 Audio To adjust the audio settings, press to enter the Audio sub menu. ITEM DESCRIPTION Volume Press the ◄ or ► button to adjust the audio volume. Mute Press the ◄ or ► button to turn on or off the speaker.
- Page 42 Advanced 1 To adjust the advanced settings, press to enter the Advanced 1 sub menu. ITEM DESCRIPTION Language Press the ◄ or ► button to select a different localization menu. Press the ◄ or ► button to enable or disable security lock Security Lock function.
- Page 43 3D Setting To adjust the 3D settings, press to enter the 3D Setting sub menu. ITEM DESCRIPTION Press the ◄ or ► button to select Off, DLP-Link or IR. 3D Sync Invert Press the ◄ or ► button to turn 3D sync Invert on or off. Press the ◄...
- Page 44 Advanced 2 To adjust the advanced settings, press to enter the Advanced 2 sub menu. ITEM DESCRIPTION Test Pattern Press the ◄ or ► button to select different test pattern. H Image Shift Press the ◄ or ► button to shift the horizontal position. V Image Shift Press the ◄...
-
Page 45: Settings 2 Menu
Settings 2 Menu To access the Settings 2 menu and adjust the settings, perform the following steps: 1. Enter the OSD menu. 2. Press the ◄ or ► button to select the Settings 2 menu. 3. Press the ▲ or ▼ button to move the cursor up and down in the Settings 2 menu and press 4. -
Page 46: Reset All
Reset All To reset all of the menu items to the factory default values (except Language and Security Lock), perform the following steps: 1. Enter the OSD menu. 2. Press the ◄ or ► button to select the Settings 2 menu. 3. - Page 47 Status To see the status of the Qumi, perform the following steps: 1. Enter the OSD menu. 2. Press the ◄ or ► button to select the Settings 2 menu. 3. Press the ▲ or ▼ button to select the Status menu and press...
- Page 48 Advanced 1 To access the Advanced 1 menu and adjust the settings, perform the following steps: 1. Enter the OSD menu. 2. Press the ◄ or ► button to select the Settings 2 menu. 3. Press the ▲ or ▼ button to select the Advanced 1 menu and press 4.
- Page 49 Advanced 2 To access the Advanced 2 menu and adjust the settings, perform the following steps: 1. Enter the OSD menu. 2. Press the ◄ or ► button to select the Settings 2 menu. 3. Press the ▲ or ▼ button to select the Advanced 2 menu and press or ►.
- Page 50 Source Filter To adjust the source filter, press or ► to enter the Source Filter sub menu. ITEM DESCRIPTION Press the ◄ or ► button to enable or disable VGA source in auto search loop. Press the ◄ or ► button to enable or disable Composite Video Composite Video source in auto search loop.
-
Page 51: Chapter 5 Taking Care Of Your Qumi
2. Use only a dampened cloth when cleaning. Do not allow water to enter the ventilation openings on the Qumi. 3. If a small amount of water gets into the interior of the Qumi while cleaning, unplug the Qumi and set in a well ventilated area for several hours before using. -
Page 52: Troubleshooting
For example, if you replace batteries and the problem remains, put the original batteries back and move to the next step. Keep a record of the steps you take when troubleshooting. The information may be useful for reference when calling technical support or for bringing the Qumi to service personnel. -
Page 53: Led Error Messages
Problem: The image is wider at the top or bottom (trapezoid effect) 1. Position the Qumi so that it is perpendicular to the screen as much as possible. 2. Adjust the Keystone settings in the OSD to correct the problem or set Auto Keystone to On. -
Page 54: Remote Control Problems
Remote Control Problems Problem: The Qumi does not respond to the remote control 1. Aim the remote control towards remote sensor on the Qumi. 2. Make sure the path between remote and sensor is not obstructed. 3. Turn off any fluorescent lights in the room. - Page 55 1. Does Qumi work with a personal computer, notebook or netbook? Yes. Use the provided VGA cable or HDMI cable. The Qumi can connect to a PC, notebook or netbook if they have an appropriate HDMI or VGA port. To play audio, a stereo audio cable is required to connect to the Qumi’s audio port.
-
Page 56: Vivitek Support Site
10. What type of photo formats does the QUMI support? JPEG, PNG and BMP. 11. How long will the LED light source in the Qumi last and can it be replaced? The Qumi does not use a typical UHP lamp. It uses a set of Light Emitting Diodes (LED) to illuminate and project images. -
Page 57: Specifications
Specifications MODEL Qumi Q7 Series RESOLUTION HD (720p - 1280x800) PROjECTION DISTANCE 800mm ~ 3000mm (31.5” ~ 118.11”) PROjECTION SCREEN SIzE 762mm ~ 2718mm (30” ~ 107”) (DIAGONAL) PROjECTION LENS Manual focus and Zoom THROW RATIO 1.3/1.43 : 1 VerTical KeySTOne +40 step = 30°... -
Page 58: Projection Distance Vs. Projection Size
Projection Distance vs. Projection Size Projection Distance and Size Table IMAGE PROjECTION IMAGE WIDTH IMAGE HIGH DIAGONAL DISTANCE (mm/incHeS) (mm/incHeS) (mm/incHeS) (mm/incHeS) 762/30 646/25 404/16 840/33 1016/40 862/34 538/21 1120/44 1270/50 1077/42 673/26 1400/55 1524/60 1292/51 808/32 1680/66 1778/70 1508/59 942/37 1960/77 2032/80... -
Page 59: Timing Mode Table
Timing Mode Table H-SYNC V-Sync cOmPOSiTe / SIGNAL RESOLUTION COMPONENT RGB DVi/HDmi (KHz) (Hz) S-ViDeO NTSC — 15.734 60.0 — — — PAL/SECAM — 15.625 50.0 — — — 720 x 400 37.9 85.0 — — 640 x 480 31.5 60.0 —... - Page 60 480p 31.469 60.0 — — EDTV 576p 31.25 50.0 — — 720p 37.5 50.0 — — 720p 45.0 60.0 — — 1080i 33.8 60.0 — — HDTV 1080i 28.1 50.0 — — 1080p 67.5 60.0 — — 1080p 56.3 50.0 —...
-
Page 61: 3D Timing Table
3D Timing Table The unit automatically determines PC signals to select the appropriate resolution. Some signals may require manual adjustment. 3D RESOLUTION HDMI 3D FORMAT 800 x 600 @ 120Hz Frame sequential 1024 x 768 @ 120Hz Frame sequential 1280 x 720 @ 120Hz Frame sequential HD 1080p 24 FPS Frame packing... -
Page 62: Qumi Dimensions
Qumi Dimensions 238.0 mm 238.0 mm 124.66 69.66 34.66 Tripod Hole: :#1/4-20 Max L=0.3 inch Ceiling Mount Hole: M4xP0.7 L=8 mm (Max) Note: When installing, ensure that you use only UL Listed ceiling mounts. For ceiling installations, use approved mounting hardware and M4 screws with a maximum screw depth of 8 mm (0.31 inch). -
Page 63: Regulatory Compliance
Regulatory Compliance FCC Warning This equipment has been tested and found to comply with the limits for a Class B digital device pursuant to Part 15 of the FCC Rules. These limits are designed to provide reasonable protection against harmful interference when the equipment is operated in a commercial environment.
Need help?
Do you have a question about the QUMI and is the answer not in the manual?
Questions and answers