Table of Contents
Advertisement
Quick Links
Advertisement
Table of Contents

Related Manuals for Vivitek QUMI Q9


Summary of Contents for Vivitek QUMI Q9
- Page 1 User Manual www.vivitekcorp.com...
-
Page 2: Table Of Contents
TABLE OF CONTENTS Important Safety Information ..........1 Symbols Used ................1 General Safety Information ............2 Q9 Installation Notice .............. 2 Power Supply Safety ..............3 Cleaning Q9 ................3 Control Warning ............... 3 Regulatory Compliance ............4 FCC Warning ................4 Canada .................. - Page 3 Start up wizard ..............17 Making Connections ............18 Connecting to a Wi -Fi Network ..........19 Using the Projector ............20 Adjusting the Focus ............... 20 Playing Media Files from a Storage Device (USB Flash Drive or internal storage) ..............21 Submenu setting ..............
- Page 4 Remote Control Problems ............47 Audio Problems ..............48 FAQs ..................48 Vivitek Support Site ............... 49 Additional Information ............50 Projection Distance vs Projection Size ........50 Timing Mode Table ..............51 Specifications ................ 53 - iii -...
-
Page 5: Important Safety Information
IMPORTANT SAFETY INFORMATION IMPORTANT: It is strongly recommended that you read this section carefully before using Q9. These safety and usage instructions will make sure you enjoy many years of safe use of Q9. Keep this manual for future reference. Symbols Used Warning symbols are used on the unit and in this manual to alert you of hazardous situations. -
Page 6: General Safety Information
General Safety Information RG1 IEC 62471-5:2015 Do not open the casing. There are no user-maintainable parts inside the machine. For any maintenance, please contact a qualified service technician. Follow all warnings and precautions on the machine or in this Manual. ... -
Page 7: Power Supply Safety
Power Supply Safety Only use the supplied adapter. Do not place anything on the cord. Place the cord where it will not be in the way of foot traffic. Remove the battery from the remote control when storing or not in use for a prolonged ... -
Page 8: Regulatory Compliance
REGULATORY COMPLIANCE FCC Warning This equipment has been tested and found to comply with the limits for a Class B digital device pursuant to Part 15 of the FCC Rules. These limits are designed to provide reasonable protection against harmful interference when the equipment is operated in a commercial environment. -
Page 9: Introduction
INTRODUCTION About this Manual This manual is intended for end users and describes how to install and operate Q9. Wherever possible, relevant information—such as an illustration and its description—has been kept on one page. This printer-friendly format is both for your convenience and to help save paper, thereby protecting the environment. -
Page 10: Package Contents
PACKAGE CONTENTS Remote Control with Battery Adapter Carry Bag Documentation Wi-Fi / Bluetooth Dongle... -
Page 11: Your Projector
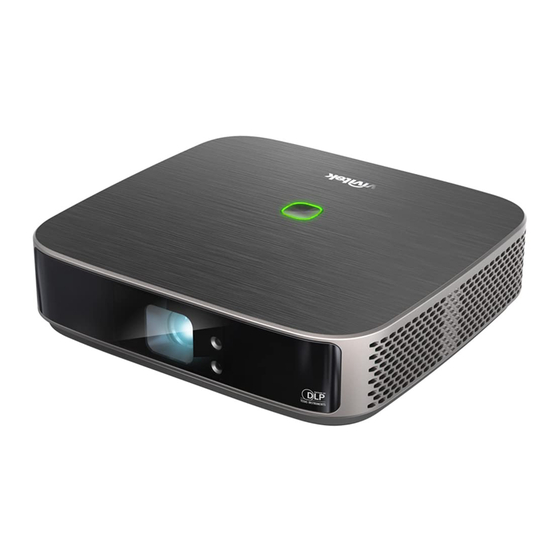
YOUR PROJECTOR Top and Front-Left View Lens Power Button Front IR Sensor LED Status Indicator Focus LED status LED status Description Ready to power on (Standby) Projector standby and ready for turn on Projector cooling and ready to turn on when Cooling LED turn to solid Red System initial... -
Page 12: Rear View
Rear View RJ45 Lan Port Audio Out (3.5mm) Jack Type-A USB Port DC In Port Type-C DisplayPort Rear IR Sensor HDMI Port Bottom View Ceiling mount hole WiFi Dongle cover Triple connector WiFi Dongle Angle free adjustment foot... -
Page 13: Remote Control
REMOTE CONTROL Remote Control Keypad Power ON/OFF Volume ‒ Down LED status Setting Return Source Focus in Left Mouse Focus out Sub Menu Enter Home Volume + Right NOTE: LED status: Red - IR mode, Green - BT mode, Flashing Green - BT pairing mode ... - Page 14 IMPORTANT: Avoid using the projector with bright fluorescent lighting turned on. Certain high- frequency fluorescent lights can disrupt remote control operation. Be sure nothing obstructs the path between the remote control and the projector. If the path between the remote control and the projector is obstructed, you can bounce the signal off certain reflective surfaces such as projector screens.
-
Page 15: Plug In Wifi Dongle In Q9
Plug in WiFi dongle in Q9 Q9 wifi & Bluetooth funciton need a dongle plug in to enable function Please find Wifi dongle in Accessory box and Plug in Q9 before Q9 first power on. Loosen the screw on the WiFi Dongle cover. Remove the WiFi Dongle cover. -
Page 16: Using Your Remote Control
Using Your Remote Control Operating Range ● The remote controller is duel type, both has infrared and Bluetooth mode to control projector ● In the Bluetooth mode, the operating distance can be more than 10 meters, and there is no directivity. -
Page 17: Replacing Batteries
2. When pairing success, screen show green check mark and LED flashing stop. Replacing Batteries ● Slide IN/OUT the battery compartment cover. ● Insert the battery with the positive side facing up. CAUTION: 1. Only use AAA batteries (Alkaline batteries are recommended). 2. -
Page 18: Powering The Projector
POWERING THE PROJECTOR To supply power to the Q9: 1. Connect the power cable to a power socket 2. Connect the power cable to the supplied adapter. 3. Connect the adapter cable to the DC In port on the projector. 4. -
Page 19: Powering On/Off The Projector
To power on the projector: 1. Press the power ( ) button on the top of the projector or the power ( ) button on the remote control. 2. The fans will begin to operate and the Vivitek logo will appear on the screen:... - Page 20 To power off the projector: Press the power ( ) button on the top of the projector or the power ( ) button on the remote control. 2. A message will appear on the projected screen to confirm power off. Select OK and press the enter ( ) button.
-
Page 21: Start Up Wizard
START UP WIZARD Quick set up in your Q9 first boot When your first boot Q9, system will lead you to finish necessary setting 3. Language set up Please select the language you use 4. Remote control pairing Please long press Submenu and Return key 5 sec till remote control blinking green And pairing success with screen pop up Green check mark 5. -
Page 22: Making Connections
MAKING CONNECTIONS Connection Connection Device Corresponding Section Port / Type Wireless Smartphones, Tablets, Screencasting with a Smartphone, Screencasting Tablet, or PC on page Connect Headphone or Speaker without Audio Out Headphones, Speaker Amp function Blu-Ray/DVD Players, Playing from a Video Source Set-top Boxes, PCs , (HDMI or Type-C) on page... -
Page 23: Connecting To A Wi-Fi Network
Connecting to a Wi-Fi Network To connect the projector to a wireless network: Select the Wireless icon on Quick launch key or wireless setting in Network of Setting function 2. Select the Wi-Fi ON and the Wi-Fi network you want to connect to and press the enter ( button. -
Page 24: Using The Projector
USING THE PROJECTOR Adjusting the Focus Q9 has Auto focus function, please long press Focus key + or - to process auto focus adjustment, or short press Focus + or - to do the manual adjustment. -
Page 25: Playing Media Files From A Storage Device (Usb Flash Drive Or Internal Storage)
Playing Media Files from a Storage Device (USB Flash Drive or internal storage) To play a media file (video, photos, music) from a storage device or internal storage: Making Connections 1. Connect the device to the projector. Refer to the section on page NOTE: If you are already playing media from a different source press the home (... - Page 26 4. Navigate to the file folder where the media file is located in the storage device. 5. Select the media file you want to play and press the enter ( ) button. NOTE: If the file folder contains multiple types of media files you may use the PICTURE, SONG, or VIDEO buttons on the left side of the menu to specify the media files shown by type.
-
Page 27: Submenu Setting
6. The media player will begin playing the media file on the projected screen. The media player’s interface and available options will depend on the type of media being played. Press "Sub menu" key to control more information. Submenu setting In Video and Picture playing, you can press sub menu key to enable sub menu in left side of image It allow you to adjust the preference for your playing content... -
Page 28: Using The Sub-Settings Menus
USING THE SUB-SETTINGS MENUS When you are in video playing or running any APP program, you can adjust the Picture setting and Audio setting with sub setting menu. 1. Press the settings ( ) button on the remote control. 2. The sub-Settings menu will appear on the right side of projected screen. - Page 29 Category Menu Value (Default value) Picture Mode Bright / Presentation/ Cinema / TV Brightness 0-100 Contrast 0-100 Color 0-100 Tint 0-100 Picture Sharpness 0-100 Color Temperature Cool / Standard / Warm Color Enhance OFF / ON Aspect Ratio Auto / 4:3 / 16:9 / Full Picture setting Reset Sound Mode...
-
Page 30: Screencasting With A Smartphone, Tablet, Or Pc
Connect your device to the same Wi-Fi network as Q9. NOTE: Vivitek cannot guarantee the interoperability of all brands and models of the devices listed above on the market. Some live-streaming applications such as Netflix, Disney+, etc. do not support screencasting via the Q9 projector. -
Page 31: Screencasting With An Ios Device
4. Swipe down from the top of the device's screen to access the iOS control console, then tap the Screen Mirroring button. 5. In the Screen Mirroring menu select the device name “Vivitek”. 6. Your iOS device’s screen will be displayed on the projector. -
Page 32: Screencasting With A Macos Device
4. Open the status menu at the top of the screen and then click the Screen Mirroring button. 5. In the Screen Mirroring menu select the device name “Vivitek”. 6. Your MacOS device’s screen will be displayed on the projector. -
Page 33: Screencasting With An Android Device
Or you could use "Google Home" APP in your phone to do the casting process. ● 5. In the wireless casting menu select the device name “Vivitek”. 6. Your Android device’s screen will be displayed on the projector. Screencasting with a Windows PC Powering On/Off the Projector Power on the projector. - Page 34 6. Select Cast… in the Chrome menu. 7. In the Cast tab menu select the device name “Vivitek”. 8. Select either Cast tab to cast the browser tab you are viewing, or Cast desktop to cast your PCs entire desktop.
-
Page 35: Playing From A Video Source (Hdmi Or Type-C)
Playing from a Video Source (HDMI or Type-C) To project a video from a device connected to the HDMI or Type-C port: Making Connections Connect the device to the projector. Refer to the section on page NOTE: Q9 only supports playing video via the Type-C port from devices with DisplayPort ... - Page 36 3. Source selection pop up, and select the source you connected (HDMI or Type C) 4. The video will automatically be projected onto the screen. 5. To control the video playback, use the control options directly from the video source. Press the exit ( ) button on the keypad or remote control to return to the home screen.
-
Page 37: Bluetooth Connections
BLUETOOTH CONNECTIONS ® Connecting the Projector to Bluetooth Devices You can also connect Q9 with other Bluetooth devices, such as an external speaker, headphones, or mouse/keyboard. To connect the projector to a Bluetooth device: 1. Using the remote control, select the Bluetooth button on the quick launch list or Bluetooth function in Network of Setting menu then press the enter ( ) button. - Page 38 3. Once Connected is shown as the status of your device in the Bluetooth menu, you will be able to use the device until Bluetooth is disconnected or the device is powered off. NOTE: Do not turn off the Bluetooth mode arbitrarily. If you turn off the Bluetooth mode, the Bluetooth function of the Remote Control will be invalid, and only the IR function will remain.
-
Page 39: The Home Screen
THE HOME SCREEN The home screen for Q9 allows you to view status indicator icons, and access category menus, the system settings menu, and app shortcuts: Status Indicator Icons App Shortcuts Item Description Status Indicator Icons indicating the status for storage media inputs, Bluetooth Icons connection, Wi-Fi connection, and battery charge. -
Page 40: Customizing The App Shortcuts On The Home Screen
Customizing the App Shortcuts on the Home Screen To configure the apps included in the app shortcuts section of the home screen: NOTE: A maximum of 6 app shortcuts are allowed in the app shortcut section. 1. Using the keypad or remote control, select the + button on the home screen and press the enter ( ) button. -
Page 41: Using The Settings Menus
USING THE SETTINGS MENUS The projector setting Menu allow you to configure Q9's all settings such as picture, sound, network, app, system update or restore and related system general settings. 1. Press the settings ( ) button on the remote control or Select Settings on the home screen and then press the enter ( ) button on the remote control. -
Page 42: Settings
Settings Category Sub-Menu Description Allows you to setup the basic setting such as language, General theme, and sleep timer and so on. Allow you to set the projection condition to fit environment, Display such as projection, aspect ratio, 4 corner, keystone and focus. -
Page 43: General
General Category Sub-Menu Description Language Allows you to select the language for the system. Allows you to select different Main screen with icon style Theme for the system. Enables/Disables system-related sounds (such as clicking, System Sound and prompt sounds). Allow you to set the keypad input language, if need add General more input method, you many need to find available application kit to install. -
Page 44: Display
Display Category Sub-Menu Description Projection Sets the position of the projector. Aspect ratio Adjusts the screen ratio. Auto Ceiling Image rotate automatically when projector install ceiling type, the default setting is ON. V keystone Manually adjusts the keystone value, and when Auto Display keystone set ON, this function will disable. -
Page 45: Picture
Picture Category Menu Item Description Picture Mode Switches the display settings to pre-defined settings. Brightness Allows you to adjust the detail of each picture mode properties Contrast Allows you to adjust the detail of each picture mode properties Color Allows you to adjust the detail of each picture mode properties Tint Allows you to adjust the detail of each picture mode... -
Page 46: Sound
Sound Category Menu Item Description Sound Mode Switches the display settings to pre-defined Sound settings. Treble Allow you to adjust the setting of sound mode, and please noted the only Custom mode is adjustable. Sound Bass Allow you to adjust the setting of sound mode, and please noted the only Custom mode is adjustable. -
Page 47: Network
Network Category Menu Item Description Wired Setting Allow user to set RJ45 Lan setting. Allows you to configure your Wi-Fi connection, and Wireless configure screen casting capabilities, please refer to Network Setting Connecting to a Wi-Fi Network in page Bluetoth Allow user to set Bluetooth setting, please refer to Setting Bluetooth... -
Page 48: Apps
Apps Category Menu Item Description Unknown Need set Yes when you want to install APP with APK type. Sources My App Allows you to control operations, view information, Apps configure settings, and define system access/permissions for individual apps. Storage Info Allows you to view information regarding the projector’s internal storage. -
Page 49: System Setting
System Setting Category Menu Item Description System Allows you to check the projector’s information, such as Information model name, MAC address, and SW version Privacy Policy Allows you to review legal information and Agreement. Local Update Allows you to update the projector’s firmware by USB storage. -
Page 50: Troubleshooting/Faq
TROUBLESHOOTING/FAQ These guidelines provide tips to deal with problems you may encounter while using Q9. If the problem remains unresolved, contact your dealer for assistance. The problem sometimes can be as simple as improper connection of cables. Review the following possible issues before proceeding to the problem-specific solutions. Use another electrical device to confirm that the electrical outlet is properly working. -
Page 51: Screencasting Problems
Screencasting Problems Problem: Unable to find Vivitek in my device’s casting list. Ensure that both devices are in the same network and successfully connected 2. Restart AirReceiver on the projector several times (Check AirReceiver > Restart/Close > RESTART). 3. Change the device’s discovery setting and check again (Check AirReceiver > Advanced Setting >... -
Page 52: Audio Problems
Audio Problems Problem: There is no sound. Adjust the volume on the audio source. 2. Test the output of the audio source with other speakers. 3. If using Bluetooth, ensure that Q9 is in Bluetooth mode on and ensure that pairing has occurred. -
Page 53: Vivitek Support Site
The LED module is not replaceable. 10. I’ve lost my remote. Where can I get a replacement? Contact your Reseller or Vivitek Service via www.vivitekcorp.com (select region) to obtain a replacement remote (Charges may be applied). -
Page 54: Additional Information
ADDITIONAL INFORMATION Projection Distance vs Projection Size Projection Distance Image Diagonal Image Width Image Height (cm/inch) (cm/inch) (cm/inch) (cm/inch) 100.0 39.4 95.0 37.4 82.8 32.6 46.6 18.3 107.0 42.1 101.6 40.0 88.6 34.9 49.8 19.6 134.0 52.8 127.0 50.0 110.7 43.6 62.3 24.5... -
Page 55: Timing Mode Table
Timing Mode Table Specification OSD Display Pixel clock Resolution H-freq(KHz) V-freq(Hz) (MHz) 720x480i 60Hz 720(1440)x480i 15.734 59.940 27.000 720x576i 50Hz 720(1440)x576i 15.625 50.000 27.000 720x483 60Hz 720x483(480P) 31.469 59.940 27.000 720x576 50Hz 720x576(576P) 31.250 50.000 27.000 45.000 60.000 74.250 1280x720p 60Hz 1280x720p 44.955 59.940... - Page 56 Specification OSD Display Pixel clock Resolution H-freq(KHz) V-freq(Hz) (MHz) 1280x1024,60Hz 63.981 60.020 108.000 1280x1024,72Hz 78.16 71.97 135.060 1280x1024 1280x1024,75Hz 79.976 75.025 135.000 1280x1024,85Hz 91.146 85.024 157.500 1366x768,60Hz 1366x768 47.720 59.799 84.750 1400x1050,60Hz 65.317 59.978 121.750 1400x1050 1400x1050,75Hz 82.278 74.867 156.000 1440x900,60Hz 1440x900 55.935...
-
Page 57: Specifications
Specifications Projector Specifications Model No. Native Resolution 1080p (1920 x 1080) Maximum Resolution 4K 3840x2160 @ 30Hz Throw Ratio (Distance/Width) 1.21:1 Aspect Ratio 16:9 Native Keystone Correction Vertical ± 30° Operation System Android Wireless 802.11a/b/g/n/ac 2,4+5GHz Bluetooth BT 4.2 with BLE ®... - Page 58 Visit www.vivitekcorp.com for more product info Copyright (c) 2022 Delta Electronics, Inc. All Rights Reserved...
Need help?
Do you have a question about the QUMI Q9 and is the answer not in the manual?
Questions and answers