
Subscribe to Our Youtube Channel
Related Manuals for Vivitek Q3PLUS


Summary of Contents for Vivitek Q3PLUS
- Page 1 The user manual of the HD Pocket Projector Product name: HD Pocket Projector Trade: VIVITEK Mode: Q3PLUS FCC ID: H79Q3PLUS User Manual...
- Page 2 Foreword Copyright ©2015 Vivitek is a trademark of Delta Electronics, Inc. All other trademarks are the property of their respective owners. All values, weights and sizes in this Manual are approximate values. Specifications are subject to change without notice. Disclaimer The information in this Manual is subject to change without notice.
-
Page 3: Important Safety Information
Important Safety Information Important: It is strongly recommended to read this part before usage of Qumi. These safety and usage instructions will ensure a safe usage of Qumi for several years. Please keep this Manual properly for future reference. Symbols A warning symbol, either on the machine or in this Manual, denotes a hazard. - Page 4 Installation Precautions Leave at least 500mm surround the air outlet. Ensure that the air inlet will not take any hot gas from the air outlet. When Qumi is used in a confined space, ensure that the ambient temperature will not exceed the working temperature of Qumi and the air inlet and outlet are unclogged.
-
Page 5: Main Characteristics
Power supply safety Only use supplied adapter. Do not place any objects on the power supply cables. Place the power supply cables at proper places to avoid tread. If the machine is stored or out of service for a long time, please get the battery out of the remote controller. -
Page 6: Table Of Contents
Qumi Cleaning ............................38 Cleaning lens ............................38 Troubleshooting ............................. 39 Specification ............................42 Vivitek support website .......................... 43 Projection distance and size ........................44 Projection distance and size specification ....................44 List of compatible signal ........................45 Qumi size ............................... 46 Regulatory compliance ........................... -
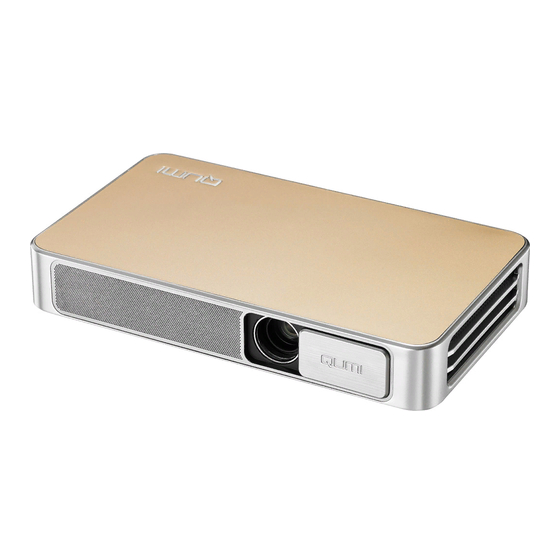
Page 7: Chapter 1 Views
Chapter 1 Views Views Front/Top/Right view... - Page 8 Rear/Top/Left view Bottom view...
-
Page 9: Standard Accessories
Stan ndard acc cessories: Qumi accesso ories include: Remo ote controller (with a 3VCR R2025 batter Power r supply cabl le and adapter r (based on re egions) Docum ment kit (Use er Manual, Q uick Start, W Warranty Card Stand dard HDMI ca ables... -
Page 10: Remote Controller
Remote controller... -
Page 11: Set Remote Controller
Set remote controller The remote controller has one (1) 3V lithium battery (CR2025). The battery is preassembled in the remote controller. Before usage of the remote controller, get the plastic sheet (A) out of the battery compartment. Change remote controller battery Get the groove stuck and Take out the old battery and Rotate and install the cover... -
Page 12: Chapter 2 Start To Use
Chapter 2 Start to Use What you need Qumi can be connected to several types of external and peripheral equipment. To play music, connect Qumi to an external or portable music player. To play films, connect Qumi to DVD, VCD or VHS player. To play video and display photos, connect Qumi to video camera and digital camera. -
Page 13: Set Qumi
Set Qumi Connect peripherals through HDMIconnection Connect the HDMI compatible peripherals to Qumi through cables (optical). - Page 14 Connect a USB drive Connect a storage device (like a USD drive) to corresponding port for connection to Qumi. Audio output/AV Connect a headset or a mini loudspeaker to the audio output jack for connection to Qumi.
- Page 15 Charge battery After outage, charge the projector in the steps below: Connect the AC adapter to Qumi. Connect the other end of AC adapter to a wall outlet. During charging, at the receiver of remote controller, the blue light will be on. After full charge, the blue light will be off.
- Page 16 Power on/off Qumi Connect the AC adapter to Qumi. Connect the other end of AC adapter to a wall outlet. Note: The adapter models may differ over region. Press power button to power on Qumi. When AC is connected, hold 1 second. When AC is not connected, hold 5 seconds.
- Page 17 If several inp put devices a are connected d, press the SO OURCE (signal sourc ce) button on n the remote controller an nd select appropriate d device throug gh ▲ or ▼ bu utton. HDMI:H HDMI/DVI USB1:U USB disc USB2:U USB disc Press...
-
Page 18: Happy Cast- Android Operation
Happy cast- Android operation Screen mirror -Android Operation I: Turn on Happycast and scan the two-dimensional code with an Android phone to download and install the Mobile Version Happycast; Turn on the Projector Setting - General - More - Portable Hotspot - Portable WLAN Hotspot; Conform the portable WLAN hotspot with a tick √. - Page 19 Operation II: Ensure that the mobile phone and the projector are under a same WiFi environment; Turn on Happycast and scan the two-dimensional code with an Android phone to download and install the Mobile Version Happycast; Turn on the mobile Happycast screen, and click device matched to the projector name (as shown below) for screen mirror operation.
-
Page 20: Happy Cast-Ios Operation
Happy cast-iOS operation Screen mirror -iOS Operation I: Turn on the Projector Setting - General - More - Portable Hotspot - Portable WLAN Hotspot; Conform the portable WLAN hotspot with a tick √. Turn on the projector Happycast; ensure that the mobile phone is connected to the projector WiFi, slide up from the bottom of mobile phone screen to appear the console interface. - Page 21 Operation II: Ensure that the mobile phone and the projector are under a same WiFi environment; Turn on the projector Happycast; slide up from the bottom of mobile phone screen to appear the console interface. Click Airplay button to select the device to be projected. Turn on the mirror image switch (as shown below) for screen mirror operation.
-
Page 22: Chapter 3 Qumi User Interface
Chapter 3 Qumi User Interface Views Qumi user interface (UI) is designed for setting and convenient operation. UI enables a complete medium experience by accessing medium files via smart devices (phones or pads) or USD drives. UI mainly comprises nine functions: Photo - display photo and provide slide function;... -
Page 23: Photo
Photo All available images in connected USB drives or devices are listed in the “Photo” menu. Open Image - Select Viewing mode. Press buttons on the remote controller to select files and press for display. The control panel display will change based on the file. The table below lists available functions. -
Page 24: Video
Video Play film files; the available videos in connected USB drives or devices are listed in the “Video” menu. Open video -- Select local disk/USB -- Click the video for display Press buttons on the remote controller to select files and press for display. -
Page 25: Music
Music Play audio files; the available music files in connected USB drives or devices are listed in the “Music” menu. Open Music --, including five categories: Musician, Album, Song, Playlist and Playing. Press buttons on the remote controller to select files and press for display. -
Page 26: Files
Files Play the files; the available files in connected USB drives or devices are listed in the “File” menu. Open the file -- Open -- Local directory -- Select file for opening Press buttons on the remote controller to select files and press display. -
Page 27: App Store
APP Store Manage downloads, updates and accesses to the APPStore. Open APP Store -- Click Search the desired APP. -
Page 28: Browser
Browser Display HTML files of the web page servers or file systems (an application for standard and general markup languages) and achieve user-file interaction. Press buttons on the remote controller to select files and press for display. The control panel display will change based on the file. The table below lists available functions. -
Page 29: Application Program
Application program Manage and operate all application program settings related to QUMI. Open All Applications -- Click application based on required operation... -
Page 30: Wifi
WiFi Achieve mutual wireless connection among PC, portable devices (e.g., PAD, mobile phone) and other terminals. Enable WiFi -- Select network name Input password -- Click Connect Press buttons on the remote controller to select files and press display. The control panel display will change based on the file. The table below lists available functions. -
Page 31: Setting
Setting Access to Display, Audio file, Wireless linkage, Bluetooth, Memory, General, Application and System. Press buttons on the remote controller to select files and press display. The control panel display will change based on the file. The table below lists available functions. -
Page 32: Chapter 4 Osd Setting
Chapter 4 OSD Setting OSD menu control Qumi has an OSD (on screen display) setting menu for adjusting and changing settings, like display setting and audio setting. OSD menu has 10 sub-menus: Menu language - set language display formats of the system. Press OK for entry. Select and move to the desired language by Arrow Keys and then press MENU key or Exit to exit. -
Page 33: Osd Menu Overview
Zoom mode 4:3, 16:9, zoom in 1, zoom in 2 Projection method 3, 2, 1, 0 Electronic Auto - standard automatic trapezoid trapezoid Manual - -35 - +35 correction Software update (USB) Reset All Yes/No State Model Q3PLUS Version No. XX.X-XXX.XX.XX... -
Page 34: Setting Osd Menu Language
Setting OSD menu language Menu language of OSD may be changed. Perform the following steps to change the menu language: 1. Press the Screen Display Control Key on remote controller and enter OSD menu. 2. Move the cursor to highlight the menu language, and press 3. - Page 35 Setting display mode Display mode of OSD may be changed. Perform the following steps to change the display mode: 1. Press the Screen Display Control Key on remote controller and enter OSD menu. 2. Move the cursor to highlight the display mode, and press 3.
- Page 36 Setting audio mode Audio mode of OSD may be changed. Perform the following steps to change the audio mode: 1. Press the Screen Display Control Key on remote controller and enter OSD menu. 2. Move the cursor to highlight the audio mode, and press 3.
- Page 37 Setting color temperature Color temperature of OSD may be changed. Perform the following steps to change the color temperature: 1. Press the Screen Display Control Key on remote controller and enter OSD menu. 2. Move the cursor to highlight the color temperature, and press 3.
- Page 38 Setting zoom mode Zoom mode of OSD may be changed. Perform the following steps to change the zoom mode: 1. Press the Screen Display Control Key on remote controller and enter OSD menu. 2. Move the cursor to highlight the zoom mode, and press 3.
- Page 39 Setting projection method Projection method of OSD may be changed. Perform the following steps to change the projection method: 1. Press the Screen Display Control Key on remote controller and enter OSD menu. 2. Move the cursor to highlight the projection method, and press 3.
- Page 40 Setting electronic trapezoid correction Electronic trapezoid correction of OSD may be changed. Perform the following steps to change the electronic trapezoid correction: 1. Press the Screen Display Control Key on remote controller and enter OSD menu. 2. Move the cursor to highlight the electronic trapezoid correction, and press 3.
- Page 41 Setting software update (USB) Please contact with your local supplier of projectors.
- Page 42 Setting of reset all OSD may all be reset. Perform the following steps to reset all: 1. Press the Screen Display Control Key on remote controller and enter OSD menu. 2. Move the cursor to highlight the reset all, and press 4.
- Page 43 View status View status via OSD. Perform the following steps to view status: 1. Press the Screen Display Control Key on remote controller and enter OSD menu. 2. Move the cursor to highlight the status, and press...
-
Page 44: Chapter 5 Qumi Maintenance
Chapter 5 Qumi Maintenance Qumi Cleaning Clean Qumi to remove dust and dirt for its normal operation. Warning: 1. Before cleaning, close Qumi and disconnect the power lines. Otherwise injury or system damage may be caused. 2. During cleaning, only wet cloth may be used. Exposure to water is not allowed for vents of Qumi. -
Page 45: Troubleshooting
Troubleshooting FAQs and solutions In case of any problem arising from application of Qumi, all these methods may provide you with skills for problem solving. If such problem cannot be solved, please contact your distributor for help. Some problems may just be caused by improper connection of cables. Please check for possible conditions as below before seeking particular solutions. - Page 46 Image problem Problem: No image displayed in the screen 1. Check whether PC is properly configured. 2. Close all devices and then power them on again in proper sequence. Problem: Blurring image 1. Operate by remote controller. 2. Ensure that the distance between Qumi and screen is within specified limit. 3.
- Page 47 Audio problem Problem: No sound 1. Adjust the volume of audio source. 2. Check the connection of audio cable. 3. Use other loudspeaker to test output of audio source. 4. Send Qumi for maintenance. Problem: Sound distortion 1. Check the connection of audio cable. 2.
-
Page 48: Specification
Specification Model Qumi Q3PLUS Series Resolution HD (720p-1280x720) Projection distance 0.7m~3.7m (19"-100") Size of projection screen 762mm~2, 286mm (30”~90”) (diagonal) Projection lens Electronic zoom in/out Throw ratio 1.66:1 Vertical trapezoid correction +/-35 step (-45º - +33º) Front projection, rear projection, desk projection, front ceiling and... -
Page 49: Vivitek Support Website
11. Why should I readjust the focal length after Qumi is initiated? In order to ensure best image quality, Zoom in+/Zoom out- Key on the remote controller may be adjusted when the operation temperature is reached. Vivitek support website For more information, support and production registration, please visit www.vivitekcorp.com. -
Page 50: Projection Distance And Size
Projection distance and size Projection distance and size specification Image diagonal Image width (cm/inch) Image width (cm/inch) Projection distance (cm/inch) (cm/inch) 76.2/30 66.4/26.14 37.4/14.72 112.5/44.29 101.6/40 88.6/34.88 49.8/19.61 150.3/59.17 114.3/45 99.6/39.21 56/22.05 169.1/66.57 127/50 110.7/43.58 62.3/24.53 188/74.02 152.4/60 132.8/52.28 74.7/29.41 225.8/88.9 177.8/70 155/61.02... -
Page 51: List Of Compatible Signal
List of compatible signal Horizontal Vertical Signal Resolution DVI/HDMI synchronization (KHZ) synchronization (HZ) 720x400 37.9 85.0 640x480 31.5 60.0 640x480 37.9 72.0 640x480 37.5 75.0 640x480 43.3 85.0 800x600 35.2 56.0 800x600 37.9 60.0 800x600 48.1 72.0 800x600 46.9 75.0 800x600 53.7 85.0... -
Page 52: Qumi Size
Qumi size... -
Page 53: Regulatory Compliance
Regulatory compliance FCC warning As confirmed by tests, the Device conforms to Section 15 of FCC Rules in respect of limitations on Grade B digital equipment. Such limitations aim to provide the Device with proper protection against harmful interference in commercial environment. The Device may produce, use and radiate radio frequency energy;... -
Page 54: List Of Name And Content Of Toxic And Hazardous Substances Or Elements In The Product
List of name and content of toxic and hazardous substances or elements in the Product In accordance with the “Measures for the Control of Pollution from Electronic Information Products” issued by the Chinese government, in order to control and reduce pollution on environment caused by wasted electronic information products;... - Page 55 FCC Statement This equipment has been tested and found to comply with the limits for a Class B digital device, pursuant to part 15 of FCC Rules. These limits are designed to provide reasonable protection against harmful interference in a residential installation. This equipment generates and can radiate radio frequency energy and, if not installed and used in accordance with the instructions, may cause harmful interference to radio communications.
Need help?
Do you have a question about the Q3PLUS and is the answer not in the manual?
Questions and answers