Table of Contents
Advertisement
Quick Links
Advertisement
Table of Contents

Related Manuals for Vivitek Qumi Q2-L Series


Summary of Contents for Vivitek Qumi Q2-L Series
- Page 2 Preface Copyright ©2012 Vivitek Corporation. is a trademark of Vivitek Corporation. Other trademarks are the properties of their respective owners. Values, weights and dimensions are approximate. Specifications are subject to change without prior notice. Disclaimer The information in this document is subject to change without notice. The manufacturer...
-
Page 3: Important Safety Information
Important Safety Information Important: It is strongly recommended that you read this section carefully before using the Qumi. These safety and usage instructions that will make sure you enjoy many years of safe use of the Qumi. Keep this manual for future reference. Symbols Used Warning symbols are used on the unit and in this manual to alert you of hazardous situations. - Page 4 Qumi Installation Notice • Allow at least a 50cm clearance around the exhaust vent. Minimum 100mm Minimum 500mm • Make sure that the intake vents do not recycle hot air from the exhaust vent. • When operating the Qumi in an enclosed space, make sure that the surrounding air temperature within the enclosure does not exceed operating temperature while the Qumi is running, and the air intake and exhaust vents are unobstructed.
-
Page 5: Main Features
Power Safety • Only use the supplied adapter. • Do not place anything on the cord. Place the cord where it will not be in the way of foot traffic. • Remove the battery from the remote control when storing or not in use for a prolonged period. -
Page 6: Table Of Contents
Chapter 4 Taking Care of Your Qumi ........28 Cleaning the Qumi ....................28 Cleaning the Lens ....................28 Troubleshooting ....................29 Vivitek Support Site ....................32 Specifications ....................... 33 Projection Distance vs. Projection Size ............... 34 Projection Distance and Size Table ..............34 Timing Mode Table .................... -
Page 7: Chapter 1 At A Glance
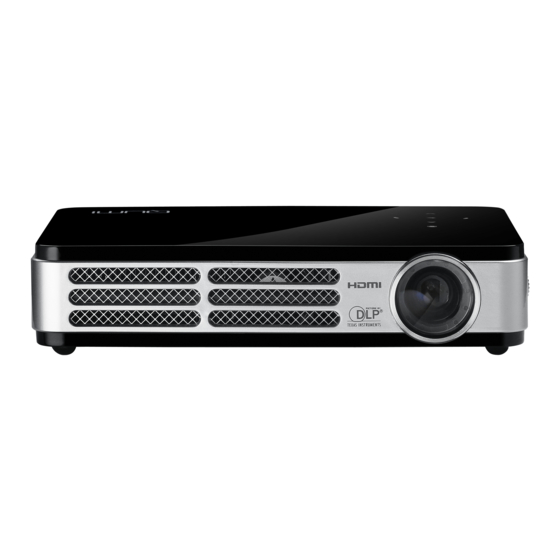
Chapter 1 At a Glance Overview Front/Top/Right View Keypad See Keypad - On-Screen Display (OSD) buttons Cooling Vent Cooling Vent Do not cover Do not cover Lens Focus ring Projection Lens Focus the projected image Keypad Menu Open and exit the OSD buttons Up Cursor Navigate and change... -
Page 8: Bottom View
Rear/Top/Left View DC IN Connect the supplied power adapter Power Switch AUDIO OUT Turn on/off the Qumi Connect an audio cable to speakers or headphones UNIVERSAL I/O AV IN Connect a RGB or component Connect the AV IN cable cable from a device from a video device MINI HDMI Connect a MINI HDMI cable... -
Page 9: Accessories
Accessories Along with the Qumi, the following accessories are included: Remote Control (With one 3V CR2025 battery) VGA Cable Regional Power Cord and Power Adapter Documentation Kit (Quick Start Guide, Warranty Card) W A R R A N T Y Cable Cores* Contact your dealer immediately if any items are missing, appear damaged, or if the unit does not work. -
Page 10: Remote Control
Remote Control Up Cursor Navigate and change ON/OFF settings in the OSD Tuen on or off Qumi Right Cursor Enter Navigate and change Change settings in the OSD settings in the OSD Exit Left Cursor Close the OSD Navigate and change settings in the OSD Down Cursor Navigate and change... -
Page 11: Chapter 2 Getting Started
Chapter 2 Getting Started What You Need Many types of external devices and peripherals can be connected to the Qumi. DVD, VCD and VHS players can be connected to play movies. Camcorders and digital cameras can also be used to play videos. Computers can be connected to display documents and other types of media stored on the computer. -
Page 12: Setting Up Qumi
Setting Up Qumi ® Connecting Apple Devices (Optional) Connect an Apple device to the Qumi by using the following: ® Apple Connection Kit ® iPhone iPod iPad ® VGA to Apple Video Adapter (Optional) iPhone iPod iPad (Available at Apple Store) Connecting Peripherals by HDMI (Optional) Connect HDMI-compatible peripherals to the Qumi using the Mini to Standard HDMI cable. - Page 13 Connecting Personal Computers Connect a personal computer to the Qumi by using the VGA cable. Personal Computer Note: The personal computer must have a VGA output port to use the VGA cable to connect to the Qumi. Connecting Video Connect video devices to the Qumi by using the audio/video cable (optional accessory). Game Console Player...
- Page 14 Starting and Shutting down the Qumi Connect the AC power adapter to the Qumi. Connect the other end of the AC power adapter to a wall outlet. Note: Adapter models may vary between regions. Then slide the POWER switch to turn on the Qumi. The Qumi splash screen displays and connected devices are detected.
-
Page 15: Adjusting The Image
Slide the POWER switch to turn off the Qumi. Adjusting the Image If the projected image is not clear, the image can be adjusted by moving the focus ring up or down until the image is clear. Setting an Access Password (Security Lock) To prevent unauthorized use of the Qumi, you can create a password. - Page 16 Press the ▲ or ▼ button to select Security Lock. Press the ◄ or ► button to enable or disable the security lock function. A password dialog box automatically appears. You can use the ▲▼◄► buttons located either on top of the Qumi or on the remote control to enter the password.
-
Page 17: Setting Up The Remote
Setting Up the Remote The remote control comes with one (1) 3V lithium battery (CR2025). The battery is pre-installed in the remote control. To begin using the remote control, remove the plastic tab (A) from the battery compartment. Replacing the Remote Control Batteries Remove the old Install the cover. -
Page 18: Chapter 3 On-Screen Display (Osd) Settings
Chapter 3 On-Screen Display (OSD) Settings OSD Menu Controls The Qumi has an On-Screen Display (OSD) settings menu that allows you to make adjustments and changes to settings, such as display settings and audio settings. There are 5 menus within the OSD menu: •... -
Page 19: Setting The Osd Language
Setting the OSD Language The language that is displayed in the OSD can be changed. To change the language in the OSD, perform the following steps: 1. Enter the OSD menu. Press the ◄ or ► button to select the Installation I menu. 2. -
Page 20: Osd Menu Overview
OSD Menu Overview Use the following illustration to quickly find a setting or determine the range for a setting. -
Page 21: Osd Sub-Menu Overview
OSD Sub-Menu Overview... -
Page 22: Image Menu
Image Menu To access the Image menu and adjust the settings, perform the following steps: 1. Enter the OSD menu. 2. Press the ◄ or ► button to select the Image menu. 3. Press the ▲ or ▼ button to move the cursor up or down in the Image menu. 4. -
Page 23: Advanced Feature
Advanced Feature To access the Advanced menu and adjust the settings, perform the following steps: 1. Enter the OSD menu. 2. Press the ◄ or ► button to select the Image menu. 3. Press the ▲ or ▼ button to move to the Advanced menu and then press 4. -
Page 24: Computer Menu
Computer Menu To access the Computer menu and adjust the settings, perform the following steps: 1. Enter the OSD menu. 2. Press the ◄ or ► button to select the Computer menu. 3. Press the ▲ or ▼ button to move the cursor up or down in the Computer menu. 4. -
Page 25: Video/Audio Menu
Video/Audio Menu To access the Video/Audio menu and adjust the settings, perform the following steps: 1. Enter the OSD menu. 2. Press the ◄ or ► button to select the Video/Audio menu. 3. Press the ▲ or ▼ button to move the cursor up and down in the Video/Audio menu. 4. - Page 26 Audio To adjust the audio settings, press to enter the Audio sub menu. ITEM DESCRIPTION Volume Press the ◄ or ► button to adjust the audio volume. Mute Press the ◄ or ► button to turn on or off the audio. Audio Input Press the ◄...
-
Page 27: Installation I Menu
Installation I Menu To access the Installation I menu and adjust the settings, perform the following steps: 1. Enter the OSD menu. 2. Press the ◄ or ► button to select the Installation I menu. 3. Press the ▲ or ▼ button to move the cursor up or down in the Installation I menu. 4. - Page 28 Advanced To adjust the advanced settings, press to enter the Advanced sub menu. ITEM DESCRIPTION Press the ◄ or ► button to enable or disable security lock Security Lock function. Press the ◄ or ► button to enable or disable keypad lock Keypad Lock function.
-
Page 29: Installation Ii Menu
Installation II Menu To access the Installation II menu and adjust the settings, perform the following steps: 1. Enter the OSD menu. 2. Press the ◄ or ► button to select the Installation II menu. 3. Press the ▲ or ▼ button to move the cursor up or down in the Installation II menu. ITEM DESCRIPTION Press the ◄... - Page 30 Advanced Feature To access the Advanced menu and adjust the settings, perform the following steps: 1. Enter the OSD menu. 2. Press the ◄ or ► button to select the Installation II menu. 3. Press the ▲ or ▼ button to select the Advanced menu and then press 4.
- Page 31 OSD Menu Setting ITEM DESCRIPTION Menu Position Press the ◄ or ► button to select different OSD location. Press the ◄ or ► button to select OSD background translucent Translucent Menu level. Menu Display Press the ◄ or ► button to select OSD timeout delay. Peripheral Test ITEM DESCRIPTION...
-
Page 32: Factory Reset
ITEM DESCRIPTION Press the ◄ or ► button to select Off, DLP-Link or IR. 3D Sync Invert Press the ◄ or ► button to turn 3D Sync Invert On or Off. Factory Reset To reset all of the menu items to the factory default values (except Language and Security Lock), perform the following steps: 1. - Page 33 Status To see the status of the Qumi, perform the following steps: 1. Press the ▲ or ▼ button to move the cursor up or down in the Installation II menu. 2. Select the Installation II sub menu. 3. Press to enter the Status sub menu.
-
Page 34: Chapter 4 Taking Care Of Your Qumi
Chapter 4 Taking Care of Your Qumi Cleaning the Qumi Cleaning the Qumi to remove dust and grime will help provide trouble-free operation. Warning: 1. The Qumi should be turned off and unplugged before cleaning. Failure to do so may result in injury or damage to the system. -
Page 35: Troubleshooting
Troubleshooting Common Problems and Solutions These guidelines provide tips to deal with problems you may encounter while using the Qumi. If the problem remains unresolved, contact your dealer for assistance. The problem sometimes can be as simple as a wire that is not completely connected. Review the following possible issues before proceeding to the problem-specific solutions. -
Page 36: Image Problems
Image Problems Problem: No image appears on the screen 1. Verify that the settings on your personal computer are properly configured. 2. Turn off all of the equipment and power up the equipment again in the correct order. Problem: The image is blurred 1. -
Page 37: Audio Problems
Audio Problems Problem: There is no sound 1. Adjust the volume of the audio source. 2. Check the audio cable connection. 3. Test the output of the audio source with other speakers. 4. Have the Qumi serviced. Problem: The sound is distorted 1. -
Page 38: Vivitek Support Site
7. Why do I need to re-adjust the focus on my Qumi after it’s powered up? For the best picture quality, adjustment of the focus ring may be necessary once the operational temperature has been met. Vivitek Support Site Please visit www.vivitekcorp.com for more information, support and product registration. -
Page 39: Specifications
Specifications Model Qumi Q2-L Series Resolution HD (720p - 1280x800) Projection Distance 1000mm ~ 3000mm (39.37” ~ 118.11”) Projection Screen Size 762mm ~ 2286mm (30” ~ 90”) (Diagonal) Projection Lens Manual focus Throw Ratio 1.55x Vertical Keystone Correction +/- 40 steps... -
Page 40: Projection Distance Vs. Projection Size
Projection Distance vs. Projection Size Projection Distance and Size Table IMAGE IMAGE PROJECTION IMAGE HIGH OFFSET-A DIAGONAL WIDTH DISTANCE (MM/INCHES) (MM/INCHES) (MM/INCHES) (MM/INCHES) (MM/INCHES) 762/30 646/25.43 404/15.91 1000/39.37 10/0.40 1016/40 862/33.94 538/21.18 1340/52.76 13/0.51 1143/45 969/38.15 606/23.86 1500/59.06 15/0.59 1270/50 1077/42.40 673/26.50 1670/65.75... -
Page 41: Timing Mode Table
Timing Mode Table H-SYNC V-SYNC COMPOSITE / SIGNAL RESOLUTION COMPONENT RGB DVI/HDMI (KHZ) (HZ) S-VIDEO NTSC — 15.734 60.0 — — — PAL/SECAM — 15.625 50.0 — — — 720 x 400 37.9 85.0 — — 800 x 600 31.5 60.0 —... -
Page 42: Qumi Dimensions
Qumi Dimensions 160.0mm (6.3”) 160.0mm (6.3”) -
Page 43: Regulatory Compliance
Regulatory Compliance FCC Warning This equipment has been tested and found to comply with the limits for a Class B digital device pursuant to Part 15 of the FCC Rules. These limits are designed to provide reasonable protection against harmful interference when the equipment is operated in a commercial environment.
Need help?
Do you have a question about the Qumi Q2-L Series and is the answer not in the manual?
Questions and answers