
Related Manuals for Bauhn AS-PVR1000R

Summary of Contents for Bauhn AS-PVR1000R
- Page 1 1TB HDD PVR with Twin Tuners Model Number AS-PVR1000R INSTRUCTION MANUAL After Sales Support Telephone: 1300 886 649 N13275 Email: info@tempoaustralia.com.au...
-
Page 2: Table Of Contents
Contents Warranty Welcome General Safety Instructions Controls and Connections Basic Operations Electronic Program Guide (EPG) Recording Functions Media Browser/File Manager Menus FAQs Technical Specifications After Sales Support Telephone: 1300 886 649 Email: info@tempoaustralia.com.au... -
Page 3: Warranty
1TB HDD PVR with Twin Tuners Warranty Details The product is guaranteed to be free from defects in workmanship and parts for a period of 24 months from the date of purchase. Defects that occur within this warranty period, under normal use and care, will be repaired, replaced or refunded at our discretion, solely at our option with no charge for parts and labour. -
Page 4: Welcome
Welcome Congratulations on choosing to buy a BAUHN® product. By doing so you now have the assurance and peace of mind that comes with purchasing a product made by one of the leading manufacturers. All products brought to you by BAUHN®... -
Page 5: General Safety Instructions
General Safety Instructions Read this manual thoroughly before first use and keep it in a safe place for future reference, along with the warranty card, purchase receipt and carton. The safety precautions enclosed herein reduce the risk of fire, electric shock and injury when correctly adhered to. - Page 6 General Safety Instructions (Cont.) Installation • The product must be installed in accordance with local laws. • Place the product on a straight, rigid and stable place. Do not place it on carpet. Do not place it on top of another appliance that may cause overheating (for example, a receiver or amplifier).
-
Page 7: Controls And Connections
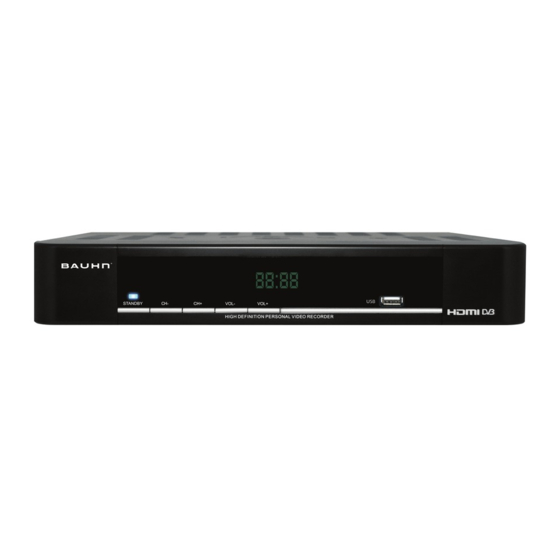
Controls and Connections Front Panel 1 Standby: Press this button to switch the unit on or to standby. 2 CH-: Press this button to change the channel downwards. 3 CH+: Press this button to change the channel upwards. 4 VOL-: Press this button to decrease the volume. 5 VOL+: Press this button to increase the volume. -
Page 8: The Remote Control
Controls and Connections (Cont.) The Remote Control After Sales Support Telephone: 1300 886 649 Email: info@tempoaustralia.com.au... -
Page 9: Remote Control Functions
Controls and Connections (Cont.) Remote Control Functions POWER: Switch the product on or to standby. Numeric buttons (0-9): Select a channel by channel number. INFO: Show current program information. VOL+/-: Increase or decrease the volume. Navigate through the menus. ASPECT: Change the aspect ratio (16:9, 4:3, Letter Box, Pan Scan). : Navigate up or down in menu mode / Change the program. -
Page 10: Using The Remote Control
Controls and Connections (Cont.) Using the Remote Control 1. To use the remote control, point it towards the front of the HDD PVR. 2. The remote control has a range of up to 7 metres from the HDD PVR at an angle of up to 60 degrees. - Page 11 Controls and Connections (Cont.) Antenna Requirements • You may not need to change or replace your existing TV antenna to receive digital reception. However, if your antenna is not in a good condition, it is recommended that you consider replacing it to ensure uninterrupted digital television viewing. • Viewers in areas of poor analog reception may need specialist advice about antenna requirements for digital reception in their area.
- Page 12 Controls and Connections (Cont.) For High Definition Viewing: Connect the HDD PVR receiver via HDMI output Connect the loop cable to LOOP IN and to LOOP OUT. Connect the antenna to ANT IN of the unit. Connect the unit to the TV via HDMI cable, as illustrated below. HDMI Interface Antenna AUDIO INPUT...
- Page 13 Controls and Conections (Cont.) For Audio Connection: Connect via SPDIF (Optical/Coaxial), Mixed Audio L/R output Connect the loop cable to LOOP IN and to LOOP OUT. Connect the antenna with ANT IN of the unit. Connect the unit to the amplifier via audio cable, as illustrated below. Audio Decoder Interface Antenna DIGITAL INPUT...
-
Page 14: Basic Operations
Basic Operations Power On/Off Press the button on the remote control (or at the front of the AS-PVR1000R) to turn on the power to the unit. The blue standby light will extinguish and the LCD will display the current mode. - Page 15 Changing Channels There are five options for selecting a channel to view: • Press CH+ / CH- on the remote control or front of the AS-PVR1000R. • Press the arrow keys on the remote control. • Press OK to display channel list, then use the arrow keys to choose a channel and press OK to view it.
-
Page 16: Aspect Ratio
Changing Volume There are three options for changing the volume level: • Press VOL+ / VOL- on the remote control or front of the AS-PVR1000R. • Press the / arrow keys on the remote control. • Press on the remote control to mute the volume. - Page 17 Basic Operations (Cont.) Format You can select the video output resolution (1080p, 1080i, 720p, 576i). Audio You can select which audio language, sound track and digital audio format you wish to use from the broadcast of the current program you are watching. Press AUDIO to display the Audio Window.
-
Page 18: Electronic Program Guide (Epg)
Electronic Program Guide (EPG) EPG stands for Electronic Program Guide. It is supplied by the program providers and offers information about the programs to be broadcast. Before you can view any EPG information, you have to ‘activate’ every channel for which you want to view program information. - Page 19 Electronic Program Guide (Cont.) Horizontal EPG Mode arrow or CH+ / CH- keys to select a channel. • Press the • Press the / arrow keys to cycle through the programs on the right side for the selected channel. • Press to view the previous day's program list for the selected channel.
-
Page 20: Recording Functions
This mode allows you to start recording the current channel immediately without having to set up a start and finish time. The AS-PVR1000R has the ability to record two channels at the same time. Follow the instructions below to start recording the first channel, then change to the second channel you wish to record and perform the same action to start recording. - Page 21 Recording Functions (Cont.) Time-shift Recording While in Live TV mode and if enabled, the unit will automatically start time-shift recording the channel currently being viewed. To enable/disable time-shift, simply press T.SHIFT on the remote control. • • Time-shift recording will only start 30 seconds after changing to a channel. •...
- Page 22 Recording Functions (Cont.) Timer Edit Window • Press the arrow keys to select an option • Press / to change an option. • Use the number buttons to enter date, start time and duration options directly. Press OK to save options and close the Edit window. •...
-
Page 23: Media Browser/File Manager
Media Browser/File Manager The Media Browser allows you to explore and play your recorded programs or media files from the internal HDD or attached USB device. The right side will display information about the currently selected file such as recorded time, recording duration, file size, censorship (program rating) and the storage location (inner HDD or USB1/2). - Page 24 Media Browser/File Manager (Cont.) Operation / File Options Press to display the file options menu. • Copy: Copies the selected file to the inner HDD or USB device selected in the PVR menu. • Select All: Fast option for selecting all files. •...
-
Page 25: Menus
Menus Main menu Menu Selection and Adjustment Press MENU to display the Main Menu. Press the arrow keys to select a menu. Press OK or to enter the menu. Press the arrow keys to select a menu item. Press OK or / to adjust the menu option/value. - Page 26 Menus (Cont.) PVR menu • Media Browser - Opens the Media Browser window (file can support MPG, TS, TRP, WMV, MP4, MKV, FLV, AVI, MOV, VOB, MP3, WAV format). • Timer List - Opens the Timer List window. • Storage - Displays information about the internal HDD and attached USB devices (allows you to format the internal HDD or attached USB).
-
Page 27: Settings Menu
Menus (Cont.) Installation menu • Auto Search (see page 14 for details). • DTV Manual Search (see page 15 for details). Settings Menu • Audio & Video Output Settings Video resolution - select video output resolutions: 1080p, 1080i, 720p, 576i. TV aspect ratio - select the suitable aspect ratio for your TV: 16:9, 4:3. - Page 28 Menus (Cont.) • Time Mode - Auto. Display Existing Date - Automatically set from broadcast signal. Display Existing Time - Automatically set from broadcast signal. Daylight Saving Time - Enable/Disable summer time (+1hr). Region - Select your time zone. • Parental control Censorship - Set your desired program block level from All Block, P, C, G, PG, M, MA, AV, R, No Block.
- Page 29 Menus (Cont.) • OSD settings OSD Transparency - Set the transparency level for On-Screen Display. Info Box Display Time - Set auto hide time for Info box (see page 16). • System information View system information of the unit. • Firmware upgrade Select to upgrade the software of the unit (upgrade USB must be connected to rear USB port).
-
Page 30: Faqs
FAQs If you experience problems with this HDD PVR or its installation, in the first instance please read carefully the relevant sections of this instruction manual. If none of the solutions help you solve your problem, contact the after sales support line. Problem Possible cause Solution... -
Page 31: Technical Specifications
Technical Specifications 174~230MHz UHF Input frequency 474~858Mhz VHF Bandwidth 7MHz Tuner Input impedance 75 Ohms Input level -80 ~ -20 dBm Waveform COFDM Demodulation QPSK, 16QAM, 64QAM Channel 1/2, 2/3, 3/4, 5/6, 7/8 decoding Guard 1/4, 1/8, 1/16, 1/32 Mode 2K, 8K MPEG-2: MP@ML, MP@HL MPEG-4: ASP@L5... - Page 32 Technical Specifications (Cont.) HDTV output HDMI 1.3 ANT input IEC-type, female Loop output IEC-type, male Rear panel Video CVBS YPbPr Audio Digital audio output coaxial and optical USB 2.0 IR Receiver 38KHz Front panel/ Category IR (Carrier 38KHz) Battery 2 x 1.5V Input voltage AC 100-240V ~ 50/60Hz Power/...
Need help?
Do you have a question about the AS-PVR1000R and is the answer not in the manual?
Questions and answers