Advertisement
Quick Links
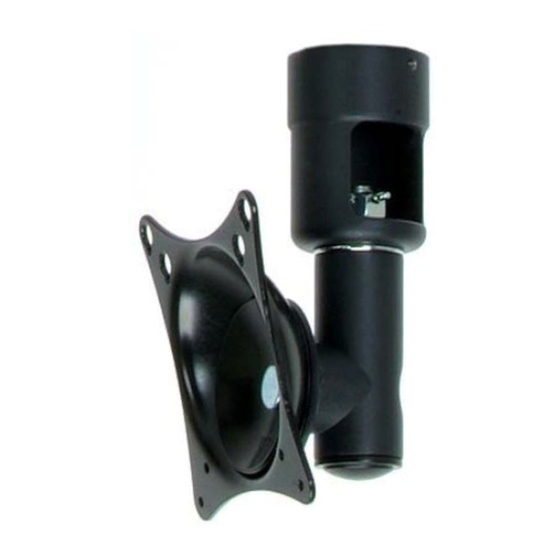
CMA-01 CEILING MOUNT
http://www.orionimages.com
All contents of this document may change without prior notice, and actual product appearance may differ
from that depicted herein
FLAT LCD DISPLAY MOUNT MODEL
Ceiling Lower Assembly Flat Panel Mount
Installation and User's Guide
Installation and User's Guide
Advertisement

Subscribe to Our Youtube Channel
Related Manuals for Orion CMA-01


Summary of Contents for Orion CMA-01
- Page 1 Installation and User’s Guide Installation and User’s Guide FLAT LCD DISPLAY MOUNT MODEL CMA-01 CEILING MOUNT Ceiling Lower Assembly Flat Panel Mount http://www.orionimages.com All contents of this document may change without prior notice, and actual product appearance may differ from that depicted herein...
-
Page 2: Warning
Installation and User’s Guide http://www.orionimages.com Warning Statements The wall, floor or ceiling should be capable of supporting a weight of at least five (5) times the monitor’s weight. If it cannot, the wall, floor or ceiling must be reinforced. Proper installation procedure by qualified personnel as outlined in the installation instructions must be adhered to Failure to do so could result in serious personal injury. -
Page 3: Table Of Contents
2. INSTALLATION TOOLS / PART LIST .……............... 3. FEATURES .……........................4. CMA-01 INSTALLATION .……..................5. MOUNTING HARDWARE .……..................6. ATTACING THE FLAT PANEL TO THE CMA-01 .……............7. TECHNICAL SPECIFICATION .……..................8. LIMITED WARRANTY .……....................7300 Bolsa Avenue, Westminster CA 92683 / Tel: 714-766-6300 / Fax: 714-766-6310... -
Page 4: Installation Tools / Part List
The following tools may be required depending upon your particular installation. They are not included. PARTS LIST: Make sure your ORION Images product has the following hardware and components before beginning installation. If there are parts missing and/or damaged, stop the installation and call ORION Images at (714) 766-6300. - Page 5 Installation and User’s Guide http://www.orionimages.com INSTALLATION TOOLS / PARTS LIST PARTS LIST (Continue): 7300 Bolsa Avenue, Westminster CA 92683 / Tel: 714-766-6300 / Fax: 714-766-6310...
-
Page 6: Features
Installation and User’s Guide http://www.orionimages.com FEATURES Extendable The CMA-01 may be attached to 1-½” standard threaded pipe (NPT), or one of ORION’s adjustable- height ceiling adapters. Please refer to the installation instructions that come with these adapters. Radial Glide® 360° rotation and 15° of Cable Routing adjustment in any direction. -
Page 7: Cma-01 Installation
CMA-01 Installation Attaching the CMA-01: The desired ceiling attachment must be installed prior to performing the following steps. Screw the CMA-01 coupling adapter to the 1½” standard threaded pipe The PRC-LA must be threaded four complete turns before tightening down the set screw. -
Page 8: Mounting Hardware
Installation and User’s Guide http://www.orionimages.com MOUNTING HARDWARE Selecting the Mounting Hardware: Insert the Thread Depth Indicator into the thread inserts found on the bottom or top of the flat panel. Use a pencil to mark the depth of the thread insert on the Thread Depth Indicator, as shown in Figure 1. - Page 9 MOUNTING HARDWARE Universal Spacing Installation: ORION Images’ Universal Spacers allow you to attach the mounting bracket to flat panels which have recessed or uneven mounting points. Each Universal Spacer adds ¼˝ to the distance between the Adapter Plate and your flat panel.
-
Page 10: Attacing The Flat Panel To The Cma-01
Installation and User’s Guide http://www.orionimages.com ATTACHING THE FLAT PANEL TO THE CMA-01 Insert two (2) M4 screws into the top two mounting points of your flat panel or UFP-280 Adapter Plate. Thread the M4 screws to one-half of their length into the flat panel or UFP- 280 Adapter Plate, but do not tighten the M4 screws at this time. -
Page 11: Technical Specification
Installation and User’s Guide http://www.orionimages.com TECHNICAL SPECIFICATIONS All measurements are in inches [mm]. 75mm x 75mm VESA mounting points. 100mm x 100mm VESA mounting points. 200mm x 100mm mounting points. (M4 x 10mm Phillips flat head screws only) 200mm x 200mm mounting points. (If M4 screws are used, M5 washers must be used as well) pg11 7300 Bolsa Avenue, Westminster CA 92683 / Tel: 714-766-6300 / Fax: 714-766-6310... -
Page 12: Limited Warranty
2Year Limited Warranty All Orion Images products carry a limited warranty from ship date against defects in materials and workmanship. Orion Images is not liable for improper installation that results in damage to mounts, adapters, display equipment or personal injury.
Need help?
Do you have a question about the CMA-01 and is the answer not in the manual?
Questions and answers