Table of Contents
Advertisement
Quick Links
Advertisement
Table of Contents

Summary of Contents for Orion 9829
- Page 1 INSTRUCTION MANUAL Orion ® SkyView Pro EQ Mount ™ #9829 Customer Support (800) 676-1343 E-mail: support@telescope.com Corporate Offices (831) 763-7000 P.O. Box 1815, Santa Cruz, CA 95061 Providing Exceptional Consumer Optical Products Since 1975 IN 195 Rev. A 10/02...
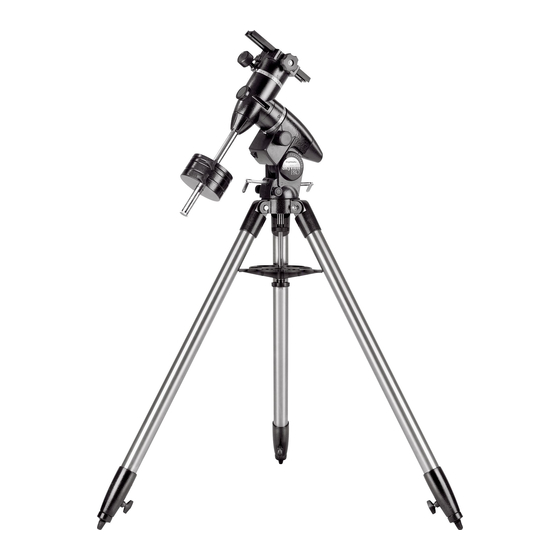
- Page 2 Declination lock lever (opposite side) Right ascension lock lever (opposite side) Declination slow-motion control knob Safety thumbscrew Mounting plate securing knob Counterweight shaft Counterweights Counterweight lock knobs Tripod leg Leg lock knobs Figure 1. The SkyView Pro EQ Mount. Tube ring mounting plate Right ascension slow-motion control knob Latitude scale...
-
Page 3: Table Of Contents
Orion mount. Your new SkyView Pro Equatorial Mount was developed to work with many different telescope optical tubes. Designed for astronomical use, this precision mount allows convenient “tracking” of celestial objects as they move slowly across the sky, so they remain within your eyepiece’s field of view. -
Page 4: Attaching A Telescope
SkyView Pro, including refractors, Newtonian reflectors, and catadiotropics, provided a set of tube rings is available to cou- ple the tube to the mount. Orion sells a variety of telescope tube rings. Please visit our website at telescope.com for details. -
Page 5: Setting Up And Using The Equatorial Mount
Dec. slow-motion control knob Dec. setting circle Front opening R.A. slow-motion control knob Figure 4. 4. To balance the telescope on the declination axis, first tight- en the R.A. lock lever, with the counterweight shaft still in the horizontal position. 5. - Page 6 Azimuth adjustment knobs Figure 6. For polar alignment, position the tripod so that the "N" label at the base of the mount faces north. The azimuth fine adjustment knobs above it are used to make small adjustments to the mount’s azimuth position. Be certain to loosen the tripod attachment knob on the central support shaft before adjusting these knobs.
- Page 7 Figure 8. The optical tube must be at a 90° angle to the right ascension axis in order to view through the polar axis finder The polar axis finder scope is now ready to be used. When not in use, replace the plastic protective cover to prevent the polar finder from getting bumped, which could knock it out of alignment.
- Page 8 So, the coordinates for the Orion Nebula listed in a star atlas will look like this: R.A. 5h 35.4m Dec. –5° 27' That’s 5 hours and 35.4 minutes in right ascension, and -5...
-
Page 9: Specifications
Figure 10. This illustration show the telescope pointed in the the four cardinal directions (a) north, (b) south, (c) east, (d) west. Note that the tripod and mount have ot been moved; only the telescope tube has been moved on the R.A. and Dec. axes. Confused About Pointing the Telescope? Beginners occasionally experience some confusion about how to point the telescope overhead or in other directions. -
Page 12: One-Year Limited Warranty
During this warranty period Orion Telescopes & Binoculars will repair or replace, at Orion’s option, any warranted instrument that proves to be defective, provided it is returned postage paid to: Orion Warranty Repair, 89 Hangar Way, Watsonville, CA 95076. If the product is not registered, proof of purchase (such as a copy of the original invoice) is required.


Need help?
Do you have a question about the 9829 and is the answer not in the manual?
Questions and answers