Table of Contents
Advertisement
Quick Links
Advertisement
Table of Contents

Related Manuals for Sirius XM RAdio LYNX RADIO & VEHICLE KIT


Summary of Contents for Sirius XM RAdio LYNX RADIO & VEHICLE KIT
-
Page 1: Quick Start Guide
QUICK START GUIDE SiriusXM Portable Radio RADIO & Wi-Fi ® ENABLED VEHICLE KIT... -
Page 2: What's In The Box
What’s in the Box? Lynx Radio Battery USB Cable Carry Bag/ Cleaning Cloth USB Travel Charger... - Page 3 What’s in the Box? (continued) ch - ch + Dash Mount Vehicle Dock Remote Control Vent Mount & Extended Vent Mount Clips Antenna Cable Routing Adapter Alcohol Alcohol Prep Pad Prep Pad Magnetic Mount Aux In Cable PowerConnect Alcohol Pads AMPS Screws Antenna Power Adapter...
-
Page 4: Buttons And Controls
Buttons and Controls Audio Speaker Power/Lock/Brightness Button Lynx Top View Press for 3 seconds to Volume Control turn Radio On or Off, or Press to decrease < to turn airplane mode On to increase > or Off (handheld mode the audio volume. only), or to put Radio in sleep mode;... - Page 5 Vehicle Dock Controls & Connectors Vehicle Dock Front View Lock Tab Knob (PowerConnect Only) Secures Lynx in the Vehicle When at the Now Playing Dock. Push back to release screen, press and hold for Lynx from the dock. two seconds to display the FM Settings screen.
- Page 6 Remote Control Button Functions and Battery Pause and Replay Buttons: Power Button Press for 3 seconds to turn Pause/Play button Radio On; press and hold to Pauses or resumes playing of turn Radio Off. the currently tuned channel. Rewind button Tune Up/Down Channels Immediately tunes up or Rewinds through content so...
-
Page 7: Charging The Battery
Charging the Battery The Lynx battery can be charged by using the USB Travel Charger and Cable, or via a USB port on any computer using the USB Cable. It can also be charged when Lynx is in the optional LV1 Vehicle Dock, LH1 Home Dock, or BB2 Portable Speaker Dock. - Page 8 Managing Memory Card Content If you have installed an optional microSD memory Rear View (rear cover removed) card in Lynx, connecting Lynx to a computer using the USB Cable will allow you to manage content and playlists on the memory card. When Lynx is connected to the computer, the memory card will be recognized as a removable storage device.
- Page 9 Install the Battery and Take the Tour Let’s get started discovering Lynx! Remove the rear cover Turn Lynx over and grasp it firmly in your hand. Using your other hand, put your fingernail into the groove on the side of Lynx, placing it more toward the left side.
- Page 10 Subscribe Lynx to SiriusXM Lynx allows you to connect to SiriusXM Satellite Radio, SiriusXM Internet Radio, or both. Connecting to both services provides you with the complete experience, giving you access to all of the features Lynx has to offer. Whether you’re in your home, in your vehicle,* out walking or jogging, or within range of a Wi-Fi network, you’ll always have a variety of SiriusXM content available.
- Page 11 Subscribe Lynx to SiriusXM (continued) Subscribe/Connect to SiriusXM Internet Radio To subscribe to Internet Radio (or connect if you are already subscribed), you will first need to connect to a Wi-Fi Internet connection. Be sure you are in a location where a Wi-Fi connection is available. If the Wi-Fi network is secured, you will need to know the password or key.
- Page 12 Audio You can listen to Lynx using the built-in speaker, by connecting your own headphones or earbuds to the headphone jack, or by Bluetooth®. Lynx Bluetooth is compatible with stereo audio streaming devices (A2DP Profile). Lynx is not compatible with the Hands Free Profile (HFP), which is typically used for a Bluetooth connection to a cellphone.
- Page 13 Using Lynx Let’s get familiar with some of the screens you will see when navigating Lynx. The symbol means more detailed information is available in another screen MORE description, so keep reading. This section continues on the opposite side. Home The Home screens are where you choose what you want to do with Lynx —...
-
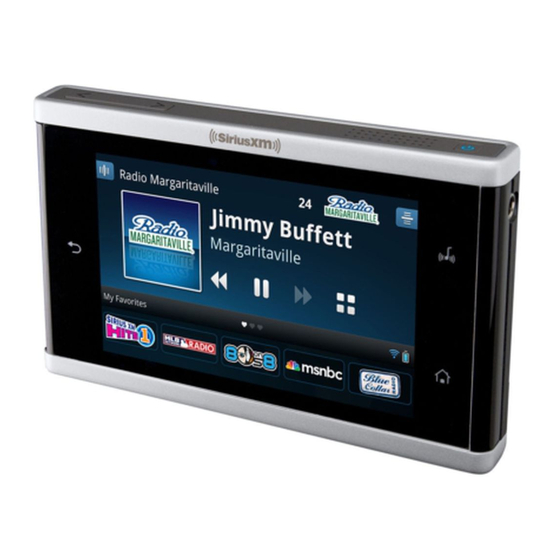
Page 14: Now Playing
Using Lynx (continued) Now Playing The Now Playing screen is where you see what’s currently playing, change channels, pause and replay, learn more, and access favorites. Satellite Radio Now Playing Screen Spectrum. Displays a preview card for each channel showing detailed channel information. MORE Channel Number and Logo. - Page 15 Using Lynx (continued) Spectrum Spectrum displays a preview of each channel so you can browse other channels while continuing to listen to the currently tuned channel. Swipe the Now Playing screen for Spectrum. Sort. Sort channels by channel number (default), or Sort: alphabetically by channel name, or by category.
-
Page 16: Show Finder
Using Lynx (continued) My Library My Library contains your recordings, content saved for Radio Replays, and your personal content. My Recorded Shows. Shows which you have recorded with scheduled recording. My Recorded Channels. Channels which you have recorded with scheduled or block recording. Radio Replays. - Page 17 Using Lynx (continued) Settings Settings is where you view, configure, manage, and adjust the behavior of Lynx. My Account. Displays the Radio ID, the status of your SiriusXM subscription, the status of the Internet Radio connection, and an option to logout of Internet Radio. Wi-Fi &...
- Page 18 Using Lynx (continued) Pause and Replay Pause and Replay allows you to pause, rewind, and replay Satellite or Internet Radio. Pause. Pauses the playing of the channel and enters pause and replay. Play. Resumes playing of the channel. Rewind. Rewinds through the replay content so you can hear-that-again.
-
Page 19: Installing The Vehicle Dock
Installing the Vehicle Dock For mounting the PowerConnect™ Vehicle Dock, you can select either the Dash Mount method or the Vent Mount method. For the Vent Mount, wait until after you have connected all the cables to the Vehicle Dock before you attach it to the mount. - Page 20 Installing the Vehicle Dock (continued) Clean the surface where you are installing the Dash Mount with the alcohol preparation pad. Once the surface is dry, remove the adhesive liner. Press and hold the Dash Mount in place for 30 seconds. Allow the adhesive to cure for 2-4 hours. Dock Mounting Plate You can adjust the dock mounting plate, tilting it in your preferred direction.
- Page 21 Installing the Vehicle Dock (continued) Install the Vent Mount onto the vehicle vent: Dash Insert the Vent Mount into Vent the vent opening. Foot Louver Dash Push until hooked on the rear HOOKED PUSH of the vent louver. Rest the foot against the bottom of Vent the vent.
- Page 22 Install the Magnetic Mount Antenna... Mount the Magnetic Mount Antenna outside your vehicle, on a clean and dry horizontal surface that will always face the sky. Choose the location for the antenna according to your type of vehicle. Center it between the left and right sides, and away from other antennas.
- Page 23 ...and PowerConnect Power Adapter TIP: Include enough slack in your cable routing to accommodate open doors or the hood lid. Coil any excess cable in a hidden location and keep it away from any vehicle pedals or controls. Run the cable under the dash, or under a floor mat, bringing it out at the Radio location.
- Page 24 Connect the Vehicle Dock Audio You’ll need to decide how you will connect Audio Quality GOOD BETTER BEST the audio so you can hear it in your vehicle. Aux In Cable (AUX) The chart to the right shows the Bluetooth (A2DP Profile) possible audio connection options FM Direct Adapter (FMDA)* and their quality.
- Page 25 Connect the Vehicle Dock Audio (continued) Aux In Cable (or Cassette Adapter) Audio Setup: If your vehicle radio has an AUX jack, the Aux In Cable connects Lynx to your vehicle radio for the audio. If your vehicle has a cassette player, you can also use an optional Cassette Adapter (sold separately) for the audio.
-
Page 26: Specifications
Specifications Lynx Radio Dimensions: 4.4 in (width) x 2.5 in (height) x .44 in (depth) 112 mm (width) x 63 mm (height) x 11 mm (depth) Weight: 4.8 oz (136 g) (with battery) Audio Connector: 1/8 in (3.5 mm) female Antenna Connector: SMB male Operating Temperature:... - Page 27 SAR and IC Statements SAR STATEMENT: Exposure to Radio Frequency Energy (SAR) To maintain compliance with FCC RF exposure guidelines when you carry this device on your body, use only belt clips, holsters or similar accessories that have no metallic component in the assembly. Use of other non-approved accessories might violate FCC RF exposure guidelines.
-
Page 28: Important Legal Information
Important Legal Information Hardware and subscription sold separately. Activation fee, other fees, and taxes required. Service will automatically renew for additional periods of the same length as the plan you choose, on the subscription package you choose (which may differ from the package which arrived with the radio), and you will automatically be charged at the rates then in effect at each renewal, until you call us at 1-877-438-9677 to cancel. - Page 32 Sirius XM Canada Inc. 135 Liberty St. - 4th floor siriusxm.ca Toronto, Ontario, M6K 1A7 1-877-438-9677 © 2012 Sirius XM Canada Inc. Lynx + VK QSG 120628a...
Need help?
Do you have a question about the LYNX RADIO & VEHICLE KIT and is the answer not in the manual?
Questions and answers