Table of Contents
Advertisement
Quick Links
Advertisement
Table of Contents

Related Manuals for George Foreman GFMG700


Summary of Contents for George Foreman GFMG700
- Page 1 ® G E O R G E F O R E M A N Meat Mincer GFMG700 Instructions & Guarantee...
-
Page 2: Important Safeguards
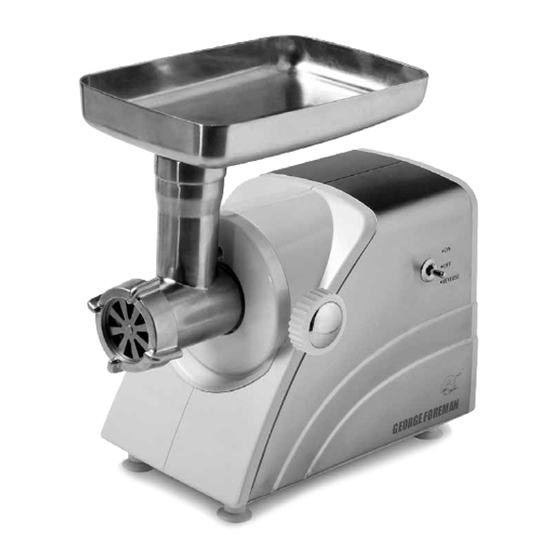
SAVE THESE INSTRUCTIONS Read the instructions before use and keep them safe. If you pass the meat mincer on, make sure to pass on the instructions too. Remove all packaging, but keep it till you’re satisfied the meat mincer is working. important safeguards When using electrical appliances, basic safety precautions should always be followed including the following:... - Page 3 PARTS A. Motor housing K. Cutting plate (medium) B. On/Off/Reverse switch L. Cutting plate (fine) C. Locking knob M. Screw ring D. Grinder/Feeder head N. Sausage stuffer E. Feeding tray O. Washer, plastic F. Food pusher P. Washer, steel G. Feeding tube Q.
- Page 4 ASSEMBLING THE MEAT MINCER Before using, remove all packaging and wash all parts. (See the “How to Clean” section.) 1. Insert the Feed 2. Position the Cutting Screw into the long Blade onto the Feed Screw end of the spindle with the flat cutting side first.
- Page 5 SELECTING CUTTING PLATES Your George Foreman Meat Mincer set includes 3 cutting plates: FINE, MEDIUM and COARSE. Experiment to choose the plate that best suits your tastes and recipes. The following are suggested uses for each plate: FINE: Use for ground meat for burgers or for making patés, spreads and...
- Page 6 TIPS ON GRINDING • Cut the food into strips or cubes slightly smaller than the opening on the feeding tube. • Make sure the food is free of bone or tough tendons before grinding. • Raw meat or fish should be well chilled (not frozen) before grinding to reduce the loss of juices.
- Page 7 3. Place the Sausage Stuffer through the Screw Ring. Attach the Screw Ring to the end of the grinder tube, turning clockwise until tight. 4. Insert the Grinder Head into the Motor Unit opening and tighten Locking Knob to secure. TO STUFF CASINGS 1.
- Page 8 GUARANTEE This product is guaranteed for a period of 1 year from date of purchase, against defects in material and workmanship. It is particularly important that the purchaser carefully read the instructions provided in order to get maximum use from this product. This guarantee is only valid if the appliance is used solely for domestic purposes in accordance with the instructions and provided it is not connected to an unsuitable electricity supply or dismantled or interfered with in any way...
Need help?
Do you have a question about the GFMG700 and is the answer not in the manual?
Questions and answers