Linn SNEAKY MUSIC DS Installation And Setup Manual
Hide thumbs
Also See for SNEAKY MUSIC DS:
- Owner's manual (12 pages) ,
- Setup & user's manual (28 pages)
Advertisement
Table of Contents
- 1 Table of Contents
- 2 Overview
- 3 Set up of the Nas
- 4 Twonky Media
- 5 Ripstation Micro Ds
- 6 RIPPING a LARGE COLLECTION of Cds
- 7 The Wireless Control Point, and Installing the Linn Gui and Config Application
- 8 Sneaky Music Ds Installation
- 9 The Linn Config Application
- 10 Final Steps
- 11 Technical Specifications
- Download this manual
Advertisement
Table of Contents

Related Manuals for Linn SNEAKY MUSIC DS


Summary of Contents for Linn SNEAKY MUSIC DS
- Page 1 SNEAKY MUSIC DS NETWORK MUSIC PLAYER SYSTEM INSTALLATION AND SETUP MANUAL...
- Page 2 Trade marks used in this publication: Linn, the Linn logo and Sneaky are registered trade marks of Linn Products Limited. Music DS is a trade mark of Linn Products Limited.
-
Page 3: Table Of Contents
4 RIPSTATION MICRO DS 5 RIPPING A LARGE COLLECTION OF CDs 6 THE WIRELESS CONTROL POINT, AND INSTALLING THE LINN GUI AND CONFIG APPLICATION 7 SNEAKY MUSIC DS INSTALLATION 8 THE LINN CONFIG APPLICATION 9 FINAL STEPS 10 TECHNICAL SPECIFICATIONS... -
Page 4: Overview
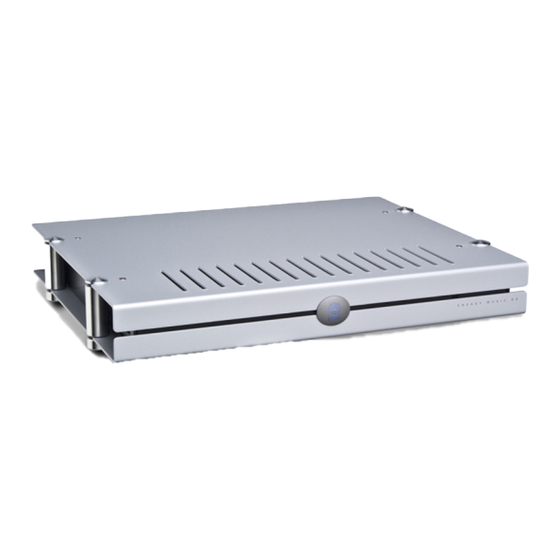
SNEAKY MUSIC DS INSTALLATION AND SETUP 1 OVERVIEW The Sneaky Music DS operates within a standard Ethernet network. There are six components involved in the network. 5. Wireless control point 2. Wireless Access Point (WAP) 4. Network Attached Storage (NAS) 1. - Page 5 Many other network configurations are possible, depending on specific system, it must be connected to the switch. requirements. The final three devices interact together to provide the Sneaky Music DS music experience. They are: Important: Installation of the Sneaky Music DS requires knowledge of networks and Securely stores music on a hard drive array.
-
Page 6: Set Up Of The Nas
SNEAKY MUSIC DS INSTALLATION AND SETUP 2 SET UP OF THE NAS To make installation easier, here we describe in detail the steps needed to setup an Infrant ReadyNAS NV+. For other NAS devices consult the documentation from your NAS vendor. The instructions below assume that the NAS has been supplied with hard drives pre-installed. - Page 7 SNEAKY MUSIC DS INSTALLATION AND SETUP 2 SET UP OF THE NAS (continued...) The ‘Ethernet’ screen Select the IP address assignment appropriate for the network the The ‘Clock’ screen Akurate DS system is being installed into. Press ‘Apply’, then ‘Next’.
- Page 8 SNEAKY MUSIC DS INSTALLATION AND SETUP 2 SET UP OF THE NAS (continued...) 11. The ‘Share List’ screen Click on the CIFS icon on the line beginning ‘media’. This will take you The ‘Standard File Protocols’ screen to ‘Share Options’…...
- Page 9 SNEAKY MUSIC DS INSTALLATION AND SETUP 2 SET UP OF THE NAS (continued...) 12. The ‘Share Options’ screen Set the default access to ‘Read/Write’. Repeat this on the ‘NFS’, ‘HTTP/S’ and ‘Rsync’ tabs. Leave the ‘AFP’ and ‘FTP/S’ tabs set to ‘Disabled’.
-
Page 10: Twonky Media
If you are using an Infrant ReadyNAS, download the software and software has to be installed onto it. This is a UPnP media server and allows installation manual from the Linn website: http://www.linn.co.uk/ds_ access to all material stored on the NAS. - Page 11 SNEAKY MUSIC DS INSTALLATION AND SETUP 3 TWONKY MEDIA (continued...) Select ‘Sharing’ from the left of the page. Select ‘First Steps’ from the menu on the left-hand side. Here the name of the server can be set. This is necessary for The settings for ‘Content Locations’...
- Page 12 SNEAKY MUSIC DS INSTALLATION AND SETUP 3 TWONKY MEDIA (continued...) Select ‘Naming’ from the left of the page. Tick ‘Standardize titles’ at the top of the page. Remove the ‘Video’, ‘Pictures’ and ‘-ALL-‘ directories. Press ‘Save Changes’. ww w.l i nn. c o .u k...
- Page 13 SNEAKY MUSIC DS INSTALLATION AND SETUP 3 TWONKY MEDIA (continued...) Select ‘Music Tree’ from the left of the page. Note: If you wish to add SHOUTcast Internet radio as a source, select Internet Radio from the Basic Setup menu, enable SHOUTcast and select the required genres.
-
Page 14: Ripstation Micro Ds
5 RIPPING A LARGE COLLECTION OF CDs 4 RIPSTATION MICRO DS Linn recommends the use of Ripfactory’s Ripstation Micro DS for ripping If you have a large collection of CDs that need to be ripped to the NAS, CDs to FLAC and sending them to the NAS. This software is available free of using the above method may be too time consuming. -
Page 15: The Wireless Control Point, And Installing The Linn Gui And Config Application
(see the information supplied with the control point), this may take an hour or longer. * You may wish to add a desktop shortcut to the Linn GUI to make it easier to find. Update the control point with .NET 2.0, available at www.microsoft.com/net. -
Page 16: Sneaky Music Ds Installation
Similarly, some electrical devices such as plasma TVs, fluorescent lights and energy saving lamps can This section describes how to connect the Sneaky Music DS into a Linn hi-fi emit IR which can likewise affect the operation. - Page 17 For connecting the unit to an earthing terminal if no mains earth is available RC5 ACCESSORY For connecting the unit to a Linn Knekt RCU or Basik 3 IR Mains power inlet DIGITAL AUDIO OUTPUT One SPDIF and one TOSLINK output for connection to a device with digital input capabilities www.l i n n.c o .uk...
- Page 18 EARTH GROUND connector is connected to an earthing terminal. Amplifier protection The Sneaky Music DS features two methods of protecting its internal power amplifier from damage. Short-circuit protection If the speaker outputs are accidently short-circuited, the power amplifier will shut down instantly and will remain in that state until the short-circuit is rectified.
-
Page 19: The Linn Config Application
INSTALLATION AND SETUP 8 THE LINN CONFIG APPLICATION Highlight the ‘Sneaky Music DS (Source)’ and wait until the Linn Config connects to the unit. The ‘Version’ tab contains information on the The Linn Config application is used to configure the settings on the Sneaky Sneaky Music DS for use by Linn Service personnel. - Page 20 Lounge Amplifier Gain’ option is for use if you require more volume (you may want to increase the setting if using the Sneaky Music DS in a large room). Note: If you are bi-amping the Sneaky Music DS by using the internal power amplifier and an external Linn power amplifier, set...
- Page 21 SNEAKY MUSIC DS INSTALLATION AND SETUP 8 THE LINN CONFIG APPLICATION (continued...) From the top window select ‘Sneaky Music DS (Preamp)’. On the ‘Advanced Configuration’ tab you will see the current pre-amplifier settings for the unit. Change the settings, if required.
-
Page 22: Final Steps
Turn on the NAS and wait for it to finish booting. Turn on the Sneaky Music DS. Turn on the wireless control point and start the Linn GUI. Follow the instructions in the Operation chapter of the Sneaky Music DS owner’s manual. -
Page 23: Technical Specifications
SNEAKY MUSIC DS INSTALLATION AND SETUP 10 TECHNICAL SPECIFICATIONS Signal-to-noise ratio Date of introduction March 2008 line outputs Better than -120 dB Type Network music player Channel balance Better than +/- 0.2 dB Supported file types WAV, FLAC, MP3 Channel separation Audio sample rates 7.35 k, 8 k, 11.025 k, 12 k, 14.7 k, 16 k, 22.05 k,... - Page 24 SNEAKY MUSIC DS INSTALLATION AND SETUP 10 TECHNICAL SPECIFICATIONS (continued...) Fuse 250 V, T1.6 A (not user replaceable) Dimensions 345 mm (w) x 44.5 mm (h) x 274 mm (d) 13.6” (w) x 1.8” (h) x 10.8” (d) Shipping dimensions 440 mm (w) x 115 mm (h) x 380 mm (d) 17.3”...
Need help?
Do you have a question about the SNEAKY MUSIC DS and is the answer not in the manual?
Questions and answers