Advertisement
Quick Links
NOTE: CarShow System is only compatible with vehicles equipped with Single-Disc SYNC systems
NOTICE OF INTENDED INSTALLATION AND USE
THE AUXILIARY VIDEO DISPLAY IS DISABLED WHEN THE VEHICLE'S PARKING BRAKE IS NOT
THE INSTALLER OF THIS PRODUCT MUST INSURE THE VIDEO DISABLE CONNECTION IS
IMPROPER INSTALLATION COULD DISTRACT THE DRIVER OR INTERFERE WITH SAFE OPERATION
OF THE VEHICLE, WHICH COULD RESULT IN SERIOUS INJURY OR DEATH, AND COULD ALSO
CARSHOW ELECTRONICS DISCLAIMS ANY LIABILITY FOR ANY BODILY INJURY OR PROPERTY
DAMAGE THAT MAY RESULT FROM ANY IMPROPER OR UNINTENDED INSTALLATION AND/OR USE.
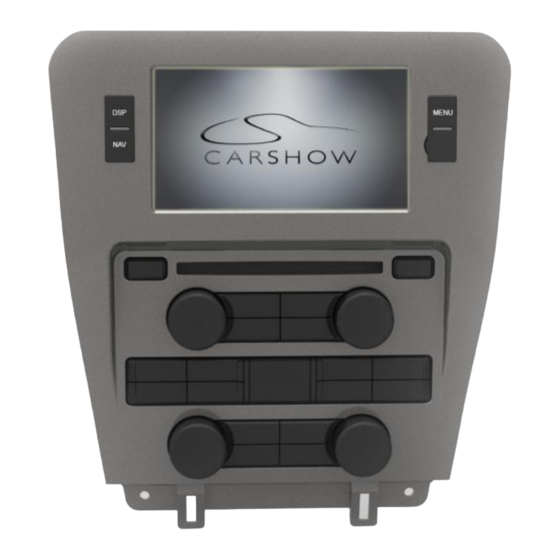
CarShow
Multi-Media Navigation System Installation Guide
WORKING PROPERLY PRIOR TO DELIVERY OF THE VEHICLE.
VIOLATE STATE AND/OR FEDERAL LAW.
Damage to the vehicle may occur
Do not proceed until process has been completed
Process must be carefully observed in order to
CAUTION
reduce the risk of damage to the accessory or
Process must be carefully observed in order to
Specific tools and equipment recommended for this
Observe safe practices, this process can be
dangerous and there is a risk of personal injury
TESTING and TROUBLESHOOTING
Content specific testing and troubleshooting points
ENGAGED
STOP
CAUTION
vehicle
CRITICAL
ensure a quality installation
TOOLS and EQUIPMENT
process
SAFETY RISK
Installation Guide
Copyright 2013 All Rights Reserved
Rev A
Advertisement

Related Manuals for Car Show CS-MUST10 Ford Mustang

Summary of Contents for Car Show CS-MUST10 Ford Mustang
- Page 1 Installation Guide NOTE: CarShow System is only compatible with vehicles equipped with Single-Disc SYNC systems NOTICE OF INTENDED INSTALLATION AND USE THE AUXILIARY VIDEO DISPLAY IS DISABLED WHEN THE VEHICLE’S PARKING BRAKE IS NOT ENGAGED THE INSTALLER OF THIS PRODUCT MUST INSURE THE VIDEO DISABLE CONNECTION IS WORKING PROPERLY PRIOR TO DELIVERY OF THE VEHICLE.
-
Page 2: Preparing For The Installation
CarShow Installation Guide - Ford Mustang PREPARING FOR THE INSTALLATION STEP Before you start, please read these critical steps below BEFORE YOU START THE INSTALLATION, READ THIS GUIDE! CHECK THE BATTERY Test the battery voltage to make sure it’s fully charged to a minimum of 12.8 VDC This only takes seconds and can save hours of troubleshooting later. - Page 3 CarShow Installation Guide - Ford Mustang REMOVE CENTER CONSOLE COMPONENTS STEP Remove Shifter Trim Bezel Carefully remove shift knob trim with panel pry tool CAUTION Remove Center Console Carefully remove back of center console with panel pry CAUTION tool and pull straight up as shown at right. Be sure to disconnect all harnesses.
- Page 4 CarShow Installation Guide - Ford Mustang Remove Radio Mounting Bolts Remove 7mm bolt on beneath climate controls on right hand side Remove Radio Mounting Bolts Remove 7mm bolt on beneath climate controls on left hand side Remove Radio Panel CAUTION Use your panel pry-tool to carefully remove radio dash panel starting with top.
- Page 5 CarShow Installation Guide - Ford Mustang Remove OEM Sync Display Remove 4 x 7mm bolts to remove Sync display Remove SYNC Display Carefully remove/unplug OEM SYNC display CAUTION Harness is extremely short so use **NOTE: caution !!** Unplug harness CAUTION Carefully unplug data harness from back of Sync display.
- Page 6 CarShow Installation Guide - Ford Mustang AC Module Removal NOTE: Removing this module is necessary to remove OEM Radio as it aids in the removal of harnesses at back of radio. The module also needs to be relocated before installation. (Shown in step 7) The AC module is EXTREMELY fragile.
- Page 7 CarShow Installation Guide - Ford Mustang OEM Radio/SYNC Display Removed OEM Radio/SYNC display removed at right Preparing OEM SYNC Display STEP You will need to prepare the OEM SYNC display to put back into dash. The following steps will help guide you through this process. Locate Included Foam Piece Foam piece for OEM SYNC display is shown at right Cut Adhesive Backing...
- Page 8 CarShow Installation Guide - Ford Mustang Wrap SYNC Display & AC module Wrap SYNC display & AC module in foam and be sure that they are lined up correctly as shown at right. Be sure that exposed adhesive is making contact with SYNC display.
- Page 9 CarShow Installation Guide - Ford Mustang OEM Radio Bezel Disassembly STEP You will need to disassemble the OEM radio bezel and prepare for re-install onto CarShow radio bezel OEM and Rosen Bezel Preparation OEM Radio Bezel on right OEM Radio Face Assembly Remove 15 x T10 torx screws to remove OEM Radio face Assembly.
- Page 10 CarShow Installation Guide - Ford Mustang Rosen Radio Bezel Re-install OEM Radio controls to CarShow radio bezel assembly using 13 x T10 OEM torx screws that were removed in previous step. NOTE: 2 Screw holes shown in picture at right do NOT get screws re-inserted.
- Page 11 CarShow Installation Guide - Ford Mustang Connect CarShow Harness Connect CarShow “T” harness to OEM harnesses. CAUTION Use care not to pinch or damage cables as this will cause performance issues/failures Connect/Install OEM Radio Chassis Connect OEM Radio chassis to CarShow “T” harness. CAUTION Be sure to connect AM/FM &...
- Page 12 CarShow Installation Guide - Ford Mustang Snap Radio Face Assembly Into Place Carefully snap radio face assembly into place. Then, with the connectors Fully Engaged, turn the vehicle on and verify system powers up. ENABLE INSTALLER SETTINGS STEP You will need to select certain settings based on any Optional Equipment that you may have installed Launch the Setting Screen From the AM/FM screen, select “Settings”...
- Page 13 CarShow Installation Guide - Ford Mustang Perform Pre-Delivery Tests STEP You will need to perform several Pre-Delivery Tests to ensure customer satisfaction Some optional equipment may not be applicable Turn the vehicle ON and System ON Confirm the unit starts up properly Troubleshooting 1) Reset the System while the Vehicle is ON 2) Confirm all connectors are properly installed...
- Page 14 CarShow Installation Guide - Ford Mustang Select Reverse Camera Confirm the backup camera screen shows in reverse Troubleshooting 1) Confirm the Camera is set to ON in the Installer Settings 2) Confirm the Camera is receiving 12VDC as required Main Harness Diagram Option Harness Diagram CarShow Copyright 2013 All Rights Reserved...
- Page 15 CarShow Installation Guide - Ford Mustang CarShow Copyright 2013 All Rights Reserved Installation Guide CS-MUST-IG Rev A Page 15...
Need help?
Do you have a question about the CS-MUST10 Ford Mustang and is the answer not in the manual?
Questions and answers