
Related Manuals for Raymarine Ray260


Summary of Contents for Raymarine Ray260
- Page 1 Ray260 Installation and operation instructions Date: 1 1-2013 Document number: 81343-3-EN © 2013 Raymarine UK Limited...
- Page 3 Product handbooks The latest versions of all English and translated handbooks are available to download in PDF format from the website www.raymarine.com. Please check the website to ensure you have the latest handbooks.
-
Page 5: Table Of Contents
6.10 Adjusting the LCD backlight level ......38 6.11 Adjusting the LCD contrast........38 Chapter 14 Spares and accessories ....77 6.12 Changing the transmit power ......39 14.1 Ray260 Spares & Accessories ......78 6.13 GPS setup ............39 14.2 SeaTalk cables and accessories ....... 78 6.14 Handset station priority ........ - Page 6 Appendix B NMEA 2000 sentences ....82 Appendix C VHF Channels ......... 83 Appendix D Phonetic alphabet......90 Appendix E Prowords ......... 91 Ray260...
-
Page 7: Chapter 1 Important Information
A certified installation qualifies for enhanced In an emergency you can use your product to make an automatic product warranty benefits. Contact your Raymarine dealer for DSC distress call. further details, and refer to the separate warranty document packed with your product. -
Page 8: General Information
Disclaimer You do not need a license to operate this product within Raymarine does not warrant that this product is error-free or that sovereign waters of Canada or the US. You will need a license it is compatible with products manufactured by any person or to operate this radio outside of Canada or the US. - Page 9 Directive requires the recycling of waste electrical and electronic ATIS is active. equipment. Whilst the WEEE Directive does not apply to some Raymarine products, we support its policy and ask you to be EMC installation guidelines aware of how to dispose of this product.
-
Page 10: Technical Accuracy
Technical accuracy To the best of our knowledge, the information in this document was correct at the time it was produced. However, Raymarine cannot accept liability for any inaccuracies or omissions it may contain. In addition, our policy of continuous product improvement may change specifications without notice. -
Page 11: Chapter 2 Document And Product Information
Chapter 2: Document and product information Chapter contents • 2.1 Handbook information on page 12 • 2.2 Product information on page 12 Document and product information... -
Page 12: Handbook Information
2.1 Handbook information 2.2 Product information This handbook contains important information regarding your The Ray260 is a Class D Digital Selective Calling (DSC) VHF DSC VHF Radio. radio. DSC enables you to make a selective call to a specific radio, and to transmit and receive position information to and from the selected radio. -
Page 13: Chapter 3 Planning The Installation
Chapter 3: Planning the installation Chapter contents • 3.1 System integration on page 14 • 3.2 Typical systems on page 15 • 3.3 Installation checklist on page 16 • 3.4 Schematic diagram on page 16 • 3.5 System protocols on page 17 •... -
Page 14: System Integration
• RS130 SeaTalk or NMEA 0183 with an NMEA 0183 to NMEA 2000 converter. • RS125 • Raymarine multifunction display equipped with internal GPS Note: The Ray260 does not support connection to NMEA 0183 and SeaTalk at the same time. Ray260... -
Page 15: Typical Systems
3.2 Typical systems The Ray260 can be installed as a standalone radio with peripherals or as part of a marine electronics network. Standalone DSC VHF radio system D12614-3 1. Ray260 base station 2. Handset 3. Handset extension cable 4. Handset adaptor cable 5. -
Page 16: Installation Checklist
SeaTalk INTCM INTCM D1281 1-1 1. Station 1 active speaker 2. Station 1 handset 3. Ray260 base station 4. Loud hailer 5. GPS receiver 6. Station 2 active speaker 7. Station 2 handset 8. Station 3 handset 9. Station 3 passive speaker 10. -
Page 17: System Protocols
3.5 System protocols 3.6 Parts supplied Your product can send and receive position information, e.g. The parts supplied with your Ray260 are shown below. latitude and longitude using any of the following protocols: • SeaTalk • NMEA 2000 • NMEA 0183... - Page 18 Ray260...
-
Page 19: Chapter 4 Cables And Connections
Chapter 4: Cables and connections Chapter contents • 4.1 General cabling guidance on page 20 • 4.2 Connections overview on page 20 • 4.3 Power connection on page 21 • 4.4 NMEA 0183 connection on page 22 • 4.5 Loud hailer connection on page 22 •... -
Page 20: General Cabling Guidance
4.1 General cabling guidance 4.2 Connections overview The connections shown below are available on the Ray260 Cable types and length Base station. It is important to use cables of the appropriate type and length • Unless otherwise stated use only standard cables of the correct type, supplied by Raymarine. -
Page 21: Power Connection
7 A (if only 1 device is connected) within power cable Note: The suitable fuse rating for the thermal breaker is dependent on the number of devices you are connecting. If in doubt consult an authorized Raymarine dealer. Cables and connections... -
Page 22: Nmea 0183 Connection
The NMEA 0183 wires on the power/data cable can be used to A single 30 watt loud hailer can be connected to the base station connect the radio to a GPS receiver or a Raymarine multifunction via the loud hailer wires on the power / data cable. -
Page 23: Handset Connection
4.6 Handset connection 4.7 Passive speaker connection Up to 3 stations can be connected to the unit. A passive speaker can be connected to the handset cable using the external speaker pigtail wires. A station must include a handset and can include a passive or an active speaker. -
Page 24: Active Speaker Connection
4.8 Active speaker connection 4.9 SeaTalk connection An active speaker can be connected using the handset cable or The Ray260 can interface with Raymarine GPS receivers and handset extension cable. Raymarine multifunction displays using the SeaTalk connector. A Raymarine SeaTalk... -
Page 25: Chapter 5 Location And Mounting
Chapter 5: Location and mounting Chapter contents • 5.1 General location requirements on page 26 • 5.2 Base station dimensions on page 27 • 5.3 Base station mounting on page 28 • 5.4 Speaker mounting on page 28 • 5.5 Handset mounting on page 29 Location and mounting... -
Page 26: General Location Requirements
Ensure that the antenna is connected to the radio before transmission. Raymarine declares a Maximum Permissible Exposure (MPE) radius of 1.5 metres (4.9 ft) (per OET Bulletin 65) for this system, assuming 25 watts output to an omnidirectional antenna of 3dBi gain or less. -
Page 27: Base Station Dimensions
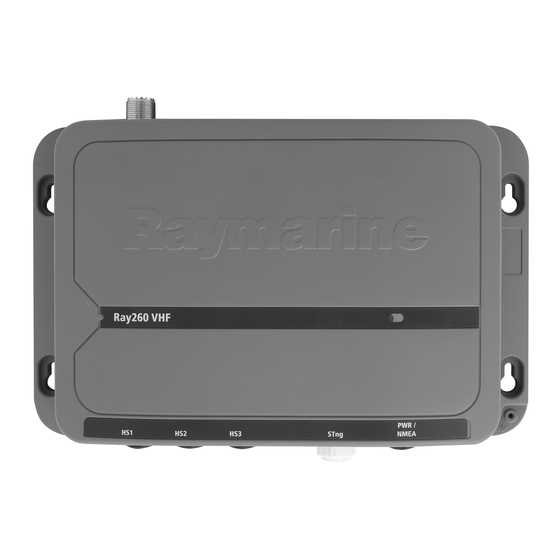
5.2 Base station dimensions The dimensions of the Ray260 base station are shown below. D12607-1 112 mm (4.4 in) 112 mm (4.4 in) 20.3 mm (0.799 in) 15.55 mm (0.61 in) D12606-1 269.5 mm (10.6 in) 25 mm (0.98 in) 168 mm (6.6 in) -
Page 28: Base Station Mounting
5.3 Base station mounting 5.4 Speaker mounting In order to mount the Ray260 base station follow the steps below. In order to mount a passive or active speaker follow the steps below. Note: Raymarine recommends mounting the unit vertically. D12608-1 The speaker is designed to be flush mounted. -
Page 29: Handset Mounting
5.5 Handset mounting 5. Hold the clip in place and secure using the screws provided. 6. Pull the connector end of the cable through the hole in the In order to mount the handset clip follow the steps below. mounting panel. Note: The handset extension cable includes a speaker cable. - Page 30 Ray260...
-
Page 31: Chapter 6 Getting Started
Chapter 6: Getting started Chapter contents • 6.1 Controls on page 32 • 6.2 Switching the radio on on page 32 • 6.3 Switching the radio off on page 33 • 6.4 Voltage detection on page 33 • 6.5 Handset display LCD overview on page 34 •... -
Page 32: Controls
With the power off: Ray260 / Ray 2 60 AIS Ray260E / Ra y 260E AIS 1. Press the red 16/9 / 16 PLUS button. The radio will power up and the radios MMSI number is displayed on-screen for approximately 3 seconds before displaying the main screen. -
Page 33: Switching The Radio Off
6.3 Switching the radio off 6.4 Voltage detection To switch the radio off follow the steps below. The radio detects the power supply voltage and a warning is displayed if the supply voltage is under or over recommended With the radio switched on: power. -
Page 34: Handset Display Lcd Overview
Indicates that your radio will not automatically switch to 5. Call time the channel requested by an incoming DSC call but will prompt you to manually accept or decline the channel The time the current call has been active. Ray260... -
Page 35: Entering Your Mmsi Number
12. Select Back to go back to the DSC menu. Note: You can only enter the MMSI number once, if you have stored an incorrect MMSI number in your product, the product will have to be reset by an authorized Raymarine dealer. Getting started... -
Page 36: Entering Your Atis Id
12. Select Back to go back to the ATIS Operation menu. Note: You can only enter the ATIS ID number once, if you have stored an incorrect ATIS ID number in your product, the product will have to be reset by an authorized Raymarine dealer. Ray260... -
Page 37: Selecting Nmea 0183 Or Seatalk Ng Connection
6.8 Selecting NMEA 0183 or SeaTalk 6.9 Regional programming connection The frequency band of the product can be changed and must be set to the region the product will be used in. The type of connection in use must be selected (i.e. SeaTalk The regions available are: or NMEA 0183). -
Page 38: Adjusting The Lcd Backlight Level
Arrow and Right Arrow soft buttons to adjust the backlight Arrow and Right Arrow soft buttons to adjust the contrast to to the required level. the required level. 5. Select Ok to confirm the new backlight level. 5. Select Ok to confirm the new contrast level. Ray260... -
Page 39: Changing The Transmit Power
DSC distress transmissions. Position data received from other vessels can be sent to and displayed on a connected Raymarine multifunction display. No GPS position If no GPS data is available, after 10 minutes of no data the GPS icon flashes, NO POS DATA and NO GPS is displayed on screen and an audible warning is sounded. -
Page 40: Handset Station Priority
AM 0 1 :2 3 UT CHANNEL NAM E CHANNEL NAM E 0 0 1 A 0 0 2 8 A 0 0 8 8 A 0 0 1 A 0 0 2 8 A 0 0 8 8 A Ray260... -
Page 41: Chapter 7 Digital Selective Calling (Dsc)
Chapter 7: Digital selective calling (DSC) Chapter contents • 7.1 Digital Selective Calling (DSC) on page 42 • 7.2 Distress calls on page 43 • 7.3 Urgency calls on page 45 • 7.4 Safety calls on page 46 • 7.5 Routine calls on page 46 •... -
Page 42: Digital Selective Calling (Dsc)
• Local time (must be input manually if no GPS position data is available). • Transmission frequency. Once a safety call is sent it must be followed with a SECURITE voice message on channel 16 and include the necessary details. Ray260... -
Page 43: Distress Calls
7.2 Distress calls Making a distress call In an emergency you can use your product to make an automatic Making a designated distress call DSC distress call. RX HI RX HI When making a distress call you can specify the nature of the DIS TRESS DIS TRESS UND ESI GNATED... -
Page 44: Receiving A Distress Call
Message received from vessel in distress or details of and the envelope icon will flash on-screen to let you know a the distress message has been received. When connected to a Raymarine multifunction display the position data from a distress call can Message ends also be display in the chart application. -
Page 45: Urgency Calls
7.3 Urgency calls Acknowledging a distress relay sent to your vessel If a distress relay is specifically sent to your vessel this will be Making an urgency call because the sender deems you to be in a position to assist in the rescue. -
Page 46: Safety Calls
No operator available The radio is re-tuned to channel 16. UNAVAILABLE Operator temporarily unavailable 3. Listen on channel 16 for the safety message. DISABLE Equipment disabled UNABLE CH Unable to use proposed channel UNABLE MODE Unable to use proposed mode Ray260... -
Page 47: Group Calls
7.6 Group calls Making a routine DSC call You can use your product to make a routine DSC call to contact Routine group calls can be made to groups of vessels sharing saved in the phonebook. the same Group MMSI numbers. 1. -
Page 48: Position Requests
The position data will be available on a Raymarine multifunction display connected over Position requests can be sent to any contact stored in the phone NMEA 0183 or SeaTalk book or by manually inputting the MMSI number of the station. -
Page 49: Test Calls
• Test call to another vessel that has a radio that supports for up to 1 hour or until the call is acknowledged. the test call feature. If the receiving radio is a Raymarine radio, this type of test call requires a manual response Important: The voice mail feature should only be used with (acknowledgement) from the call recipient. -
Page 50: Received Call Logs
From the DSC menu: 1. Select PHONEBOOK. 2. Select the contact you want to delete. 3. Select DELETE. 4. Select DELETE again to confirm and delete the contact. The phonebook is displayed and the contact is now deleted. Ray260... -
Page 51: Group List
7.13 Group list 7.14 DSC options Groups can be created to the MY GROUP ID list to enable DSC options can be set from the DSC options menu. group calling. When automatic channel • ON AUTO CH Existing groups can be edited and deleted as required. CHANGE change is turned on the •... - Page 52 Ray260...
-
Page 53: Chapter 8 Vhf Operations
Chapter 8: VHF operations Chapter contents • 8.1 Scan mode on page 54 • 8.2 Watch modes on page 54 • 8.3 Priority channels on page 55 • 8.4 Favorite channels on page 55 • 8.5 Sensitivity on page 56 •... -
Page 54: Scan Mode
3. Select END at any time to stop the watch mode and resume channel 16 is scanned. normal operation. Note: On the Ray260 and Ray260 AIS, if the weather alert function is activated the weather alert channel is included in the scan. -
Page 55: Priority Channels
8.3 Priority channels 8.4 Favorite channels Channel 16 is the dedicated priority channel. Favorite channels can be saved to memory and assigned to the soft buttons during normal operation. The default secondary priority channel is channel 09, however this can be changed if required. A total of 9 channels can be saved as favorites, Favorite channels are assigned to 1 of 3 banks of favorite channels. -
Page 56: Sensitivity
3. Select BACK or press the Clear button to return to the previous menu. • DENMARK PLEA. • DENMARK FISH. • FINLAND PLEA. • FINLAND FISH. • HOLLAND (Netherlands) • NORWAY PLEA. • NORWAY FISH. • SWEDEN PLEA. • SWEDEN FISH. • UK 2. Select the required private channel set. Ray260... -
Page 57: Automatic Transmitter Identification System (Atis) And Marcom-C Mode
You can enable or disable ATIS using the menus (except on Marcom-C configured units). Marcom-C mode Marcom-C mode is a restricted Ray260 configuration for VHF operators with a Marcom-C license. This is applicable to radios operated exclusively in European inland waterways using the ATIS system. -
Page 58: Ais
8.8 AIS 8.9 Voice recorder The Ray260 AIS and Ray260E AIS have a built in AIS receiver. The radio includes a voice recorder function. The voice recorder enables automatic recording of up to 90 With the built-in AIS receiver switched on AIS information can be sent to a connected Raymarine multifunction display using either seconds of a received transmission. -
Page 59: System Configuration
8.10 System configuration The options available from the system configuration menu are shown below. BACKLIGHT Allows adjustment • OFF to HIGH in 10 increments. to the LCD’s backlight level. CONTRAST Allows adjustment • LOW to HIGH in 10 increments. to the LCD’s contrast level. - Page 60 Ray260...
-
Page 61: Chapter 9 Hailer, Fog Horn, And Intercom
Chapter 9: Hailer, Fog horn, and Intercom Chapter contents • 9.1 Hailer on page 62 • 9.2 Fog horn on page 62 • 9.3 Handset intercom on page 63 Hailer, Fog horn, and Intercom... -
Page 62: Hailer
You can adjust the volume of the fog horn function. During manual or auto fog horn mode: 1. Use the Up Arrow soft button to increase the hailer volume. 2. Use the Down Arrow soft button to decrease the hailer volume. Ray260... -
Page 63: Handset Intercom
9.3 Handset intercom Installations that contain more than 1 handset can use the intercom feature. The intercom feature allows voice communication between connected handsets. The intercom call can be initiated from any handset. Using the intercom From the main menu: 1. - Page 64 Ray260...
-
Page 65: Chapter 10 Maintenance
Chapter 10: Maintenance Chapter contents • 10.1 Maintenance on page 66 • 10.2 Routine checks on page 66 • 10.3 Cleaning on page 67 • 10.4 Unit cleaning instructions on page 67 Maintenance... -
Page 66: Maintenance
10.1 Maintenance 10.2 Routine checks The Ray260 has no user serviceable parts or adjustments. The following periodic checks should be made: Never remove the cover or attempt to service the product, doing • Examine cables for signs of damage, such as chafing, cuts or so may invalidate your product warranty. -
Page 67: Cleaning
10.3 Cleaning 10.4 Unit cleaning instructions Best cleaning practices. The unit does not require regular cleaning. However, if you find it necessary to clean the unit, please follow the steps below: When cleaning this product: 1. Ensure power is switched off. •... - Page 68 Ray260...
-
Page 69: Chapter 11 Troubleshooting
Chapter 11: Troubleshooting Chapter contents • 11.1 Troubleshooting on page 70 • 11.2 VHF Radio troubleshooting on page 71 Troubleshooting... -
Page 70: Troubleshooting
The troubleshooting information provides possible causes and corrective action required for common problems associated with marine electronics installations. All Raymarine products are, prior to packing and shipping, subjected to comprehensive test and quality assurance programs. However, if you experience problems with the operation of your product this section will help you to diagnose and correct problems in order to restore normal operation. -
Page 71: Vhf Radio Troubleshooting
11.2 VHF Radio troubleshooting Problems with your VHF radio and their possible causes and solutions are described below: Radio will not power up. Loose wiring connection. Check all cable connections. Blown fuse. Check fuse and replace if necessary. DSC functions are not working. MMSI number not programmed. - Page 72 Ray260...
-
Page 73: Chapter 12 Technical Support
Chapter 12: Technical support Chapter contents • 12.1 Raymarine customer support on page 74 Technical support... -
Page 74: Raymarine Customer Support
12.1 Raymarine customer support Raymarine provides a comprehensive customer support service. You can contact customer support through the Raymarine website, telephone and e-mail. If you are unable to resolve a problem, please use any of these facilities to obtain additional help. -
Page 75: Chapter 13 Technical Specification
Chapter 13: Technical specification Chapter contents • 13.1 Technical specification on page 76 Technical specification... -
Page 76: Technical Specification
Better than 80 dB Spurious noise rejection Better than –80 dB Inter modulation rejection 80 dB (typical) Audio output (active speaker) Audio distortion Less than 10% Hum and noise in audio Better than –40 dB Handset Audio output power 3.5 W (typical) Ray260... -
Page 77: Chapter 14 Spares And Accessories
Chapter 14: Spares and accessories Chapter contents • 14.1 Ray260 Spares & Accessories on page 78 • 14.2 SeaTalk cables and accessories on page 78 Spares and accessories... -
Page 78: Ray260 Spares & Accessories
Ray260 VHF radio. products. Description Part Number Description Part No Notes Ray260 handset US version with 10 m A80196 SeaTalk starter kit T70134 Includes: (32.8 ft.) adaptor cable • 1 x 5 Way connector (A06064) - Page 79 Description Part No Notes A80001 SeaTalk Inline Provides direct connection of terminator a spur cable to the end of a backbone cable. No T-piece required. SeaTalk Blanking plug A06032 R12112 ACU / SPX SeaTalk Connects an SPX course spur cable 0.3 m (1.0 ft) computer or an ACU to a SeaTalk backbone.
- Page 80 Ray260...
-
Page 81: Appendix A Nmea 0183 Sentences
Appendix A NMEA 0183 sentences The radio supports the following NMEA 0183 sentences. Ray260 / Ray260E Ray260 AIS / Ray260E AIS Sentence Description Receive Transmit Receive Transmit ● ● Digital Selective Calling ● ● Expanded Digital Selective Calling ● AIS VHF Data Link Message ●... -
Page 82: Appendix B Nmea 2000 Sentences
Appendix B NMEA 2000 sentences The radio supports the following NMEA 2000 sentences. These are applicable to NMEA 2000 and SeaTalk protocols. Ray260 / Ray 260E Ray260 AIS / Ray260E AIS Sentence Description Receive Transmit Receive Transmit ● ● ●... -
Page 83: Appendix C Vhf Channels
Appendix C VHF Channels US Marine VHF Channels and Frequencies CH No. TX Freq RX Freq Single Freq 156.050 156.050 Port operations and commercial, VTS. Available only in New Orleans / Lower Mississippi area. 156.150 156.150 US Government only. 156.250 156.250 Port operations or VTS in the Houston, New Orleans and Seattle areas. - Page 84 Intership, commercial, non-commercial and safety: Maybe used for search and rescue communications between ships and aircraft. 156.350 156.350 All areas Intership, ship/shore, commercial. 156.400 156.400 WC, EC Intership, commercial and safety. Also assigned for operations in the Lake Winnipeg area. Ray260...
- Page 85 Area of CH No. TX Freq RX Freq operation 156.450 156.450 Intership, ship/shore, commercial, non-commercial and ship movement. Maybe used to communicate with aircraft and helicopters in predominantly maritime support operations. 156.500 156.500 AC, GL Intership, ship/shore, commercial, non-commercial, safety and ship movement. May also be used for communications with aircraft engaged in coordinated search and rescue and antipollution operations.
- Page 86 Intership and ship/shore Canadian Coast Guard and other government agencies. 161.775 AC, GL Safety: Continuous Marine Broadcast (CMB) service. 157.225 161.825 Ship/shore and public correspondence. 157.275 161.875 AC, GL ,NL Ship/shore and public correspondence. 157.325 161.925 Ship/shore and public correspondence. Ray260...
- Page 87 Area of CH No. TX Freq RX Freq operation 157.375 161.975 AC, GL, NL Ship/shore and public correspondence. 157.425 162.025 AC, GL, NL Ship/shore and public correspondence. Area of operation • AC — Atlantic Coast, Gulf and St. Lawrence River up to and including Montreal. •...
- Page 88 4. Channels 15 and 17 may also be used for on-board communications provided the effective radiated power does not exceed 1 Watt. 5. The use of channels 75 and 76 should be restricted to navigation related communications only and all precautions should be taken to avoid harmful interference to channel 16. Transmit power is limited to 1 Watt. Ray260...
- Page 89 Private Channels (Europe only) Channel Designa- Country tions TX Freq RX Freq Channel Use Belgium 162.425 162.425 Marina Denmark 155.500 155.500 Pleasure 155.525 155.525 Pleasure Finland, 155.500 155.500 Pleasure Norway & 155.525 155.525 Pleasure Sweden 155.650 155.650 Pleasure Holland 157.550 162.150 Marina (Nether-...
-
Page 90: Appendix D Phonetic Alphabet
To help make call letters more clearly understood, and to assist in spelling out similar sounding or unfamiliar word, radiotelephone users employ the international phonetic alphabet. ALPHA NOVEMBER BRAVO OSCAR CHARLIE PAPA DELTA QUEBEC ECHO ROMEO FOXTROT SIERRA GOLF TANGO HOTEL UNIFORM INDIA VICTOR JULIET WHISKEY KILO X-RAY LIMA YANKEE MIKE ZULU Ray260... -
Page 91: Appendix E Prowords
Appendix E Prowords Prowords can be used to simplify and speed up radio communications. Proword Meaning ACKNOWLEDGE Have you received and understood? CONFIRM Is that correct? CORRECTION An error has been made? I SAY AGAIN I repeat (e.g. important information). I SPELL Phonetically spelling of the word. - Page 92 Ray260...
- Page 94 www.ra ym a rin e .c o m...
Need help?
Do you have a question about the Ray260 and is the answer not in the manual?
Questions and answers