
Related Manuals for Miele PT 7136 Plus


Summary of Contents for Miele PT 7136 Plus
- Page 1 Operating and Installation manual Vented Dryer PT 7136 Plus To prevent accidents and machine damage read these instructions before installation or use. M.-Nr. 06 855 790...
-
Page 2: Table Of Contents
Contents IMPORTANT SAFETY INSTRUCTIONS ....... . . 3 Guide to the dryer ..........6 Control panel . -
Page 3: Important Safety Instructions
Faulty components must only be Check the packaging, the dryer replaced with genuine Miele spare and accessories for any signs of parts. Only genuine Miele spare parts damage. Do not use a damaged can guarantee the safe operation of this appliance. - Page 4 IMPORTANT SAFETY INSTRUCTIONS Never connect an exhaust duct to an active chimney, vent flue or The installation of this unit at non room venting ductwork. Danger of stationary locations (e.g. ships) toxication by draw back of exhaust must be performed by a qualified fumes.
-
Page 5: Save These Instructions
Using accessories – Do not dry mops, floor cloths, etc. in Only use genuine Miele this machine if they contain accessories and replacement substances such as wax or chemical parts. If other parts are used, cleaning agents. -
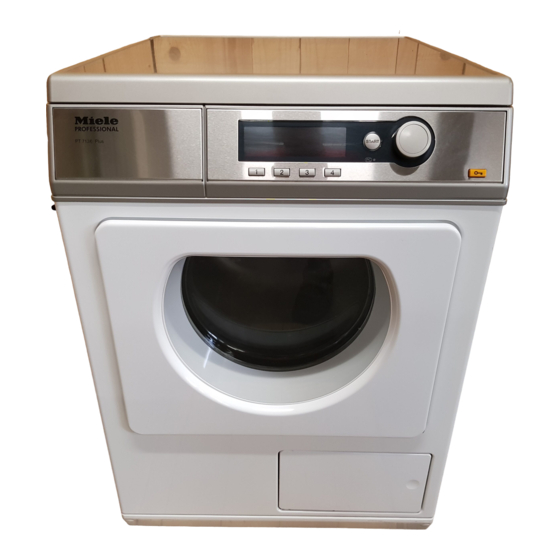
Page 6: Guide To The Dryer
Guide to the dryer Control panel a Display* d Optical interface PC See the following pages for more Allows a service technician to check information and update the drying programs b Direct select buttons e Jog shuttle To select a drying program directly. Turn to select menus You can also save a "Favorite"... -
Page 7: Display Function
Guide to the dryer Display function Contents in the display will vary with program offering. Main menu Cottons Programme selection ... Minimum iron Settings F ... Woollens handcare 10:00 Smoothing The display shows the main menu (with factory default settings). "Program selection" is highlighted. If the display is dark (in Stand-by mode) turn the jog shuttle. - Page 8 Guide to the dryer Menu Program selection Programme Back A selection Cottons Minimum iron Woollens handcare ^ All pre-set programs can be selected with the jog shuttle. Depending on the direction the jog shuttle is turned the highlighter moves up or down. The arrows e- at the right side of the display show that more selections are available.
-
Page 9: Before Using For The First Time
Before using for the first time The appliance must be correctly installed and connected before the first use. Please see the "Installation instructions." Welcome screen The Welcome screen shows when the dryer is turned on for the first time. The welcome screen will not show anymore, when the total use time of the dryer exceeds one hour. -
Page 10: Use
Fabric care labels – Wool and wool blends tend to felt and shrink. Dry wool and wool Before drying, check fabric care labels blends in the "Woollen handcare" for special drying instructions. program. q = Drying with normal temperature – The fine fabric of down filled items r = Drying with low temperature tend to shrink. -
Page 11: Sort The Laundry
1. Sort the laundry 2. Load the laundry ^ Loosen up the washed laundry. ^ Use the a button to open the drum door. ^ For even drying results sort by ^ Load the laundry loosely into the desired dryness, fiber/fabric, size and residual moisture after spinning. -
Page 12: Coin Mechanism
3. Select a program 6. Starting a program Two program selection possibilities: "Start" flashes when a program can be started. ^ Select a "Favorite" by pressing the ^ Press the "Start" button. respective direct select button. The "Start" button lights. ^ Select from the "Program selection"... - Page 13 7. At the end of a program Remaining time When a program is selected, the "Anti-crease" (if selected) and "End" approximate duration is displayed. This mark the end of a program in the is the "remaining time". display. During the anti-crease phase the drum will turn in intervals if the The program duration can vary due to laundry is not immediately removed...
-
Page 14: Coin Mechanism
Coin mechanism Adding/removing laundry during a drying program For coin mechanism operated ^ Press the a button. machines: Money or tokens will be lost when the door is opened after ^ Open the door. program start or when canceling a program. -
Page 15: Program Guide
Program guide Programs may vary depending on the offerings of your machine. Cottons Load size: 14.3 lbs (6.5 kg) Extra dry, Normal+, Normal Items Single and multilayered cotton and linen laundry e.g. terry towels, beach towels, bath robes, T-Shirts, underwear, cottons bed linens, baby clothing, etc. - Page 16 Program guide Woollen handcare Load size: 5.5 lbs (2.5 kg) Items Woolen fabrics Note – Woolen items will be loosened up and fluffed in a short time, but not completely dried. – Remove the items immediately after the program ends and allow them to air dry.
- Page 17 Program guide Jeans Load size: 7.7 lbs (3.5 kg) Normal, Hand iron r Items Denim fabric items, pants, jackets, skirts or shirts, etc. Shirts Load size: 5.5 lbs (2.5 kg) Normal, Hand iron r Items Shirts and dress shirts. Outerwear Load size: 7.7 lbs (3.5 kg) Normal, Hand iron r Items...
-
Page 18: Delay Start
Delay start The delay start option allows you to select the program end time. The program start can be delayed from 30 minutes to 24 hours. Select the sub-menu Timer Cottons Normal+ Low temp. Duration 1:47 h Low temp. B Timer Y Save Back A... -
Page 19: Favorites
Favorites The dryer has the option to save the most used drying programs on the direct select buttons. The option "Save" must be selected in "Settings - Supervisor level". Contact Technical Service for access to this level. Selecting/Changing a Favorite ^ Close the door. - Page 20 Favorites Depending on the selection the display shows one of the following submenus – Select a program Programme Back A selection Cottons Minimum iron Woollens handcare ^ Select the desired program with the jog shuttle and confirm. Important: If no selection is made in the sub-menu, the display will switch back to the basic menu after 20 seconds.
-
Page 21: Low Temp
Favorites Low temp. To dry delicate items (fabric care symbol r) e.g. made from acrylic, press the "Low temp." button. – The temperature is reduced and the program duration is extended. ^ Press the D "Low temp." button. Saving a Favorite The basic menu shows all selected components. -
Page 22: Cleaning And Care
Cleaning and Care Cleaning the lint filter Check and clean the lint filter when the following message shows: "Clean the filters" or "Clean out airways". A two-piece lint filter in the dryer fan cavity collects the lint. It has to be removed and disassembled. - Page 23 Cleaning and Care Clean the lint filters - dry Cleaning the fan cavity Check the fan cavity regularly. Clean only if heavily soiled. ^ Open the door. ^ Remove the lint with your fingers or ^ Turn the knobs, a, of the left and use a vacuum.
-
Page 24: Cleaning The Exterior And The Control Panel
Cleaning and Care Cleaning the exterior and the control panel To reduce the risk of electric shock, disconnect this appliance from the power supply by unplugging or tripping the circuit breaker. Do not use an abrasive cleaner, a glass cleaner or an all-purpose cleaner. -
Page 25: Frequently Asked Questions
– See "Clean out immediately. airways". Technical fault A numerical fault In some cases "Clean out To delete the message: message shows, airways" is displayed. – Confirm with "OK". e.g. "F47". If the problem persists call Miele Technical Service Department. - Page 26 Frequently asked questions What if Possible cause At the end of a The dryer reminds you to – Remove and clean the lint filter. program clean the lint filter. To delete this message: Clean filter. – Confirm with "OK". Clean the lint The cycle of the "Clean –...
-
Page 27: Other Faults
Frequently asked questions Other faults What if ... Possible fault The program In some cases "Clean out airways" is displayed. See "Clean out airways". Open and close the dryer door. runs too long or stops. The air supply is Open a window or door to insufficient. - Page 28 Frequently asked questions What if ... Possible fault What if there is The dryer is connected to a – The dryer must only be condensed water in collective exhaust duct installed with a non-return the drum? where the non-return flap flap to the collective does not work correctly.
- Page 29 "Standby" to save energy. shuttle does not If pressing a button does Call the Miele Technical light. not bring the display and Service Department. The "Start" indicator light back on, a fault has flashes slowly.
-
Page 30: Changing The Light Bulb
^ Slide a screwdriver with a wide head underneath the side edge of the bulb cover and twist (see illustration). ^ Flip down the bulb cover. ^ Replace the light bulb with a temperature proof bulb available from Miele. -
Page 31: After Sales Service
After sales service In the event of a fault which you cannot The PC indicator allows a service fix yourself, please contact the Miele technician to check and update the Technical Service Department at the drying programs. address on the back of this booklet. -
Page 33: Installation Instructions
Installation Instructions To prevent accidents and machine damage read these instructions before installation or use. -
Page 34: Installation
Installation Front view a Exhaust connection d Door e Lint filter flap The exhaust hose can be installed either at the rear, left or right of the f Four height adjustable feet dryer. g Stand b Power cord h Optional accessory: retaining clips c Control panel (use when installed on a cement base) - Page 35 Installation Side view Rear view a Lid over hang with transport grips (arrow) b Stand (Optional accessory)
- Page 36 Installation Top view Washer/ Dryer Stack The Miele dryer can be installed as part of a washer-dryer stack in combination with a Miele washer. An appropriate "stacking kit" available from Miele is required. Installation of the stacking kit must be completed by a Miele Service...
- Page 37 Installation on a cement base Coin mechanism The dryer can be equipped with a coin mechanism (optional accessory). Miele’s Technical Service will install the coin mechanism and program the dryer electronic. Empty the coin mechanism regularly to avoid the coins getting jammed.
- Page 38 Installation Installation Do not install a lockable or slide door in the pivoting area of the dryer door. Transporting the dryer to the installation site The rear overhang of the lid has transport grips. ^ Use the front dryer feet and the rear overhang to transport the dryer from the packaging base to the installation ^ The machine can be leveled by...
-
Page 39: Electrical Connection
The conversion must be performed by a Miele Service The dryer comes with a power cord Technician. without a plug. The machine is supplied as standard... -
Page 40: Installation Of Exhaust Venting
Installation of exhaust venting General notes The dryer must only run if the moist exhaust air from the drying process is conducted outside by an installed exhaust duct vent. Disconnect the dryer from the mains during installation of the exhaust duct. The exhaust connection (e.g. -
Page 41: How To Calculate The Effective Duct Length
Installation of exhaust venting How to calculate the effective Tips about the ductwork duct length – Check with your local building code to determine the maximum allowable The overall duct length will determine duct length. the duct diameter. – Use a flexible metal pipe or rigid a ^ Measure the actual duct length metal pipe for venting. - Page 42 Installation of exhaust venting Additional duct lengths (4" rigid pipe only) Type of bend Radius Additional duct length Flexible metal duct – 3’ 3" (1 m) straight 5’ 11" – 45° angle 10" 4’ 11" – 90° angle 10" 8’ 2" Smooth metal duct –...
- Page 43 Installation of exhaust venting Example: Calculating the effective duct length and required internal duct diameter Rigid pipe Duct length Duct length 12’ 5" 3.8 m Wall duct with louvered wall vent 2’ 7" 0.8 m 90° bend 1’ 7" 0.5 m 20"...
-
Page 44: Determining The Position Of The Exhaust Connection
Installation of exhaust venting Determining the position of the exhaust connection The exhaust connection can be left at the rear of the dryer (factory standard) or moved to the left or right side of the dryer. Changing the position of the exhaust connection ^ Remove the cap turning it counterclockwise. -
Page 45: Exhaust Connection With A Flexible Exhaust Hose Or Rigid Pipe
Installation of exhaust venting Exhaust connection with a Window connection flexible exhaust hose or rigid pipe Using the connector supplied, an exhaust hose (4" [100 mm] diameter) can be installed. Necessary materials: – the supplied connector – a wall or window duct (optional accessory) –... - Page 46 Installation of exhaust venting Chimney connection 1 Pipe with connection nozzle (= single parts of the Miele wall pipe) 2 Connector for the flexible exhaust hose 3 Chimney, humidity insulated The appliance must not be connected to a chimney or vent flue which is in use.
-
Page 47: Direct Wall Connection
However, for the wall pipe to be installed a hole must be cut through the outer wall. Regard the Install manual for the Miele wall pipe and the dimension illustrations below. Necessary materials: – wall pipe (optional accessory) –... - Page 48 Installation of exhaust venting Dryer side view ^ Connect the flexible space ring, 2, to the wall pipe connector, 1. 1 Wall pipe ^ Push the dryer to the wall. 2 Flexible foam gasket (space ring)
- Page 49 Installation of exhaust venting Collective exhaust duct A non-return flap* (optional accessory, see right picture) per dryer must be installed directly into the collective exhaust duct. Otherwise the dryers can be damaged and the electrical safety compromised. When installing multiple dryers, increase the duct diameter.
-
Page 50: Technical Data
Technical Data Height 33 7/16" (850 mm) (adjustable + / - 1/4" (7 mm)) Width 23 7/16" (595 mm) Depth 27 9/16" (700 mm) Depth with the door open 46 3/4" (1,188 mm) Weight 123 lbs (56 kg) Drum 28.6 gal (130 l) Maximal load 14.3 lbs (6.5 kg) Dry laundry weight Power cord... -
Page 51: Caring For The Environment
Caring for the environment Disposal of the packing Disposal of an appliance materials Old appliances may contain materials that can be recycled. Please contact The cardboard box and packing your local recycling authority about the materials protect the appliance during possibility of recycling these materials. - Page 53 Menu Settings J to adjust standard settings The dryer controls can be adjusted to changing demands through the settings. Depending on the programming status of the machine – some settings may be visible and can be changed by all users (Menu "Settings J") –...
-
Page 54: Settings J
Settings J Opening the menu Settings Cottons Programme selection ... Minimum iron Settings F ... Woollens handcare 10:00 Smoothing ^ Select "Settings" J in the main menu and confirm by pressing the jog shuttle. Selecting Settings Settings Back A Language F ... Anti-crease Buzzer ^ Select the settings to be changed and confirm. -
Page 55: Language J
Settings J Language J Buzzer The displayed language can be set When the buzzer is selected a tone in the submenu "Language J". sounds at the end of a program. The flag behind the word "Language J" is a guide to find the settings menu in The end-of-program buzzer is turned case a foreign language is selected. - Page 56 Settings J Contrast/Brightness Lengthening the cooling time Display contrast and brightness can The cooling phase can be be adjusted in 10 levels. lengthened before the program is started. The laundry will be cooled. The bar shows the selected level. The bar shows the selected level. Standby Delivery status: 0 minutes (normal cooling down phase).
-
Page 57: Settings - Supervisor Level
Settings - Supervisor level The menu "Settings/Supervisor level" is locked with a code to prevent unauthorized access (except Language J). It must be activated by Technical Service. Settings Back A Supervisor level Access via code ^ Select "Access via code" and confirm. Entering the code ^ Enter the code "0 0 0"... -
Page 58: Drying Levels
Settings - Supervisor level Sort languages Drying levels The bars show the selected level. The language order can be set, Factory default: medium level when the option "Language access - international" is selected. – The program duration shortens (more moist) or lengthens (more dry). Supervisor level Drying level "Cottons"... -
Page 59: Cleaning The Lint Filters
Settings - Supervisor level Cleaning the airways Cleaning the lint filters The lint filters must be cleaned after The display "Clean filter" reminds the every drying cycle. Additionally the user to clean the lint filter. The user indicator "Clean out airways" lights can decide after how many once a certain level of lint is operating hours this reminder should... - Page 60 All rights reserved / 1406 M.-Nr. 06 855 790 / 00 en - USA...
Need help?
Do you have a question about the PT 7136 Plus and is the answer not in the manual?
Questions and answers