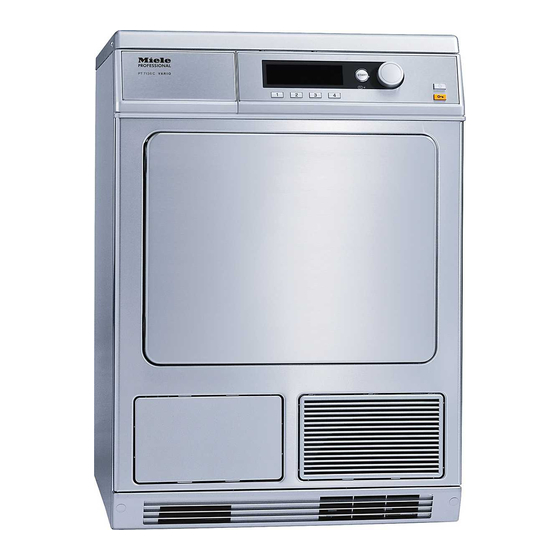
Miele PT 7135 C Vario Operating And Installation Instructions
Hide thumbs
Also See for PT 7135 C Vario:
- Operating and installation instructions (56 pages) ,
- Commissioning, programme chart and settings (36 pages) ,
- Instructions manual (15 pages)

Related Manuals for Miele PT 7135 C Vario


Summary of Contents for Miele PT 7135 C Vario
- Page 1 Operating and Installation Instructions Condenser Dryer PT 7135 C Vario en - US To prevent accidents and machine damage read these instructions before installation or use. M.-Nr. 10 278 390...
-
Page 2: Table Of Contents
Contents IMPORTANT SAFETY INSTRUCTIONS....... . . 4 Operating the dryer ..........7 Control panel . - Page 3 Contents Frequently asked questions ........28 Check and fault messages in the display .
-
Page 4: Important Safety Instructions
The tumble dryer is only intended for Only use genuine Miele accessories drying fabrics washed in a water and replacement parts. If other parts solution. Check fabric care labels to are used, warranty, performance and verify materials can be machine dried. - Page 5 IMPORTANT SAFETY INSTRUCTIONS To prevent the risk of fire, the To prevent the risk of fire, the following articles must not be dried in following articles or items must not be this tumble dryer: dried in this tumble dryer: – items which have not been washed. –...
- Page 6 IMPORTANT SAFETY INSTRUCTIONS GROUNDING INSTRUCTIONS This appliance must be grounded. In the event of a malfunction or breakdown, grounding will reduce the risk of electric shock by providing a path of least resistance for electric current. This appliance is equipped with a cord having an equipment-grounding conductor and a grounding plug.
-
Page 7: Operating The Dryer
Before using the machine for the first d PC/Optical interface time, ensure that it is correctly This is used by Miele service installed and connected. See technicians during servicing work for "Installation". testing purposes. -
Page 8: Display
Operating the dryer Display Main menu Cottons Program selection ... Minimum iron Settings F ... Woollens handcare 10:00 Smoothing When the dryer is switched on, the Main menu (with four favorite programs listed) appears with Program selection highlighted. Multi-function selector Turning the multi-function selector moves the highlighting to the next option. -
Page 9: Settings Menu J
Operating the dryer program selection menu Program Back A selection Cottons Minimum iron Delicates You can use the multi-function selector to select any program. The highlighting will move up or down depending on the direction the multi-function selector is turned in. The HV arrows on the right of the display, indicate further options. -
Page 10: Operating The Tumble Dryer In Laundromat Mode
Operating the dryer Operating the tumble dryer in Laundromat mode The Main menu will vary depending on the Controls setting selected. ^ The dryer is operated either with direct select buttons D, E, F, G or the multi-function selector. WS-direct select buttons, basic Cottons Normal+ Minimum iron... -
Page 11: Notes And Tips On Laundry Care
Notes and tips on laundry care 1. Sort the laundry – New dark-colored garments should be washed and dried separately Garment care label symbols from light-colored garments the first few times they are washed, to avoid Drying the risk of colors running and Normal/higher temperature discolouring other garments or even the plastic components in the tumble... -
Page 12: Load The Tumble Dryer
Notes and tips on laundry care 2. Load the tumble dryer . . . e.g. Machine iron or Hand iron if the laundry needs further processing Using the tumble dryer after drying. incorrectly could cause a fire. Read See separate booklet the "IMPORTANT SAFETY "Commissioning, Program chart and INSTRUCTIONS"... -
Page 13: Short Instructions
Short instructions A Sort the laundry It is very important to read the "Notes and tips on laundry care" section before proceeding. B Load the dryer To avoid damaging your laundry, when shutting the door check that no items of laundry have become trapped in the door opening. - Page 14 Short instructions C Select a program ^ Switch the dryer on by pressing the On/Off K button. Please note: – If no further selection is made within 15 minutes, the dryer will switch off automatically. 2. Selecting a program from the –...
- Page 15 Short instructions D Start the program program duration/Estimated time remaining The Start button will flash as soon as a program can be started. When a program is selected, the estimated duration will appear in the ^ Press the Start button. display.
- Page 16 Short instructions E Remove the laundry when the Check that all items have been program has finished removed from the drum. Anything Anti-crease (if selected) and End will left in the dryer could be damaged appear in the display to indicate that by overdrying when it is next used.
-
Page 17: Selecting A Program
Selecting a program Selecting/changing a program Main menu Cottons program selection ... Minimum iron Settings F ... Woollens handcare 10:00 Smoothing ^ Press shortcut button D. Main menu Cottons Normal Duration 0:50 h Low temp. Timer Y Save Back A ^ By turning the multi-function selector you can then highlight the following options in the display: Program (Cottons) or the drying level (Normal), and confirm your selection by... - Page 18 Selecting a program Note: If you do not make a selection in the sub-menu within approx. 20 seconds, the display will revert to the main menu. – programs with drying levels Cottons Normal+ Drying levels from Machine iron - Extra dry ^ Use the multi-function selector to select the drying level you want, and confirm your selection.
-
Page 19: Low Temperature
Selecting a program Low temperature Select Low temperature for all delicate or minimum iron fabrics with the r care label (e.g. acrylic garments). – Delicate fabrics are dried at a lower temperature. – The program duration is longer. ^ Press shortcut button D Low temp. Saving a favorite program You can program the direct select buttons to call up the four most frequently used drying programs. -
Page 20: Timer
Timer Depending on the Delay start setting, you can use the Timer to set the time you wish a program to finish or start at, or you can delay the start of the program. To open the Timer sub-menu Cottons Normal+ Low temp. -
Page 21: Changing The Program Sequence
Take care when in the vicinity of the appliance, * Either during the commissioning when opening the door and process or subsequently, a Miele ser- handling freshly dried laundry. vice technician can re-set the payment Danger of burning. -
Page 22: Cleaning And Care
Clean the filters after your Miele dealer or Miele or use a each drying program*. vacuum cleaner. ^ Once clean, push the filter back into... -
Page 23: Cleaning Them With Water
Cleaning and care Cleaning them with water Replacing the filters If there is a great deal of compacted Do not replace the filters if they lint on any of the filters, they can be are damp or wet. Damp or wet filters removed and cleaned under hot could cause operational faults. -
Page 24: Cleaning The Tumble Dryer
^ Dry all parts with a soft cloth. A range of Miele branded cleaning and conditioning agents are available to order via the Miele website. -
Page 25: Cleaning The Heat Exchanger
Cleaning and care Cleaning the heat exchanger Check the heat exchanger unit regularly. It should always be cleaned immediately the Clean condenser unit or Clean out airways message appears. Removing the heat exchanger ^ Turn the lever on the inner cover downwards to the vertical position. -
Page 26: Checking The Condenser Unit (Heat Exchanger Unit)
Cleaning and care If you can see some lint: ^ Clean the condenser unit as described below. To clean the condenser unit ^ Use a shower head or similar to rinse the unit out as shown. ^ Pull the condenser (heat exchanger) unit out of its housing by the handle. -
Page 27: Replacing The Condenser Unit
Cleaning and care ^ Check the condenser unit again for Replacing the condenser unit any visible lint, and if necessary flush ^ Push the condenser unit all the way it through again until it has all gone. back into the housing, until it clicks ^ Also make sure the rubber seals are into place. -
Page 28: Frequently Asked Questions
Frequently asked questions With the help of the following notes minor faults in the performance of the appliance, some of which may result from incorrect operation, can be put right without contacting the Service Department. Repair work to electrical appliances should only be carried out by a suitably qualified person in strict accordance with current local and national safety regulations. - Page 29 Frequently asked questions Problem Possible cause Remedy Clean out airways There is a blockage – Confirm with OK. Clean the filters in the ducting system. – Clean the lint filters. Check ducting. – Check all possible causes appears at the end given under "The drying of a program.* process goes on too long or...
-
Page 30: An Unsatisfactory Drying Result
Frequently asked questions An unsatisfactory drying result Problem Possible cause Remedy The laundry is not The load consisted of – Finish drying using the sufficiently dry. different fabrics. Hot air program (timed drying). – Next time, select a more suitable program (see "program chart"... -
Page 31: Other Problems
Frequently asked questions Other problems Problem Possible cause Remedy The drying You might be asked to Please check all possible process goes on clean the airways/ducting causes, described below. too long or even system again. switches off. Ventilation to and from the Open a door or window while dryer may be insufficient, the dryer is in operation for... - Page 32 Frequently asked questions Problem Possible cause Remedy Water leaks from the – The inner cover of the – Ensure that the dryer after the condenser unit has not condenser unit is condenser unit has been locked properly positioned correctly been cleaned. and/or the condenser and lock the inner unit has not been...
- Page 33 Frequently asked questions Problem Possible cause Remedy The program does There is no power to – Is the dryer switched on? not start and the the dryer. – Is the door closed properly? display is dark. – Has the fuse or circuit breaker tripped? When the power comes back on after a power outage,...
-
Page 34: Changing The Light Bulb
^ Apply a little pressure and while doing so turn your wrist in the direction of the arrow to open the cover. The cover will open downwards. The temperature resistant light bulb should only be ordered from your Miele dealer or Miele. -
Page 35: After Sales Service
PC / Optical interface In the event of a fault which you cannot The indicator or check light marked PC fix yourself, please contact the Miele on the fascia panel is the interface used Technical Service Department at the by Miele service technicians during address on the back of this booklet. -
Page 36: Installation Instructions
INSTALLATION INSTRUCTIONS To prevent accidents and machine damage read these instructions before installation or use. -
Page 37: Important Safety Instructions
Do not use an extension cord to connect this appliance to the power Repair and maintenance work supply. Extension cords do not should be performed by a Miele guarantee the required safety of the authorized service technician. Work by appliance (e.g. danger of overheating). -
Page 38: Installation
Installation Front view a Power cord f External drainage options (e.g. via sink, drain or gully) b Control panel Optional accessory: Extension hose c Door g Intake and exhaust vents for cooling d Service panel for condenser unit the condenser unit e Four height adjustable screw feet... -
Page 39: Side View
A stacking kit is b Air exhaust vent for cooling the required which can be purchased from condenser unit Miele. The stacking kit must be fitted by c Stainless steel plith (open or closed, a Miele authorised service technician. optional Miele accessory) -
Page 40: Installing The Tumble Dryer
Installation Installing the tumble dryer Levelling the machine Make sure the dryer door can be opened without hindrance after installation. Transporting the dryer to its installation site The machine must be perfectly level to ensure safe and proper operation. When moving the dryer, hold it by the lid where it protrudes to the rear. -
Page 41: Room In Which The Dryer Is Located
In order to ensure sufficient This must be connected and programd ventilation to the dryer, do not by a Miele Service technician. reduce the vent gap between the underside of the dryer and the floor Coins/tokens must be removed from with a plinth, deep-pile carpet, etc. -
Page 42: External Drainage Of The Condensed Water
Installation External drainage of the condensed water The condensed water is pumped away through the drain hose which is located at the back of the dryer at the bottom. Drain hose length: ..6' 6 3/4" (2 m) Drain pump height: . -
Page 43: Electrical Connection
Installation Electrical connection The dryer comes with a power cord and NEMA L6-20 plug. This installation should be The machines is supplied for a performed by an experienced and connection to a 2 AC 230V 60Hz qualified technician, in accordance 2x16A, Single Phase Supply. -
Page 44: Technical Data
Technical data Height " (850 mm) (adjustable + / - " (7 mm)) Width " (595 mm) Depth " (710 mm) Depth with door open " (1,188 mm) Weight 133 lbs (60.5 kg) Drum volume 28.6 gal (130 l) Maximum capacity 14.3 lbs (6.5 kg) Dry laundry weight Length of connection cable 63"... -
Page 45: Caring For The Environment
Caring for the environment Disposal of the packing Disposal of an appliance materials Old appliances may contain materials that can be recycled. Please contact The cardboard box and packing your local recycling authority about the materials protect the appliance during possibility of recycling these materials. - Page 48 Technical Service. U.S.A. Canada Miele, Inc. Importer Miele Limited National Headquarters 9 Independence Way Headquarters and Miele Centre Princeton, NJ 08540 161 Four Valley Drive Phone: 800-843-7231 Vaughan, ON L4K 4V8 609-419-9898 www.miele.ca 609-419-4298...
Need help?
Do you have a question about the PT 7135 C Vario and is the answer not in the manual?
Questions and answers