JVC RC-BM5 Instructions Manual
Jvc cd portable system instructions
Hide thumbs
Also See for RC-BM5:
- Instructions manual (28 pages) ,
- Service manual (52 pages) ,
- Instructions manual (174 pages)
Table of Contents
Advertisement
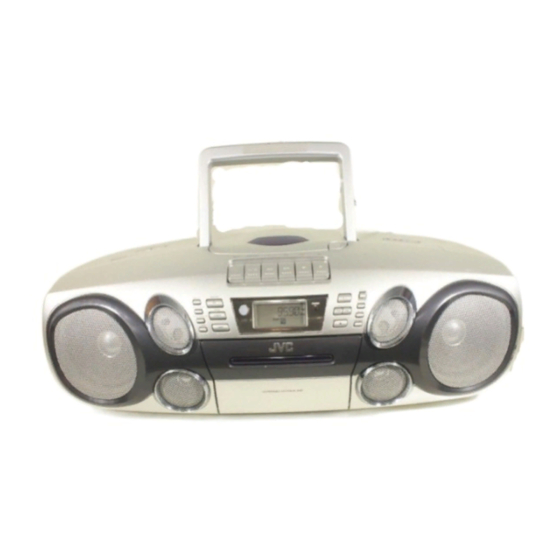
CD PORTABLE SYSTEM
RC-BM5
STANDBY/ON
PROGRAM/
RANDOM
SET
REPEAT
CD
BAND
1
2
3
TUNER
FM MODE/
BEAT CUT
4
5
6
UP
7
8
9
PRESET
DOWN
0
+10
DISPLAY
UP
TITLE
MP3
GROUP
SEARCH
DOWN
CD
VOLUME
SOUND
MUTING
HBS
RM-SRCBM5J REMOTE CONTROL
INSTRUCTIONS
OPEN
DISPLAY
PRESET UP
CD
PRESET DOWN
TITLE SERCH
STANDBY
FM MODE/BEAT CUT
TUNER
REPEAT
SOUND
PROGRAM
TAPE
CD POTABLE SYSTEM RC-BM5
For Customer Use:
Enter below the Model No. and Serial No.
which are located on the rear of the
cabinet.
Retain this information for future reference.
Model No.
Serial No.
LVT0926-001A
[J]
Advertisement
Table of Contents

Related Manuals for JVC RC-BM5


Summary of Contents for JVC RC-BM5
- Page 1 FM MODE/BEAT CUT TUNER REPEAT SOUND PROGRAM TAPE CD POTABLE SYSTEM RC-BM5 For Customer Use: Enter below the Model No. and Serial No. which are located on the rear of the cabinet. Retain this information for future reference. Model No.
- Page 2 Warnings, Cautions and Others Mises en garde, précautions et indications diverses CAUTION RISK OF ELECTRIC SHOCK DO NOT OPEN CAUTION: TO REDUCE THE RISK OF ELECTRIC SHOCK, DO NOT REMOVE COVER (OR BACK). NO USER SERVICEABLE PARTS INSIDE. REFER SERVICING TO QUALIFIED SERVICE PERSONNEL. The lightning flash with arrowhead symbol, within an equilateral triangle is intended to alert the user to the presence of uninsulated “dangerous voltage”...
- Page 3 WARNING: TO REDUCE THE RISK OF FIRE OR ELECTRIC SHOCK, DO NOT EXPOSE THIS APPLIANCE TO RAIN OR MOISTURE. For Canada/pour le Canada CAUTION: TO PREVENT ELECTRIC SHOCK, MATCH WIDE BLADE OF PLUG TO WIDE SLOT, FULLY INSERT. ATTENTION: POUR EVITER LES CHOCS ELECTRIQUES, INTRODUIRE LA LAME LA PLUS LARGE DE LA FICHE DANS LA BORNE CORRESPONDANTE DE LA PRISE ET POUSSER JUSQUAU FOND.
-
Page 4: Table Of Contents
TURNING THE UNIT ON/OFF ... 6 ADJUSTING THE SOUND ... 7 FEATURES 1 Portable system incorporating CD player • CD functions can be operated with the remote control unit as well as on the main unit. • 8-cm (3-3/16") CD playback capability 2 Digital LCD (Liquid Crystal Display) indicates general playback status. -
Page 5: Handling Precautions
HANDLING PRECAUTIONS Do not use this unit in direct sunlight or leave the unit in a closed automobile (or yacht, etc.) where it would be exposed to high temperatures above 40°C (104°F). 1 Avoid using the unit in the following places: •... -
Page 6: Power Supply
Refer to the figure below for correct connection. CAUTIONS: • Use only with the JVC power cord provided with this unit to avoil malfunction or damage to the unit. Remove batteries when using the power cord. -
Page 7: Names Of Parts And Controls
4 Disc door 5 OPEN 0 button 6 PRESET UP button PRESET DOWN button FM MODE/BEAT CUT button SOUND button STANDBY CD POTABLE SYSTEM RC-BM5 7 CD/RANDOM button TUNER/BAND button TAPE button 8 Remote sensor section 9 Display window 10 Cassette holder... -
Page 8: Rear Side
Rear side 14 Telescopic antenna 15 Battery compartment cover 16 ÓAC IN (AC input) jack REMOTE CONTROL UNIT Installing batteries 1 Remove the battery cover from the back of the remote control unit. 2 Insert two R03 (UM4)/AAA (24F)-size batteries (not supplied). -
Page 9: Names Of Buttons
TITLE SEARCH button GROUP UP/DOWN buttons 8 VOLUME +/– buttons 9 MUTING button STANDBY CD POTABLE SYSTEM RC-BM5 Notes: • The STANDBY/ON button on the remote control unit does not function when the POWER ON/OFF button is set to OFF. -
Page 10: Adjusting The Sound
Connect a pair of headphones to the PHONES jack. No sound comes out of the speakers anymore. Be sure to turn down the volume before connecting headphones. STANDBY CD POTABLE SYSTEM RC-BM5 SOUND Selecting the sound mode Sound mode can be selected to enhance the type of music being played. -
Page 11: Playing Compact Discs
PLAYING COMPACT DISCS Notes on compact discs This unit is designed to play audio CDs, CD-Rs and CD- RWs. You can use compact discs with the mark shown below. Note on CD-R and CD-RW • User-edited CD-Rs (Recordable) and CD-RWs (Rewritable) can be played only if they are already finalized. -
Page 12: To Pause Playback
• The following indication may be displayed when the disc is loaded upside down. Reload the disc correctly. STANDBY CD POTABLE SYSTEM RC-BM5 • If mistracking occurs during playback, lower the volume. • Mistracking may occur if a strong shock is applied to the unit or if it is used in a place subject to vibrations (e.g. - Page 13 Skipping • To skip to the next track Press the ¢ button during playback to skip to the beginning of the next track. • To skip back to the previous track Press the 4 button during playback to skip back to the previous track.
-
Page 14: Changing The Display
Album number, album name, track number and track name being played REPEAT STANDBY CD POTABLE SYSTEM RC-BM5 In case of an MP3 disc: Repeat playback of a single track (“REPEAT” lights up in the display window.) Repeat playback of an album (“REPEAT GROUP”... - Page 15 Alternatively, use the number buttons on the remote control unit. STANDBY CD POTABLE SYSTEM RC-BM5 4 Press the PROGRAM button. “OK” is displayed and the PROG. indicator lights up steadily. 5 Repeat steps 2 to 4 to program other tracks.
- Page 16 Programmed playback of an MP3 disc Up to 99 tracks can be programmed to play in any desired order. 1 In stop mode, press the PROGRAM button. Alternatively, press the PROGRAM/SET button on the remote control unit. The PROG. indicator starts blinking in the display window.
-
Page 17: Radio Reception
Main unit The STEREO indicator lights up steadily in the display window when the unit receives an FM stereo broadcast of sufficient signal strength in stereo reception mode. STANDBY CD POTABLE SYSTEM RC-BM5 Using the antennas FM MODE/ BEAT CUT Note:... -
Page 18: Presetting Stations
The preset number lights up steadily. 6 Repeat steps 2 to 5 to preset other stations, using different preset numbers. STANDBY CD POTABLE SYSTEM RC-BM5 Tuning in a preset station 1 Press the TUNER/BAND button to select the band, FM or AM. -
Page 19: Cassette Playback
2 Load a cassette with the open side up and the playback side facing out as shown in the figure below. + Forward direction CD POT ABLE SYSTEM RC-BM5 3 Close the cassette holder by pressing it gently and firmly. The cassette holder clicks back into position. - Page 20 Use only a type-I normal tape. 3 Press the 2 PLAY button to start playback. 4 Adjust the volume and sound. STANDBY CD POTABLE SYSTEM RC-BM5 To stop playback Press the § STOP/EJECT button. The tape also stops when it reaches the end.
-
Page 21: Recording
Either turn off the TV or increase the distance between the TV and the unit. STANDBY CD POTABLE SYSTEM RC-BM5 Using the beat-cut function When recording an AM broadcast, beats may occur. If this happens, press the FM MODE/BEAT CUT button to select the better beat-cut position, “BEAT 01”... - Page 22 Synchronized recording with CD playback You can make the CD player to start playback when the tape deck enters the recording mode. 1 Load a cassette. Use only a type-I normal tape. 2 Load a CD. 3 Press the CD/RANDOM button to enter CD mode.
-
Page 23: Maintenance
MAINTENANCE Cleaning the heads, capstan and pinch roller Cleaning is important! When the tape is running, magnetic powder and dust naturally accumulate on the heads, capstan and pinch roller. When they become too dirty; • Sound quality deteriorates. • The sound output level drops. •... -
Page 24: Troubleshooting
TROUBLESHOOTING What appears to be trouble is not always serious. Make sure first ... 1 Power cannot be turned on. * Is the power cord unplugged? 2 When the 2 PLAY button is pressed, tape does not move. * Is the 8 PAUSE button pressed? 3 Playback sound is at a very low level. -
Page 25: Specifications
SPECIFICATIONS Compact disc player section Type : Compact disc player Signal detection system : Non-contact optical pickup (semiconductor laser) Number of channels : 2 channels (stereo) Frequency response : 20 Hz to 20 000 Hz Signal-to-noise ratio : 90 dB Wow &... -
Page 26: Authorized Service Centers
To prevent electrical shock, do not open the cabinet. There are no user serviceable parts inside. Please refer to qualified service personnel for repairs. Accessories To purchase accessories for your JVC product, please call toll free: 1 (800)882-2345 or on the web at www.JVC.com BT-51026-1... -
Page 27: Limited Warranty
If service is not available locally, box the product carefully, preferably in the original carton, and ship, insured, with a copy of your bill of sale plus a letter of explanation of the problem to the nearest JVC Factory Service Center, the name and location of which will be given to you by the toll-free number. - Page 28 0502NNMBICMTS...
Need help?
Do you have a question about the RC-BM5 and is the answer not in the manual?
Questions and answers