Miele CVA 2650 Operating Instructions Manual
Coffee systems built-in coffee system
Hide thumbs
Also See for CVA 2650:
- Technical information (100 pages) ,
- Operating instructions manual (88 pages) ,
- Specification (2 pages)
Table of Contents
Advertisement
Prepared By:
From:
Tom Bogna
Company: Classic Custom Cabinets
Address: 11544 Sheldon street
Phone:
818-767-1144
Fax:
818-767-1278
Email:
tom@cbdcabinets.com
Model No
CVA2650
CVA2650
CVA2650
KM5753
KM5753
DA3190
DA3190
M82601
M82601
EB271630
EB271630
KSCS25FVSS
KSCS25FVSS
Forward to Brian please.
- Thank you for using our NEW PDF Booklet Feature!!
feature will save you time when working on your project.
- Dimension Express is now offering FREE model listings for
manufacturers. All information listed with Dimension Express MUST be
approved by the manufacturer. Please check back regularly as we are
adding manufacturers and industries.
To access over 14,000 appliance specification sheets, visit:
www.dexpress.com
Dimension Express Booklet
Prepared On:
Type
Manufacturer
COF
Miele
COF
Miele
COF
Miele
CKT
Miele
CKT
Miele
HOD
Miele
HOD
Miele
MIC
Miele
MIC
Miele
OVN
Gaggenau
OVN
Gaggenau
REF
Kitchen Aid
REF
Kitchen Aid
http://www.dexpress.com
Page 1 of 105
.
12/31/2010
Job Information:
Job Name: Atlantis--Astaire
Doc Type
Mfr Guide
Condensed
Support Doc
Mfr Guide
Condensed
Mfr Guide
Condensed
Mfr Guide
Condensed
Mfr Guide
Condensed
Mfr Guide
Condensed
We hope this
Page
2
4
10
78
79
86
87
94
95
97
98
101
102
12/31/2010
Advertisement
Table of Contents

Related Manuals for Miele CVA 2650


Summary of Contents for Miele CVA 2650
- Page 1 Company: Classic Custom Cabinets Address: 11544 Sheldon street Phone: 818-767-1144 Fax: 818-767-1278 Email: tom@cbdcabinets.com Model No Type Manufacturer Doc Type Page CVA2650 Miele Mfr Guide CVA2650 Miele Condensed CVA2650 Miele Support Doc KM5753 Miele Mfr Guide KM5753 Miele Condensed DA3190...
- Page 2 Mfr Guide Page 2 of 105 CVA2650 12/31/2010 Product and Cut-out Dimensions Built-in Coffee System CVA 2650 - Wall cabinet installation Lower Edge Detail - Full overhang CVA Housing 5/8" Cabinet base Unit should be installed without removable feet. Unit will overhang cabinet base...
- Page 3 Mfr Guide Page 3 of 105 CVA2650 12/31/2010 Product and Cut-out Dimensions Built-in Coffee System CVA 2650 - Tall cabinet installation Lower Edge Detail - Limited overhang CVA Housing Removable feet (4) 1/4" Cabinet Shelf Unit should be installed with removable feet in...
-
Page 4: Electrical Connection
If there is any question concerning the electrical connection of this appliance to your power supply, please consult a licensed electrician or call Miele’s Technical Service Department. U 1-800-999-1360 V 1-800-565-6535 www.dexpress.com Cond Inst... - Page 5 Cond Inst Page 5 of 105 Installation Installation options A countertop option for the CVA 2650 is possible with the CVSG 50 casing. The coffee system is designed to be built into cabinetry. www.dexpress.com Cond Inst Page 5 of 105...
- Page 6 www.dexpress.com Cond Inst Page 6 of 105 Installation www.dexpress.com Cond Inst Page 6 of 105...
- Page 7 www.dexpress.com Cond Inst Page 7 of 105 Installation www.dexpress.com Cond Inst Page 7 of 105...
- Page 8 Cond Inst Page 8 of 105 Installation To install the CVA 2650 below a hanging cabinet a CVUG 50 casing (optional accessory) is required. www.dexpress.com Cond Inst Page 8 of 105...
- Page 9 www.dexpress.com Cond Inst Page 9 of 105 Installation Installation Make sure power is not supplied to the appliance while installation or maintenance work is performed. Disconnect the power supply to the work area by unplugging the unit, tripping the circuit breaker or removing the fuse.
-
Page 10: Operating Instructions
Mfr Sup Page 10 of 105 Operating instructions Coffee System CVA 2650 To prevent accidents and machine damage read these instructions before www.dexpress.com Mfr Sup Page 10 of 105 installation or use. M.-Nr. 06 221 360... - Page 11 www.dexpress.com Mfr Sup Page 11 of 105 www.dexpress.com Mfr Sup Page 11 of 105...
-
Page 12: Table Of Contents
www.dexpress.com Mfr Sup Page 12 of 105 Contents IMPORTANT SAFETY INSTRUCTIONS ....... . . 5 Guide to the machine. - Page 13 www.dexpress.com Mfr Sup Page 13 of 105 Contents Frequently asked questions ........47 Removing a jammed capsule .
-
Page 14: Important Safety Instructions
If in installation in these applications. Please doubt, consult a qualified technician. contact the Miele Technical Service Department with specific requirements. The appliance must be properly installed before operation to ensure... - Page 15 Return fresh tap water. Warm or hot water appliance to the nearest authorized or any other liquids may damage the Miele dealer for examination, repair or machine. The water should be changed adjustment. daily to prevent bacteria or mold Always attach plug to appliance growth.
- Page 16 The water lines must be rinsed and Only use the descaling tablets the machine cleaned thoroughly provided by Miele and be sure to before the first coffee is prepared. See use the correct mixture of water and "Daily coffee system care".
-
Page 17: Guide To The Machine
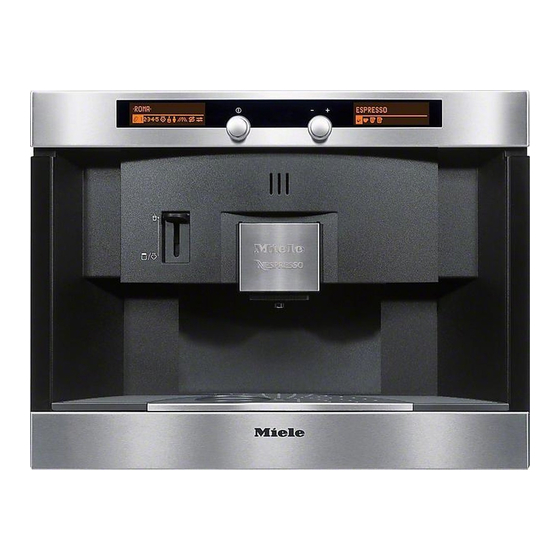
www.dexpress.com Mfr Sup Page 17 of 105 Guide to the machine Front view a Left display d Right display b Left jog shuttle e Upper door handle (for installation at countertop height) Press this jog shuttle to turn the f Lower door handle machine on and off. -
Page 18: Interior View
www.dexpress.com Mfr Sup Page 18 of 105 Guide to the machine Interior view l Main switch o Capsule carousel m Capsule plate p Carousel tray (replaced with the descaling funnel q Water tank when descaling is performed) r Drip tray with grid n Perforator (grid avoids spilling during transport) (not visible, penetrates capsule to... -
Page 19: Displays
www.dexpress.com Mfr Sup Page 19 of 105 Displays Left display Right display COSI LANGUAGE 2 3 4 5 K n I – Drink selection – selects coffee or espresso Up to 5 different coffee types K, as – shows current actions, e.g. heating well as, steam L and hot water o –... -
Page 20: First Steps To Use
www.dexpress.com Mfr Sup Page 20 of 105 First steps to use Turning the machine on and off Turning on ^ Press the left jog shuttle. The appliance must be correctly installed and connected before the Míele first use. Welcome! When turned on for the first time, a welcome screen as well as other messages will appear in the right display. -
Page 21: Before Using The Coffee System
www.dexpress.com Mfr Sup Page 21 of 105 First steps to use Before using the coffee system 4. Rinse the lines for the first time RINSE K1 2 3 4 5 L o n 1. Clean the parts ^ Hand wash the coffee capsule plate ^ Turn the left jog shuttle to "Rinse". -
Page 22: Filling Water And Coffee Capsules
www.dexpress.com Mfr Sup Page 22 of 105 Filling water and coffee capsules Filling the water tank The water tank should be washed and filled with fresh cold tap water before each day of use. Never put hot water or any other liquid except cold water into the water tank. -
Page 23: Filling The Coffee Capsule Carousel
www.dexpress.com Mfr Sup Page 23 of 105 Filling water and coffee capsules Filling the coffee capsule carousel Only insert Nespresso coffee capsules in the carousel. Damaged, broken or dented capsules should not be used they may jam in the machine. ^ Pull the carousel tray, a, all the way There are five chambers, each can hold out. -
Page 24: Allocating Various Coffee Types
www.dexpress.com Mfr Sup Page 24 of 105 Allocating various coffee types ^ Take the carousel from the machine Twelve different Nespresso coffee types are available for this coffee system. to see which coffee type is filled in They differentiate in terms of acidity, each chamber. - Page 25 www.dexpress.com Mfr Sup Page 25 of 105 Allocating various coffee types Allocating different coffee To enter text types ^ Turn the right jog shuttle to the first letter or number and press to CHAMBER 5 confirm. The selected letter shows in ARPEGGIO the upper line.
-
Page 26: Making Coffee
www.dexpress.com Mfr Sup Page 26 of 105 Making coffee If the "Automatic rinsing" option is set to Rinse the water lines before "on" (default setting) the next message preparing the first drink of the day. If shows: the "Automatic rinsing" option is set to "on"... - Page 27 www.dexpress.com Mfr Sup Page 27 of 105 Making coffee Prewarming the cups To prewarm with hot water Prewarming the cups allows the coffee HOT WATER to fully develop the flavor and aroma. K1 2 3 4 5 Use caution. Steam and hot water ^ Turn the left jog shuttle to the "Hot are very hot.
-
Page 28: Espresso And Coffee
www.dexpress.com Mfr Sup Page 28 of 105 Making coffee Espresso and coffee Interrupting the brewing ^ Press the right jog shuttle to interrupt The flavor of the coffee depends on the coffee capsule and the quantity of the coffee dispensing immediately. water used. -
Page 29: Cappuccinatore (Milk Froth Mug)
www.dexpress.com Mfr Sup Page 29 of 105 Making coffee Cappuccinatore (milk froth mug) A cappuccinatore (milk froth mug) is supplied with the appliance. Before using the cappuccinatore for the first time, wash it either in the The steam is regulated by turning the dishwasher or with hot water and valve: liquid dish soap. - Page 30 www.dexpress.com Mfr Sup Page 30 of 105 Making coffee Frothing milk into the cup Frothing milk in the cappuccinatore ^ Fill the cappuccinatore to the upper ^ Fill the cappuccinatore up to the "max" mark with cold milk. lower "max" mark with cold milk. ^ Turn the spout to the cup symbol.
-
Page 31: After Use
www.dexpress.com Mfr Sup Page 31 of 105 Making coffee Rinsing the lid After use For a quick cleaning between froths the At the end of each day, the lines of the cappuccinatore lid can be rinsed with coffee system should be rinsed. the steam valve. -
Page 32: Dispensing Hot Water
www.dexpress.com Mfr Sup Page 32 of 105 Dispensing hot water Hot water ^ Place a cup under the hot water / steam valve. HOT WATER K1 2 3 4 5 ^ Turn the left jog shuttle to "Hot water". ^ Press the right jog shuttle to confirm. ^ Press again to stop the water from dispensing. -
Page 33: Setting Serving Sizes
www.dexpress.com Mfr Sup Page 33 of 105 Setting serving sizes Setting a default serving size The flavor of the coffee depends on the coffee type and the quantity of water Have the correct cups handy. used. To ensure the machine uses ^ Place the desired cup under the exactly the amount of water to suit your taste and your cup size, there is a... -
Page 34: Setting User Profiles
www.dexpress.com Mfr Sup Page 34 of 105 Setting user profiles Setting the user name To enter text ^ Turn the right jog shuttle to the first Up to four different user profiles can be programmed to accommodate different letter or number and press to preferences and serving sizes. -
Page 35: Setting User Profiles (Serving Sizes)
www.dexpress.com Mfr Sup Page 35 of 105 Setting user profiles Setting user profiles Making espresso / coffee with (serving sizes) user profile In addition to the default, different If a user profile was set, select the serving sizes can be programmed for profile first before preparing a drink. -
Page 36: Settings
www.dexpress.com Mfr Sup Page 36 of 105 Settings Selecting a language The coffee system can be customized to suit individual preferences. SETTINGS F K1 2 3 4 5 ^ Turn the left jog shuttle to "Settings". LANGUAGE K n I The language symbol is selected in the right display. -
Page 37: Setting The Time Of Day
www.dexpress.com Mfr Sup Page 37 of 105 Settings Setting the time of day TIME OF DAY SETTINGS F : 00 K1 2 3 4 5 ^ Turn the right jog shuttle to select the ^ Turn the left jog shuttle to "Settings". hours, press to confirm. -
Page 38: Turning Off After Standby Time
www.dexpress.com Mfr Sup Page 38 of 105 Settings Turning off after Standby time The setting will be automatically saved and the display will go back to the To conserve energy the coffee system previous screen. The coffee system will can be set to turn off after a turn off at the preset time. -
Page 39: Turning On At A Preset Time
www.dexpress.com Mfr Sup Page 39 of 105 Settings Turning on at a preset time The setting will be automatically saved and the display will go back to the A specific time can be set to turn the previous screen. The coffee system will machine on, e.g. -
Page 40: Turning Off At A Preset Time
www.dexpress.com Mfr Sup Page 40 of 105 Settings Turning off at a preset time The setting will be automatically saved and the display will go back to the A specific time can be set to turn the previous screen. The coffee system will coffee system off. -
Page 41: Setting Lighting, Display Contrast And Brightness
www.dexpress.com Mfr Sup Page 41 of 105 Settings ^ Turning the right jog shuttle clockwise Setting lighting, display increases the bar size and brightens contrast and brightness the settings. SETTINGS F ^ Press the right jog shuttle to save the K1 2 3 4 5 settings. -
Page 42: Automatic Rinsing
www.dexpress.com Mfr Sup Page 42 of 105 Settings Automatic rinsing AUTOMATIC RINSING The rinsing feature flushes out coffee residue and pre-warms the coffee on B system. When "Automatic rinsing - on" ^ Turn the right jog shuttle to select "on" is selected the system will automatically be rinsed when the appliance is turned or "off", press to confirm. -
Page 43: Steam System
www.dexpress.com Mfr Sup Page 43 of 105 Settings Steam system STEAM SYSTEM To conserve energy, the steam system can be turned off if steam is not used on B all the time. ^ Turn the right jog shuttle to select "on" Residual heat may allow the or "off". -
Page 44: Total Coffee Counter (Info)
www.dexpress.com Mfr Sup Page 44 of 105 Settings Total coffee counter (INFO) Factory setting If the option "Info" is selected, the This option allows you to reset all saved display will show the number of cups of settings to the factory default. coffee dispensed to date (espresso, SETTINGS F coffee, double espresso / coffee). -
Page 45: System Lock
www.dexpress.com Mfr Sup Page 45 of 105 System lock The coffee system can be locked so Locking the coffee system that it cannot be used by children or ^ Turn the coffee system off by those not familiar with the operating pressing the left jog shuttle. -
Page 46: Daily Coffee System Care
www.dexpress.com Mfr Sup Page 46 of 105 Daily coffee system care The following components of the coffee Turn the machine off at the main system should be cleaned after each switch before cleaning. day of use to prevent mold and bacteria growth. -
Page 47: Common Coffee System Care
www.dexpress.com Mfr Sup Page 47 of 105 Common coffee system care Interior Drip tray ^ Clean all interior parts and areas of ^ Clean and dry the metal contacts at the machine with a solution of hot the back of the drip tray. If the water and liquid dish soap. -
Page 48: Capsule Plate
The cleaning tablets can be purchased from Miele. ^ Press the steam lever down and pull off the rubber sleeve. ^ Clean the rubber sleeve and the steam valve tip with a mild solution of water and liquid dish soap. - Page 49 www.dexpress.com Mfr Sup Page 49 of 105 Common coffee system care Exterior Cappuccinatore The front of the appliance can be Clean the cappuccinatore after every cleaned with a sponge and a solution of use, otherwise it may become blocked warm water and non abrasive liquid with dried milk and hard to clean.
- Page 50 Common coffee system care Maintenance The perforator should be changed after 15000 cups of coffee / espresso. The perforator can be purchased from Miele. It is recommended to contact the Miele Service department for assistance in performing this maintenance task.
- Page 51 www.dexpress.com Mfr Sup Page 51 of 105 Common coffee system care The right display goes dark and the appliance is now lowering the perforator. Remove capsule plate and change the capsule hopper ^ Open the appliance door. ^ Pull out the capsule plate. Do not reach up into the ^ Screw the new perforator firmly into perforator opening.
-
Page 52: Descaling The Appliance
The descaling the best results possible. tablets can be purchased from your local Miele dealer or Miele. Other agents may damage the machine and affect the taste of coffee and hot water. - Page 53 www.dexpress.com Mfr Sup Page 53 of 105 Descaling the appliance The right display will prompt you At the beginning of the descaling through the single steps of the program there will be a delayed start to descaling process. allow the tablets to completely dissolve. Follow these prompts.
-
Page 54: Descaling Prompts
www.dexpress.com Mfr Sup Page 54 of 105 Descaling the appliance Descaling prompts For clarification regarding the prompts see the following: Please add descaling agent to the Please empty drip tray water container (and waste container) ^ Remove the water tank. ^ Since the machine is also rinsed inside, the drip tray needs to be ^ Fill the water tank with cold tap water... -
Page 55: Fault Messages
www.dexpress.com Mfr Sup Page 55 of 105 Fault messages If an error occurs a fault message will appear in the right display. Minor problems can be fixed without a service call. Message Possible fault Chamber empty - The selected coffee chamber is empty. Fill with coffee capsules. -
Page 56: Frequently Asked Questions
– Is the main switch turned off? – Is the machine plugged in? – Check that the fuse is not defective. If so contact the Miele Service Department. What if the unit suddenly turns off? – Is the machine plugged in? –... - Page 57 www.dexpress.com Mfr Sup Page 57 of 105 Frequently asked questions What if the light turns suddenly off? The light turns off automatically when the machine has not been used for 10 minutes. What if the door cannot be opened or closed? The steam lever is not pushed up all the Press the lever down and then up again way.
- Page 58 www.dexpress.com Mfr Sup Page 58 of 105 Frequently asked questions Preparing / dispensing problems What if no drink is prepared although there are coffee capsules and water in the tank? Take out the water tank and then insert it again. What if no coffee is prepared although water is in the tank and coffee capsules are in the carousel? ^ Open the appliance door.
- Page 59 www.dexpress.com Mfr Sup Page 59 of 105 Frequently asked questions What if the steam heating system is turned off and steam can still be dispensed? Steam can be dispensed as long as the Once cooled the system will no longer steam heating system is warm.
- Page 60 www.dexpress.com Mfr Sup Page 60 of 105 Frequently asked questions Coffee results What if the dispensed coffee has some ground coffee in it? The capsule plate is soiled. Clean the capsule plate. What if the water flow stopped when programming the serving size? –...
- Page 61 www.dexpress.com Mfr Sup Page 61 of 105 Frequently asked questions Descaling problems What if the descaling process was started accidently? The descaling process cannot be interrupted once the right jog shuttle is pressed. The process now needs to be completed as a safety measure. Descaling is important to increase the life of the machine and to ensure the best results possible.
- Page 62 See "Removing a jammed capsule from the capsule plate". What if any other fault messages "F" appear in the display? Call the Miele Technical Service Department. www.dexpress.com Mfr Sup Page 62 of 105...
-
Page 63: Removing A Jammed Capsule
www.dexpress.com Mfr Sup Page 63 of 105 Removing a jammed capsule Turn the machine off at the main switch in the upper left corner. Danger of electric shock. The machine must be turned off before performing the next steps. From the carousel tray From the capsule plate ^ Take the carousel and the capsule plate out. -
Page 64: After Sales Service
Mfr Sup Page 64 of 105 After sales service In the event of a fault which you cannot correct yourself please contact the Miele Technical Service Department. 1-800-999-1360 techserv@mieleusa.com 1-800-565-6435 service@miele.ca When contacting the Technical Service Department, please quote the model... -
Page 65: Electrical Connection
If there is any question concerning the electrical connection of this appliance to your power supply, please consult a licensed electrician or call Miele’s Technical Service Department. U 1-800-999-1360 V 1-800-565-6535 www.dexpress.com Mfr Sup... -
Page 66: Installation
www.dexpress.com Mfr Sup Page 66 of 105 Installation Installation options The coffee system is designed to be built into cabinetry. www.dexpress.com Mfr Sup Page 66 of 105... - Page 67 www.dexpress.com Mfr Sup Page 67 of 105 Installation www.dexpress.com Mfr Sup Page 67 of 105...
- Page 68 www.dexpress.com Mfr Sup Page 68 of 105 Installation www.dexpress.com Mfr Sup Page 68 of 105...
- Page 69 Installation To install the CVA 2650 below a hanging cabinet a CVUG 50 casing (optional accessory) is required. A countertop option for the CVA 2650 is also possible with the CVSG 50 casing. www.dexpress.com Mfr Sup Page 69 of 105...
-
Page 70: Installation
www.dexpress.com Mfr Sup Page 70 of 105 Installation Installation Make sure power is not supplied to the appliance while installation or maintenance work is performed. Disconnect the power supply to the work area by unplugging the unit, tripping the circuit breaker or removing the fuse. -
Page 71: Programming
www.dexpress.com Mfr Sup Page 71 of 105 Installation Programming You will then be prompted to select a language. The appliance must be correctly ^ Turn the right jog shuttle until the installed and connected before the desired language shows in the first use. -
Page 72: Setting The Water Hardness
www.dexpress.com Mfr Sup Page 72 of 105 Installation Setting the water hardness Program Water gr/gal The hardness of the water used in the setting Hardness coffee system must be determined and Hardness 1 1 (soft) 0 - 3 0 - 130 programmed into the appliance. -
Page 73: Coffee Glossary
www.dexpress.com Mfr Sup Page 73 of 105 Coffee glossary Caffè is the Italian term for a standard Cappuccino scuro is a "dark" espresso. cappuccino with more espresso and less hot milk. Caffè americano is a thin espresso with water added. Cappuccino senza schiuma is a cappuccino without the froth. -
Page 74: The Espresso Range
www.dexpress.com Mfr Sup Page 74 of 105 The Espresso range Ristretto (black) Livanto (copper brown) is the typical Italian espresso. It is a A very well balanced blend, Livanto is short, strong, full-bodied espresso with characterized by a dense and velvety a touch of acidity. -
Page 75: The Lungo Range
www.dexpress.com Mfr Sup Page 75 of 105 The Lungo range Vivalto (sky blue) is an intense Lungo which combines a beautifully roasted note with a subtle floral note. With its noticeable crema and mild aroma, it is also delicious prepared with milk. Strength: 6 Ideal cup size: Lungo Decaffeinato Lungo (coral) -
Page 76: Caring For The Environment
www.dexpress.com Mfr Sup Page 76 of 105 Caring for the environment Disposal of packing material Disposal of an old appliance The cardboard box and packing Old appliances may contain materials materials protect the appliance during that can be recycled. Please contact shipping. - Page 77 Mfr Sup Page 77 of 105 Alteration rights reserved / 0205 M.-Nr. 06 221 360 / 04 en / US / CDN CVA 2650 www.dexpress.com Mfr Sup Page 77 of 105...
- Page 78 www.dexpress.com Mfr Guide Page 78 of 105 KM5753 12/31/2010 Product and Cut-out Dimensions Touch Control Induction Cooktop KM5753 3" - See notes 1 1/2" min. Location Codes 208-240 Volt, 40 Amp 3-wire power supply connects rear right bottom Notes • Please specify 208 Volt or 240 Volt unit when ordering. •...
- Page 79 www.dexpress.com Cond Inst Page 79 of 105 IMPORTANT SAFETY INSTRUCTIONS Note to the installer: Please leave this instruction book with the consumer for the local electrical inspector’s use. 2 ” The minimum distances given in these Installation Instructions must be observed in order to ensure safe operation.
- Page 80 30" (760 mm) must installation in these applications. Please be maintained. contact the Miele Technical Service Department with specific requirements. If there is more than one appliance The cooktop must not be beneath a hood (e.g.
- Page 81 www.dexpress.com Cond Inst Page 81 of 105 Installation Cooktops flush with the countertop Frame/Facet cooktops a Wall b Wall covering c Back splash d Countertop e Countertop cut-out f 2" (50 mm) minimum distance www.dexpress.com Cond Inst Page 81 of 105...
- Page 82 www.dexpress.com Cond Inst Page 82 of 105 Installation Installation dimensions 6 " " 9 / 1 5 / 1 6 1 / 4 " ( 5 1 4 m ( 8 m 1 / 4 " ( 6 5 ( 7 9 4 6 "...
- Page 83 www.dexpress.com Cond Inst Page 83 of 105 Installation Ventilation 9/16" 3" (700mm) (75mm) a Front of cooktop b Cut-out at the rear wall of the cabinet for ventilation c Protective base If a protective base is fitted, there must be a distance of atleast 4 ½" (110 mm) between the top of the protective base and the top of the countertop, for proper ventilation of the appliance.
- Page 84 www.dexpress.com Cond Inst Page 84 of 105 Installation Cut out Installing the cooktop ^ Make the countertop cut-out following ^ Feed the cooktop connection cable the dimensions given in the down through the cut-out. illustration. ^ Place the cooktop centrally in the Remember to maintain a minimum cut-out.
- Page 85 www.dexpress.com Cond Inst Page 85 of 105 Electrical connection Connection CAUTION: Before installation or The cooktop is equipped with a flexible servicing, disconnect the power metal conduit encasing 3 wires ready supply by either removing the fuse, for connection to a grounded power shutting off the power main or supply.
- Page 86 www.dexpress.com Mfr Guide Page 86 of 105 DA3190 12/31/2010 Product and Cut-out Dimensions Built-in Ventilation System DA3190 3 3/8" Duct Centerline User Supplied IMPORTANT INFORMATION Fascia Unit must be installed through 1 1/8" the front of the cabinet. Cabinet should not be designed with lower rail.
- Page 87 U 1-800-999-1360 When installing the hood, make sure techserv@mieleusa.com that the following minimum V 1-800-565-6435 distance between the top of a Miele cooking surface and the bottom of service@miele.ca the hood is: r (+65) 6735 1191 - 18" (45 cm) above electric infosea@miele.com.sg...
- Page 88 www.dexpress.com Cond Inst Page 88 of 105 Electrical data Important All electrical work should be performed by a qualified electrician The hood comes equipped with a 5 ft in strict accordance with national (1.5 m) power cord with a NEMA 5-15 and local safety regulations.
-
Page 89: Appliance Dimensions
www.dexpress.com Cond Inst Page 89 of 105 Appliance dimensions * The hood can also be installed in a 23 " (60 cm) cabinet. www.dexpress.com Cond Inst Page 89 of 105... - Page 90 www.dexpress.com Cond Inst Page 90 of 105 Installation www.dexpress.com Cond Inst Page 90 of 105...
- Page 91 For recirculation mode a respective installation kit is recommended which can be obtained from Miele. In addition an active charcoal filter is ^ Insert the hose from below into the air needed.
- Page 92 – If the exhaust is ducted through an of sharp bends should be minimized. outside wall, a Miele Telescopic Wall Vent can be used. – For most efficient air extraction, the diameter of the ductwork should not be less than 6"...
- Page 93 www.dexpress.com Cond Inst Page 93 of 105 Air extraction Important If the ductwork runs through rooms, ceilings, garages, etc. where temperature variations exist, it may need to be insulated to reduce condensation. Condensate trap In some cases, a condensate trap may also be required to collect and evaporate any condensate which may occur.
- Page 94 www.dexpress.com Mfr Guide Page 94 of 105 M82601 12/31/2010 Product and Cut-out Dimensions Microwave Oven M8260-1 Location Codes 5 foot electrical main with plug connects upper rear right side 120 Volt - 15 Amp 3 wire connection with NEMA 5-15R. Location must be accessible Notes •...
- Page 95 www.dexpress.com Cond Inst Page 95 of 105 Electrical connection Power supply CAUTION: Before servicing, The microwave comes equipped with a disconnect the power supply by power cord with a molded plug ready either removing the fuse, shutting off for connection to a: the power main or manually "tripping"...
- Page 96 www.dexpress.com Cond Inst Page 96 of 105 Installation Building-in dimensions When building in the appliance, ensure that the vents located at the Tall cabinet front of the appliance are not blocked, and that there is adequate ventilation to the rear of the unit (see illustrations).
- Page 97 www.dexpress.com Mfr Guide Page 97 of 105 EB271630 12/31/2010 Planning notes: 4' Power cable (hardwire required). EB 270/271–... Hinging must be specified when Universal heating system with ordering as the door is not ten heating methods. interchangeable. Oven interior volume: 2.4 cb.ft. When planning a corner solution, –...
- Page 98 www.dexpress.com Cond Inst Page 98 of 105 EB271630 12/31/2010 8. Assembly instructions 8.1.1 Technical data EB 270 8.1.2 Technical data EB 290 Rating: AC 220-240 V , 16 A Rating: AC 220-240 V , 20 A Heating power: Heating power: Infrared grill 3100W Infrared grill...
- Page 99 www.dexpress.com Cond Inst Page 99 of 105 EB271630 12/31/2010 8.2 How to do it The appliance must only be connected by an authorised specialist, paying attention to the relevant regulations of the power supply companies and the regional construction regulations. The electrician is responsible for the correct functioning of the appliance at the time of installa- tion.
- Page 100 www.dexpress.com Cond Inst Page 100 of 105 EB271630 12/31/2010 EB 270 Proceed as follows: – When unpacking the appliance, check it for transport damage. – Please remove the adhesive tapes that protect the door during transport. – A flexible cable should be used as the mains 5 8 0 m lead.
- Page 101 www.dexpress.com Mfr Guide Page 101 of 105 KSCS25FVSS 12/31/2010 ® Counter Depth, Side by Side Refrigerator PRODUCT MODEL NUMBERS PRODUCT DIMENSIONS Top View ³⁄₈ KSCS23FT KSCS23FV " (95.3 mm) ⁵⁄₈ KSCS25FT KSCK23FV " (90.5 cm) KSCS25FV KSCK25FV ■ Height dimensions are shown with the leveling legs extended to the minimum Electrical: A 115-volt, 60-Hz, AC-only 15- or 24"...
-
Page 102: Installation Requirements
www.dexpress.com Cond Inst Page 102 of 105 KSCS25FVSS 12/31/2010 REFRIGERATOR SAFETY Your safety and the safety of others are very important. We have provided many important safety messages in this manual and on your appliance. Always read and obey all safety messages. - Page 103 www.dexpress.com Cond Inst Page 103 of 105 KSCS25FVSS 12/31/2010 Side View Front View Height dimensions are shown with the leveling legs extended to the minimum height of ¹⁄₄" (6.35 mm) below the refrigerator. The power cord is 66" (167.7 cm) long. The water line attached to the back of the refrigerator is 78"...
-
Page 104: Electrical Requirements
www.dexpress.com Cond Inst Page 104 of 105 KSCS25FVSS 12/31/2010 Opening Dimensions Location Requirements Height dimensions are shown with the leveling legs extended WARNING to the minimum height of ¹⁄₄" (6.35 mm) below the refrigerator. NOTE: When leveling legs are fully extended to 1" (25 mm) below the refrigerator, add ³⁄₄"... -
Page 105: Installation Instructions
www.dexpress.com Cond Inst Page 105 of 105 KSCS25FVSS 12/31/2010 NOTE: Before performing any type of installation, cleaning, or removing a light bulb, turn the control (Thermostat, Refrigerator or Water Pressure Freezer Control depending on the model) to OFF and then disconnect the refrigerator from the electrical source.
Need help?
Do you have a question about the CVA 2650 and is the answer not in the manual?
Questions and answers