Gaggenau BS 450 Instruction Manual
Combi-steam oven
Hide thumbs
Also See for BS 450:
- Instruction manual (44 pages) ,
- Installation instructions (4 pages) ,
- User manual and installation instructions (64 pages)
Table of Contents
Advertisement
Quick Links
Advertisement
Table of Contents

Related Manuals for Gaggenau BS 450


Summary of Contents for Gaggenau BS 450
- Page 1 Gaggenau Instruction manual BS 450/451 BS 454/455 Combi-steam oven...
-
Page 2: Table Of Contents
End of cooking time Acrylamide in foodstuffs Long-term timer Setting the long-term timer Individual recipes Additional information on products, accessories, replacement parts and services can be found at Recording a recipe www.gaggenau.com and in the online shop Programming a recipe www.gaggenau-eshop.com... -
Page 3: Important Safety Information
m Important safety information Read these instructions carefully. Only then Risk of fire! will you be able to operate your appliance Combustible items stored in the cooking ▯ safely and correctly. Retain the instruction compartment may catch fire. Never store manual and installation instructions for future combustible items in the cooking use or for subsequent owners. -
Page 4: Causes Of Damage
Risk of scalding! Causes of damage When you open the appliance door, hot ▯ Caution! steam can escape. Steam may not be – Do not place anything on the cooking visible, depending on its temperature. compartment floor. Do not cover it with aluminium When opening, do not stand too close to foil. -
Page 5: Environmental Protection
– Do not detach the door seal. The appliance door Environmental protection will no longer close properly if the door seal is damaged. The fronts of adjacent units could be damaged. Have the door seal replaced. Unpack the appliance and dispose of the packaging in –... -
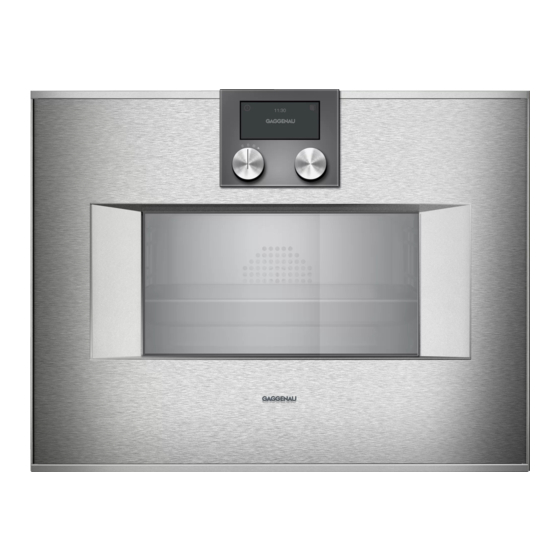
Page 6: Getting To Know The Appliance
Getting to know the appliance Use this section to familiarise yourself with your new appliance. The control panel and the individual operating controls are explained. You will find information on the cooking compartment and the accessories. Steam oven Ventilation opening Air flap Socket for core temperature probe Door seal... -
Page 7: Display And Operating Controls
Display and operating controls Control panel These areas are touch sensitive. Touch a symbol to select the cor- These instructions are valid for different versions of responding function. the appliance. Depending on the appliance model, Display The display shows, for example, some details may differ. -
Page 8: Colours And Display
Colours and display Additional information Colours By touching the symbol, you can call up additional information. The different colours are used to guide the user in the relevant setting situations. symbol appears for important information and indicates that an action is required. Important Orange Initial settings information on safety and operation mode are also... -
Page 9: Function Selector Positions
Function selector positions Position Function/type of heating Temperature Off position ž Light 30 - 230 °C Steaming at 70°C - 100 °C: For vegetables, fish and side dishes. Default temperature 100 °C Hot air + 100% humidity The food is completely surrounded by steam. Combination at 120°C - 230 °C: For puff pastry, bread, bread rolls. -
Page 10: Accessories
Position Function/type of heating Temperature Your appliance can be individually adjusted in Basic settings the basic settings. ¢ You can use the cleaning aid to remove dirt from Cleaning aid the cooking compartment with steam. The drying programme dries the cooking com- Drying programme partment after steaming or cleaning. -
Page 11: Before Using For The First Time
After the appliance is connected to the mains, the GAGGENAU logo is displayed for approx. 30 seconds before the "Initial settings" menu is automatically displayed. ‒... -
Page 12: Setting The Date
Setting the date Setting the water hardness The preset date appears in the display. The day "Water hardness" appears in the display. setting is already active. Check the mains water with the included Set the day using the rotary selector. carbonate hardness test: fill the small measurement tube with mains water up to the 5 ml Touch the... -
Page 13: Calibration
Calibration After moving house Repeat calibration so that the appliance adapts automatically to the new installation location. The boiling point of water depends on barometric pressure. As air pressure drops with increasing After resetting to the factory settings elevation, the boiling point drops as well. During After resetting to the factory settings in the basic calibration, the appliance sets the boiling point to the settings menu, you must repeat calibration. -
Page 14: Activating The Appliance
"Hot air + 30% humidity", "Hot air + 0% humidity" and ‒ Different displays are available for standby mode. "Drying program"): The default setting is the GAGGENAU logo and Basic Open the appliance door and take out the water the clock. To change the display, refer to the tank (fig. -
Page 15: Cooking Compartment
Cooking compartment Inserting accessories The cooking compartment has four shelf positions. The wire rack and the perforated cooking container The shelf positions are counted from the bottom up. feature a locking function. The locking function prevents the accessories from tilting when they are Note: When steaming, defrosting, dough proofing and pulled out. -
Page 16: After Every Use
After every use Timer functions Emptying the water tank. You use the timer menu to make the following settings: Open the appliance door carefully. Š Hot steam will escape. Short-term timer Remove and clean the water tank. Stopwatch Thoroughly dry the seal in the tank cover and the Cooking time (not in standby mode) tank recess in the appliance. -
Page 17: Stopwatch
The timer menu closes and the time begins to count The "Timer" menu is closed and the time starts Š down. The symbol and the countdown appear in the counting down. The symbol and the elapsed time display. are shown in the display. A signal sounds once the time has elapsed. -
Page 18: End Of Cooking Time
End of cooking time Set the desired cooking time using the rotary selector. You can delay the cooking time end to a later time. Example: it is 14:00. The dish requires a cooking time of 40 minutes. You want it to be ready at 15:30. Enter the cooking time and delay the cooking time end until 15:30. -
Page 19: Long-Term Timer
To change the cooking time end: The appliance starts. and the temperature appear Call up the timer menu. Use to select the in the display. "Cooking time end" function. Set the desired cooking The oven and display lighting are switched off. The time end using the rotary selector. -
Page 20: Individual Recipes
Programming a recipe Individual recipes You can programme and save up to 5 preparation phases. It is possible to save up to 50 individual recipes. You can record a recipe. These recipes can be given a Turn the function selector to the desired type of name so that they can be called up quickly and heating. -
Page 21: Entering Names
Entering names Notes ‒ The cooking time does not start counting down Enter the name of the recipe in "ABC". until the appliance has reached the set temperature. ‒ You can use the rotary selector to change the temperature while the recipe is in progress. This does not change the saved recipe. -
Page 22: Core Temperature Probe
Inserting the core temperature Core temperature probe probe in the food to be cooked Insert the core temperature probe in the food to be The core temperature probe enables exact cooking to cooked before you place it in the cooking interior. the spot. -
Page 23: Setting The Core Temperature
Setting the core temperature Recommended core temperature values Insert food into the oven interior with the core temperature probe inserted. Insert the core Use fresh foodstuffs only. Do not use deep-frozen temperature probe in the socket in the oven foods. The details in the table are recommended interior and close the appliance door. -
Page 24: Child Lock
Cooked food Recommended Child lock core temperature Duck breast The appliance has a child lock to prevent children medium-rare 55 - 60 °C operating it accidentally. well-done 70 - 80 °C Notes Ostrich steak 60 - 65 °C ‒ You must set the child lock to "Available" in the Basic settings basic settings (refer to the section). -
Page 25: Basic Settings
- Date + GAGGENAU logo select the desired display. - Clock + date The selection is displayed. - Clock + date + GAGGENAU logo Reduced Display screen Reduced* / Standard If set to , after a brief period only the most important information is shown. - Page 26 Date format D.M.Y* Sets the date format D/M/Y M/D/Y Date Current date Sets the date. You can switch between year/month/day using the symbol Temperature format °C* / °F Sets the temperature unit Language German* / French / Italian / Spanish / Select language for text display Portuguese / Dutch / Danish / Swedish Note: If the language is changed, the system...
-
Page 27: Cleaning And Maintenance
Cleaning and maintenance Area Cleaning agent Stainless steel or Hot soapy water: enamel oven inte- clean with a dish cloth and dry with a With thorough care and cleaning your appliance will rior soft cloth. retain its looks and remain in good order. We will Do not use oven spray or other explain here how you should care for and clean your aggressive oven cleaners or abrasive... -
Page 28: Cleaning Aid
Cleaning aid Cleaning sponge The enclosed cleaning sponge is very absorbent. Use the cleaning sponge only for cleaning the cooking The cleaning aid loosens stubborn dirt in the cooking compartment and for removing residual water from the compartment and makes cleaning easier. evaporator dish. -
Page 29: Drying Programme
Descaling programme A signal sounds after 1 minute. Empty the evaporator dish with the cleaning sponge. Empty the water tank and leave it to dry with the lid open. Wipe the cooking Your appliance must be descaled at regular intervals compartment dry with a soft towel and use the drying for it to remain operable. -
Page 30: Removing Slide-In Rails
Removing slide-in rails The first rinsing process is displayed. Start with . The appliance is rinsed. The rinsing time counts down on the display. You can remove the slide-in rails for cleaning. Detaching the rails Place a dish cloth in the cooking compartment to protect the stainless steel against scratches. -
Page 31: Trouble Shooting
Trouble shooting Malfunctions often have simple explanations. Please Risk of electric shock! read the following notes before calling the after-sales Incorrect repairs are dangerous. Repairs may only be service. carried out by one of our trained after-sales engineers. If the appliance is faulty, unplug the mains plug or switch off the fuse in the fuse box. -
Page 32: Power Cut
For technical reasons the lamp cover cannot be Please find the contact data of all countries in the removed. Lamp must only be replaced by Gaggenau enclosed customer service list. after-sales service. To book an engineer visit and product advice Caution! Do not remove the lamp cover. -
Page 33: Settings Table And Tips
Settings table and tips Notes ‒ When using the perforated cooking container or the wire rack without additional cookware, always ‒ The specified cooking times are only a slide the unperforated cooking container into the recommendation. Actual cooking time is first level from below to avoid soiling of the influenced by the quality and temperature of the cooking compartment's bottom and the... -
Page 34: Fish
Food Cooking con- Tempera- Humid- Cooking Remarks tainer ture in °C ity in % time in min. Potatoes, Perforated 20 - 35 peeled and quartered Kohlrabi, in slices Perforated 15 - 25 Leek, in slices Perforated 5 - 10 Stuffed peppers Unperforated 180 - 200 80/100 15 - 20... -
Page 35: Fish - Low-Temperature Steaming
Fish – low-temperature steaming ▯ ▯ When steamed at between 70 and 90°C, fish Insert the unperforated cooking container in the does not overcook and fall apart so easily. This is first level from below to avoid soiling of the particularly advantageous for sensitive fish. -
Page 36: Meat - Cooking At Higher Temperatures
Meat – cooking at higher temperatures ▯ ▯ The combination of steam and hot air is the When using the perforated cooking container or optimum cooking process for many types of meat. the wire rack, insert an unperforated cooking In this mode of operation, the cooking container underneath it. -
Page 37: Meat/Poultry - Low-Temperature Cooking
Meat/poultry – low-temperature cooking ▯ ▯ Vigorously browned meat matures over a longer Venison and horse meat tastes stronger after time at a lower temperature. As a result, the meat low-temperature cooking than when prepared by evenly becomes gentle pink and extraordinarily classical methods. -
Page 38: Side Dishes
Food Cooking con- Tempera- Humid- Cooking Remarks tainer ture in °C ity in % time in min. Duck, whole (3 kg) Unperforated 1) 150 - 160 80 - 90 Start cooking with the breast pointing down. Turn the duck round after half of 2) 220 20 - 30 the cooking time. -
Page 39: Desserts
Desserts Food Cooking con- Tempera- Humid- Cooking Remarks tainer ture in °C ity in % time in min. Crème Brûlée (130 g each) Perforated 90 - 95 35 - 40 in soufflé dishes, covered with heat- resistant cling film Yeast dumplings Unperforated 100 20 - 30 Leave yeast dumplings to rise for 30 min. -
Page 40: Baking
Baking ▯ ▯ Using the steam oven, you can prepare your You can only bake on one level in the steam oven. baked items with the optimum humidity: Insert the unperforated cooking container into the second level from below. When using a high ‒... -
Page 41: Regenerating (Reheating)
Regenerating (reheating) ▯ ▯ In the steam oven, you can generate the optimum The data refers to portions for one person. You climate for heating ready-cooked meals without can also warm up large quantities in the them drying out. Thus, taste and quality are unperforated cooking container. -
Page 42: Preserving
Food Cooking con- Tempera- Heating Cooking Remarks tainer ture in °C mode time in min. Berries (300 g) Perforated 40 - 45 3 - 4 Roast (1,000 g) Perforated 40 - 45 45 - 60* Fish fillet (150 g each) Perforated 40 - 45 5 - 10*... -
Page 43: Preparing Yoghourt
Preparing yoghourt ▯ ▯ You can prepare your own yoghourt in the steam In the case of yoghourt ferment, pay attention to oven. the notes on the packaging. ▯ ▯ Heat up pasteurized milk to 90°C on the cooktop Pour the yoghourt into rinsed jars. to avoid disturbing the yoghourt cultures. - Page 44 Gaggenau Hausgeräte GmbH Carl-Wery-Straße 34 D-81739 München www.gaggenau.com...
Need help?
Do you have a question about the BS 450 and is the answer not in the manual?
Questions and answers