Craftsman 71.74291 Operator's Manual
Convertible cordless 18v power handle
Hide thumbs
Also See for 71.74291:
- Operator's manual (28 pages) ,
- Operator's manual (22 pages) ,
- Operator's manual (36 pages)
Table of Contents
Advertisement
Quick Links
Operator's Manual
Convertible Cordless
18V Power Handle
Model No. 71.74291
BEFORE returning this
product, first call:
(800) 539-6455
IMPORTANT
OPERATING HINT:
When starting unit, first push the thumb switch forward and then squeeze
the control trigger. It is NOT necessary to keep the thumb switch pushed
forward during use.
CAUTION:
Before using this product, read this manual and follow all
its Safety Rules and Operating Instructions.
Sears, Roebuck and Co., Hoffman Estates, IL 60179, U.S.A.
www.craftsman.com
• Safety
• Assembly
• Operation
• Maintenance
• Español
• Français
rev. 040908
Advertisement
Chapters
Table of Contents

Related Manuals for Craftsman 71.74291


Summary of Contents for Craftsman 71.74291
- Page 1 Operator’s Manual Convertible Cordless 18V Power Handle Model No. 71.74291 BEFORE returning this product, first call: (800) 539-6455 IMPORTANT OPERATING HINT: When starting unit, first push the thumb switch forward and then squeeze the control trigger. It is NOT necessary to keep the thumb switch pushed forward during use.
-
Page 2: Table Of Contents
WARRANTY Craftsman One Year Full Warranty If this Craftsman product fails due to manufacturer’s defects within one year from the date of purchase, return it to any Sears store or other Craftsman outlet in the United States for free replacement. - Page 3 always be followed to reduce the risk wear proper eye protection, and use a of fire, electric shock, and personal face or dust mask if operation is dusty. injury, including the following: MAINTAIN UNIT WITH CARE - Keep To reduce risk of injury: the unit clean for best performance and to reduce the risk of injury.
-
Page 4: Operation
See instructions on how to attach line half and sliding into the slot in the back guard in the Operation section of the of the wall charging rack. line trimmer manual. Failure to attach the line guard may pose a risk of SAVE THESE INSTRUCTIONS injury, may cause motor damage and OPERATION... - Page 5 3. Charge for at least 1 hour. the charge to each battery and shuts of the charge when complete. The 4. The LED will glow red when the batteries can be left in the charger battery is charging and green when indefinitely and will not over-charge.
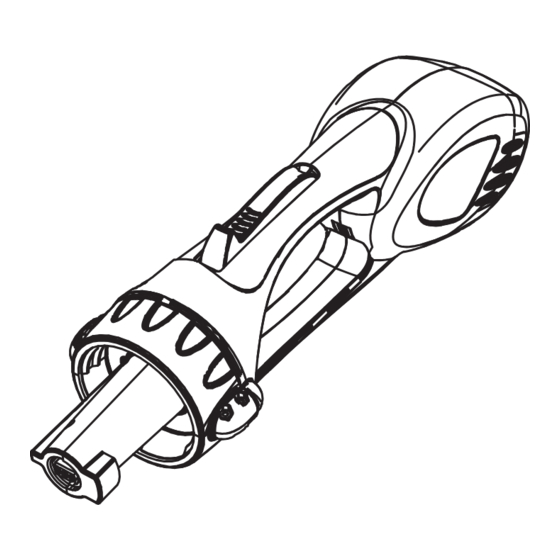
- Page 6 check that the keys on the handle are properly aligned with the slots in the tool. Figure 6 2. Pull the power handle and tool attachment apart. The power handle Figure 4 and tool attachment should separate easily. If they do not, check to be 3.
- Page 7 Figure 8 Figure 10 2. Pull the battery pack straight out from the handle. To turn the tool off: 1. Release the control trigger and the To turn the tool on: tool will turn off. The thumb switch will 1. Grip the control grip firmly with one return to the rear position to prevent hand and grip the auxiliary handle on accidental re-starting of the tool.
-
Page 8: Maintenance
Sears maintenance on the power handle or Craftsman replacement blades and a tool attachment that is connected to cutting line be used. the power handle. WARNING: Use only Craftsman... -
Page 9: Service
SERVICE If you see any condition that may affect safe operation, or if you have any questions, contact our customer service number at: 1-800-539-6455 NEED MORE HELP? You’ll find the answer and a more on managemyhome.com – for free! Find this and all your other product manuals online. Get answers from our team of home experts. - Page 10 Get it fixed, at your home or ours! Your Home For expert troubleshooting and home solutions advice: www.managemyhome.com For repair – in your home – of all major brand appliances, lawn and garden equipment, or heating and cooling systems, no matter who made it, no matter who sold it! For the replacement parts, accessories and owner’s manuals that you need to do-it-yourself.
-
Page 11: Español
• Safety • Assembly Before using this product, read this manual and follow all its Safety Rules and Operating • Operation Instructions. • Maintenance • Español • Français Sears, Roebuck and Co., Hoffman Estates, IL 60179, U.S.A. www.craftsman.com rev. 040908... - Page 12 WARRANTY Craftsman One Year Full Warranty If this Craftsman product fails due to manufacturer’s defects within one year from the date of purchase, return it to any Sears store or other Craftsman outlet in the United States for free replacement.
- Page 13 basic safety precautions should always proper footing and balance at all times. be followed to reduce the risk of fire, Use both hands to operate unit safely. electric shock, and personal injury, USE SAFETY GLASSES - Always including the following: wear proper eye protection, and use a face or dust mask if operation is dusty.
- Page 14 and when changing accessories and and animals at least 50 feet away attachments such as saw chain and when using the pole saw. guide bar. NEVER OPERATE the pole saw within STAY ALERT - Watch what you are 50 feet of overhead electrical lines. doing.
-
Page 15: Operation
towards the operator. Pinching the It is the saw manufacturer’s saw chain along the top of the guide replacement catalogue (or bar may push the guide bar rapidly equivalent) number. back towards the operator. Either of Low-Kickback saw chain is a chain these reactions may cause you to lose which has met the kickback performance control of the saw which could result in... - Page 16 tooth or teeth for use when pruning to loosen the chain. (see figure 2) Lift the pivot the saw and maintain position chain away from the sprocket and out while sawing. of the groove in the guide bar. Switch – A device that when operated will complete or interrupt an electrical power circuit to the motor of the pole saw.
- Page 17 front of the saw head to loosen or tighten the chain as needed. When the chain is the correct tension, tighten the two socket head screws that hold the bar clamp in place. Do not over-tighten the chain as this will lead to premature wear of the chain and bar.
- Page 18 Figure 6 Figure 8 2. Insert the male end of the power handle interface into the female To attach the saw head to the pole: socket in the end of the extension pole 1. Twist the lock ring on the pole to the making sure that it is firmly seated.
- Page 19 the corresponding slot in the end of the power handle. (see figure 12) Figure 10 CAUTION: The saw head has safety Figure 12 features that prevent attaching it directly to the power handle without 2. Insert the battery fully into the the pole in between.
- Page 20 a prolonged stall. This device will cause the tool to stop operating if an overload condition exists. If the pole saw becomes jammed on a branch, release the control trigger immediately. If, after clearing the jam, the pole saw does not restart, check to see if the circuit breaker has popped (see figure 16).
- Page 21 length with the pole saw standing vertically. The top section of the pole could descend rapidly and pinch your hand. PIVOTING THE SAW HEAD The pole is designed to pivot at the top end to allow the saw head to contact branches in the most advantageous position.
-
Page 22: Maintenance
Then make the final cut from the top of the branch using the bottom side of the chain. (see figure 20) Figure 21 MAINTENANCE Figure 20 WARNING: Always remove the battery Making the initial cut on the underside when performing any maintenance on of the branch will prevent the branch the power handle or a tool attachment from splintering when it falls away from... -
Page 23: Storage
If you see any condition that may is recommended that only Sears affect safe operation, or if you have Craftsman replacement blades and any questions, contact our customer cutting line be used. service number at:... -
Page 27: Français
Get it fixed, at your home or ours! Your Home For expert troubleshooting and home solutions advice: www.managemyhome.com For repair – in your home – of all major brand appliances, lawn and garden equipment, or heating and cooling systems, no matter who made it, no matter who sold it! For the replacement parts, accessories and owner’s manuals that you need to do-it-yourself.
Need help?
Do you have a question about the 71.74291 and is the answer not in the manual?
Questions and answers