Table of Contents

Related Manuals for Solo 440


Summary of Contents for Solo 440
-
Page 1: Blower Tube
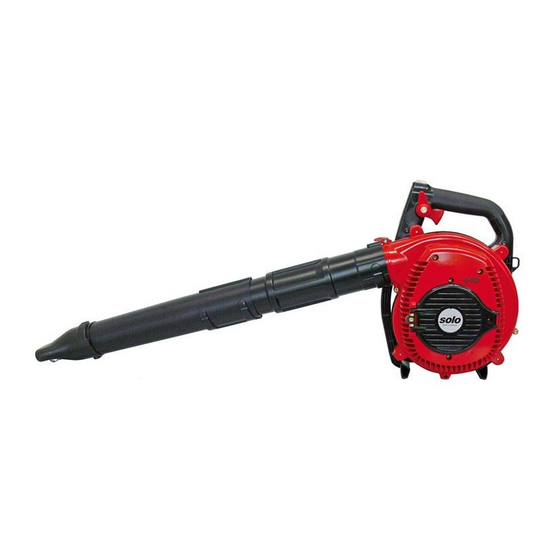
440 / 441 Instruction manual Blower tube 440 / Original instructions Vacuum shredder 441 Important! Read this instruction manual carefully before first operation and strictly observe the safety regulations! 9 440 106 english 04/2009... - Page 2 - ENGLISH - Blower tube 440 / Vacuum shredder 441 Symbols / type plate Instruction manual Original instructions The following symbols are used in this manual and on the product: Thoroughly read these operating Caution! Prior to operating the unit, please instructions before undertaking any read the owner’s manual carefully, and most...
-
Page 3: Table Of Contents
Turning off the engine: 9. Using..............................13 Blower operation - Fig. 1 Vacuum operation – only model 441 (with model 440 as accessory) - Fig. 2 10. Operating and maintenance instructions ..................14 10.1 General operating and maintenance instructions 10.2 Carburettor adjustment 10.3 Information about the spark plug... -
Page 4: Safety Regulations
This clothing should be practically oriented to the application (for example a tight fitting work suit), but should not be confining. We recommend: SOLO forest and countryside work jacket EN 340 Part no: 99 303 000 + size (2[s] - 6[xxl]) SOLO Outdoor Knee-breeches Part no: 99 020 95 + size... -
Page 5: When Performing Any Assembly, Maintenance, Repair And Cleaning Work
Safety regulations 1.3 When performing any assembly, maintenance, repair and cleaning work • Never assemble, maintain, repair or store the power tool near open flames. • When performing any assembly, maintenance, repair or cleaning work – even initial equipment assembly – observe the following: Set the ON/OFF switch to "0"... -
Page 6: Starting
Safety regulations 1.7 Starting • Start the machine no less than 3 metres from the refuelling location. Never start the machine in an enclosed space. • Ensure that you are standing firmly on the ground when starting. Always start on even ground, with a firm grip on the power tool. -
Page 7: Specification
Max. permissible speed 7200 3. Accessories Blower tube / Vacuum shredder Order no. Type 440 Order no. Type 441 Refitting set vacuum fixture for blower 440 49 00 546 Included Carrying strap for blower 440 49 00 159 Included Spark protective grate for noise suppressor... -
Page 8: Standard Delivery
Flat nozzle attachment to be fitted to the round air nozzle (if required) with edge protector clip • Vacuum attachment (only model 441; with model 440 as accessory; part no: 49 00 546) Vacuum pipe Exhaust air elbow to be fitted to the catcher with a fixing clip Catcher with strap system •... - Page 9 Control and function elements Vacuum operation Fig. 2 – only model 441 (with model 440 as accessory) ON/OFF switch (I / 0) Sparkplug cover 15 Blower cover Hand throttle Primer 16 Blower tube Gas pre-select lever 10 Starter shutter 17 Round air nozzle...
-
Page 10: Preparing The Equipment For Use
Preparing the equipment for use 6. Preparing the equipment for use Round air nozzle assembly (17) Fig. 4 Observe all safety instructions during assembly and dismantling work! 6.1 Assembly - blower operation The total pipe for the blower operation consists of three parts: Blower pipe (16) to be fitted to the standard machine. - Page 11 Catcher (21) to be fitted to the exhaust air elbow. Vacuum pipe (19) to be fitted to the standard machine. [Note: When preparing model 440 with vacuum operation accessory kit 49 00 546 for the first time, • Open Velcro strap (27) on catcher.
-
Page 12: Fuelling
Always use a fuel:oil ratio of 25:1 (4%) for the first five tank fillings. After that we recommend a ratio of 50:1 (2%) with the use of special two-stroke oil "SOLO 2T engine oil" which we can supply. With the use of other brand two-stroke oils we recommend a ratio of 25:1 (4%). -
Page 13: When The Motor Starts
(ignites). Then 9.2 Vacuum operation – only model 441 (with immediately place the starter shutter in position model 440 as accessory) - Fig. 2 Continue starting until the motor turns over. If the motor is warm:... -
Page 14: Operating And Maintenance Instructions
Operating and maintenance instructions 10. Operating and maintenance Turn the idling end-stop screw "T" to adjust the idling speed in accordance with the details provided in the instructions specification. Use an engine rev counter for this job. • If the idling speed is too high, turn the idling end- 10.1 General operating and maintenance stop screw "T"... -
Page 15: Air Filter Maintenance
Operating and maintenance instructions Spark plugs with resistor (thermal value 200) are Fig. 16 available in different brands under the following description: BOSCH WSR6F CHAMPION RCJ-6Y or comparable. The correct electrode gap is 0.5 mm. Only use spark plugs, where the contact nut has been firmly fitted. -
Page 16: Scheduled Maintenance
Operating and maintenance instructions 10.6 Scheduled maintenance The following information is based on standard operating conditions. For special conditions, such as prolonged daily use, the recommended maintenance intervals should be reduced accordingly. Carburettor Check idling speed Adjust idling speed Air filter Clean Replace Spark plug... -
Page 17: Parts Subject To Wear And Tear
12. Guarantee Where a warrantable condition exists, Solo will repair your small non-road power equipment engine at no The manufacturer guarantees trouble-free quality cost to you including diagnosis, parts, and labor. - Page 18 Made in Germany SOLO SOLO Postfach 60 01 52 P.O.Box 60 01 52 D 71050 Sindelfingen D 71050 Sindelfingen Germany Tel. 07031-301-0 Phone+49-7031-301-0 Fax 07031-301-130 +49-7031-301-149 info@solo-germany.com export@solo-germany.com...
Need help?
Do you have a question about the 440 and is the answer not in the manual?
Questions and answers