
Related Manuals for Digital Projection E-Vision 8000 Series


Summary of Contents for Digital Projection E-Vision 8000 Series
-
Page 1: User Manual
USER MANUAL INSTALLATION AND QUICK-START GUIDE CONNECTION GUIDE OPERATING GUIDE REMOTE COMMUNICATIONS GUIDE E-Vision 8000 Series High Brightness Digital Video Projector Rev F July 2014 112-796F... - Page 2 NOTE: this symbol indicates that there is some important information that you should read. Product revision Because we at Digital Projection continually strive to improve our products, we may change specifications and designs, and add new features without prior notice.
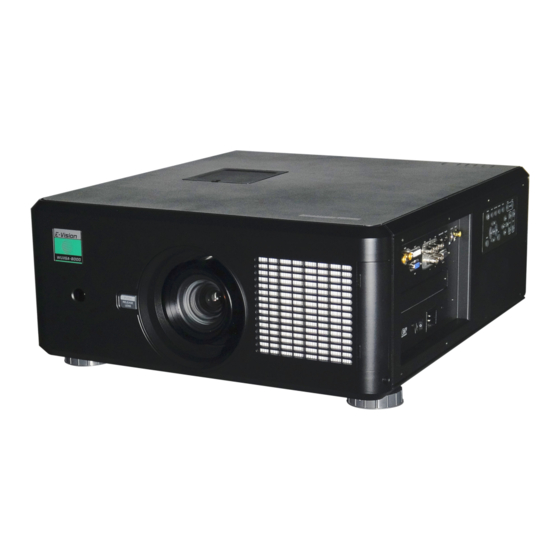
- Page 3 Digital Projection E-Vision 8000 Series Introduction Notes Congratulations on your purchase of this Digital Projection product. Your projector has the following key features: • Swappable color wheels for high brightness and color critical applications. • 3GSDI with loop-through. • Cornerstone, Vertical & Horizontal Keystone, Pincushion & Barrel, and Image Rotation.
-
Page 4: Table Of Contents
Digital Projection E-Vision 8000 Series CONTENTS INSTALLATION AND QUICK-START GUIDE ......1 Switching the projector off ..............12 WHAT’S IN THE BOX? ..............3 GETTING TO KNOW THE PROJECTOR .......... 4 CONNECTION GUIDE ................13 Front and rear views ................4 Remote control ..................4 SIGNAL INPUTS AND OUTPUTS .......... -
Page 5: Operating Guide
Digital Projection E-Vision 8000 Series ..................35 Color Space WIRING DETAILS ................. 19 Signal inputs and outputs ..............19 ..................35 Input Lock ..................... 19 ..................35 3G-SDI Background ..................19 ................... 35 HDMI input Video Standard ....................20 ................. 35... - Page 6 Digital Projection E-Vision 8000 Series CONTROL menu ................. 45 THE KEY COMMANDS ..............65 ................45 Eco Network Power WEB CONFIGURATION UTILITY ..........66 ..................45 Examples .................... 66 Auto Power Off ..................45 Auto Power On ................. 46 Projector Control ................
-
Page 7: Installation And Quick-Start Guide
INSTALLATION AND QUICK-START GUIDE E-Vision 8000 Series High Brightness Digital Video Projector Rev F July 2014... - Page 8 Digital Projection IN THIS GUIDE Installation and Quick-Start Guide E-Vision 8000 Series IN THIS GUIDE What’s In The Box? ..................... 3 Getting To Know The Projector..............4 Front and rear views ....................Remote control ......................Control panel ....................... Indicators ........................
-
Page 9: What's In The Box
Digital Projection WHAT’S IN THE BOX? Installation and Quick-Start Guide E-Vision 8000 Series What’s In The Box? Notes Make sure your box contains everything listed. If any pieces are missing, contact your dealer. You should save the original box and packing materials, in case you ever need to ship your projector. -
Page 10: Getting To Know The Projector
Digital Projection GETTING TO KNOW THE PROJECTOR Installation and Quick-Start Guide E-Vision 8000 Series Getting To Know The Projector Notes Front and rear views Remote control The projector can use an infra-red or Indicator Color wheel a wired remote control. -
Page 11: Control Panel
Digital Projection GETTING TO KNOW THE PROJECTOR Installation and Quick-Start Guide E-Vision 8000 Series Control panel Notes Some of the controls from the remote control are duplicated on the projector control panel, as shown below. For full details of how to use the button has the same function as the button on the remote control. -
Page 12: Changing The Lens, Lamps, Filters And Color Wheel
Digital Projection CHANGING THE LENS, LAMPS, FILTERS AND COLOR WHEEL Installation and Quick-Start Guide E-Vision 8000 Series Changing The Lens, Lamps, Filters And Color Wheel Notes Removing the lens The projector lens is shipped • Push in the lens release lever, and turn the lens anti-clockwise. -
Page 13: Changing A Lamp
Digital Projection CHANGING THE LENS, LAMPS, FILTERS AND COLOR WHEEL Installation and Quick-Start Guide E-Vision 8000 Series Changing a lamp Notes • Unscrew the two captive screws securing the cover for the lamp that needs changing. • Open the lamp compartment. -
Page 14: Changing The Color Wheel
Digital Projection CHANGING THE LENS, LAMPS, FILTERS AND COLOR WHEEL Installation and Quick-Start Guide E-Vision 8000 Series Notes The lamp and color wheel must be changed only by suitably qualified personnel. The projector will shut down if any of the covers are opened whilst in operation. -
Page 15: Positioning The Screen And Projector
Digital Projection POSITIONING THE SCREEN AND PROJECTOR Installation and Quick-Start Guide E-Vision 8000 Series Positioning The Screen And Projector Notes Always allow the lamp to cool for • Install the screen, ensuring that it is in the best position for viewing by your audience. -
Page 16: Operating The Projector
Digital Projection OPERATING THE PROJECTOR Installation and Quick-Start Guide E-Vision 8000 Series Operating The Projector Notes Switching the projector on • Connect the power cable between the mains supply and the projector. Switch on at the switch next to the power connector. -
Page 17: Adjusting The Lens
Digital Projection OPERATING THE PROJECTOR Installation and Quick-Start Guide E-Vision 8000 Series Adjusting the lens Notes Zoom • Use the ZOOM +/− buttons on the control panel or on the remote control to adjust the lens so that the image fills the screen. -
Page 18: Switching The Projector Off
Digital Projection OPERATING THE PROJECTOR Installation and Quick-Start Guide E-Vision 8000 Series Switching the projector off Notes • Press and hold on the control panel or on the remote control for 5 seconds. POWER POWER OFF The lamp will go off, and the Power indicator on the control panel will flash amber for a few seconds whilst the lamp cools. The Power Always allow the lamp to cool for indicator on the control panel will then show red and the projector will be in Standby mode. -
Page 19: Connection Guide
CONNECTION GUIDE E-Vision 8000 Series High Brightness Digital Video Projector Rev F July 2014... - Page 20 Digital Projection IN THIS GUIDE Connection Guide E-Vision 8000 Series IN THIS GUIDE Signal Inputs And Outputs ..............Conn_1 Conn_9 Control connections ..................Conn_1 Conn_9 3G-SDI IN ......................LAN connection ....................Conn_10 Conn_1 3G-SDI OUT ..................... RS232 Serial control input ................
-
Page 21: Signal Inputs And Outputs
Digital Projection SIGNAL INPUTS AND OUTPUTS Connection Guide E-Vision 8000 Series Signal Inputs And Outputs Notes 3G-SDI IN For a complete listing of pin • Connect a 3G-SDI cable to the left hand SDI BNC. configurations for all signal and... -
Page 22: Supported Signal Input Modes
Digital Projection SUPPORTED SIGNAL INPUT MODES Connection Guide E-Vision 8000 Series Supported Signal Input Modes Notes Standard Resolution Refresh Total Horizontal Rate number Frequency ( Hz ) of lines (kHz) SDTV 480i 720 x 480 15.73 ü ü ü ü... - Page 23 Digital Projection SUPPORTED SIGNAL INPUT MODES Connection Guide E-Vision 8000 Series Notes ...continued from previous page Standard Resolution Refresh Total Horizontal Rate number Frequency ( Hz ) of lines (kHz) SXGA60 1280 x 1024 1066 63.98 ü ü SXGA+60 1400 x 1050 1089 65.32...
-
Page 24: Control Connections
Digital Projection CONTROL CONNECTIONS Connection Guide E-Vision 8000 Series Control Connections Notes For a complete listing of pin configurations for all signal and control connectors, see Wiring • The projector’s features can be controlled via a LAN connection, using the control strings Details later in this Guide. -
Page 25: Wiring Details
Digital Projection WIRING DETAILS Connection Guide E-Vision 8000 Series Wiring Details Notes Signal inputs and outputs For full details of all input settings, see the INPUT menu in the 3G-SDI Operating Guide. 75 ohm BNC SMPTE 292 / HD-SDI signals are very high speed digital signals which require better quality coaxial cable than conventional analogue video. -
Page 26: Dvi-D
Digital Projection WIRING DETAILS Connection Guide E-Vision 8000 Series DVI-D Notes 24 way D-type connector TMDS Data 2- For full details of all input settings, TMDS Data 2+ menu in the see the INPUT pin view of female connector TMDS Data 2 Shield Operating Guide. -
Page 27: Vga
Digital Projection WIRING DETAILS Connection Guide E-Vision 8000 Series Notes 15 way D-type connector For full details of all input settings, menu in the see the INPUT pin view of female connector Operating Guide. unused Digital Ground (H Sync) R Ground... -
Page 28: S-Video Input
Digital Projection WIRING DETAILS Connection Guide E-Vision 8000 Series S-Video input Notes 4 pin mini-DIN Y Ground For full details of all input settings, pin view of female connector C Ground menu in the see the INPUT Luminance (Y) Operating Guide. -
Page 29: Control Connections
Digital Projection WIRING DETAILS Connection Guide E-Vision 8000 Series Control connections Notes LAN connection For full details of all control settings, 10BaseT Unshielded Twisted Pair cable menu in the see the CONTROL Operating Guide. The standard wire colors are as follows:... -
Page 30: Rs232 Serial Control Input
Digital Projection WIRING DETAILS Connection Guide E-Vision 8000 Series RS232 Serial control input Notes unused Received Data (RX) For full details of all control settings, Transmitted Data (TX) menu in the pin view of female connector see the CONTROL unused Operating Guide. -
Page 31: Operating Guide
OPERATING GUIDE E-Vision 8000 Series High Brightness Digital Video Projector Rev F July 2014... - Page 32 Digital Projection IN THIS GUIDE Operating Guide E-Vision 8000 Series IN THIS GUIDE Using The Remote Control ................28 PICTURE menu ......................Test Pattern ........................ Display Mode ........................Using The Control Panel ................. 29 Contrast, Brightness, Saturation, Hue ................Adaptive Contrast ......................
- Page 33 Digital Projection IN THIS GUIDE Operating Guide E-Vision 8000 Series CONTROL menu ......................Eco Network Power ......................Auto Power Off ........................ Auto Power On ........................ Projector Control ......................Network submenu ......................Startup Logo ........................Trigger ..........................Auto Search ........................Dynamic Black ........................
-
Page 34: Using The Remote Control
Digital Projection USING THE REMOTE CONTROL Operating Guide E-Vision 8000 Series Using The Remote Control Notes Some options and controls may not be available due to settings in the menus. POWER controls For full details of how to use the POWER menu system, see later in this guide. -
Page 35: Using The Control Panel
Digital Projection USING THE CONTROL PANEL Operating Guide E-Vision 8000 Series Using The Control Panel Notes Some options and controls may not be available due to settings in the menus. INPUT: AUTO SYNC: For full details of how to use the... -
Page 36: Using The Menus
Digital Projection USING THE MENUS Operating Guide E-Vision 8000 Series Using The Menus Notes Use the buttons on the projector control panel or on the remote control, to access the Some menu options and controls menu system. may not be available due to settings in other menus. -
Page 37: Submenus
Digital Projection USING THE MENUS Operating Guide E-Vision 8000 Series Submenus Notes • Select a submenu using Some menu options and controls • may not be available due to settings then open the submenu by pressing in other menus. These will be ENTER shaded grey on the actual menu. -
Page 38: Selecting Parameters
Digital Projection USING THE MENUS Operating Guide E-Vision 8000 Series Selecting parameters Notes Most parameters are changed by selecting from a list: Some menu options and controls • Select from the list using may not be available due to settings in other menus. -
Page 39: Sliders
Digital Projection USING THE MENUS Operating Guide E-Vision 8000 Series Sliders Notes • to adjust the value. The menu will disappear, to be replaced Some menu options and controls may not be available due to settings by a slider bar. -
Page 40: A Tour Of The Menus
Digital Projection A TOUR OF THE MENUS Operating Guide E-Vision 8000 Series A Tour Of The Menus Notes See also Using the Menus, earlier INPUT menu in this guide and Menu Map, later in this guide. INPUT PICTURE LAMPS ALIGNMENT... -
Page 41: Test Pattern
Digital Projection A TOUR OF THE MENUS Operating Guide E-Vision 8000 Series continued INPUT menu Notes Test Pattern See also Using the Menus, earlier • in this guide and Menu Map, later in Press to display a Test Pattern. ENTER this guide. -
Page 42: Picture Menu
Digital Projection A TOUR OF THE MENUS Operating Guide E-Vision 8000 Series PICTURE menu Notes See also Using the Menus, earlier INPUT PICTURE LAMPS ALIGNMENT CONTROL SERVICE in this guide and Menu Map, later in Display Mode < Video >... -
Page 43: Color Submenu
Digital Projection A TOUR OF THE MENUS Operating Guide E-Vision 8000 Series continued PICTURE menu Notes Color submenu See also Using the Menus, earlier • in this guide and Menu Map, later in Press to open the Color submenu. ENTER this guide. -
Page 44: Overscan
Digital Projection A TOUR OF THE MENUS Operating Guide E-Vision 8000 Series continued PICTURE menu Notes Overscan See also Using the Menus, earlier • in this guide and Menu Map, later in Set this to as required. Off On Zoom this guide. -
Page 45: Lamps Menu
Digital Projection A TOUR OF THE MENUS Operating Guide E-Vision 8000 Series LAMPS menu Notes See also Using the Menus, earlier INPUT PICTURE LAMPS ALIGNMENT CONTROL SERVICE in this guide and Menu Map, later in Mode < Dual > this guide. -
Page 46: Alignment Menu
Digital Projection A TOUR OF THE MENUS Operating Guide E-Vision 8000 Series ALIGNMENT menu Notes See also Using the Menus, earlier INPUT PICTURE LAMPS ALIGNMENT CONTROL SERVICE in this guide and Menu Map, later in Projection Mode < Front >... -
Page 47: Lens Memory Submenu
Digital Projection A TOUR OF THE MENUS Operating Guide E-Vision 8000 Series continued ALIGNMENT menu Notes Lens Memory submenu See also Using the Menus, earlier in this guide and Menu Map, later in The current lens position, focus and zoom settings can be saved in one of ten memories, for this guide. -
Page 48: Warp Submenu
Digital Projection A TOUR OF THE MENUS Operating Guide E-Vision 8000 Series continued ALIGNMENT menu Notes Warp submenu See also Using the Menus, earlier • in this guide and Menu Map, later in Press to open the Warp submenu. ENTER this guide. -
Page 49: Blanking Submenu
Digital Projection A TOUR OF THE MENUS Operating Guide E-Vision 8000 Series continued ALIGNMENT menu Notes Blanking submenu See also Using the Menus, earlier • in this guide and Menu Map, later in Press to open the Blanking submenu. ENTER this guide. -
Page 50: Edge Blend Submenu
Digital Projection A TOUR OF THE MENUS Operating Guide E-Vision 8000 Series continued ALIGNMENT menu Notes Edge Blend submenu See also Using the Menus, earlier in this guide and Menu Map, later in When several projectors are used to create a large tiled image, the edges need to be blended to avoid the this guide. -
Page 51: Digital Projection E-Vision 8000 Series Control Menu
Digital Projection A TOUR OF THE MENUS Operating Guide E-Vision 8000 Series CONTROL menu Notes See also Using the Menus, earlier CONTROL INPUT PICTURE LAMPS ALIGNMENT SERVICE in this guide and Menu Map, later in Eco Network Power < Standard >... -
Page 52: Projector Control
Digital Projection A TOUR OF THE MENUS Operating Guide E-Vision 8000 Series continued CONTROL menu Notes Projector Control See also Using the Menus, earlier • in this guide and Menu Map, later in Set this to as required. Network RS232 this guide. -
Page 53: Startup Logo
Digital Projection A TOUR OF THE MENUS Operating Guide E-Vision 8000 Series continued CONTROL menu Notes Startup Logo See also Using the Menus, earlier • in this guide and Menu Map, later in Set this to if you want the DP logo to show when the projector is first switched on. -
Page 54: Service Menu
Digital Projection A TOUR OF THE MENUS Operating Guide E-Vision 8000 Series SERVICE menu Notes See also Using the Menus, earlier in this guide and Menu Map, later in this guide. Information • The first part of the menu is for information only. -
Page 55: Menu Map
Digital Projection MENU MAP Operating Guide E-Vision 8000 Series Menu Map Notes Menu Submenus and Controls Some of the information in this menu INPUT map is summarised. See the actual Input Selection HDMI, DVI, VGA, Component/BNC, Composite, S-Video, 3G-SDI, Option Board menu on the projector for full detail. -
Page 56: Lamps
Digital Projection MENU MAP Operating Guide E-Vision 8000 Series Menu Submenus and Controls Notes LAMPS Mode Dual, Single Some of the information in this menu map is summarised. See the actual Power Normal, Custom Power, Eco menu on the projector for full detail. -
Page 57: Control
Digital Projection MENU MAP Operating Guide E-Vision 8000 Series Menu Submenus and Controls Notes CONTROL Eco Network Power Standard, Eco Some of the information in this menu map is summarised. See the actual Auto Power Off On, Off menu on the projector for full detail. - Page 58 Digital Projection Operating Guide E-Vision 8000 Series This page is intentionally left blank. Rev F July 2014...
-
Page 59: Remote Communications Guide
REMOTE COMMUNICATIONS GUIDE E-Vision 8000 Series High Brightness Digital Video Projector Rev F July 2014... - Page 60 Digital Projection IN THIS GUIDE Remote Communications Guide E-Vision 8000 Series IN THIS GUIDE Introduction ......................55 Operation commands ....................Key commands ......................The Operation Commands ................56 INPUT menu ....................... PICTURE menu ......................LAMPS menu ......................ALIGNMENT menu ....................
-
Page 61: Introduction
Digital Projection INTRODUCTION Remote Communications Guide E-Vision 8000 Series Introduction Notes The projector can be controlled by using an external control system or a PC via a LAN or RS232 serial interface, using a terminal-emulation program, such as HyperTerminal. Details of how to connect to the... -
Page 62: The Operation Commands
Digital Projection THE OPERATION COMMANDS Remote Communications Guide E-Vision 8000 Series The Operation Commands Notes <operation> <command> <values> Notes INPUT menu input.sel 0 = HDMI Not applicable when Picture Mute is 1 = DVI 2 = VGA 3 = Component / BNC... - Page 63 Digital Projection THE OPERATION COMMANDS Remote Communications Guide E-Vision 8000 Series Notes ...continued from previous page <operation> <command> <values> Notes pattern 0 = Color Bar 1 = Cross Hatch 2 = Burst 3 = Red 4 = Green 5 = Blue...
-
Page 64: Picture Menu
Digital Projection THE OPERATION COMMANDS Remote Communications Guide E-Vision 8000 Series Notes ...continued from previous page <operation> <command> <values> Notes PICTURE menu pic.mode 0 = High Bright 1 = Presentation 2 = Video contrast = ? + - 0 ~ 200 Not applicable without signal locked. - Page 65 Digital Projection THE OPERATION COMMANDS Remote Communications Guide E-Vision 8000 Series Notes ...continued from previous page <operation> <command> <values> Notes blue.offset = ? + - 0 ~ 200 Not applicable without signal locked. red.gain = ? + - 0 ~ 200 Not applicable without signal locked.
-
Page 66: Lamps Menu
Digital Projection THE OPERATION COMMANDS Remote Communications Guide E-Vision 8000 Series Notes ...continued from previous page <operation> <command> <values> Notes LAMPS menu lamps 0 = Single Not applicable when lamp is cooling. 1 = Dual Drive lamp.mode 0 = Economy 1 = Standard Not applicable without signal locked. - Page 67 Digital Projection THE OPERATION COMMANDS Remote Communications Guide E-Vision 8000 Series Notes ...continued from previous page <operation> <command> <values> Notes h.keystone = ? + - -350 ~ +350 The sum of the absolute values of h.keystone and v.keystone cannot be greater than 350.
-
Page 68: Control Menu
Digital Projection THE OPERATION COMMANDS Remote Communications Guide E-Vision 8000 Series Notes ...continued from previous page <operation> <command> <values> Notes eb.blk.btm = ? + - 0, 8, 16, 24, 32 Black Level Uplift Area Bottom eb.blk.left = ? + -... -
Page 69: Service Menu
Digital Projection THE OPERATION COMMANDS Remote Communications Guide E-Vision 8000 Series Notes ...continued from previous page <operation> <command> <values> Notes trig.1 0 = 5:4 If trig.1 is set to Auto , the projector will start 1 = 4:3 sending the trigger as soon as it is switched on. -
Page 70: Miscellaneous Commands
Digital Projection THE OPERATION COMMANDS Remote Communications Guide E-Vision 8000 Series Notes ...continued from previous page <operation> <command> <values> Notes pip.src 0 = HDMI PIP Source 1 = DVI 2 = VGA 3 = Component / BNC 4 = Composite... -
Page 71: The Key Commands
Digital Projection THE KEY COMMANDS Remote Communications Guide E-Vision 8000 Series The Key Commands Notes <operation> Corresponding remote control key An input command will return power.on POWER ON “NA” when the input command is not applicable in some specific power.off POWER OFF conditions. -
Page 72: Web Configuration Utility
Digital Projection WEB CONFIGURATION UTILITY Remote Communications Guide E-Vision 8000 Series Web Configuration Utility Notes The LAN IP Address of the projector can be set remotely using the Web Configuration Utility. must be set to Eco Network Power • Make sure the projector is connected to a remote computer via LAN. - Page 73 Digital Projection WEB CONFIGURATION UTILITY Remote Communications Guide E-Vision 8000 Series Examples - continued from previous page Notes The Image settings page allows access to settings from the Picture menu. The Lens adjustments page allows access to lens control settings.
- Page 74 Digital Projection WEB CONFIGURATION UTILITY Remote Communications Guide E-Vision 8000 Series Examples - continued from previous page Notes The Geometry adjust and Edge Blend pages allow access to settings from the Alignment menu. Rev F July 2014...
- Page 75 Digital Projection WEB CONFIGURATION UTILITY Remote Communications Guide E-Vision 8000 Series Examples - continued from previous page Notes The Advanced control page allows access to settings from the Picture menu, Color sub-menu. To view and edit your network settings, navigate to the Configuration tab.
Need help?
Do you have a question about the E-Vision 8000 Series and is the answer not in the manual?
Questions and answers